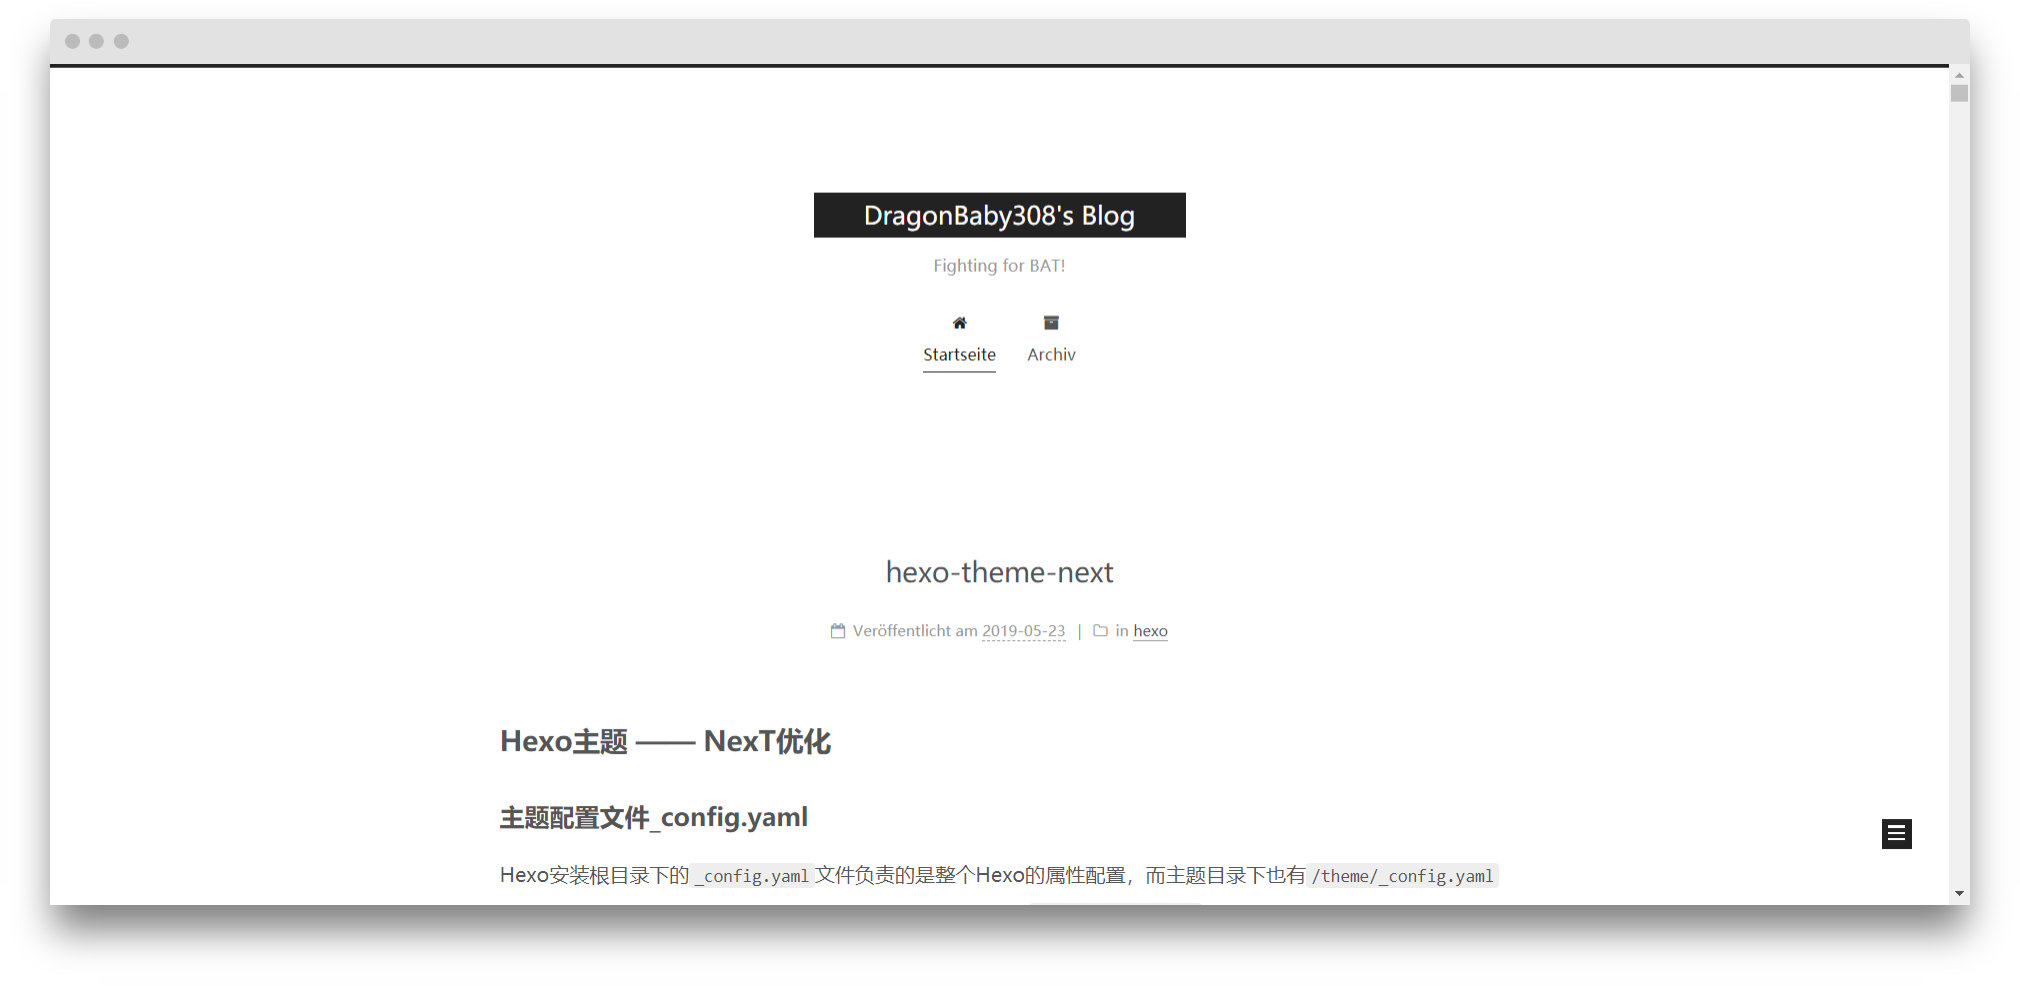
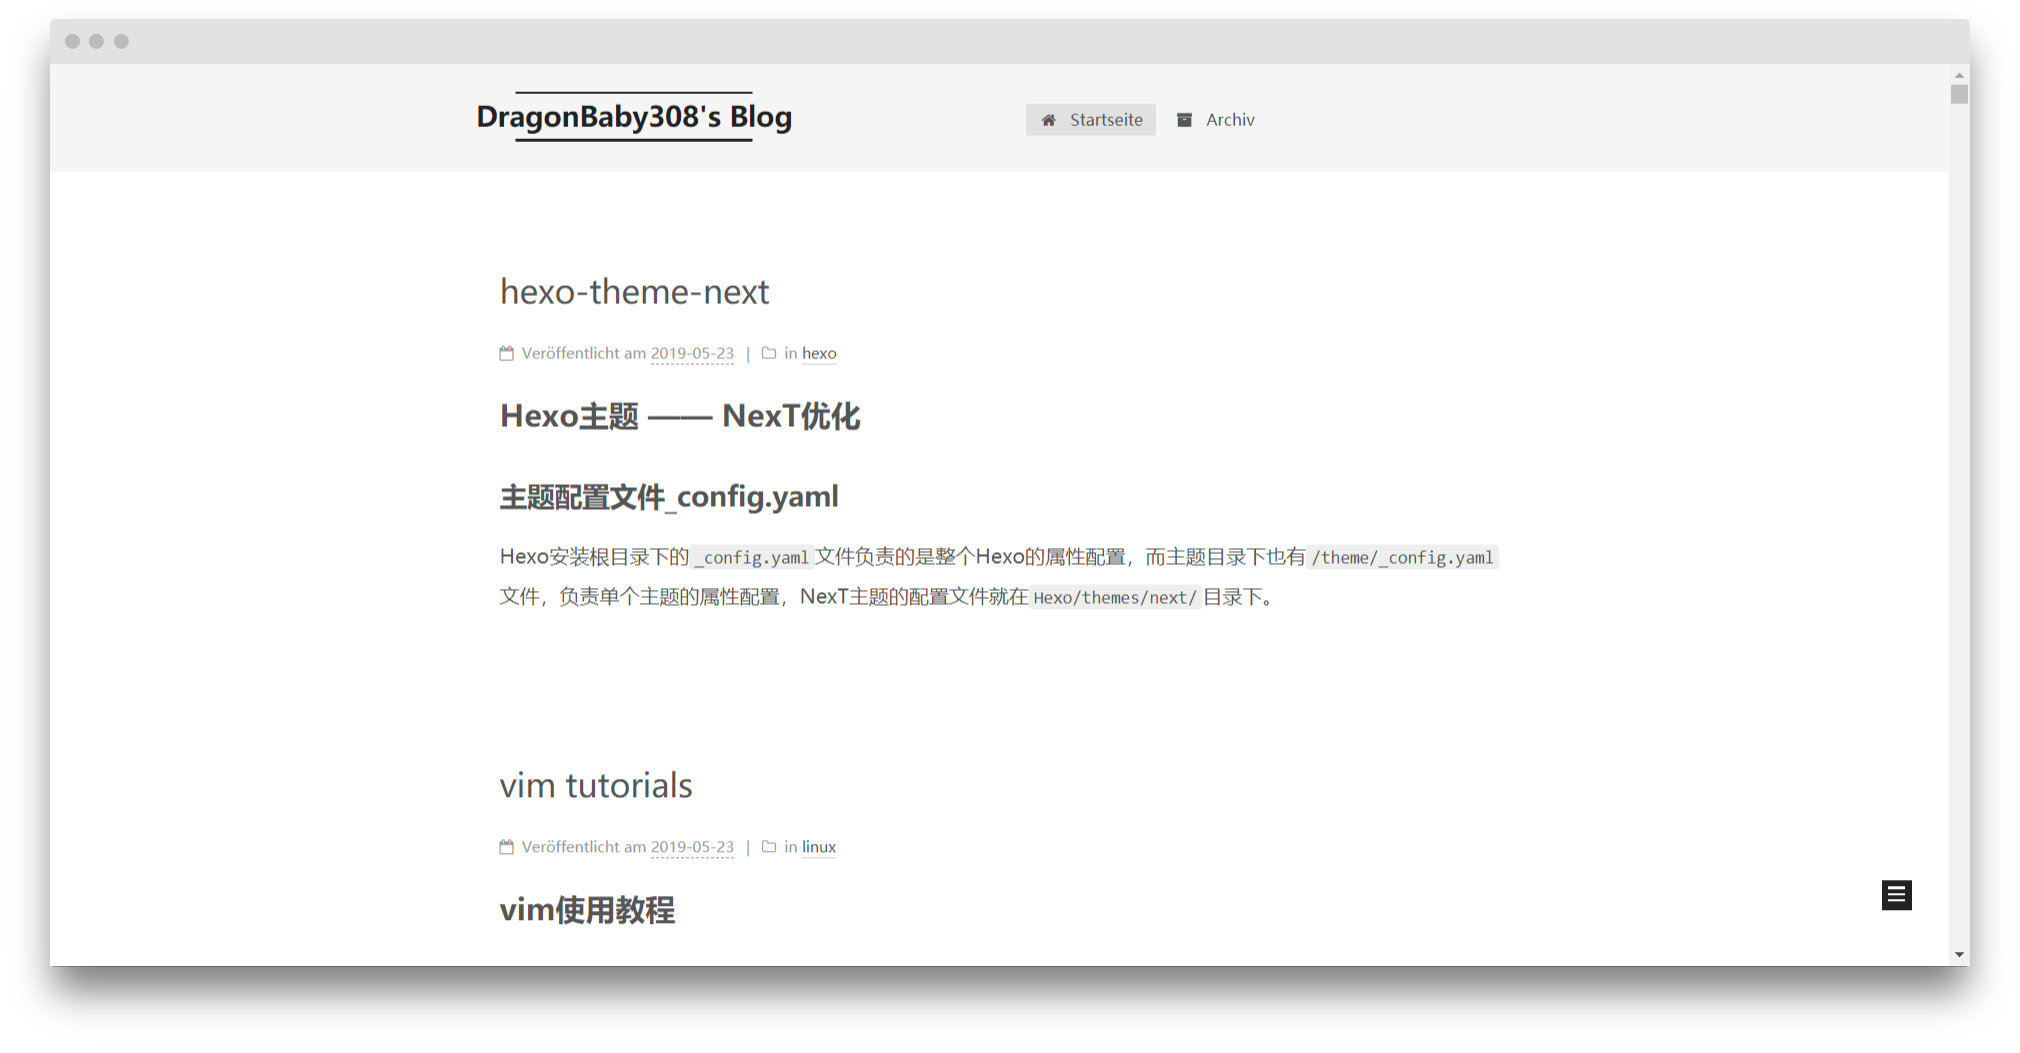
Hexo主题 —— NexT优化
首先,必须要说明的是,关于NexT主题的所有设置与功能都能在《NexT主题官方文档》中找到。本文只是记录下我采用的设置。
主题配置文件_config.yaml
Hexo安装根目录下的_config.yaml文件负责的是整个Hexo的属性配置,而主题目录下也有/theme/_config.yaml文件,负责单个主题的属性配置,NexT主题的配置文件就在Hexo/themes/next/目录下。
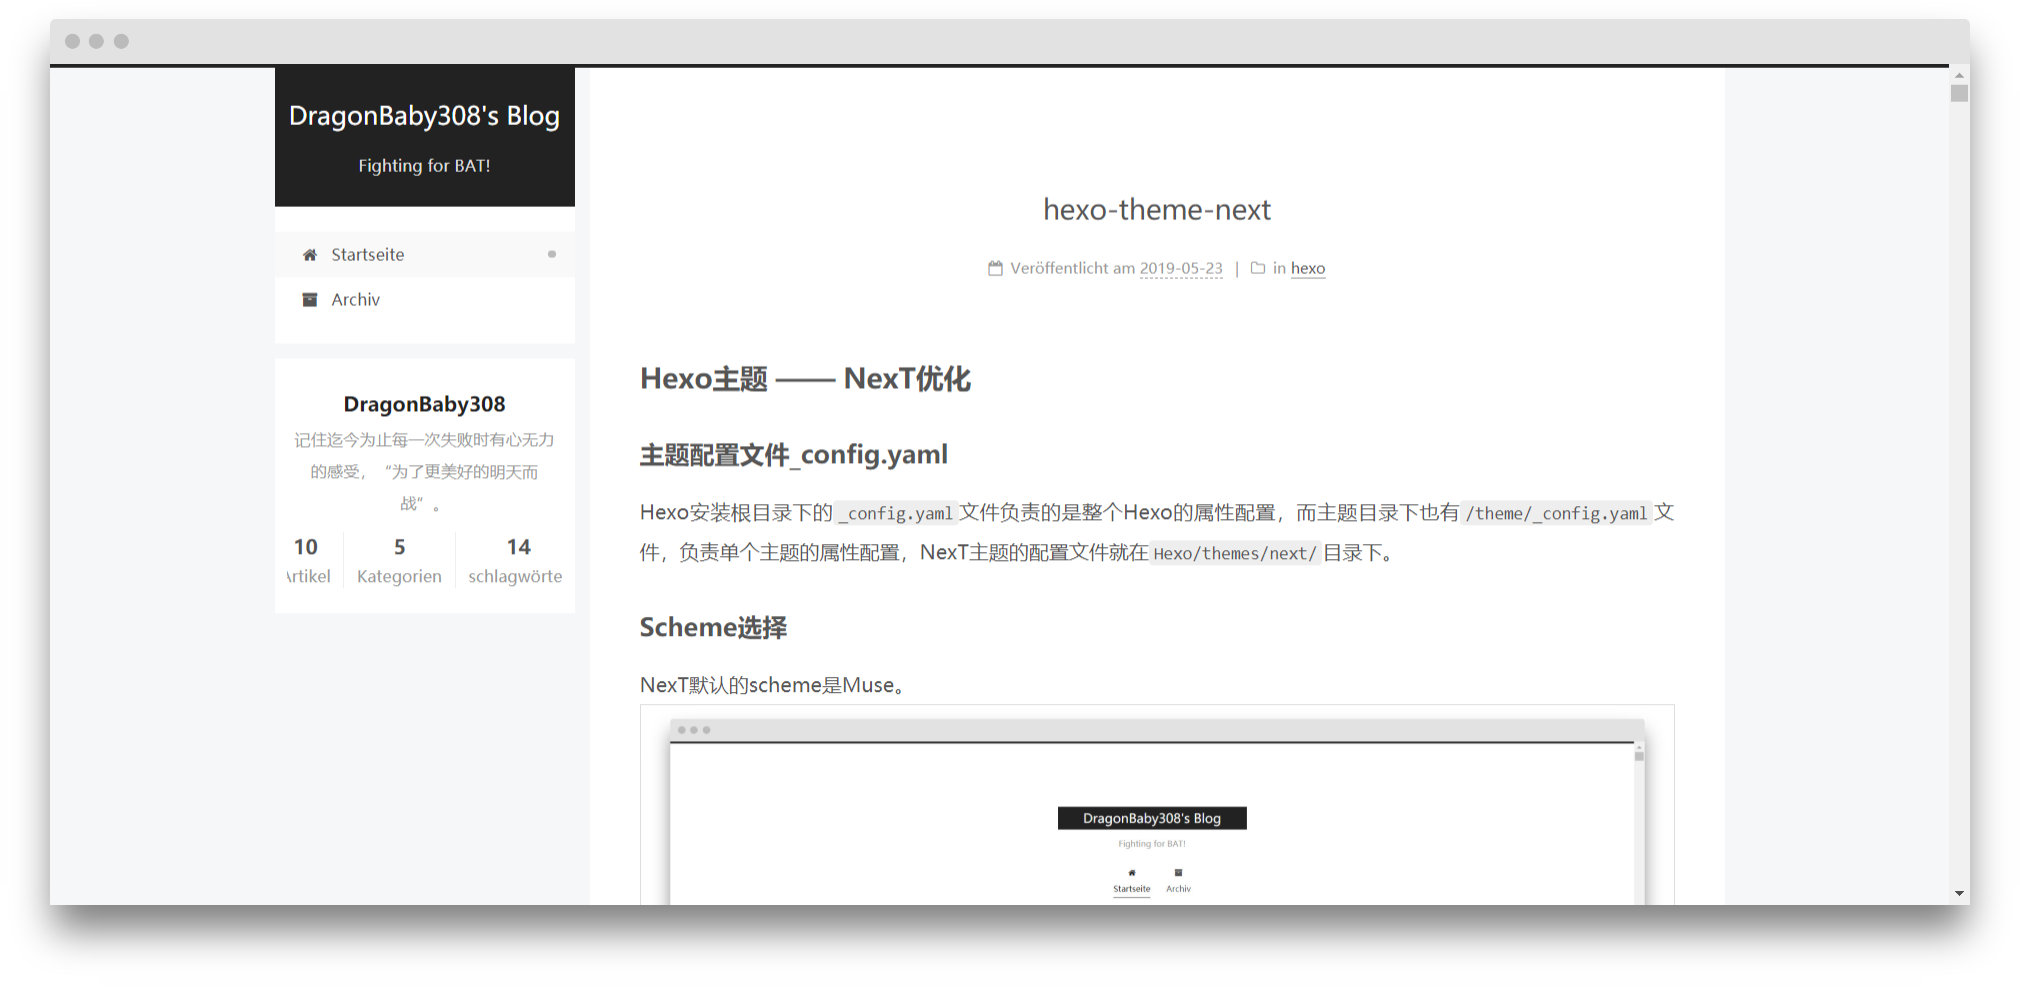
Scheme主题选择
在theme/_config.yaml文件中的scheme目录下选择自己喜欢的主题即可。
Muse 是NexT的默认版本,黑白主调,大量留白。
Mist 是NexT的紧凑版本,整洁有序。
Pisces 是双栏设计,头像、签名等被移到左边单独作为一栏,个人最喜欢。
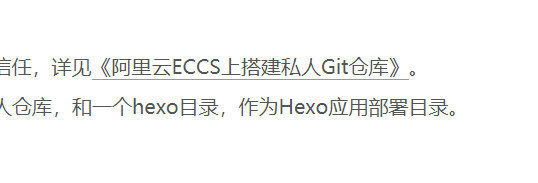
文内链接形式
未修改时,文内链接颜色和普通文本没有区别:
为了突出区别性,我们在
themes/next/source/css/_common/components/post/post.styl文件中添加下列的代码:
  .post-body p a {
    color: #0593d3;
    border-bottom: none;
    border-bottom: 1px solid #0593d3;
    &:hover {
      color: #fc6423;
      border-bottom: none;
      border-bottom: 1px solid #fc6423;
    }
  }
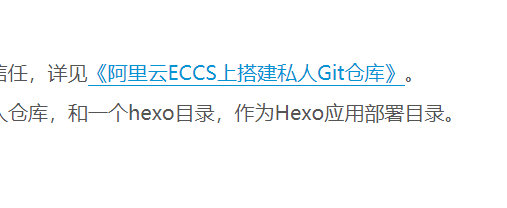
修改后的文内链接是蓝色,鼠标放上去会变为红色:
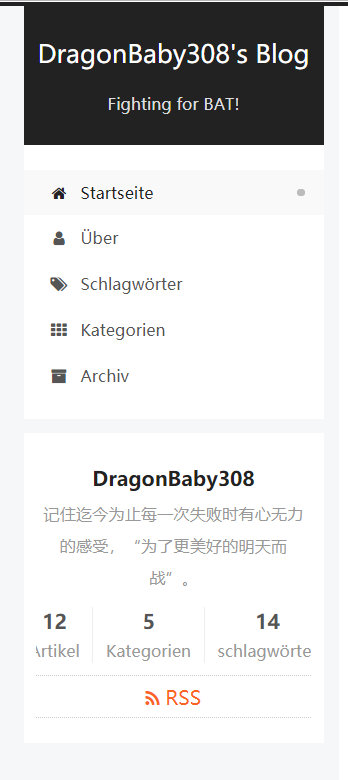
菜单设置
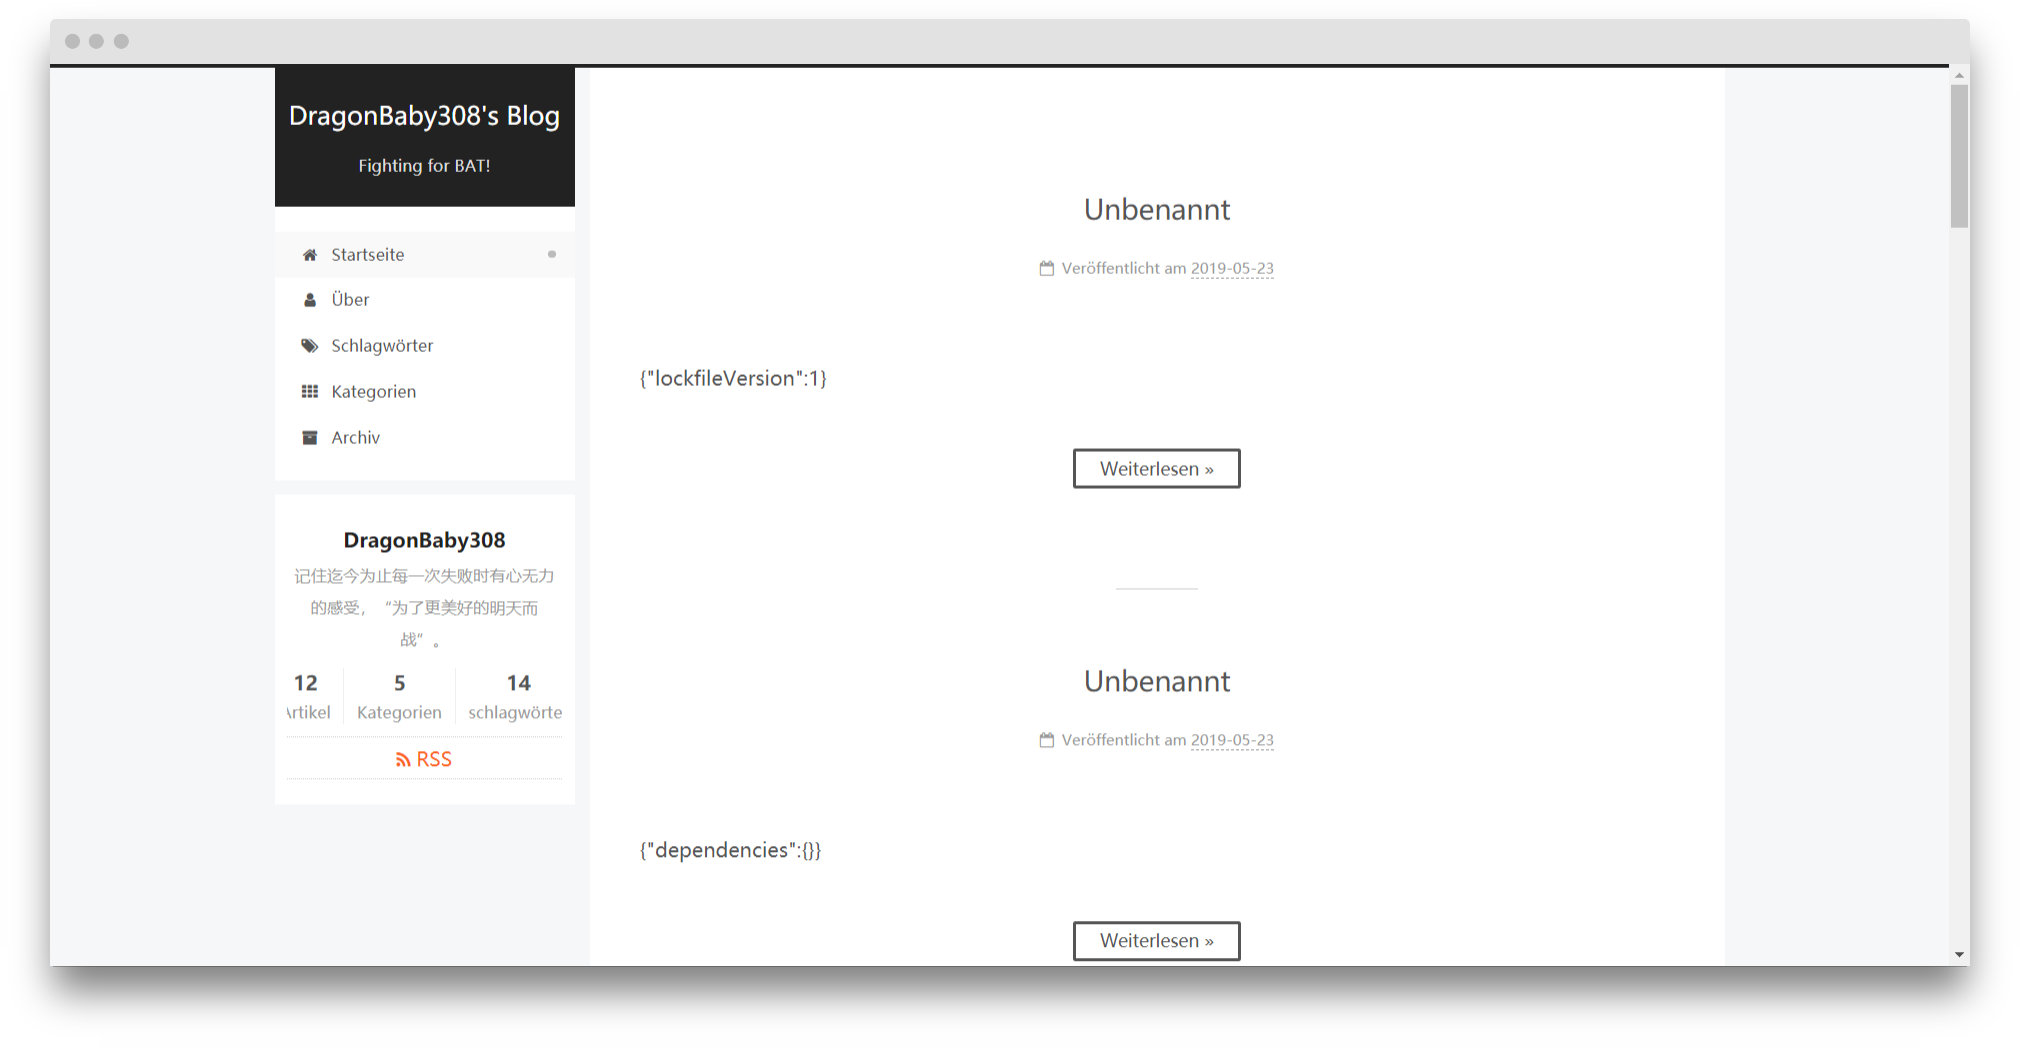
在theme/_config.yaml文件中的menu目录下:home属性代表主页,about属性代表个人信息,tags属性代表标签,categories属性代表目录,archives属性代表归档……
通过修改对应的属性,可以修改页面的展示信息,即左侧的菜单栏:
网站图标设置
将图片(png或jpg格式,不是favicon.ico)放在themes/next/source/images里,然后修改主题配置文件theme/_config.yaml的favicon属性,将small、medium和apple_touch_icon都配置为/images/imgPath就可以了,其他字段都注释掉。
favicon:
  small: /images/db3.png
  medium: /images/db3.png
  apple_touch_icon: /images/db3.png
启用RSS订阅博客更新
什么是RSS?
RSS(Really Simple Syndication,简易信息聚合)是一种描述和同步网站内容的格式,是使用最广泛的XML应用。RSS搭建了信息迅速传播的一个技术平台,使得每个人都成为潜在的信息提供者。发布一个RSS文件后,这个RSS Feed中包含的信息就能直接被其他站点调用,而且由于这些数据都是标准的XML格式,所以也能在其他的终端和服务中使用,是一种描述和同步网站内容的格式。
RSS目前广泛用于网上新闻频道,blog和wiki,主要的版本有0.91, 1.0, 2.0。使用RSS订阅能更快地获取信息,网站提供RSS输出,有利于让用户获取网站内容的最新更新。网络用户可以在客户端借助于支持RSS的聚合工具软件,在不打开网站内容页面的情况下阅读支持RSS输出的网站内容。
-
安装
hexo-generator-feed插件
npm install hexo-generator-feed --save -
在站点的配置文件
_config.yaml文件中配置RSS feed
在_config.yaml文件末尾添加:
 feed:
 type: atom
 path: atom.xml
 limit: 0

 plugins:
   - hexo-generator-feed
-
修改主题配置文件
theme/_config.yaml的rss属性为:rss: /atom.xml -
使用RSS
运行hexo g,如果提示INFO Generated: atom.xml,且在Hexo/public/目录下生成了atom.xml文件,则说明RSS设置成功。
运行hexo d,如果服务器对应的目录hexo下也有了atom.xml文件,则说明部署也成功了。
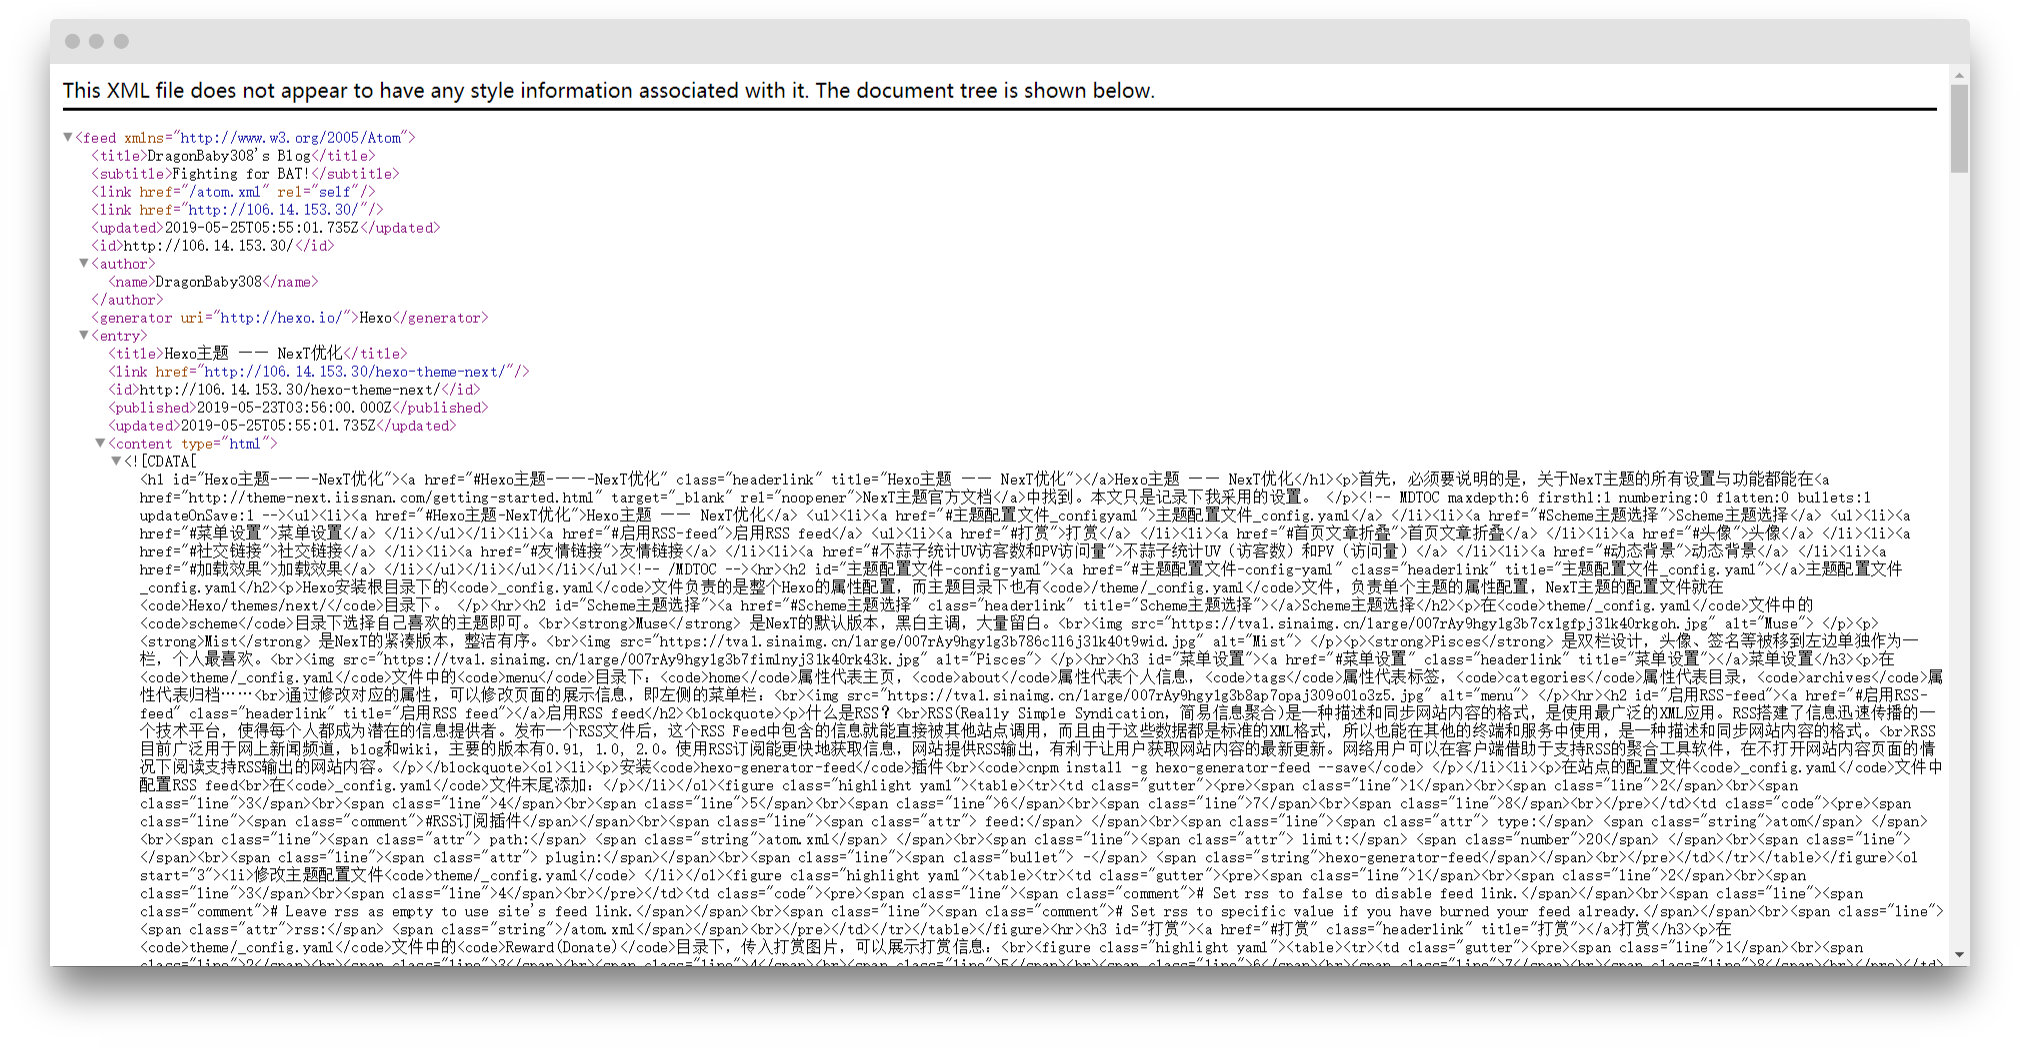
这样你的博客就可以被别人订阅了,点击主页的RSS按钮,会显示如下页面:
打赏
在theme/_config.yaml文件中的Reward(Donate)目录下,传入打赏图片,可以展示打赏信息:
  # Reward (Donate)
  reward_settings:
    enable: true
    animation: true
    comment: 没办法,要恰饭的嘛
  reward:
    wechatpay: https://tva1.sinaimg.cn/large/007rAy9hgy1g3b8vqnvnrj30u014q0w6.jpg
    alipay: https://tva1.sinaimg.cn/large/007rAy9hgy1g3b8wjrpzgj30p011iaco.jpg
首页文章折叠
将theme/_config.yaml文件auto_excerpt目录下的enable改为true即可。
回到顶部按钮显示百分比
back2top:
  # 回到顶部按钮
  enable: true
  # true,按钮显示在侧边栏;false,按钮显示在右下角
  sidebar: false
  # 按钮上显示百分比
  scrollpercent: true
如图:
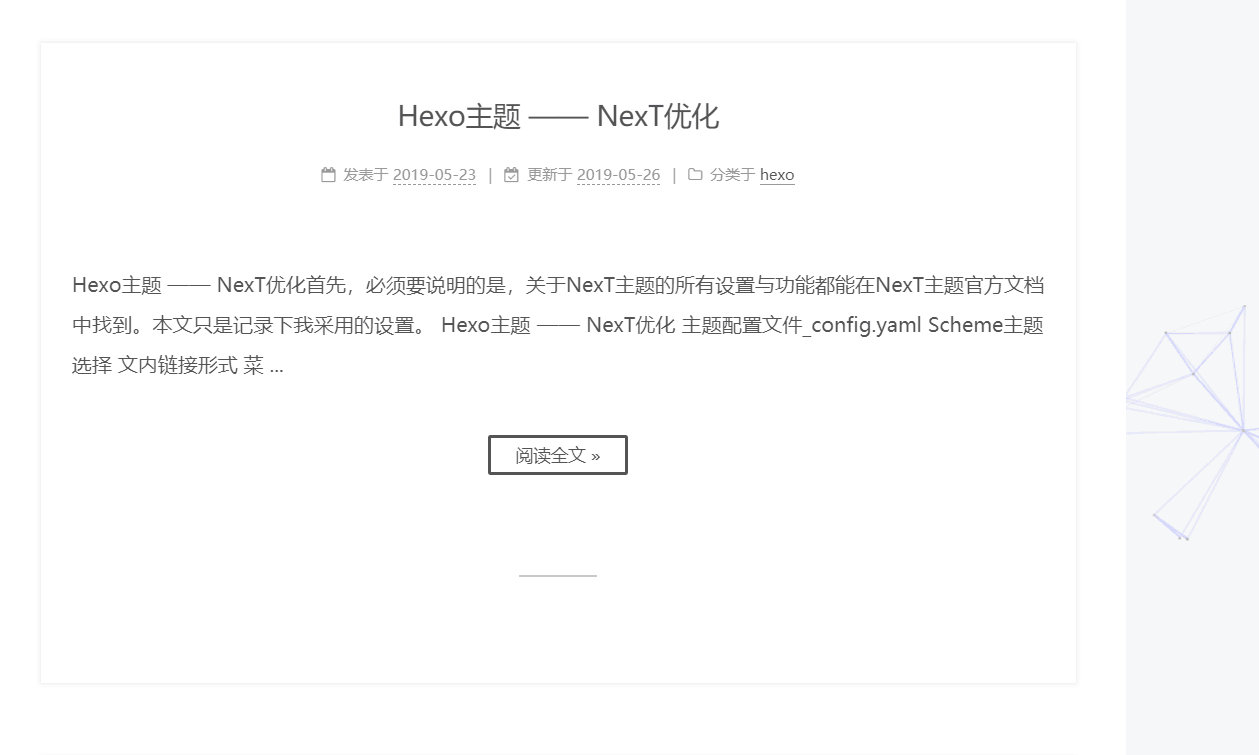
文章添加阴影
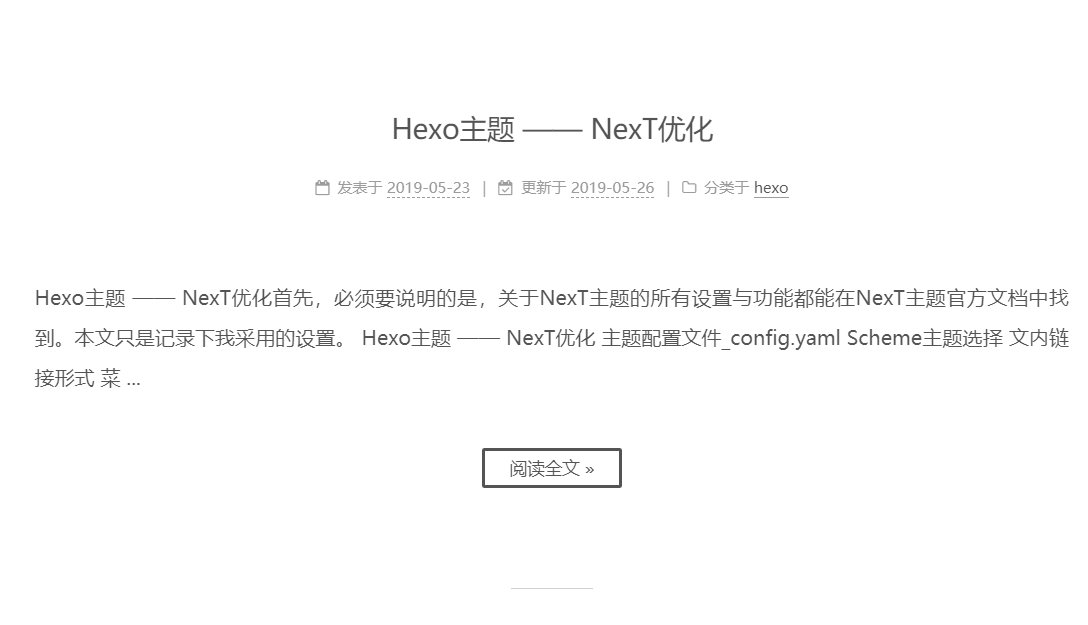
未添加阴影时,文章之间的分隔不是很明显:
在
themes/next/source/css/_custom/custom.styl文件中添加如下代码:
// Custom styles.
// 为文章添加阴影效果
.post {
   margin-top: 60px;
   margin-bottom: 60px;
   padding: 25px;
   -webkit-box-shadow: 0 0 5px rgba(202, 203, 203, .5);
   -moz-box-shadow: 0 0 5px rgba(202, 203, 204, .5);
}
效果如图:
头像
修改theme/_config.yaml文件下的avatar属性,可以使用本地图片,或是在avatar: url:属性中传入网络图片。
社交链接
修改theme/_config.yaml文件下的social属性,按照格式设置即可:
  social:
    GitHub: https://github.com/DragonBaby308 || github
    Bilibili: https://space.bilibili.com/24837083 || bilibili
友情链接
修改theme/_config.yaml文件下的links属性,按照格式设置即可:
links:
  让我帮你百度一下: http://lab.mkblog.cn/lmbtfy/
Local Search本地搜索
-
首先,安装
hexo-generator-searchdb,在根目录下执行:
npm install -g hexo-generator-searchdb --save -
在站点配置文件
_config.yaml中添加如下内容:
search:
  path: ./public/search.xml
  field: post
  format: html
  limit: 10000
- 将主题配置文件
theme/_config.yaml文件中local_search标签下的enable改为true。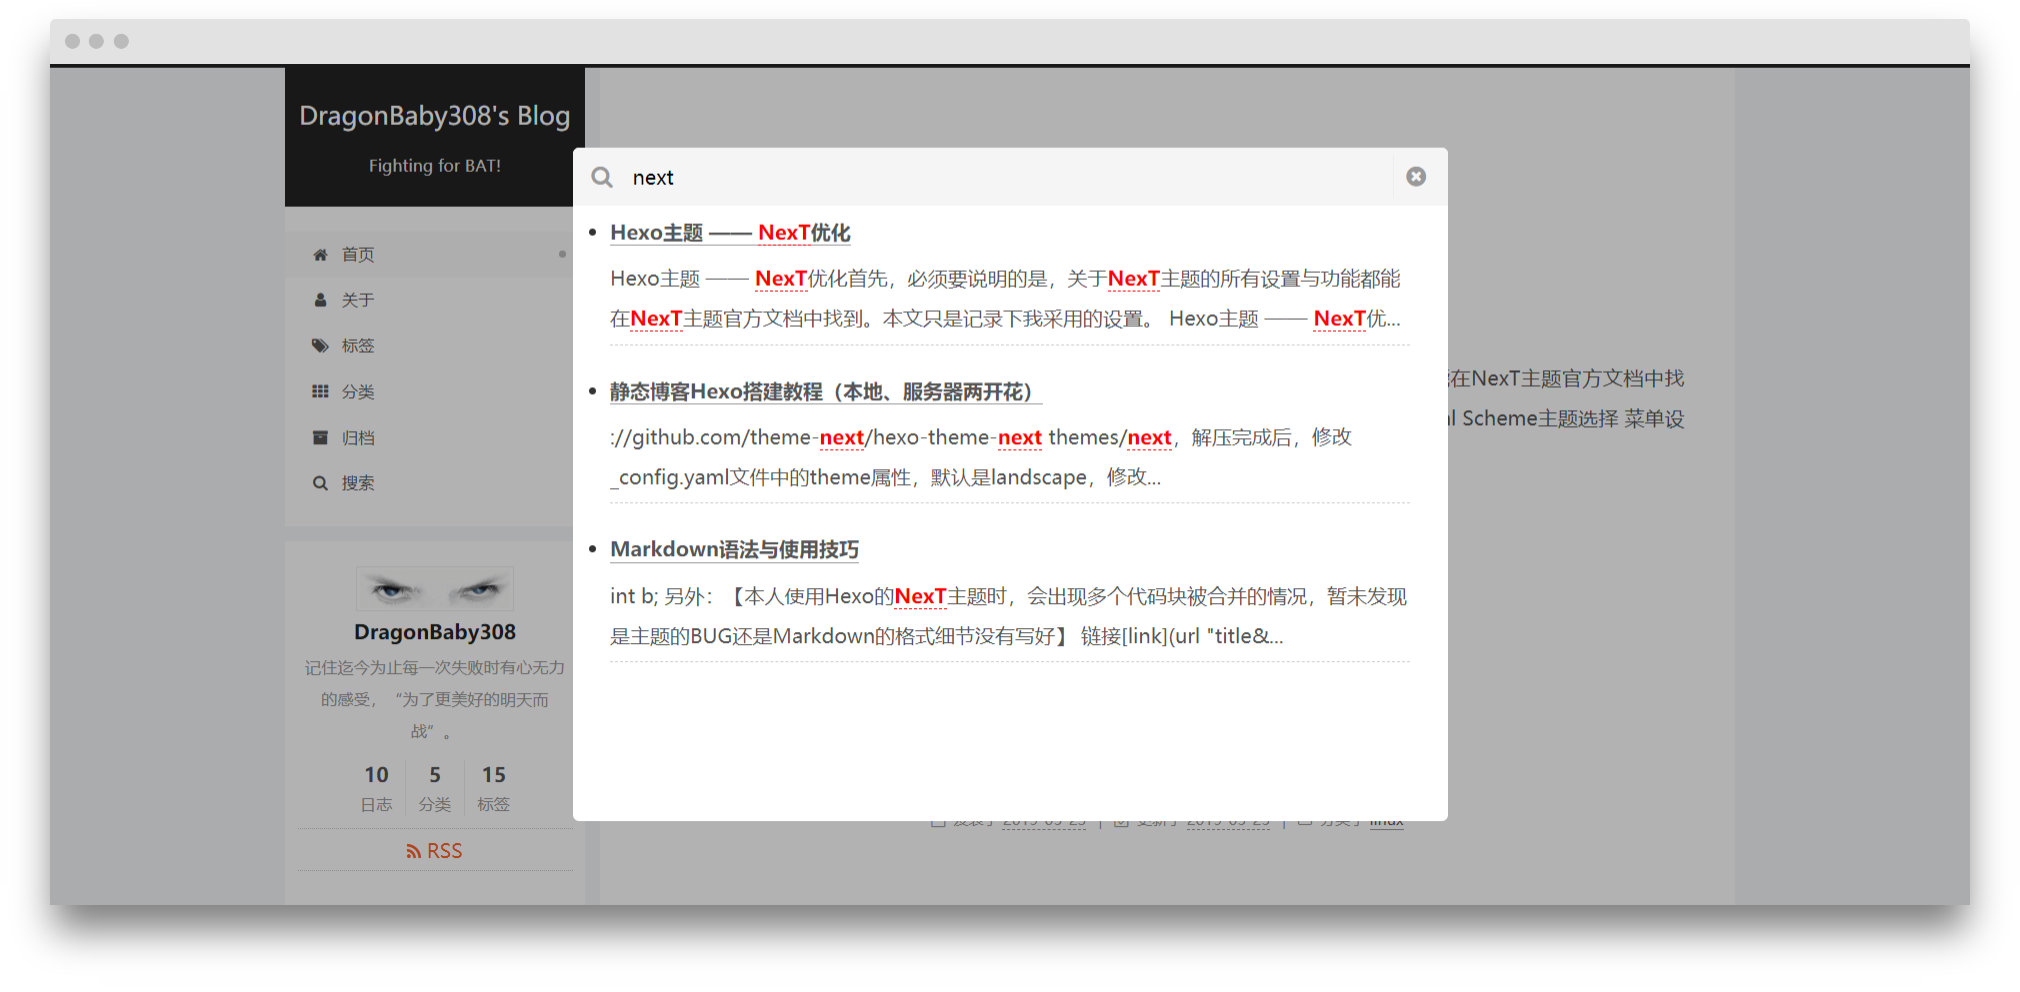
不蒜子统计UV(访客数)和PV(访问量)
将主题配置文件theme/_config.yaml文件中busuanzi_count标签下的enable改为true。配置如下:
busuanzi_count:
  enable: true
  # 访客数
  site_uv: true
  # 访问量
  site_pv: true
  # 文章阅读次数
  page_pv: true
动态背景
首先将动态背景所需要依赖的js下载到themes/next/source/lib目录下,然后将主题配置文件theme/_config.yaml文件中canvas标签下的对应特效改为true即可启用。
如,我需要使用Canvas-nest动画,则需要首先git clone https://github.com/theme-next/theme-next-canvas-nest Hexo/themes/next/source/lib/canvas-nest,将js下载到本地,然后再修改主题配置文件theme/_config.yaml文件中canvas_nest标签下的enable为true。
# canvas-nest  鼠标静止不动,会有线条聚集
git clone https://github.com/theme-next/theme-next-canvas-nest Hexo/themes/next/source/lib/canvas-next

# three_waves  波浪
# canvas_lines
# canvas_sphere
git clone https://github.com/theme-next/theme-next-three Hexo/themes/next/source/lib/next-three

# canvas-ribbon  彩虹效果,只支持Pisces
git clone https://github.com/theme-next/theme-next-canvas-ribbon Hexo/themes/next/source/lib/canvas-ribbon

canvas_nest:
  enable: true
  onmobile: true # display on mobile or not
  color: "0,0,255" # RGB values, use ',' to separate
  opacity: 0.5 # the opacity of line: 0~1
  zIndex: -1 # z-index property of the background
  count: 99 # the number of lines

three_waves: true
canvas_lines: true
canvas_sphere: true

canvas_ribbon:
  enable: true
  size: 300
  alpha: 0.6
  zIndex: -1
加载条效果
首先通过git clone https://github.com/theme-next/theme-next-pace Hexo/themes/next/source/lib/page命令,将加载条所需要依赖的js下载到Hexo/themes/next/source/lib目录下,然后将主题配置文件theme/_config.yaml文件中pace标签改为true,在pace_theme中选用对应主题即可启用。
pace: true
# pace_theme: pace-theme-big-counter  右上角百分比数字
# pace_theme: pace-theme-bounce  右上角弹球
# pace_theme: pace-theme-barber-shop  理发店蓝白加载条,从左滑到右
# pace_theme: pace-theme-center-atom  屏幕正中,原子样式的圆形加载条
# pace_theme: pace-theme-center-circle  屏幕正中,圆形转圈加载条
# pace_theme: pace-theme-center-radar  屏幕正中,雷达形状
# pace_theme: pace-theme-center-simple  屏幕正中,进度条
# pace_theme: pace-theme-corner-indicator  右上角转圈
# pace_theme: pace-theme-fill-left  从左到右
# pace_theme: pace-theme-flash  右上角有一个小圈圈,其他特效没看出来
# 屏幕正中间进度条
pace_theme: pace-theme-loading-bar
# pace_theme: pace-theme-mac-osx  斑马纹?
# pace_theme: pace-theme-minimal  啥也没有
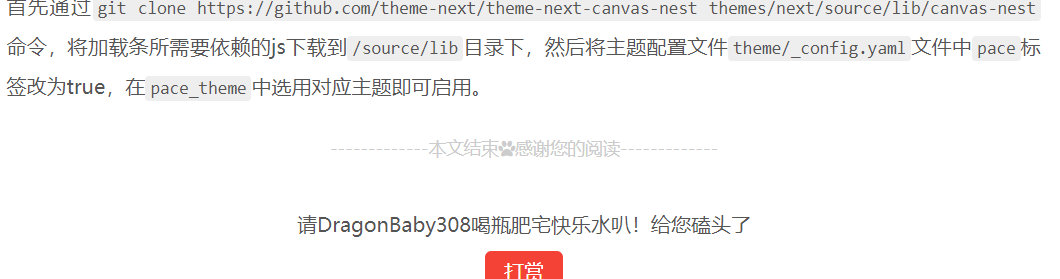
本文结束标记
在themes/next/layout/_macro目录下新建passage-end-tag.swig文件,添加以下代码:
<div>
    {% if not is_index %}
        <div style="text-align:center;color: #ccc;font-size:14px;">-------------本文结束<i class="fa fa-paw"></i>感谢您的阅读-------------</div>
    {% endif %}
</div>
接着在themes/next/layout/_macro/post.swig文件中,post-body后,添加如下代码:
<div>
  {% if not is_index %}
    {% include 'passage-end-tag.swig' %}
  {% endif %}
</div>
最后在theme/_config.yaml文件末尾添加:
# 文章末尾添加“本文结束”标记
passage_end_tag:
  enabled: true
效果如图:
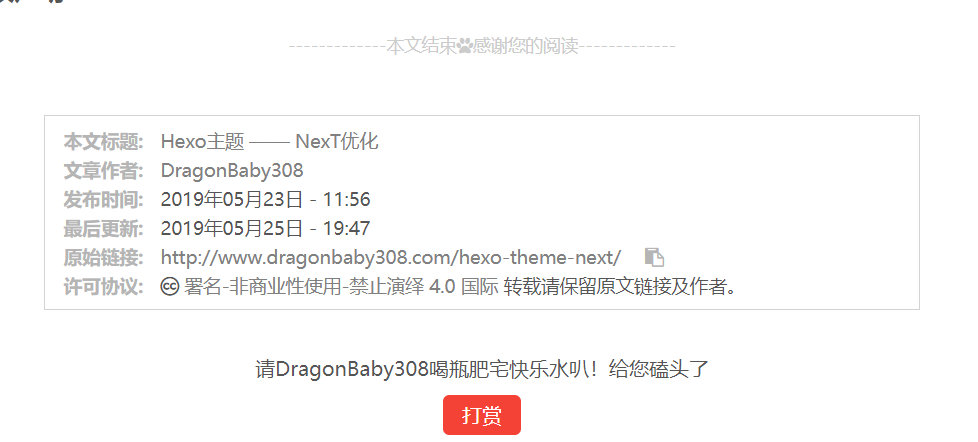
版权声明
- 在
theme/next/layout/_macro/目录下添加文件my-copyright.swig
{% if page.copyright %}
<div class="my_post_copyright">
  <script src="//cdn.bootcss.com/clipboard.js/1.5.10/clipboard.min.js"></script>

  <!-- JS库 sweetalert 可修改路径 -->
  <script src="https://cdn.bootcss.com/jquery/2.0.0/jquery.min.js"></script>
  <script src="https://unpkg.com/sweetalert/dist/sweetalert.min.js"></script>
  <p><span>本文标题:</span><a href="{{ url_for(page.path) }}">{{ page.title }}</a></p>
  <p><span>文章作者:</span><a href="/" title="访问 {{ theme.author }} 的个人博客">{{ theme.author }}</a></p>
  <p><span>发布时间:</span>{{ page.date.format("YYYY年MM月DD日 - HH:mm") }}</p>
  <p><span>最后更新:</span>{{ page.updated.format("YYYY年MM月DD日 - HH:mm") }}</p>
  <p><span>原始链接:</span><a href="{{ url_for(page.path) }}" title="{{ page.title }}">{{ page.permalink }}</a>
    <span class="copy-path"  title="点击复制文章链接"><i class="fa fa-clipboard" data-clipboard-text="{{ page.permalink }}"  aria-label="复制成功!"></i></span>
  </p>
  <p><span>许可协议:</span><i class="fa fa-creative-commons"></i> <a rel="license" href="https://creativecommons.org/licenses/by-nc-nd/4.0/" target="_blank" title="Attribution-NonCommercial-NoDerivatives 4.0 International (CC BY-NC-ND 4.0)">署名-非商业性使用-禁止演绎 4.0 国际</a> 转载请保留原文链接及作者。</p>
</div>
<script>
    var clipboard = new Clipboard('.fa-clipboard');
      $(".fa-clipboard").click(function(){
      clipboard.on('success', function(){
        swal({
          title: "",
          text: '复制成功',
          icon: "success",
          showConfirmButton: true
          });
        });
    });
</script>
{% endif %}
- 在
theme/next/source/css/_common/components/post/目录下添加文件my-post-copyright.styl
.my_post_copyright {
  width: 85%;
  max-width: 45em;
  margin: 2.8em auto 0;
  padding: 0.5em 1.0em;
  border: 1px solid #d3d3d3;
  font-size: 0.93rem;
  line-height: 1.6em;
  word-break: break-all;
  background: rgba(255,255,255,0.4);
}
.my_post_copyright p{margin:0;}
.my_post_copyright span {
  display: inline-block;
  width: 5.2em;
  color: #b5b5b5;
  font-weight: bold;
}
.my_post_copyright .raw {
  margin-left: 1em;
  width: 5em;
}
.my_post_copyright a {
  color: #808080;
  border-bottom:0;
}
.my_post_copyright a:hover {
  color: #a3d2a3;
  text-decoration: underline;
}
.my_post_copyright:hover .fa-clipboard {
  color: #000;
}
.my_post_copyright .post-url:hover {
  font-weight: normal;
}
.my_post_copyright .copy-path {
  margin-left: 1em;
  width: 1em;
  +mobile(){display:none;}
}
.my_post_copyright .copy-path:hover {
  color: #808080;
  cursor: pointer;
}
- 修改
theme/next/layout/_macro/post.swig文件
{#####################}
{### END POST BODY ###}
{#####################}

  # 添加下面这段
{% if not is_index %}
  {% include 'my-copyright.swig' %}
{% endif %}

{% if theme.wechat_subscriber.enable and not is_index %}
  {% include '../_partials/post/wechat-subscriber.swig' %}
{% endif %}
-
修改
theme/next/source/css/_common/components/post/post.styl文件,在最后一行新增:@import "my-post-copyright"; -
修改
Hexo/scaffolds/post.md,默认显示版权信息
---
title: {{ title }}
date: {{ date }}
tags:
categories:
copyright:
---
效果如图:
Livere(来必力)评论区
首先,访问Livere官网,注册→登录→安装,会得到一个data-id。
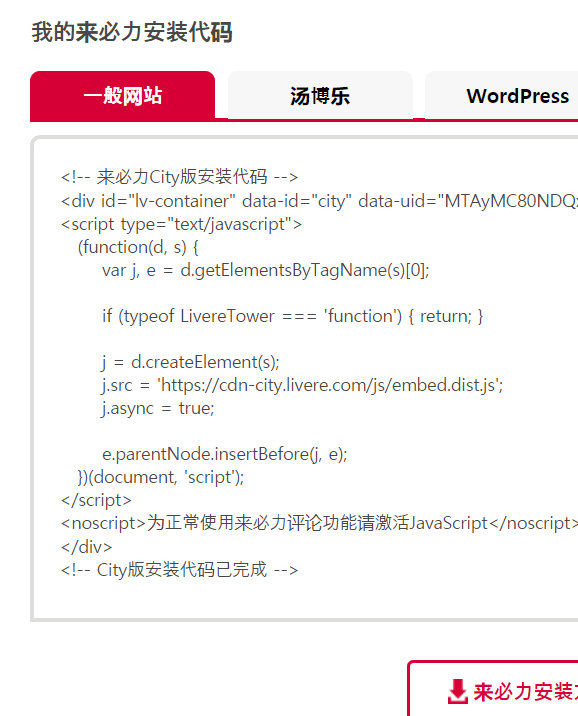
data-id复制粘贴到theme/_config.yaml文件的livere_uid属性即可。效果如图: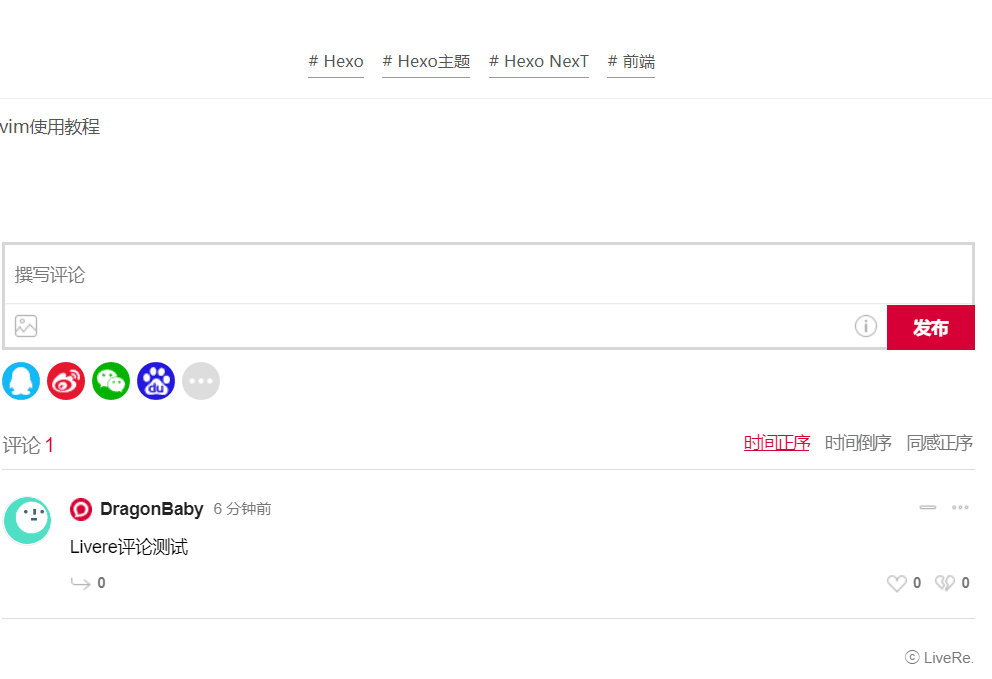
Live2d 看板娘
- 安装hexo-helper-live2d
在博客根目录下,执行npm install hexo-helper-live2d --save
- 修改站点配置文件或主题配置文件
官方已有的看板娘名称请点这里查看,部分看板娘的模型预览请看CSDN某博客。
我修改的是站点配置文件Hexo/_config.yaml,添加如下代码:
live2d:
  enable: true
  scriptFrom: local
  pluginRootPath: live2dw/
  pluginJsPath: lib/
  pluginModelPath: assets/
  model:
    # 填写你所需要的看板娘名称
    use: live2d-widget-model-haruto
  display:
    position: right
    width: 150
    height: 300
  mobile:
    show: true
- 通过npm安装依赖的看板娘文件
npm install live2d-widget-model-name,其中name是你选择的官方看板娘的名字,如我选择的是haruto,则为npm install live2d-widget-model-haruto。
重新运行hexo clean && hexo d -g则可在主页看到了。