

开始
博文组件
博文组件代码 (推荐组件名复合w3c规范: 字母全小写且必须包含一个连字符)
<!-- 博文 blog-test.vue -->
<!-- HTML 中的特性名是大小写不敏感的,所以浏览器会把所有大写字符解释为小写字符。
这意味着当你使用 DOM 中的模板时,camelCase (驼峰命名法) 的 prop名需要使用
其等价的 kebab-case (短横线分隔命名) 命名 -->
<!-- 如:在组件中我们prop的是postData,在使用组件是使用的是post-data -->
<template>
  <div>
    <h3>{{postData.title}}</h3>
    <button @click="addSize">+size</button>
    <div class="content">{{postData.content}}</div>
  </div>
</template>

<script>
export default {
    props: ['postData'],
    methods: {
        //不同于组件和 prop,事件名不存在任何自动化的大小写转换。
        //而是触发的事件名需要完全匹配监听这个事件所用的名称
        //所以在使用这个组件时还是enlarge-text事件
        //推荐你始终使用 kebab-case(短横线分隔命名)的事件名
        addSize(){
        	this.$emit('enlarge-text',0.5)
        }
    }
}
</script>

//prop验证
//类型错误控制台会报错
//没有动态绑定 :post-data="post" 会给个默认值即default里的内容
props: {
	postData: {
		type: Object,
		// 对象或数组默认值必须从一个工厂函数获取
		default: function () {
			return { title: '没有title', content: "没有内容"}
		}
	}
}
<!-- 父组件的页面 -->
<template>
	<div style="background: #eee;padding: 16px" :style="{ fontSize: postFontSize + 'em' }">
		<blogTest :post-data="post" @enlarge-text="enlargeText1"></blogTest>
	</div>
</template>

<script>
import blogTest from '@/components/blog-test'
export default {
	components: {
		blogTest
	},
	data(){
	    return {
    		post: {
    			title: '这是标题',
    			content: '这是博文的内容这是博文的内容这是博文的内容这是博文的内容这是博文的内容这是博文的内容这是博文的内容这是博文的内容这是博文的内容'
    		},
    		postFontSize: 1
	    }
	},
	methods: {
	    enlargeText1(num){
    		this.postFontSize += num;
	    }
	}
}
</script>
关于组件上使用v-model
关于组件上使用v-model(写的很详细)
查看 www.cnblogs.com/wind-lanyan…
<!-- 子组件custom-input.vue -->
<template>
<div>
	<input v-bind:value="value"  v-on:input="$emit('input', $event.target.value)" type="text">
</div>
</template>

<script>
export default {
    props: ['value']
}
</script>
<!-- 父组件的页面 -->
<template>
	<div style="background: #eee;padding: 16px">
        <!-- v-model实际是语法糖,用法如下 -->
        <customInput v-bind:value="searchText" v-on:input="searchText1 = $event"></customInput>
        <p>页面中的值:{{searchText}}</p>
        <!-- v-model正常用法,和上面的是一样的 -->
        <customInput v-model="searchText1"></customInput>
        <p>页面中的值:{{searchText1}}</p>
	</div>
</template>

<script>
import customInput from '@/components/custom-input'
export default {
    components: {
        customInput
    },
    data(){
    	return {
    	    searchText: '1',
    	    searchText1: '2'
    	}
    }
}
</script>
slot插槽
还是刚才的input组件
<!-- custom-input.vue在其中添加了一个slot -->
<div>
    <input v-bind:value="value"  v-on:input="$emit('input', $event.target.value)" type="text">
    <slot></slot>
</div>
<!-- 使用组件的页面,在customInput标签中添加了一个p标签,这个p标签会替换掉slot标签 -->
<template>
	<div style="background: #eee;padding: 16px">
		<customInput v-model="searchText">
		    <p>slot内容</p>
		</customInput>
		<p>页面中的值:{{searchText}}</p>
	</div>
</template>
插槽后备内容
<!-- custom-input.vue在其中添加了一个slot -->
<div>
    <input v-bind:value="value"  v-on:input="$emit('input', $event.target.value)" type="text">
    <slot>后备内容</slot>
</div>
<!-- 父组件的页面,在customInput标签中什么都没有时,slot标签中的内容就会显示 -->
<template>
	<div style="background: #eee;padding: 16px">
		<customInput v-model="searchText"></customInput>
		<p>页面中的值:{{searchText}}</p>
	</div>
</template>
具名插槽(文档已经很清楚了)
<!--slot-input.vue-->
<template>
<div style="background: #fff;">
    <h3>插槽是input的组件</h3>
    <slot name="header"><h1>默认头部内容</h1></slot>
    <!-- 把组件中的数据传到页面中 -->
    <slot v-bind:data="comData"></slot>
    <slot name="footer"><h1>默认底部内容</h1></slot>
</div>
</template>

<script>
export default {
	data(){
    	return {
            comData: {
                name: 'lily',
                age: 20
            }
    	}
    }
}
</script>

<!--父组件中使用-->
<template>
<div style="background: #eee;padding: 16px">
    <slotInput>
        <template v-slot:header>
            <p>头部信息</p>
        </template>
        <!-- 任何没有被包裹在带有 v-slot 的 <template> 中的内容都会被视为默认插槽的内容 -->
        <!-- <input type="text" style="width: 100px;height:30px;"> -->
        <!-- 希望更明确一些,仍然可以在一个 <template> 中包裹默认插槽的内容 -->
        <template v-slot:default="slotProps">
            <!-- 使用组件中的数据 -->
            <p>组件中的数据: {{slotProps.data.name}}</p>
        </template>

        <template v-slot:footer>
            <p>底部信息</p>
        </template>
    </slotInput>
</div>
</template>

<script>
import slotInput from '@/components/slot-input'
export default {
	components: {
		slotInput
	}
}
</script>
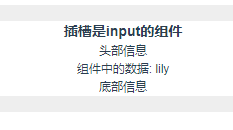
效果图:
如果在父组件的组件标签中中不添加任何内容:
<!--父组件中代码-->
<template>
	<div style="background: #eee;padding: 16px">
		<slotInput></slotInput>
	</div>
</template>
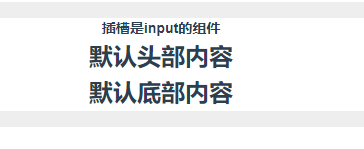
则会显示子组件插槽slot中定义默认内容,效果如下:
组件自己套用自己
<!--子组件tree-test.vue-->
<!-- 树形组件 -->
<template>
  <div class="content">
    <ul>
        <li v-for="item in treeData" :key="item.uname">
            <span @click="toggle(item)">{{item.uname}}</span>
            <treeTest1 :tree-data="item.children" v-show="item.xian"></treeTest1>
        </li>
    </ul>
  </div>
</template>

<script>

export default {
    //组件是可以在它们自己的模板中调用自身的,只能通过 name 选项来做这件事
    name: 'treeTest1',
    props: {
    	treeData: {
    		type: Array,
			default: function () {
				return [
                    {
                        uname:'默认',
                        xian: false,
                        children:[{
                            uname:'默认1',
                            xian: false,
                            children: []
                        }]
                    }
                ]
			}
    	}
    },
    methods: {
        toggle(item){
            item.xian = !item.xian
        }
    }
}
</script>
<!--父组件-->
<template>
  <div class="about">
  	<treeTest :tree-data="treeList"></treeTest>
  </div>
</template>
<script>
import treeTest from '@/components/tree-test'
export default {
	components: {
		treeTest
	},
	data(){
		return {
			treeList: [
				{
					uname:'目录',
					xian: false,
					children:[{
						uname:'目录1',
						xian: false,
						children: [{
							uname:'目录11',
							xian: false,
							children: []
							},
							{
								uname: '目录12',
								xian: false,
								children: []
							}]
						}]
				},
				{
					uname:'我的音乐',
					xian: false,
					children:[{
						uname:'音乐1',
						xian: false,
						children: []
					}]
				},
				{
					uname:'我的照片',
					xian: false,
					children:[{
						uname:'照片1',
						xian: false,
						children: []
						}]
				}
			]
		}
	}
}
</script>
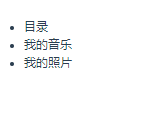
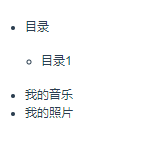
默认效果是这样的:
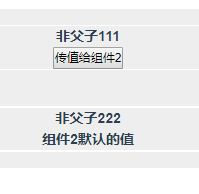
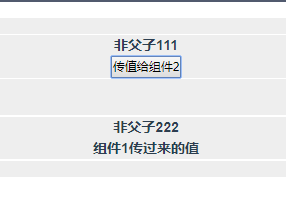
非父子组件传值
首先在main.js中,使用一个空的vue实例作为中央事件总线.
<!--main.js-->
import Vue from 'vue'
import App from './App.vue'
import router from './router/index'
import store from './store'
import iView from 'iview'
import 'iview/dist/styles/iview.css'
Vue.use(iView)
<!--放在vue原型中-->
Vue.prototype.bus = new Vue()

Vue.config.productionTip = false
Vue.directive('focus',{
  inserted(el){
    el.focus()
  }
})
new Vue({
  router,
  store,
  render: h => h(App)
}).$mount('#app')
父组件
<!--noParants.vue-->
<!-- 非父子组件传值 -->
<template>
	<div style="background: #eee;padding: 16px">
		<noParents1></noParents1><br><br>
		<noParents2></noParents2>
	</div>
</template>

<script>
import noParents1 from '@/components/no-parents1'
import noParents2 from '@/components/no-parents2'
export default {
	components: {
		noParents1,
		noParents2
	},
	data(){
		return {
			show: true
		}
	}
}
</script>
子组件
<!--noParants1.vue-->
<!-- 非父子组件测试1 -->
<template>
  <div style="border: 1px solid #fff">
    <h3>{{name}}</h3>
    <button @click="toNo2">传值给组件2</button>
  </div>
</template>

<script>
export default {
    data(){
        return {
            name: "非父子111"
        }
    },
    methods: {
        toNo2(){
          this.bus.$emit('to-news', '组件1传过来的值')
        }
    }
}
</script>
<!--noParants2.vue-->
<!-- 非父子组件测试2 -->
<template>
  <div style="border: 2px solid #fff">
    <h3>{{name}}</h3>
    <h3>{{msg}}</h3>
  </div>
</template>

<script>
export default {
    data(){
        return {
            name: "非父子222",
            msg: '组件2默认的值'
        }
    },
    methods: {

    },
    mounted(){
        let _this = this;
        this.bus.$on('to-news', function(data){
            _this.msg = data;
            console.log(_this.msg+'this')
        })
    }
}
</script>
点击前
组件非prop特性继承
就是在子组件的prop里并没有定义的特性,组件可以接受任意的特性,而这些特性会被添加到这个组件的根元素上。
<!--子组件-->
<template>
  <input v-bind:value="value" v-on:input="$emit('input', $event.target.value)" type="text" >
</template>

<script>
export default {
  props: ['value'],
  data(){
    return {

    }
  }
}
</script>

<!--父组件这里把子组件名定义为BaseInput-->
<BaseInput v-model="firstName" type="number" placeholder='Enter your username'></BaseInput>
这里我们在父组件上添加了一个type属性和placeholder属性,在子组件中并没有定义这两个属性,父组件上的type属性会替换掉组件上默认的type属,而placeholder属性就会默认继承到组件的根元素上即input标签上.对于class和style属性默认会替换/合并已有的特性
我们如果想要阻止特性的继承, 在组件的选项中设置 inheritAttrs: false
<script>
export default {
  inheritAttrs: false,//禁用特性继承
  props: ['value'],
  data(){
    return {

    }
  }
}
</script>
但是这样又把所有的特性的继承都给禁止掉了,所以就有了$attrs 属性,$attrs 属性和inheritAttrs: false的结合使用, 对于子组件中定义的属性不会进行替换, 而对于没定义的则会进行添加.
<!--子组件-->
<template>
  <input v-bind="$attrs" v-bind:value="value" v-on:input="$emit('input', $event.target.value)" type="text" >
</template>

<script>
export default {
  inheritAttrs: false,
  props: ['value'],
  data(){
    return {

    }
  }
}
</script>
自定义事件的.sync修饰符
<!--子组件-->
<template>
  <div>
    <h3 @click="updateTitle">{{title}}</h3>
  </div>
</template>

<script>

export default {
    props: {
        title: {
            type: String,
            default: function () {
                return '没有title'
            }
        },
    },
    methods: {
        updateTitle(){
            this.$emit('update:title', 'newTitle')
        },
    }
}
</script>
<!--父组件-->
<template>
	<div>
        <blogTest :title="post.title" @update:title="post.title = $event"></blogTest>
	</div>
</template>

<script>
import blogTest from '@/components/blog-test'
export default {
	components: {
		blogTest
	},
	data(){
    	return {
    		post: {
    			title: '这是标题',
    			content: '这是博文的内容这是博文的内容这是博文的内容这是博文的内容这是博文的内容这是博文的内容这是博文的内容这是博文的内容这是博文的内容'
    		},
    	}
    },
    methods: {

    }
}
</script>
上面的代码中, 点击子组件的父组件传过来的title, 然后调用父组件监听的update:title的事件来更新父组件中的title
为了方便起见,我们为这种模式提供一个缩写,即 .sync 修饰符:
<blogTest :title.sync="post.title"></blogTest>
这样写起来就简单多了,父组件传过去title, 然后点击title调用**this.$emit('update:title', 'newTitle')**把需要更新的title值传过去
当我们用一个对象同时设置多个 prop 的时候,也可以将这个 .sync 修饰符和 v-bind 配合使用:
<!--子组件-->
<template>
  <div>
    <h3 @click="updateTitle">{{title}}</h3>
    <div @click="updateContent" class="content">{{content}}</div>
  </div>
</template>

<script>

export default {
    props: {
        title: {
            type: String,
            default: function () {
                return '没有title'
            }
        },
        content: {
            type: String,
            default: function () {
                return '没有content'
            }
        }
    },
    methods: {
        updateTitle(){
            this.$emit('update:title', 'newTitle')
        },
        updateContent(){
            this.$emit('update:content', 'newContent')
        }
    }
}
</script>
<!--父组件-->
<template>
	<div>
		<blogTest v-bind.sync="post"></blogTest>
	</div>
</template>

<script>
import blogTest from '@/components/blog-test'
export default {
	components: {
		blogTest
	},
	data(){
    	return {
    		post: {
    			title: '这是标题',
    			content: '这是博文的内容这是博文的内容这是博文的内容这是博文的内容这是博文的内容这是博文的内容这是博文的内容这是博文的内容这是博文的内容'
    		}
    	}
    },
    methods: {

    }
}
</script>
注意,对于传过去的对象,这个对象中的每个属性还是要在子组件的props里定义
$attrs和$listeners
$attr: 当在组件的props中没注册的属性,可以通过$attrs.xxx获取
通过使用v-bind="$attrs"来实现属性的继承
<!--父组件-->
<child name="张三" age="20"></child>
<!--子组件-->
<template>
   <div>
       <!-- $attrs  表示属性集合 -->
       <!-- $listeners  表示方法集合 -->
       儿子2: {{$attrs}} {{$listeners}}
       <grandson2 v-bind="$attrs" v-on="$listeners"></grandson2>
   </div>
</template>
<script>
   export default {
       inheritAttrs: false,
       components: {
           grandson2: ()=> import('@/components/grandson2.vue')
       }
   }
</script>
<!--孙子组件-->
<template>
   <div>
       孙子2: {{$attrs}}
   </div>
</template>
<script>
   export default {
       data(){
       	return {}
       },
       mounted(){
           //调用父级的方法
           this.$listeners.son()
       }
   }
</script>
