

怎么动态的生成html文件呢?使用插件html-webpack-plugin。
html模板
安装插件 html-webpack-plugin
安装html-webpack-plugin
npm install --save-dev html-webpack-plugin
添加模板文件
在src目录下创建template目录,然后在template目录创建index.html文件
src目录结构
src
├── css
│   └── style.css
├── js
│   └── app.js
└── template
    └── index.html
index.html内容
<!DOCTYPE html>
<html lang="en">
<head>
	<meta charset="UTF-8">
	<title>webpack html</title>
</head>
<body>
	<div id="app"></div>
</body>
</html>
html-webpack-plugin使用
修改后webapack.config.js内容
const path = require('path');
var htmlWebpackPlugin = require('html-webpack-plugin');

module.exports = {
    mode: 'development',
    entry: './src/js/app.js',
    output: {
        path: path.resolve(__dirname, 'dist'),
        filename: 'js/app.bundle.js'
    },
    module: {
        rules: [
            {
                test: /\.css$/,
                use: [{ loader: 'style-loader' }, { loader: 'css-loader' }]
            }
        ]
    },
    plugins: [
        new htmlWebpackPlugin({
            filename: 'index.html',
            template: './src/template/index.html'
        })
    ]
};
plugins:webpack插件配置
new htmlWebpackPlugin({
    filename: 'index.html',
    template: './src/template/index.html',
})
filename:打包后文件名称
template:模板文件路径
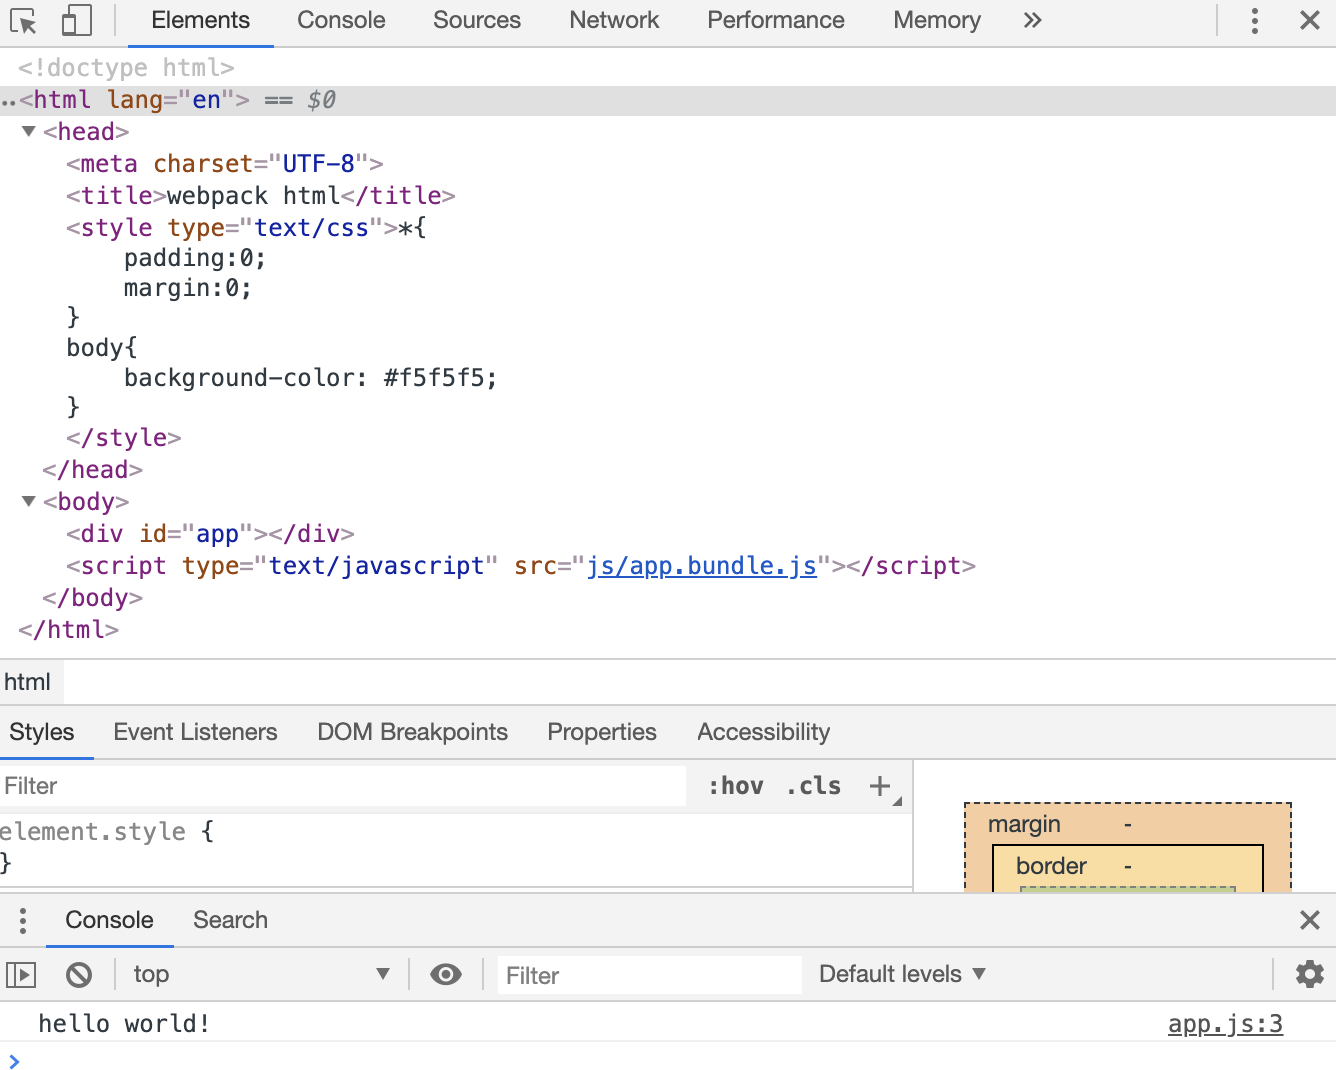
执行命令npm run webpack
浏览器访问 dist/index.html
向html模板传递参数
html-webpack-plugin其他参数
修改后webapack.config.js内容
const path = require('path');
var htmlWebpackPlugin = require('html-webpack-plugin');

module.exports = {
    mode: 'development',
    entry: './src/js/app.js',
    output: {
        path: path.resolve(__dirname, 'dist'),
        filename: 'js/app.bundle.js'
    },
    module: {
        rules: [
            {
                test: /\.css$/,
                use: [{ loader: 'style-loader' }, { loader: 'css-loader' }]
            }
        ]
    },
    plugins: [
        new htmlWebpackPlugin({
            filename: 'index.html',
            template: './src/template/index.html',
            title: 'this is webpack title'
        })
    ]
};
new htmlWebpackPlugin({
    filename: 'index.html',
    template: './src/template/index.html',
    title: 'this is webpack title'
})
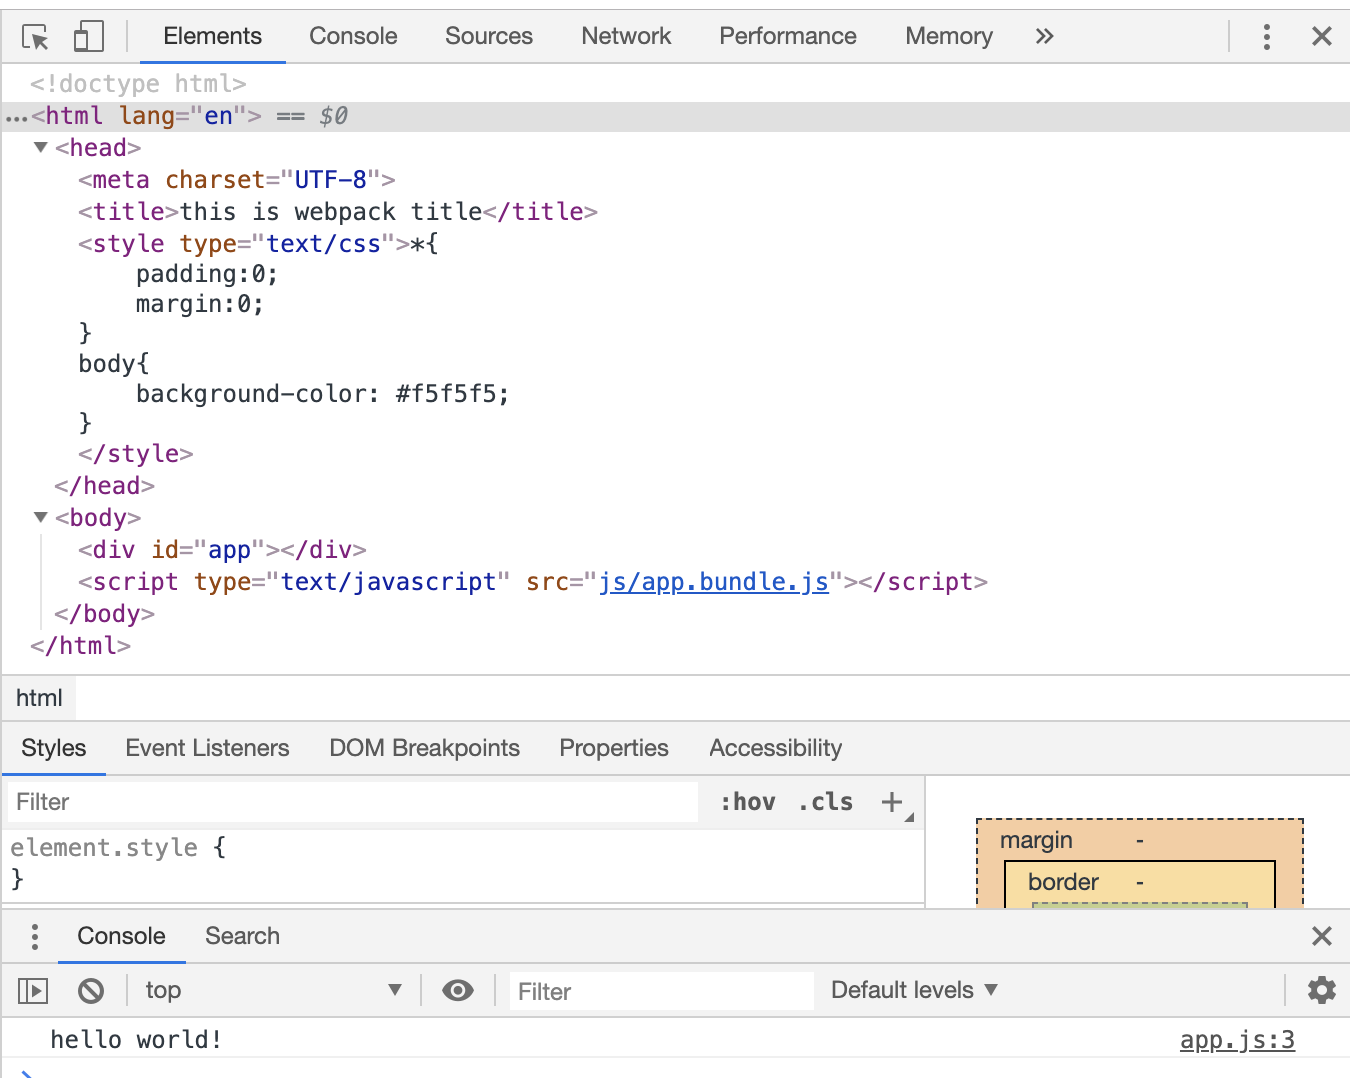
title:自定义参数
修改index.html
<!DOCTYPE html>
<html lang="en">
<head>
	<meta charset="UTF-8">
	<title><%= htmlWebpackPlugin.options.title %></title>
</head>
<body>
	<div id="app"></div>
</body>
</html>
执行命令npm run webpack
浏览器访问 dist/index.html
总结
安装插件html-webpack-plugin npm install --save-dev html-webpack-plugin
html-webpack-plugin使用
var htmlWebpackPlugin = require('html-webpack-plugin');
module.exports添加plugins,实例化htmlWebpackPlugin对象
plugins: [
    new htmlWebpackPlugin({
        filename: 'index.html',
        template: './src/template/index.html',
        title: 'this is webpack title'
    })
]
filename:打包后文件名称
template:模板文件路径
其他参数:可以向html模板中传递参数,html模板中变量调用方法<%= htmlWebpackPlugin.options.title %>
思考:
如何分开打包css和js,生成不同的文件?
因为浏览器会缓存js和css,每次修改好了js和css,需要强制刷新浏览器;如何打包生成不同的文件名?
