

首先进入宿主机终端命令行 启动docker
service docker start
查看已安装docker镜像列表
docker images

如果没有安装就安装下
docker pull nginx然后得启动这个镜像 正常启动是下面的命令,但是先别着急敲
docker run -d -p 80:80 nginx
简单解释下这里面的值都代表啥意思-d 是让这个nginx容器服务后台运行-p 是指定端口 后面跟的80:80 前面的80是宿主机的端口 后面的是容器里nginx的端口, 比如改成 8080:80 那么我们在外部访问这个nginx服务 地址应该是 xx.xx.xx.xx:8080
就可以看到nginx的欢迎页了nginx 当然是启动的镜像名字啦
但是啊,这么写不好,如果你像改这个nginx的配置文件,或者改个静态页咋改啊,我们得到这个容器的内部去改啊, 简单说下如何进入这个容器的内部
先获取到这个nginx容器的id , 查询所有容器 无论是运行的还是exit的,其实在不在执行你都能看出来了,因为上面有exit标识着呢
docker ps -a

docker rm xxxxx
扯这么多没用的,现在开始说重点的,如果去改这个nginx容器里的配置文件,日志文件的具体路径和内容呢,这就要使用到挂载,我理解的挂载的意思就是在使用这个nginx容器的时候,不去使用容器内的配置和文件路径,使用宿主机上的资源文件,对了 我还没说怎么去容器内,执行这个命令,对了 你要是不是root用户前面加 sudo
docker exec -it xxxx bash
xxxx是容器id

是不是有点眼熟 其实这个镜像自己的世界,不受外界打扰,但是功能指定没有宿主机全啊,比如你想在里面使用vim命令....
我们接着回来谈挂载,既然你想挂载,你得知道你镜像里面nginx的配置文件啥的都在哪吧,然后挂载到你宿主机的指定位置啊,所以我们先看看他们都在哪呢
镜像中nginx.conf配置文件路径
/etc/nginx/nginx.conf
default.conf配置文件的路径
/etc/nginx/conf.d/default.conf
默认首页文件夹html路径
/usr/share/nginx/html
日志文件路径
/var/log/nginx
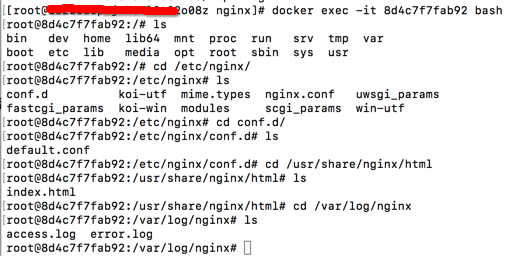
exit 退出nginx容器回到宿主机
下面在宿主机上建挂载使用的文件夹
mkdir -p /nginx/{conf,conf.d,html,logs}
建这4个文件夹都知道是干啥用的了吧, 没权限记住前面加sudo

下面就开始往对应的路径扔配置文件或者资源文件了,logs里不用,挂载好自动往里输出 error.log 和 access.log
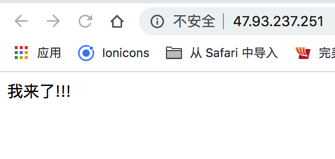
html里你放首页需要展示的.html文件,然后你在访问,你加进来的html就把默认的nginx欢迎界面替换掉了...现在整没有用啊,你还没挂载呢,等会的。
conf里放 nginx.conf 配置文件, 这个文件的内容要从镜像里的复制出来哦,我们尽量保持和镜像里面的一致
下面我们再来说说怎么将刚刚在容器里看到的配置文件copy到宿主机里面
前面是容器的路径 后面是宿主机的路径
docker cp 容器id:/etc/nginx/nginx.conf /nginx/conf/nginx.conf
user  nginx;
worker_processes  1;

error_log  /var/log/nginx/error.log warn;
pid        /var/run/nginx.pid;


events {
    worker_connections  1024;
}


http {
    include       /etc/nginx/mime.types;
    default_type  application/octet-stream;

    log_format  main  '$remote_addr - $remote_user [$time_local] "$request" '
                      '$status $body_bytes_sent "$http_referer" '
                      '"$http_user_agent" "$http_x_forwarded_for"';

    access_log  /var/log/nginx/access.log  main;

    sendfile        on;
    #tcp_nopush     on;

    keepalive_timeout  65;

    #gzip  on;

    include /etc/nginx/conf.d/*.conf;
}
同样在把conf.d 下的default.conf 复制过来
docker cp 容器id:/etc/nginx/conf.d/default.conf /nginx/conf.d/default.conf
server {
    listen       80;
    server_name  localhost;

    #charset koi8-r;
    #access_log  /var/log/nginx/host.access.log  main;

    location / {
        root   /usr/share/nginx/html;
        index  index.html index.htm;
    }

    #error_page  404              /404.html;

    # redirect server error pages to the static page /50x.html
    #
    error_page   500 502 503 504  /50x.html;
    location = /50x.html {
        root   /usr/share/nginx/html;
    }

    # proxy the PHP scripts to Apache listening on 127.0.0.1:80
    #
    #location ~ \.php$ {
    #    proxy_pass   http://127.0.0.1;
    #}

    # pass the PHP scripts to FastCGI server listening on 127.0.0.1:9000
    #
    #location ~ \.php$ {
    #    root           html;
    #    fastcgi_pass   127.0.0.1:9000;
    #    fastcgi_index  index.php;
    #    fastcgi_param  SCRIPT_FILENAME  /scripts$fastcgi_script_name;
    #    include        fastcgi_params;
    #}

    # deny access to .htaccess files, if Apache's document root
    # concurs with nginx's one
    #
    #location ~ /\.ht {
    #    deny  all;
    #}
}
然后,我们自己写一个简单的html页面,给他随意命个名,我就不改了,叫index.html
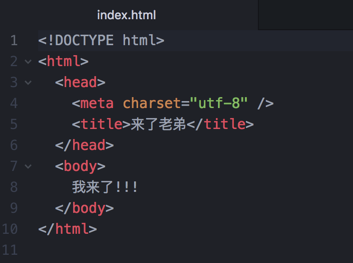
然后把这个文件丢到 宿主机的 /nginx/html/ 路径下
我是用FileZilla工具传输文件到宿主机的

最后到了最关键的环节了
开始挂载了
我们先把之前起的nginx容器服务关闭了
我直接一点, docker rm 容器id OMG 我们得先关闭再删除,
docker stop 容器id
都弄好了之后再次启动 这次和上次不同之处就是需要用到 -v 进行挂载了
docker run --name mynginx -d -p 80:80 -v /nginx/html:/usr/share/nginx/html -v /nginx/conf/nginx.conf:/etc/nginx/nginx.conf -v /nginx/conf.d/default.conf:/etc/nginx/conf.d/default.conf -v /nginx/logs:/var/log/nginx nginx
前面是宿主机路径 后面的nginx容器路径
我也是初学Java和Docker 哪有有不足请多指教,主要是给自己留个记录
