Module Introduction 模块介绍
conditionals & lists 条件语句与列表
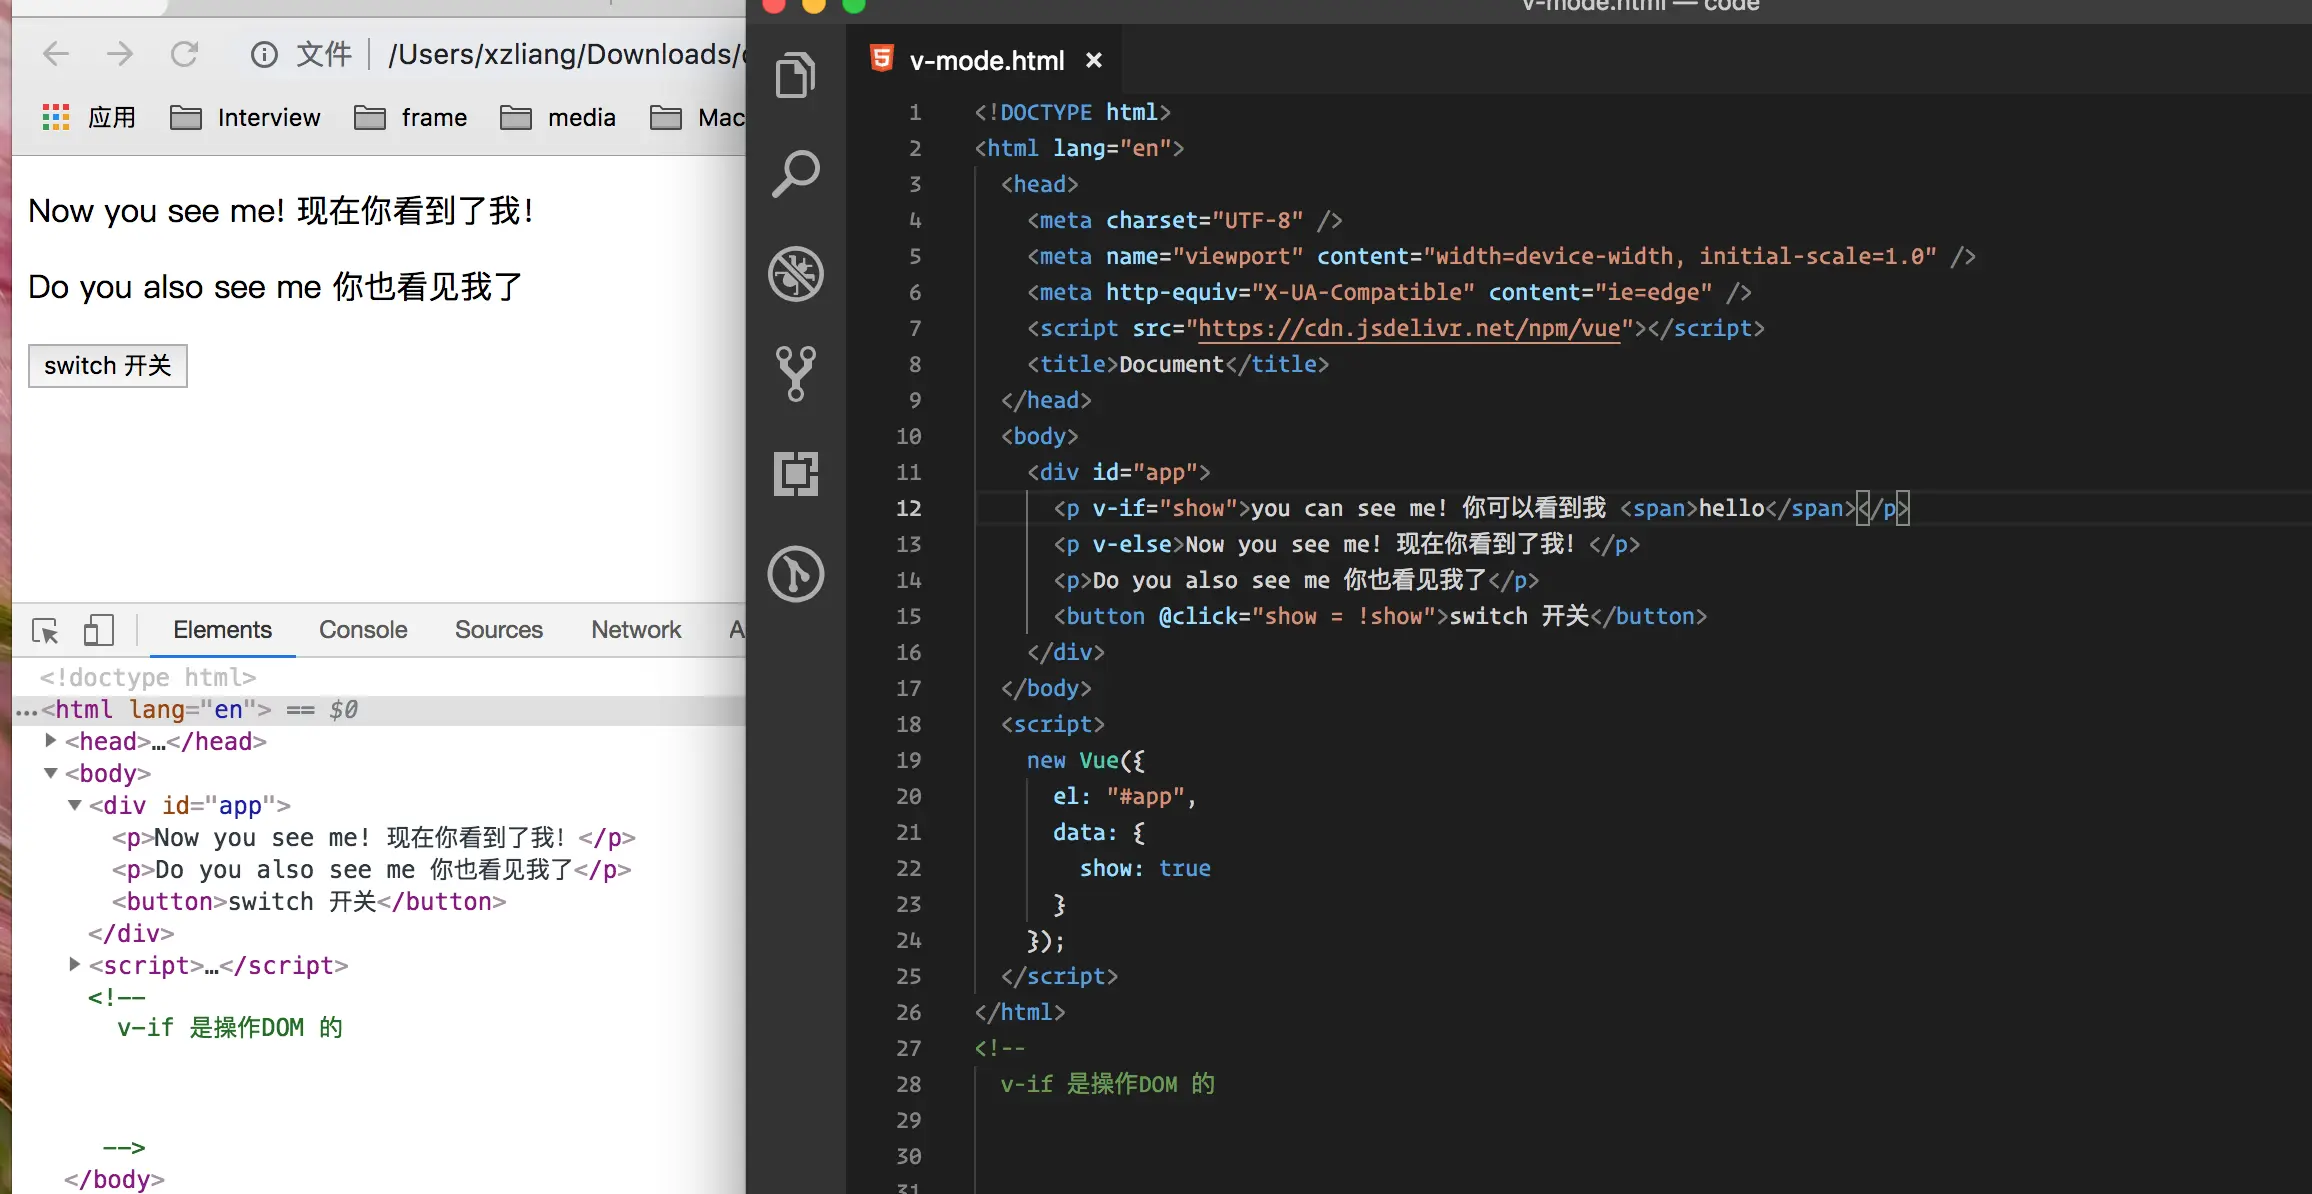
Conditional Rendering with v-if 使用v-if进行条件渲染
   <body>
    <div id="app">
      <p v-if="show">you can see me! 你可以看到我 <span>hello</span></p>
      <p v-else>Now you see me! 现在你看到了我!</p>
      <p>Do you also see me 你也看见我了</p>
      <button @click="show = !show">switch 开关</button>
    </div>
  </body>
  <script>
    new Vue({
      el: "#app",
      data: {
        show: true
      }
    });
  </script>
这里如果单存的使用 v-if 我们会发现单纯的使用v-if 是整个节点的移除,当下面我们给使用v-else 时候进行切换 --- 我是静静
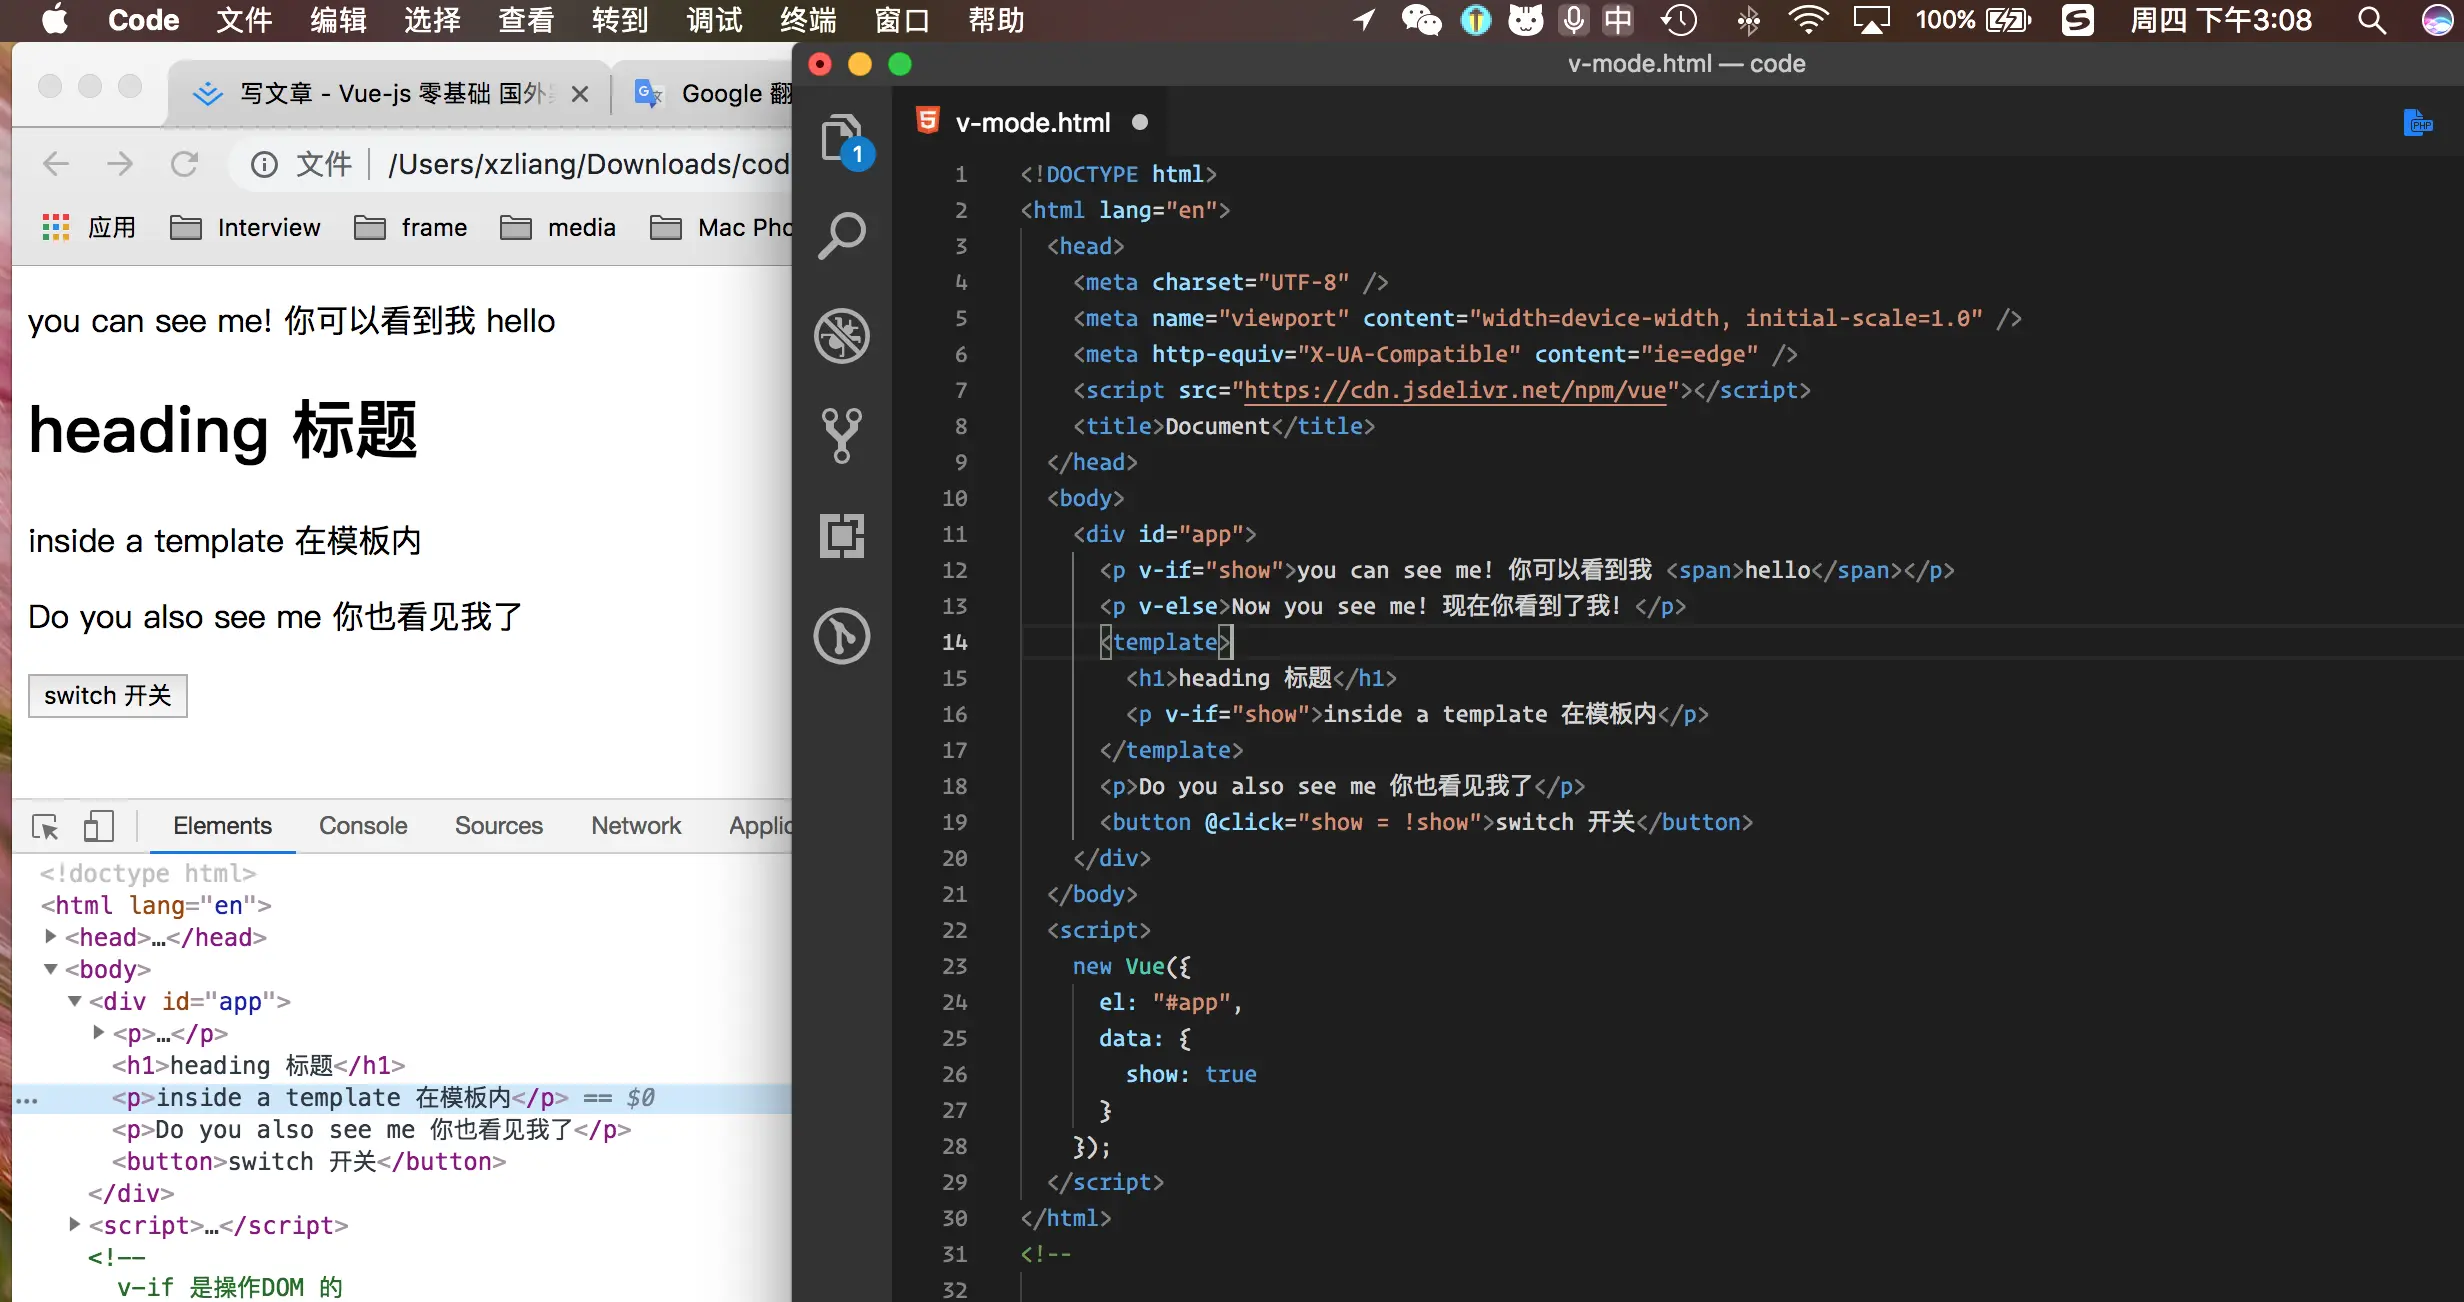
Using an Alternative v-if Syntax 使用替代v-if 的语法
<body>
    <div id="app">
      <p v-if="show">you can see me! 你可以看到我 <span>hello</span></p>
      <p v-else>Now you see me! 现在你看到了我!</p>
      <template>
        <h1>heading 标题</h1>
        <p v-if="show">inside a template 在模板内</p>
      </template>
      <p>Do you also see me 你也看见我了</p>
      <button @click="show = !show">switch 开关</button>
    </div>
  </body>
  <script>
    new Vue({
      el: "#app",
      data: {
        show: true
      }
    });
  </script>
上面我们使用template 模板进行替换,也就是把以前的div变成了template 然后在里面 写了 v-if
Dont Detach it with v-show 不要用v-show分离它

  <body>
    <div id="app">
      <p v-if="show">you can see me! 你可以看到我 <span>hello</span></p>
      <p v-else>Now you see me! 现在你看到了我!</p>
      <template v-if="show">
        <h1>heading 标题</h1>
        <p>inside a template 在模板内</p>
      </template>
      <p v-show="show">Do you also see me 你也看见我了</p>
      <button @click="show = !show">switch 开关</button>
    </div>
  </body>
  <script>
    new Vue({
      el: "#app",
      data: {
        show: true
      }
    });
  </script>
这里我给大家标注了一下会看到这里显示了display:none 是把元素隐藏了,当我们想要对一个DOM 进行频繁操作的时候,这时候我们就需要使用 v-show 因为使用v-if
进行的消耗资源会更加巨大。
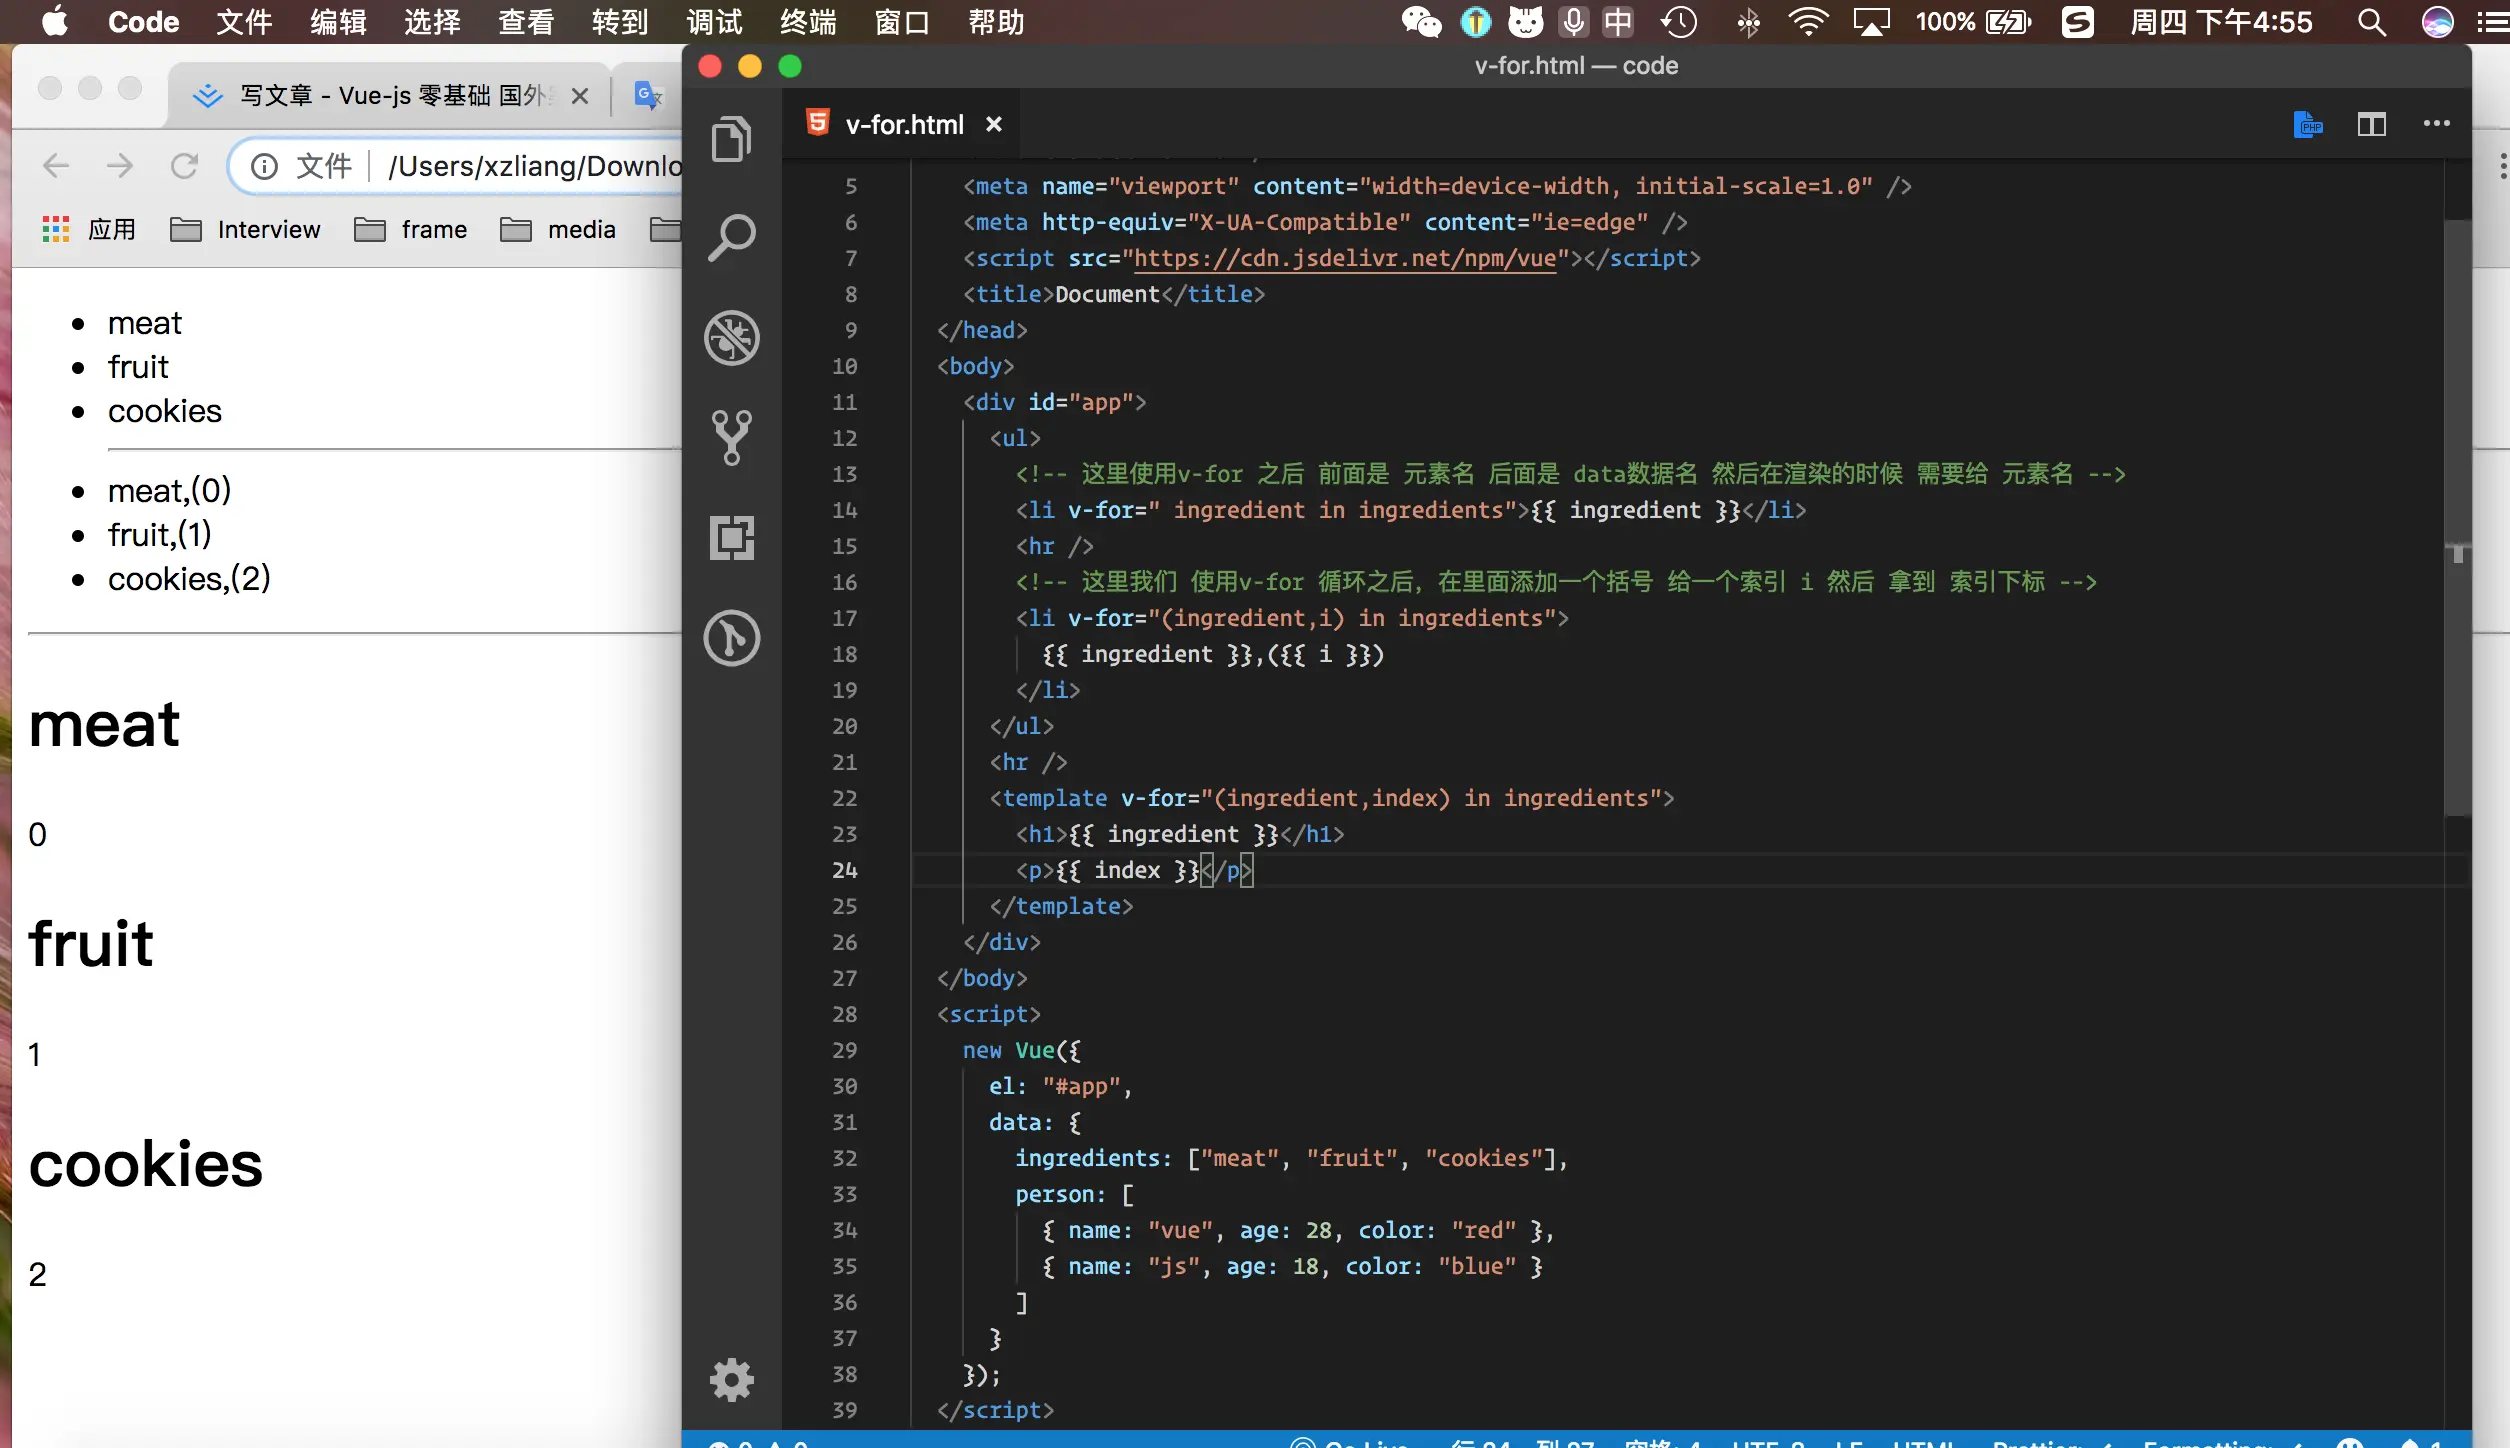
Rendering Lists with v-for 使用v-for渲染列表
<body>
    <div id="app">
      <ul>
        <!-- 这里使用v-for 之后 前面是 元素名 后面是 data数据名 然后在渲染的时候 需要给 元素名 -->
        <li v-for=" ingredient in ingredients">{{ ingredient }}</li>
        <hr />
        <!-- 这里我们 使用v-for 循环之后,在里面添加一个括号 给一个索引 i 然后 拿到 索引下标 -->
        <li v-for="(ingredient,i) in ingredients">
          {{ ingredient }},({{ i }})
        </li>
      </ul>
      <hr />
      <template v-for="(ingredient,index) in ingredients">
        <h1>{{ ingredient }}</h1>
        <p>{{ index }}</p>
      </template>
    </div>
  </body>
  <script>
    new Vue({
      el: "#app",
      data: {
        ingredients: ["meat", "fruit", "cookies"],
        person: [
          { name: "vue", age: 28, color: "red" },
          { name: "js", age: 18, color: "blue" }
        ]
      }
    });
  </script>
上面我们 使用v-for循环 获得到data中的数据,然后我们分别拿到 项目名与索引下标 从零开始的。
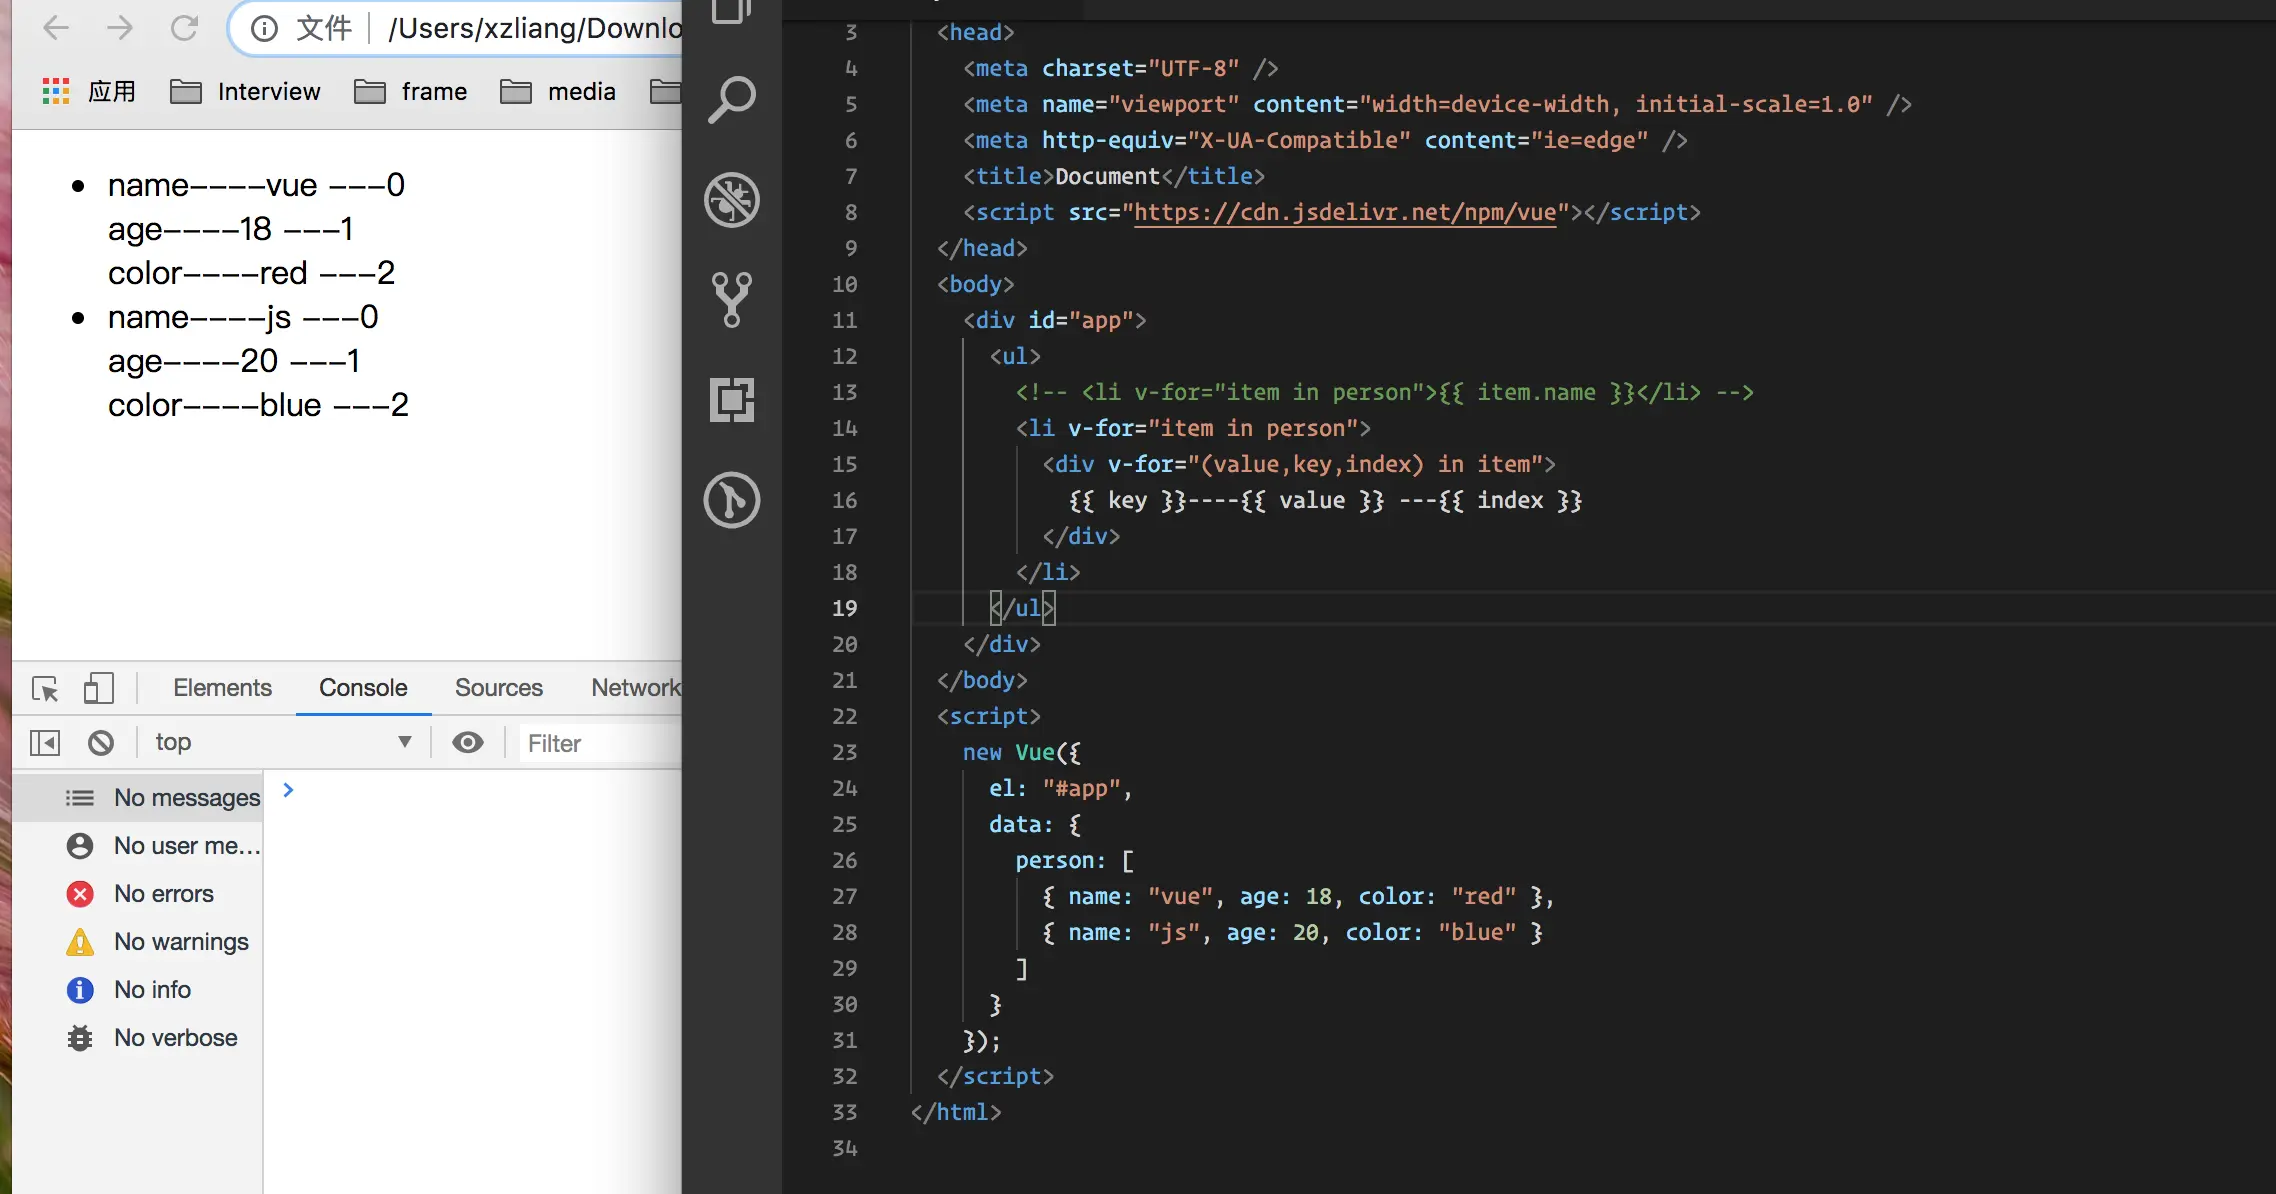
Looping through Objects 循环通过对象
  <body>
    <div id="app">
      <ul>
        <!-- <li v-for="item in person">{{ item.name }}</li> -->
        <li v-for="item in person">
          <div v-for="(value,key,index) in item">
            {{ key }}----{{ value }} ---{{ index }}
          </div>
        </li>
      </ul>

        <span v-for="n in 10">{{ n }}</span>
    </div>
  </body>
  <script>
    new Vue({
      el: "#app",
      data: {
        person: [
          { name: "vue", age: 18, color: "red" },
          { name: "js", age: 20, color: "blue" }
        ]
      }
    });
  </script>
这里我们开始遍历一个 对象一个人的person数组对象,然后使用v-for 先拿到person 人的值,然后在进行遍历 这个值分别拿到,然后可以看到 value是 值,key 是前面的名称,index是索引
然后下面的span 就会 显示数字 1到10
Keeping Track of Elements when using v-for 使用v-for时跟踪元素
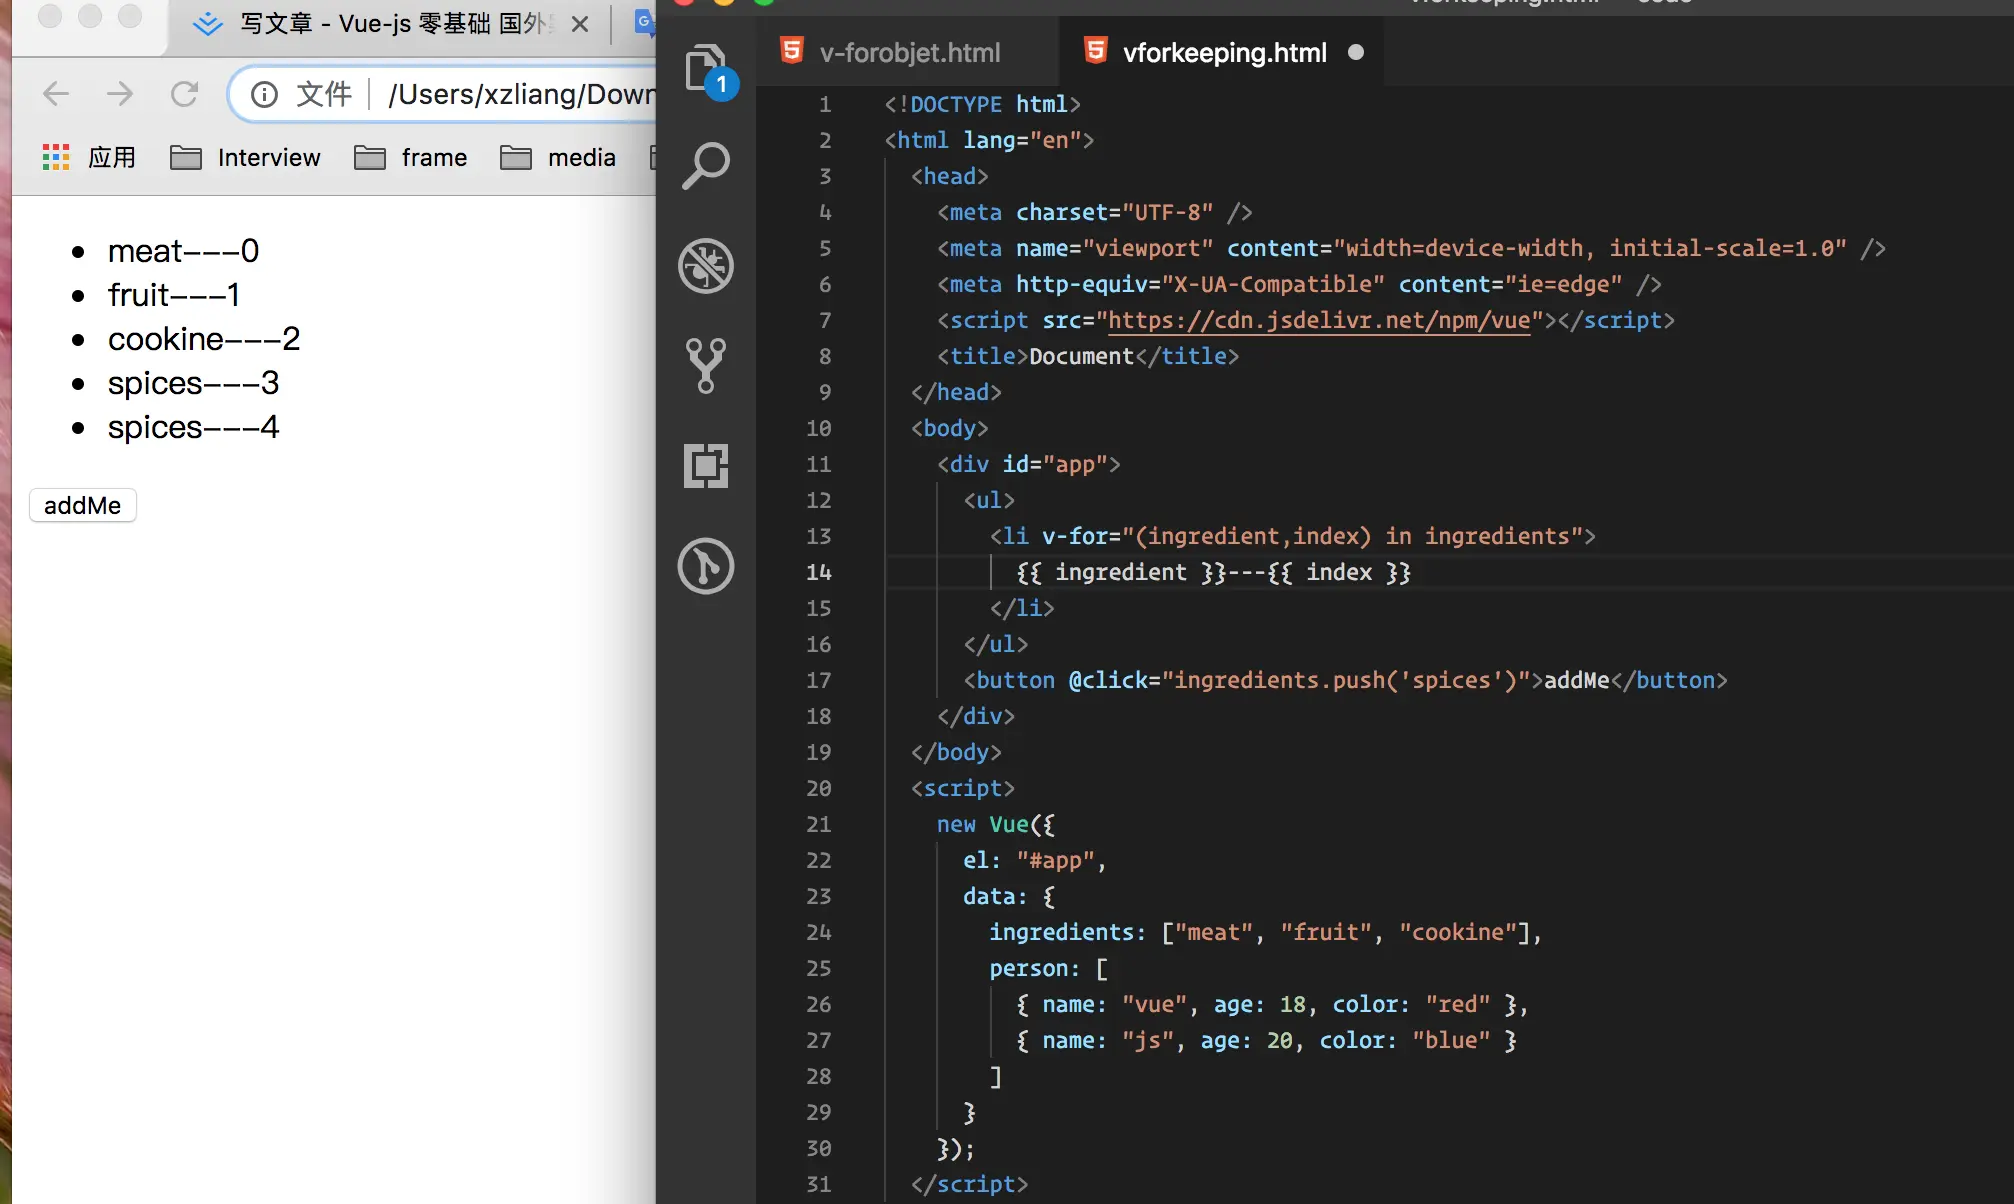
 <body>
    <div id="app">
      <ul>
        <li v-for="(ingredient,index) in ingredients">
          {{ ingredient }}---{{ index }}
        </li>
      </ul>
      <button @click="ingredients.push('spices')">addMe</button>
    </div>
  </body>
  <script>
    new Vue({
      el: "#app",
      data: {
        ingredients: ["meat", "fruit", "cookine"],
        person: [
          { name: "vue", age: 18, color: "red" },
          { name: "js", age: 20, color: "blue" }
        ]
      }
    });
  </script>
这里我们使用v-for 循环拿到ingredients中的内容渲染到页面上了,然后在 下面的按钮中 button 添加了一个 ingredients.push 事件 然后 在里面追加了元素


