

启动指令
php artisan queue:work
启动文件
namespace Illuminate\Queue\Console;

use Illuminate\Queue\Worker;
use Illuminate\Support\Carbon;
use Illuminate\Console\Command;
use Illuminate\Contracts\Queue\Job;
use Illuminate\Queue\WorkerOptions;
use Illuminate\Queue\Events\JobFailed;
use Illuminate\Queue\Events\JobProcessed;
use Illuminate\Queue\Events\JobProcessing;

class WorkCommand extends Command
{

    ...

    /**
     * @var \Illuminate\Queue\Worker
     */
    protected $worker;

    public function __construct(Worker $worker)
    {
        parent::__construct();
        $this->worker = $worker;

    }

    public function handle()
    {

        if ($this->downForMaintenance() && $this->option('once')) {
            return $this->worker->sleep($this->option('sleep'));
        }

        $this->listenForEvents();

        $connection = $this->argument('connection')
                        ?: $this->laravel['config']['queue.default'];

        $queue = $this->getQueue($connection);

        $this->runWorker(
            $connection, $queue
        );
    }

   ...
}
我们先从构造函数和 handle() 方法开始分析,这是入口。
片段一:判断是否维护模式或者
--force强制启动
if ($this->downForMaintenance() && $this->option('once')) {
    return $this->worker->sleep($this->option('sleep'));
}
片段二:通过事件绑定在控制台输出信息
$this->listenForEvents();

protected function listenForEvents()
{
    $this->laravel['events']->listen(JobProcessing::class, function ($event) {
        $this->writeOutput($event->job, 'starting');
    });

    $this->laravel['events']->listen(JobProcessed::class, function ($event) {
        $this->writeOutput($event->job, 'success');
    });

    $this->laravel['events']->listen(JobFailed::class, function ($event) {
        $this->writeOutput($event->job, 'failed');

        $this->logFailedJob($event);
    });
}
片段三:通过配置文件中配置的驱动获取对应驱动的队列名,如果没有则返回
default
$connection = $this->argument('connection') ?: $this->laravel['config']['queue.default'];

$queue = $this->getQueue($connection);

protected function getQueue($connection)
{
    return $this->option('queue') ?: $this->laravel['config']->get(
        "queue.connections.{$connection}.queue", 'default'
    );
}
片段四:传入连接驱动和队列名称到
runWorker方法运行任务。
$this->runWorker(
            $connection, $queue
        );
这里是启动的重点,我们传入的 $connection = 'redis' $queue = 'default',继续分析
protected function runWorker($connection, $queue)
{
    // "这里的 $this->laravel['cache'] 是 Illuminate\Cache\CacheManager 类的实例。
      (是在 app.providers.Illuminate\Cache\CacheServiceProvider::class 注册的)
       $this->laravel['cache']->driver() 返回 Illuminate\Cache\Repository 类的实例。"

    // "框架通过 CacheManager 对很多存储管理进行了统一。
       可以通过修改 app.config.cache.default 和 `app.config.cache.stores 中的值来修改存储驱动。"

    // "将获取的驱动赋值给 workder 的 cache成员"
    $this->worker->setCache($this->laravel['cache']->driver());

    // "当 worker 对象拥有了cache对象之后便拥有了操作对应数据的能力 !"
    return $this->worker->{$this->option('once') ? 'runNextJob' : 'daemon'}(
        $connection, $queue, $this->gatherWorkerOptions()
    );
}
继续运行
return $this->worker->{$this->option('once') ? 'runNextJob' : 'daemon'}(
        $connection, $queue, $this->gatherWorkerOptions()
    );
这里传入的参数分别是,可以看出都是对队列消费的一些基本设置。
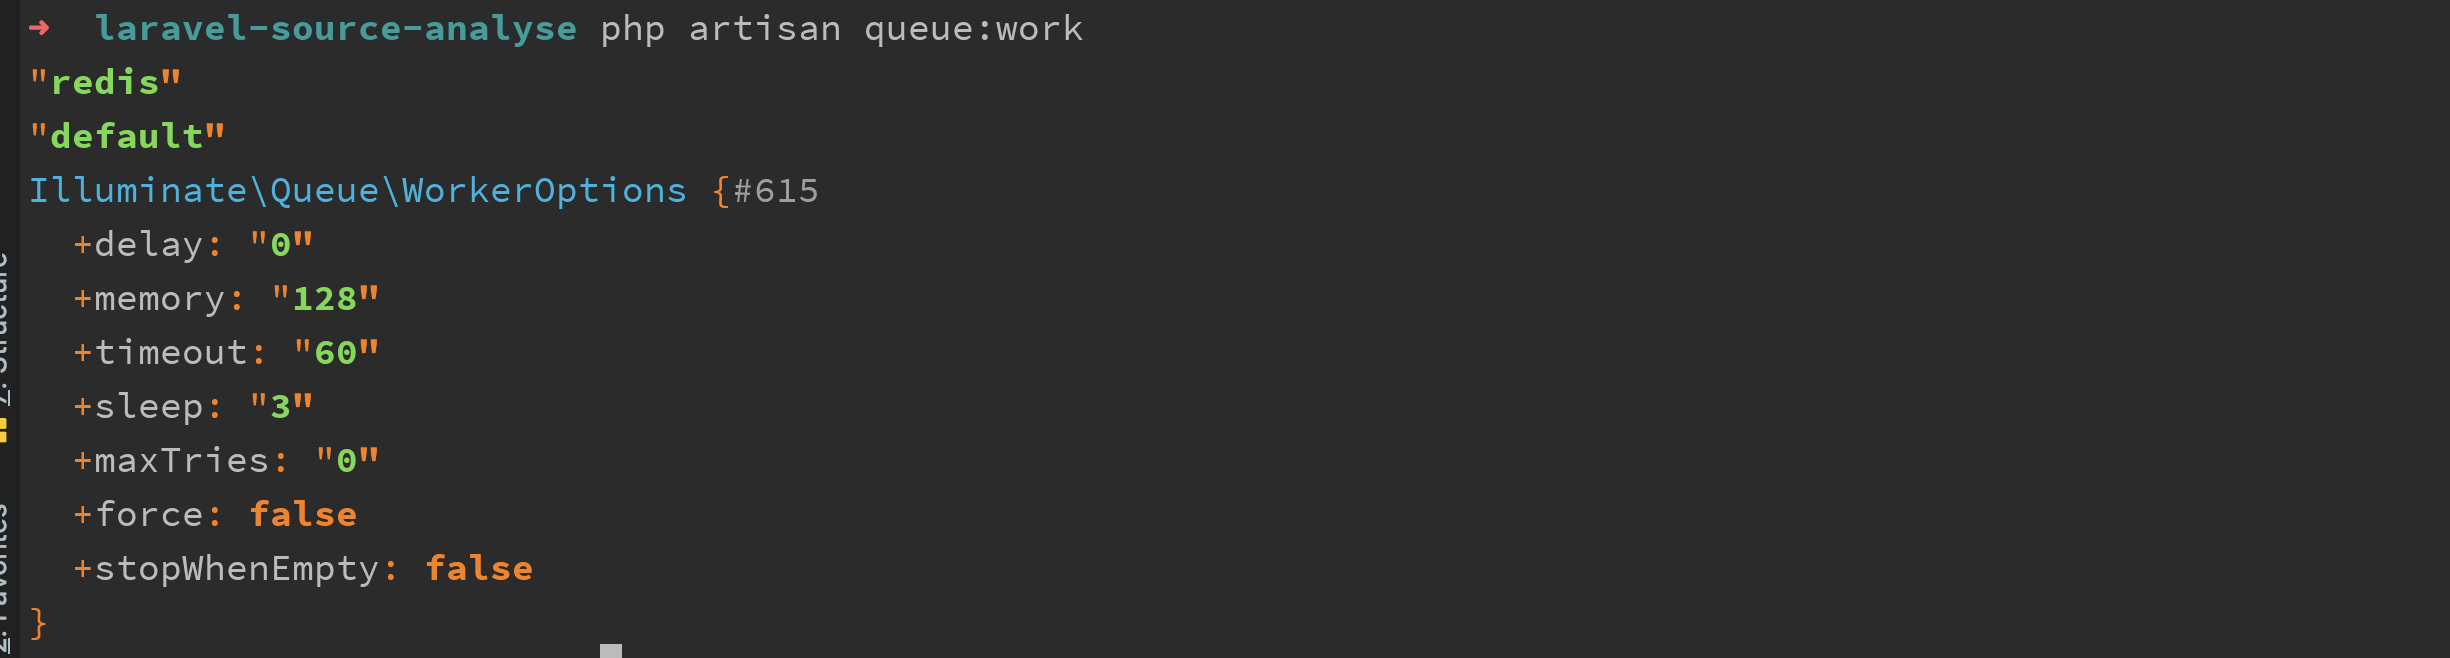
当运行模式非 --once 的情况下就会以 daemon 的方式运行。
我们看
\Illuminate\Queue\Worker 对象的 daemon 方法即可
守护进程模式
public function daemon($connectionName, $queue, WorkerOptions $options)
{
    if ($this->supportsAsyncSignals()) {
        $this->listenForSignals();
    }

    $lastRestart = $this->getTimestampOfLastQueueRestart();

    while (true) {

        if (! $this->daemonShouldRun($options, $connectionName, $queue)) {
            $this->pauseWorker($options, $lastRestart);

            continue;
        }

        $job = $this->getNextJob(
            $this->manager->connection($connectionName), $queue
        );

        if ($this->supportsAsyncSignals()) {
            $this->registerTimeoutHandler($job, $options);
        }

        if ($job) {
            $this->runJob($job, $connectionName, $options);
        } else {
            $this->sleep($options->sleep);
        }

        $this->stopIfNecessary($options, $lastRestart, $job);
    }
}
进程参数设定
先设置进程的一些管理参数
if ($this->supportsAsyncSignals()) { // extension_loaded('pcntl'); 是否支持 'pcntl' 拓展,支持多进程的拓展。
        $this->listenForSignals();
}

protected function listenForSignals()
{
    // "PHP7.1信号新特性 -- 开启异步信号处理"
    pcntl_async_signals(true);

    // "安装信号处理器,后面可以传入相应的信号来终止或其他操作"
    pcntl_signal(SIGTERM, function () {
        // "SIGTERM    终止进程      软件终止信号"
        $this->shouldQuit = true;
    });

    pcntl_signal(SIGUSR2, function () {
        // "SIGUSR2  终止进程 用户定义信号2"
        $this->paused = true;
    });

    pcntl_signal(SIGCONT, function () {
        // "SIGCONT 忽略信号  继续执行一个停止的进程"
        $this->paused = false;
    });
}
关于
pcntl的用法可以参考 PCNTL
信号可以参考对照表
接着看,从 cache 中获取上一次重启的时间戳
$lastRestart = $this->getTimestampOfLastQueueRestart();
循环任务执行
判断是否终止运行
if (! $this->daemonShouldRun($options, $connectionName,$queue)) {

    // "$opions 就是 调用artisan 传入的参数
       $connectionName 我用了redis驱动,所有就是 'redis'
       $queue 这里没有传入队列则是 'default'"

    $this->pauseWorker($options, $lastRestart);
    continue;
}
下面代码一共三个判断:
1.是否是关站模式并且非强制运行。
2.是否有外部传入的暂停信号
3.是否有绑定 Looping 事件执行并返回结果
如果符合条件则暂停或者发送终止信号。
主要功能是为了控制是否继续执行任务。
protected function daemonShouldRun(WorkerOptions $options, $connectionName, $queue)
{
    return ! (($this->manager->isDownForMaintenance() && ! $options->force) ||
        $this->paused ||
        $this->events->until(new Events\Looping($connectionName, $queue)) === false);
}
获取待运行的 Job
// "$this->manager->connection($connectionName) 是 Illuminate\Queue\RedisQueue 对象
   $queue : 'default'"

$job = $this->getNextJob(
    $this->manager->connection($connectionName), $queue
);
继续看 getNextJob
protected function getNextJob($connection, $queue)
{
    try {
        foreach (explode(',', $queue) as $queue) {
            if (! is_null($job = $connection->pop($queue))) {
                return $job;
            }
        }
    } catch (Exception $e) {
    // "异常处理主要是报告异常"
    // "设置 '$this->shouldQuit = true;' 后续就会终止"
        $this->exceptions->report($e);

        $this->stopWorkerIfLostConnection($e);

        $this->sleep(1);
    } catch (Throwable $e) {
        $this->exceptions->report($e = new FatalThrowableError($e));

        $this->stopWorkerIfLostConnection($e);

        $this->sleep(1);
    }
}
上面分析过了 $connection 是 RedisQueue 对象,所有展开 RedisQueue 的 pop 方法,获取要执行的任务对象。
public function pop($queue = null)
{
    $this->migrate($prefixed = $this->getQueue($queue));

    if (empty($nextJob = $this->retrieveNextJob($prefixed))) {
        return;
    }
    [$job, $reserved] = $nextJob;
    if ($reserved) {
        return new RedisJob(
            $this->container, $this, $job,
            $reserved, $this->connectionName, $queue ?: $this->default
        );
    }
}
迁移延迟队列
在 pop 的过程中首先迁移延迟队列的相关数据
protected function migrate($queue)
{
    // "这里是不是很熟悉了,上一章存储端分析的时候延迟"
    // "队列就是用的这个key来存的"

    // "将延迟的队列迁移到主队列"
    $this->migrateExpiredJobs($queue.':delayed', $queue);

    // "将过期队列迁移到主队列"
    if (! is_null($this->retryAfter)) {
        $this->migrateExpiredJobs($queue.':reserved', $queue);
    }
}
继续看如何迁移到主队列的
public function migrateExpiredJobs($from, $to)
{
    return $this->getConnection()->eval(
        LuaScripts::migrateExpiredJobs(),
        2,
        $from,
        $to,
        $this->currentTime()
    );
}

public static function migrateExpiredJobs()
{
    return <<<'LUA'
    if(next(val) ~= nil) then
        redis.call('zremrangebyrank', KEYS[1], 0, #val - 1)

        for i = 1, #val, 100 do
            redis.call('rpush', KEYS[2], unpack(val, i, math.min(i+99, #val)))
        end
    end

    return val
    LUA;
}
最终通过 eval 命令使用 Lua 解释器执行脚本。
请看 Redis Eval
真香,这仅仅是把延迟任务切回主队列,继续!
检索数据
从队列检索下一个 Job
if (empty($nextJob = $this->retrieveNextJob($prefixed))) {
            return; // 没有数据就返回
        }
展开检索代码
protected function retrieveNextJob($queue)
{
    // "默认值是 null"
    if (! is_null($this->blockFor)) {
        return $this->blockingPop($queue);
    }

    // "这段是直接通过 lua 从 redis lpop出对象,"
    // "在lua中完成封装,执行逻辑和 blockingPop 相似"
    return $this->getConnection()->eval(
        LuaScripts::pop(), 2, $queue, $queue.':reserved',
        $this->availableAt($this->retryAfter)
    );
}
我们主要看 blockingPop 的代码
protected function blockingPop($queue)
{
    // "以阻塞的方式弹出队列的第一个元素"
    $rawBody = $this->getConnection()->blpop($queue, $this->blockFor);

    // "解析获取的数据,同时再封装一个重试对象并写入有序集合。"
    if (! empty($rawBody)) {
        $payload = json_decode($rawBody[1], true);

        $payload['attempts']++;

        $reserved = json_encode($payload);

        $this->getConnection()->zadd($queue.':reserved', [
            $reserved => $this->availableAt($this->retryAfter),
        ]);

        return [$rawBody[1], $reserved];
    }

    return [null, null];
}
检索完成之后回到 pop 中继续执行
public function pop($queue = null)
{
    $this->migrate($prefixed = $this->getQueue($queue));

    if (empty($nextJob = $this->retrieveNextJob($prefixed))) {
        return;
    }

    // "到这里了!"
    [$job, $reserved] = $nextJob;
    if ($reserved) {
        return new RedisJob(
            $this->container, $this, $job,
            $reserved, $this->connectionName, $queue ?: $this->default
        );
    }
}
我们来看看 $nextJob 是什么

最后调用
return new RedisJob(
                $this->container, $this, $job,
                $reserved, $this->connectionName, $queue ?: $this->default
            );
看看 Illuminate\Queue\Jobs\RedisJob 的构造函数
public function __construct(Container $container, RedisQueue $redis, $job, $reserved, $connectionName, $queue)
{
    $this->job = $job;
    $this->redis = $redis;
    $this->queue = $queue;
    $this->reserved = $reserved;
    $this->container = $container;
    $this->connectionName = $connectionName;

    $this->decoded = $this->payload();
}
这应该是最后一层封装,最后要返回给最外层的任务对象。
运行 Job
回到 Worker 对象中
...

$job = $this->getNextJob(
            $this->manager->connection($connectionName), $queue
        );

// "刚刚我们从 redis 中拿到了封装好的 $job 对象,继续执行"

// "$job 就是 Illuminate\Queue\Jobs\RedisJob 对象"

// "是否支持 pcntl 拓展,异步模式传递信号"
if ($this->supportsAsyncSignals()) {
// "设置超时信号处理"
$this->registerTimeoutHandler($job, $options);
}
继续注册超时信号控制
protected function registerTimeoutHandler($job, WorkerOptions $options)
{
    pcntl_signal(SIGALRM, function () {
        $this->kill(1);
    });

    pcntl_alarm(
        max($this->timeoutForJob($job, $options), 0)
    );
}
总算要到运行 Job 的部分了
if ($job) {
        $this->runJob($job, $connectionName, $options);
    } else {
        // "不存在 $job 则睡眠,最低睡眠1秒"
        $this->sleep($options->sleep);
    }
解析 runJob
到这一步我们已经拿到了所有的对象,接下来就是把 对象用起来!
protected function runJob($job, $connectionName, WorkerOptions $options)
{
    try {
        return $this->process($connectionName, $job, $options);
    } catch (Exception $e) {

        // "异常处理和上部分的一样,"
        // "设定停止信号,在循环的结尾会检测信号"
        // "因此我们不需要分析这段"

        $this->exceptions->report($e);

        $this->stopWorkerIfLostConnection($e);
    } catch (Throwable $e) {
        $this->exceptions->report($e = new FatalThrowableError($e));

        $this->stopWorkerIfLostConnection($e);
    }
}
展开
$this->process($connectionName, $job, $options);
继续展开
public function process($connectionName, $job, WorkerOptions $options)
{
    try {

        // "触发任务执行前的绑定事件,从队列删除任务"
        $this->raiseBeforeJobEvent($connectionName, $job);

        // "标记超过最大重试次数的任务"
        $this->markJobAsFailedIfAlreadyExceedsMaxAttempts(
            $connectionName, $job, (int) $options->maxTries
        );


        $job->fire();

        // "触发任务执行后的绑定事件"
        $this->raiseAfterJobEvent($connectionName, $job);
    } catch (Exception $e) {
        $this->handleJobException($connectionName, $job, $options, $e);
    } catch (Throwable $e) {
        $this->handleJobException(
            $connectionName, $job, $options, new FatalThrowableError($e)
        );
    }
}
$job->fire()
$job => Illuminate\Queue\Jobs\RedisJob 继承了 Illuminate\Queue\Jobs\Job
所以调用了抽象父类的 fire() 方法
public function fire()
{
    $payload = $this->payload();

    [$class, $method] = JobName::parse($payload['job']);

    ($this->instance = $this->resolve($class))->{$method}($this, $payload['data']);
}
我们看看 $payload 的结构实际就是 json_decode($job, true)

转换后的[$class, $method] 分别是 Illuminate\Queue\CallQueuedHandler 和 call
最后就是从容器中解析出 Illuminate\Queue\CallQueuedHandler 对象并且调用 call 方法,展开方法
public function call(Job $job, array $data)
{
    try {
        $command = $this->setJobInstanceIfNecessary(
            $job, unserialize($data['command'])
        );
    } catch (ModelNotFoundException $e) {
        return $this->handleModelNotFound($job, $e);
    }

    $this->dispatcher->dispatchNow(
        $command, $this->resolveHandler($job, $command)
    );

    if (! $job->hasFailed() && ! $job->isReleased()) {
        $this->ensureNextJobInChainIsDispatched($command);
    }

    if (! $job->isDeletedOrReleased()) {
        $job->delete();
    }
}
先看看 $command 获取的是什么
protected function setJobInstanceIfNecessary(Job $job, $instance)
{
    if (in_array(InteractsWithQueue::class, class_uses_recursive($instance))) {
        $instance->setJob($job);
    }

    return $instance;
}
打印 class_uses_recursive($instance)

接着就调用了 $instance->setJob($job);
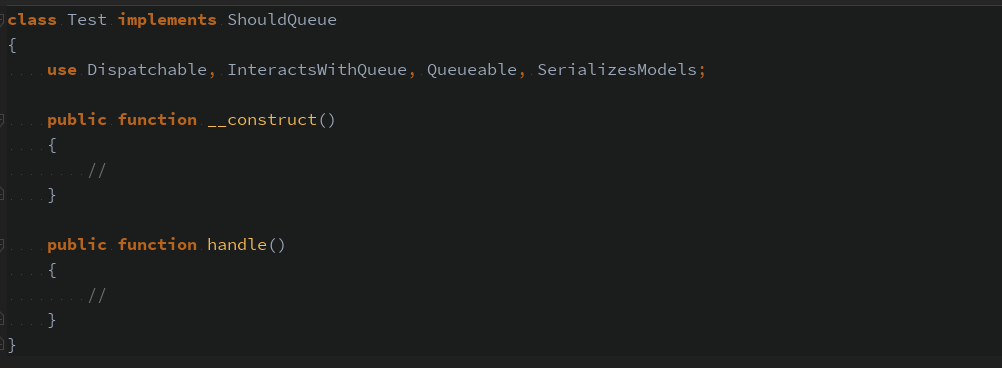
这里的 $instance 就是对应我们自己编写的任务对象。
执行完之后最终 $command 返回的就是自己编写的类

将 RedisJob 和 $command 传给 dispatchNow 方法
$this->dispatcher 是 Illuminate\Bus\Dispatcher 对象
 $this->dispatcher->dispatchNow(
            $command, $this->resolveHandler($job, $command)
        );
最后的真像
public function dispatchNow($command, $handler = null)
    {
        if ($handler || $handler = $this->getCommandHandler($command)) {
            $callback = function ($command) use ($handler) {
                // "划重点,要考!"
                return $handler->handle($command);
            };
        } else {
            $callback = function ($command) {
                return $this->container->call([$command, 'handle']);
            };
        }

        return $this->pipeline->send($command)->through($this->pipes)->then($callback);
    }
其实费了那么大的力气,最后就是调用 $command->handle
回头看看 job 的定义
就像烟火过后一样,消失于无形。
最后
整体分析下来感觉使用 pcntl 拓展来做异步信号控制和进程中断来实现终止循环是一个亮点!
至此完成了任务队列消费端的分析,后续有机会分析 Horizon
是如何消费队列的哈~
