

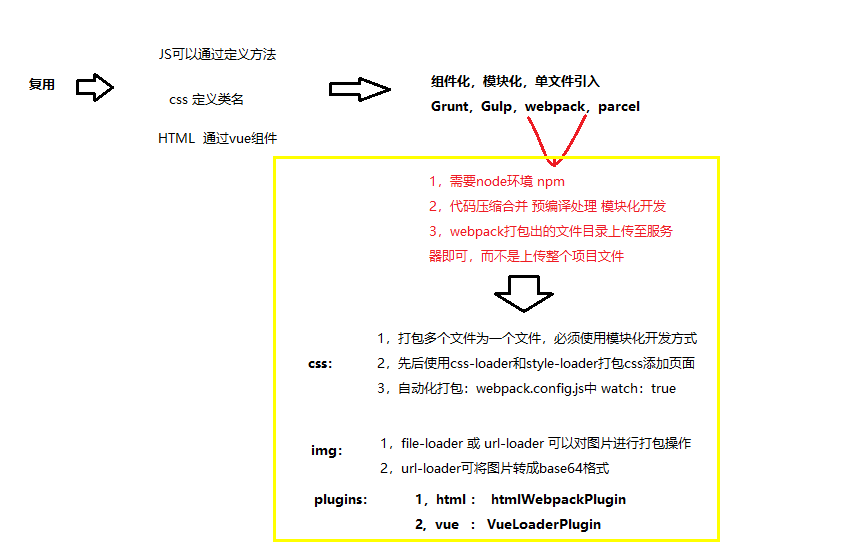
webpack了解
const htmlWebpackPlugin = require('html-webpack-plugin');   //  引入html-webpack-plugin插件

module.exports = {
    entry: './src/scripts/index.js',   // 打包入口
    output: {
        path: __dirname + '/dist',    // 输出路径
        filename: 'scripts/index.js'     // 输出文件名
    },
    module: {
        rules: [    // 其中包含各种loader的使用规则
            {
                test: /\.css$/,  // 正则表达式,表示打包.css后缀的文件
                use: ['style-loader','css-loader']   // 针对css文件使用的loader,注意有先后顺序,数组项越靠后越先执行
            },
            {   // 图片打包
                test: /\.(png|jpg|gif|svg)$/,
                loader: 'url-loader',
                options: {
                    name: './images/[name].[ext]',
                    limit: 8192
                }
            }
        ]
    },
    plugins: [   // 打包需要的各种插件
        new htmlWebpackPlugin({   // 打包HTML
            template: './src/index.html'   //  HTML模板路径
        })
    ],
    watch: true   // 监听文件改动并自动打包
};
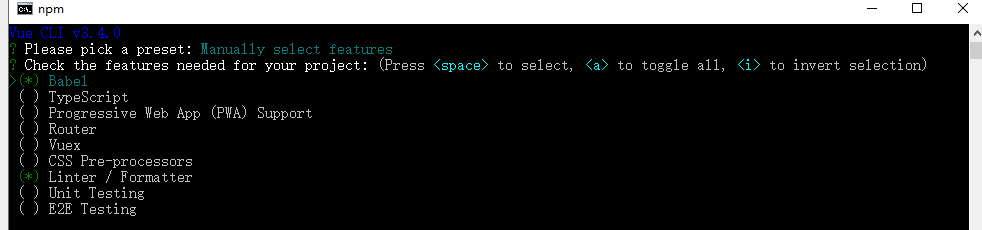
vue3.0+ 步骤
- 1,npm i -g @vue/cli 全局安装脚手架
npm install -g @vue/cli-initvue init的运行效果将会跟vue-cli@2.x相同 vue init webpack my-project - 2,vue create project-name 也可以通过vue ui 可视化界面创建 键盘上下键选择 项目依赖
运行 E:\webproject\wapDemo\my-project>npm run serve
my-project@0.1.0 serve E:\webproject\wapDemo\my-project vue-cli-service serve
