

CentOS服务器配置node环境
- 下载安装nvm通过nvm安装node环境
- 下载安装mysql
- 下载安装nginx
- 安装Yarn和Git
一、安装nvm配置node
1、下载nvm
curl -o- https://raw.githubusercontent.com/creationix/nvm/v0.33.11/install.sh | bash
在Linux系统下,执行完上面脚本,在控制台中执行nvm命令,会显示nvm: command not found,需要在终端执行:
command -v nvm
之后关闭终端,打开新的终端页,nvm已经可以使用。
2、安装node
# 查看node版本

nvm ls-remote

## 下载最新稳定版

nvm install --lts  # Latest LTS: Carbon
二、安装MySQL
1、安装MySQL
注意:MySQL 8 有兼容问题,没有预留时间成本的项目不建议使用MySQL 8, 建议使用MySQL 5.7
浏览器访问MySQL官方给出的yum下载列表。
https://dev.mysql.com/downloads/repo/yum/
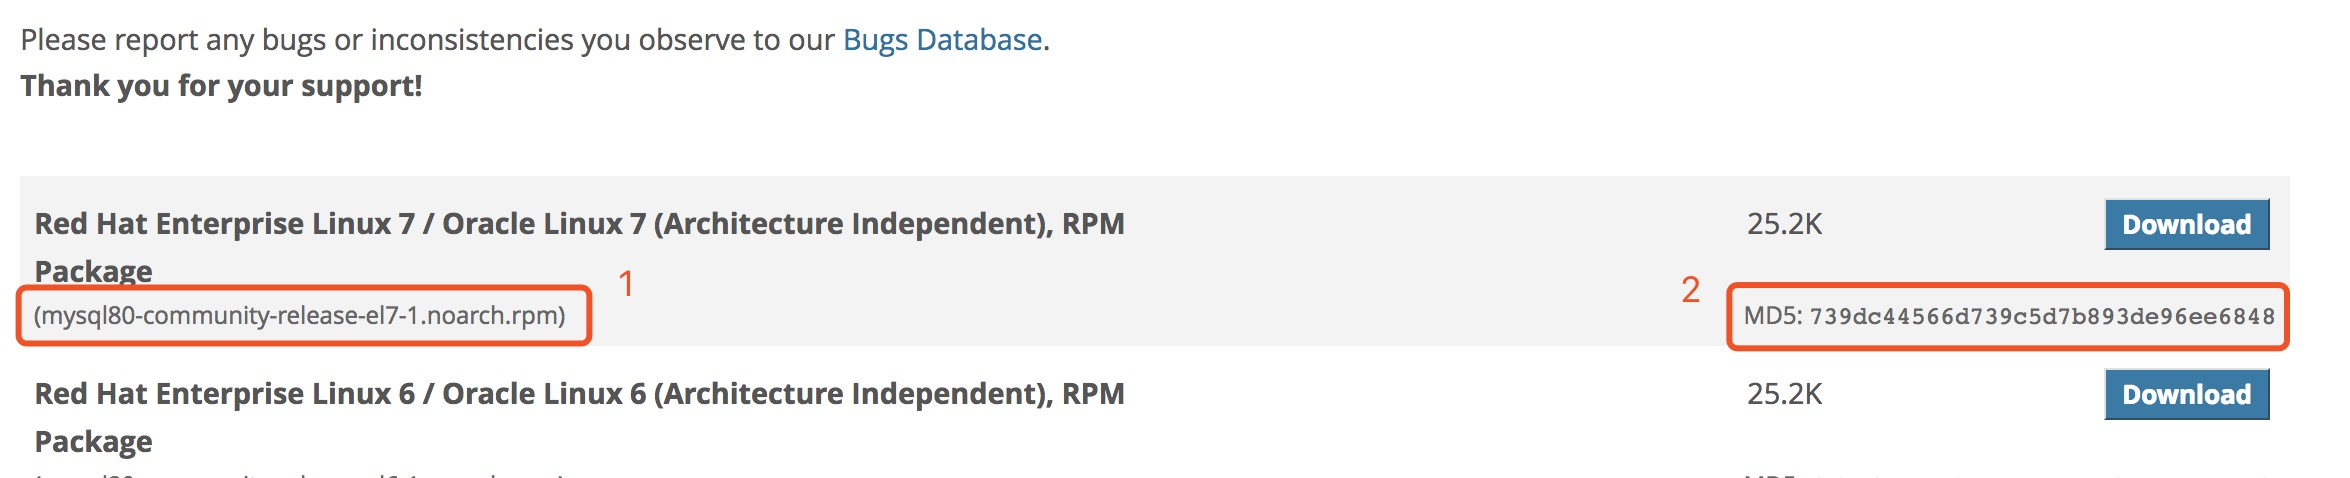
复制上图1的路径替换下面的路径:
wget https://dev.mysql.com/get/mysql80-community-release-el7-1.noarch.rpm
根据output和图2的内容作比较,验证包完整性:
md5sum mysql80-community-release-el7-1.noarch.rpm

# output

739dc44566d739c5d7b893de96ee6848  mysql80-community-release-el7-1.noarch.rpm
安装:
sudo rpm -ivh mysql80-community-release-el7-1.noarch.rpm

sudo yum install mysql-server
会弹出安装提示,按'y'通过即可。
2、启动MySQL
使用以下命令来启动守护程序:
sudo systemctl start mysqld
上面的命令并不会有任何输出,所以需要查看状态:
sudo systemctl status mysqld
如果MySQL已成功启动,则输出应包含Active:active(running),最后一行应如下所示:
······ :Starting MySQL Server...
在安装过程中,会为MySQL root用户生成临时密码。使用以下命令在mysqld.log中找到它:
sudo grep 'temporary password' /var/log/mysqld.log
记住密码,下一步需要使用:
# output

2018-09-29T07:55:22.347160Z 5 [Note] [MY-010454] [Server] A temporary password is generated for root@localhost: 88XR/ea1kY)2
3、配置MySQL
MySQL包含一个安全脚本,用于更改远程root登录和示例用户等一些不太安全的默认选项。
使用此命令运行安全脚本。
sudo mysql_secure_installation
这将提示您输入默认的root密码。输入后,您将需要更改它。
# Output
The existing password for the user account root has expired. Please set a new password.

New password:
输入一个包含至少一个大写字母,一个小写字母,一个数字和一个特殊字符的新12个字符的密码。出现提示时重新输入。
您将收到有关新密码强度的反馈,然后会立即提示您再次更改密码。之前已经更改过密码,就输入No:
# Output
Estimated strength of the password: 100
Change the password for root ? (Press y|Y for Yes, any other key for No) : No
接下来会有些安全配置需要选,其中有是否禁止远程root用户登录,这个看需求来决定是否需要否决,其他的全部输入y同意即可。
4、测试MySQL
我们可以通过连接mysqladmin工具验证我们的安装并获取相关信息,mysqladmin工具是一个允许您运行管理命令的客户端, 使用以下命令查看版本:
mysqladmin -u root -p version
输出结果如下,说明安装成功
mysqladmin  Ver 8.0.12 for Linux on x86_64 (MySQL Community Server - GPL)
Copyright (c) 2000, 2018, Oracle and/or its affiliates. All rights reserved.

Oracle is a registered trademark of Oracle Corporation and/or its
affiliates. Other names may be trademarks of their respective
owners.

Server version		8.0.12
Protocol version	10
Connection		Localhost via UNIX socket
UNIX socket		/var/lib/mysql/mysql.sock
Uptime:			23 min 49 sec

Threads: 2  Questions: 12  Slow queries: 0  Opens: 126  Flush tables: 2  Open tables: 102  Queries per second avg: 0.008
三、安装Nginx
1、添加Nginx Repository
sudo yum install epel-release

# update yum

sudo yum update
2、安装Nginx
sudo yum install nginx
验证安装:
sudo nginx -v

nginx version: nginx/1.15.4
3、启动Nginx
sudo nginx
验证是否成功启动:
curl -I 127.0.0.1

# output
HTTP/1.1 200 OK
Server: nginx/1.13.8
在浏览器中打开http://server_domain_name_or_IP/会直接看到Welcome to nginx!,此时就证明现在Nginx处于工作状态。
NOTE: 如果浏览器打开没有显示Welcome to nginx!,则需要确认服务器的安全配置是否包含80/443端口。
希望在系统启动时启用Nginx。请输入以下命令:
sudo systemctl enable nginx
四、安装Yarn和Git
安装Yarn
配置yum的yarm远程仓库:
curl --silent --location https://dl.yarnpkg.com/rpm/yarn.repo | sudo tee /etc/yum.repos.d/yarn.repo
安装Yarn:
sudo yum install yarn
运行命令来测试 Yarn 是否安装:
yarn --version
安装Git
sudo yum install git
git --version
