

改编自文章《Image Augmentation for Deep Learning With Keras》,原文地址:
Image Augmentation for Deep Learning With Keras
本文使用的图片来自kaggle竞赛“Humpback Whale Identification Challenge”,竞赛地址:Humpback Whale Identification Challenge
对原文做了如下改动:
- 改用kaggle竞赛数据集
- 修改一些说法
- 增加了“其他增强方式”部分内容
- 对代码进行了简化
Keras 图片增强 API
就像Keras的其他api一样,图像增强API简单且强大。
Keras提供了ImageDataGenerator类,定义关于图片准备和增强的配置。包括以下功能:
- 样本级的标准化
- 特征级的标准化
- ZCA白化.
- 随机旋转、转换、剪切、翻转
- 维度重排.
- 将增强的图片保存在本地.
你可以通过以下方式创建ImageDataGenerator()的实例:
from keras.preprocessing.image import ImageDataGenerator # inport api
datagen = ImageDataGenerator()
相较于在内存中对数据集应用所有的操作,keras API被设计成在深度学习模型训练过程中以实时可迭代的方式创建增强图片。这种设计能够减少内存的负担,但是在模型训练是会增加一些额外的时间消耗。
当你创建并设置好ImageDataGenerator()的实例,接下来需要将该实例应用到你的数据集上。
这个过程将计算所有需要使用的数据用于转换你的图片。你可以通过使用fit()方法来实现,该函数使用刚刚生成的ImageDataGenerator()实例和你的训练数据。
datagen.fit(train)实际上ImageDataGenerator()的实例是一个迭代器, 能够按批次返回增强的图片。我们可以使用实例的flow()方法来实现,该方法的需要的参数有批次大小batch size和数据集。
X_batch, y_batch = datagen.flow(train, train, batch_size=32)当我们想在模型中使用生成的图片时,必须使用fit_generator()方法代替fit()方法,指定使用的“图片生成器实例”、“每次迭代使用的样本数”和“迭代次数”。
model.fit_generator(datagen, samples_per_epoch=len(train), epochs=100)数据集
接下来我们使用实际数据集用来举例,数据集来自kaggle竞赛Humpback Whale Identification Challenge
我们首先读入并展示数据集:
from glob import glob
import numpy as np
from PIL import Image
import pandas as pd

train_images = glob("../input/train/*jpg") #return all jpg images path
test_images = glob("../input/test/*jpg")
df = pd.read_csv("../input/train.csv") #read in label file
df["Image"] = df["Image"].map(lambda x : "../input/train/"+x) #replace image name to file path
ImageToLabelDict = dict(zip(df["Image"], df["Id"])) #convert to dict type

def ImportImage(filename, SIZE):
    img = Image.open(filename).convert("LA").resize( (SIZE,SIZE)) # open, convert to gray and resize image
    return np.array(img)[:,:,0]

SIZE = 64
train_img = np.array([ImportImage(img, SIZE) for img in train_images]) # reading image and save to array
x = train_img

import matplotlib.pylab as plt
from matplotlib import pyplot
def plotImages( images_arr, n_images=3):
    fig, axes = plt.subplots(n_images, n_images, figsize=(10,10))
    axes = axes.flatten()
    for img, ax in zip( images_arr, axes):
        if img.ndim != 2:
            img = img.reshape((SIZE,SIZE))
        ax.imshow(img, cmap=pyplot.get_cmap('gray'))
        ax.set_xticks(())
        ax.set_yticks(())
    plt.tight_layout()

plotImages(x)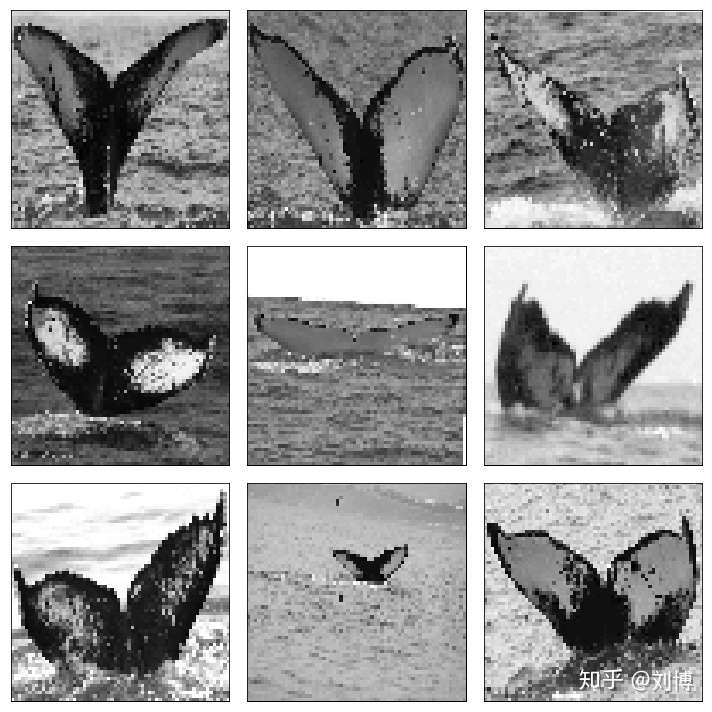
数据集中的数据是鲸鱼的尾巴图片。下面我们对这些图片进行图像增强处理。
特征标准化
我们也可以对整个图像的像素值进行标准化。这也称作特征值标准化(feature standardization),类似于对表格化的数据集的每一列执行标准化操作。
你可以通过设置featurewise_center和 featurewise_std_normalization应用特征标准化,实际上,这两个参数的默认缺省值就是True。
from sklearn.preprocessing import StandardScaler, OneHotEncoder, LabelEncoder
class LabelOneHotEncoder():
    def __init__(self):
        self.ohe = OneHotEncoder()
        self.le = LabelEncoder()
    def fit_transform(self, x):
        features = self.le.fit_transform( x)
        return self.ohe.fit_transform( features.reshape(-1,1))
    def transform( self, x):
        return self.ohe.transform( self.le.transform( x.reshape(-1,1)))
    def inverse_tranform( self, x):
        return self.le.inverse_transform( self.ohe.inverse_tranform( x))
    def inverse_labels( self, x):
        return self.le.inverse_transform( x)
from keras.preprocessing.image import ImageDataGenerator

# one-hot encoding the labels
ImageToLabelDict = dict(zip(df["Image"], df["Id"])) #convert to dict type
y = list(map(ImageToLabelDict.get, train_images))
lohe = LabelOneHotEncoder()
y_cat = lohe.fit_transform(y)
y_train = y_cat

# reshape and transform to float

x = x.reshape((-1,SIZE,SIZE,1))
x_train = x.astype("float32")

# create image gtenerator instance
datagen = ImageDataGenerator(featurewise_center=True, featurewise_std_normalization=True)

# fit parameters from data
datagen.fit(x_train,augment=True)

# configure batch size and retrieve one batch of images
for x_batch, y_batch in datagen.flow(x_train, y_train.toarray(), batch_size=9, shuffle = False):
    # create a grid of 4x4 images
    fig, axes = plt.subplots(3, 3, figsize=(10,10))
    axes = axes.flatten()
    for i in range(0, 9):
        print('标准化之前的均值是:%f之后是:%f'%(x_train[i].mean(),x_batch[i].mean()))
        print('标准化之前的方差是:%f之后是:%f'%(x_train[i].std(),x_batch[i].std()))
        axes[i].imshow(x_batch[i].reshape(SIZE, SIZE), cmap=pyplot.get_cmap('gray'))
        axes[i].set_xticks(())
        axes[i].set_yticks(())
    plt.tight_layout()
    break
标准化之前的均值是:124.352051之后是:-0.318896
标准化之前的方差是:57.989574之后是:0.840124
标准化之前的均值是:106.168457之后是:-0.582330
标准化之前的方差是:39.908623之后是:0.578176
标准化之前的均值是:134.744385之后是:-0.168337
标准化之前的方差是:52.553974之后是:0.761376
标准化之前的均值是:80.210205之后是:-0.958401
标准化之前的方差是:48.334305之后是:0.700243
标准化之前的均值是:163.198730之后是:0.243896
标准化之前的方差是:58.688942之后是:0.850256
标准化之前的均值是:175.447754之后是:0.421353
标准化之前的方差是:63.631710之后是:0.921864
标准化之前的均值是:164.416992之后是:0.261545
标准化之前的方差是:79.251526之后是:1.148156
标准化之前的均值是:133.880371之后是:-0.180854
标准化之前的方差是:22.195881之后是:0.321563
标准化之前的均值是:144.296143之后是:-0.029956
标准化之前的方差是:71.543716之后是:1.036489
可见经过标准化,图片的均值近似为0,方差近似为1.由于我们的图片是灰度图,因此直观上没有影响。
ZCA白化
图片的白化转换是通过一种线性代数的操作,减少图片的冗余。读者可以看这篇文章
更少的冗余意味着更加凸显图像的结构和特征,减少噪声。
一般来说,图像白化通过使用主成分分析,即PCA,来实现。一种效果更好用称为ZCA,这里使用的就是ZCA。
你可以通过设置zca_whitening参数为True来实现zca白化.
def show_augment_image(x_train, y_train,datagen):
    # configure batch size and retrieve one batch of images
    for x_batch, y_batch in datagen.flow(x_train, y_train.toarray(), batch_size=9, shuffle = False):
        # create a grid of 4x4 images
        fig, axes = plt.subplots(3, 3, figsize=(10,10))
        axes = axes.flatten()
        for i in range(0, 9):
            axes[i].imshow(x_batch[i].reshape(SIZE, SIZE), cmap=pyplot.get_cmap('gray'))
            axes[i].set_xticks(())
            axes[i].set_yticks(())
        plt.tight_layout()
        break

datagen = ImageDataGenerator(zca_whitening=True)
datagen.fit(x_train)
show_augment_image(x_train, y_train,datagen)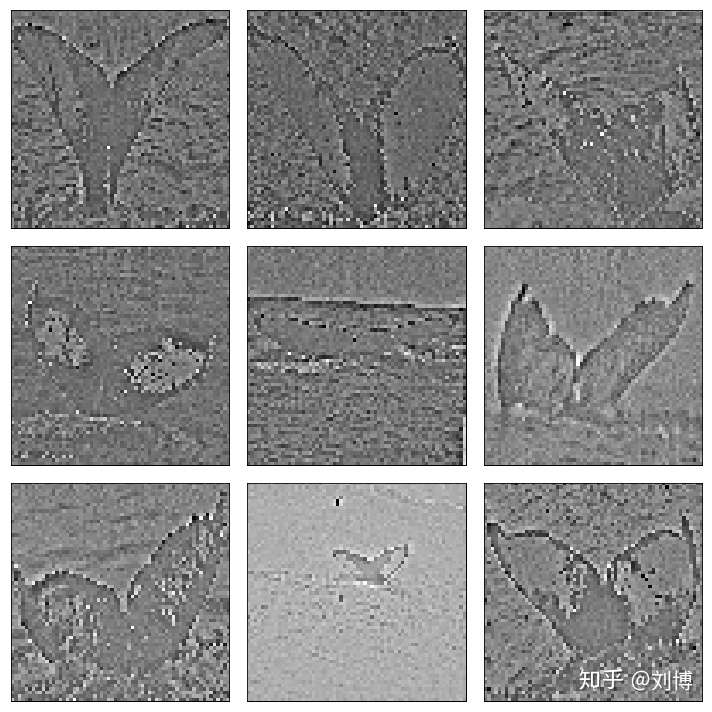
观察上图,鲸鱼尾巴的轮廓和特征信息被保留并增强,而其他信息被弱化。
随机旋转
你数据集的图片可能有不同程度的翻旋转。
你可以通过随机旋转你的训练集图片来得到对旋转的图像性能更好的模型。
你可以通过设置rotation_range argument来实现这一点,90的含义是最多旋转90度。
datagen = ImageDataGenerator(rotation_range=90)
datagen.fit(x_train)
show_augment_image(x_train, y_train,datagen)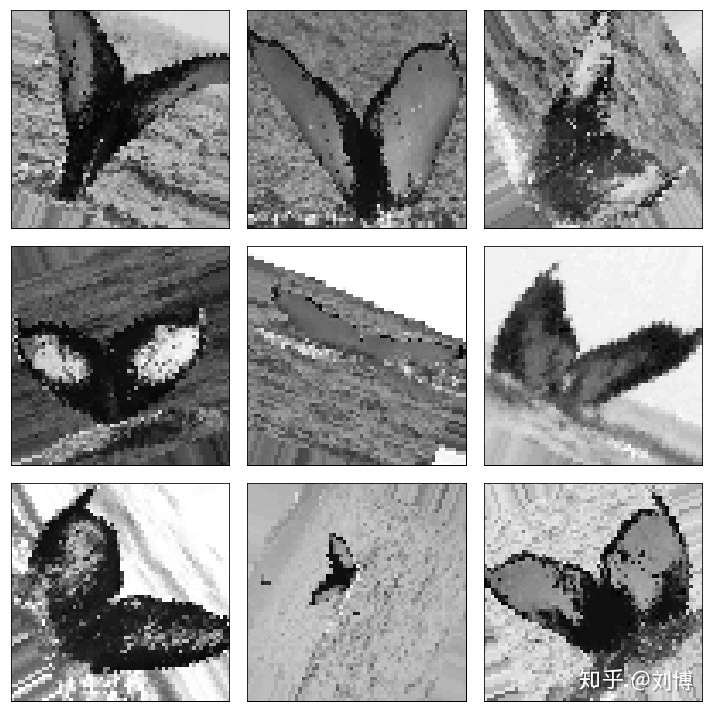
观察上图,图片被随机向左或向右旋转了一定度数,最多不超过90度。
随机转换
你的目标物不一定在图片的中心,而是很有可能偏向一侧。
你可以通过随机生成转换了一定程度的训练集图片,使你的模型对于图像的转换有更好的鲁棒性。
你可以通过keras的width_shift_range和height_shift_range arguments参数来使图像在宽度或高度方向上转换。0.2代表在这个方向上转换的长/宽占总长/宽的比例。
# define data preparation
shift = 0.2
datagen = ImageDataGenerator(width_shift_range=shift, height_shift_range=shift)
datagen.fit(x_train)
show_augment_image(x_train, y_train,datagen)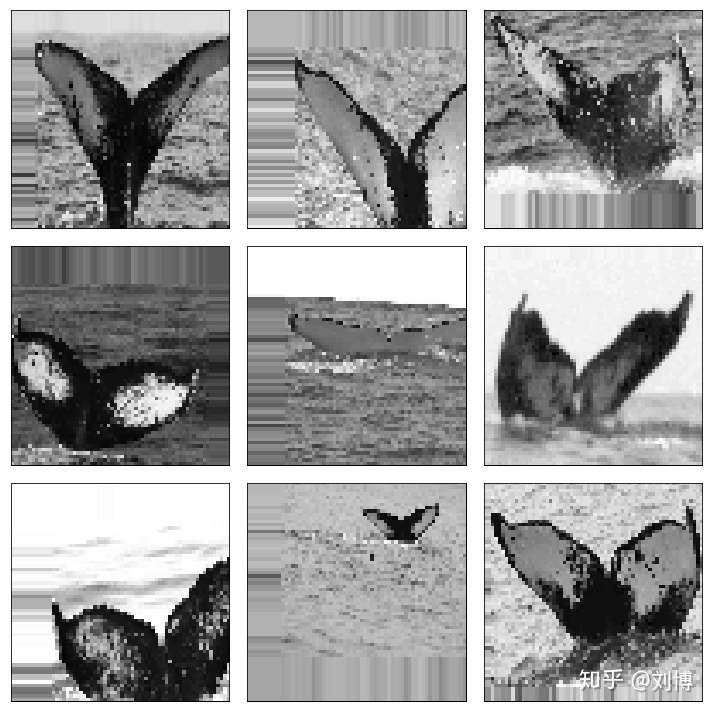
随机翻转
另一个图片增强的操作就是随机翻转。
Keras支持沿着垂直或水平方向进行随机翻转。只需要设置vertical_flip和horizontal_flip参数.
datagen = ImageDataGenerator(horizontal_flip=True, vertical_flip=True)
datagen.fit(X_train)
show_augment_image(x_train, y_train,datagen)
我们发现,图片被随机翻转了,但是这种翻转并不完全适合我们的数据集,并不需要垂直翻转。

保存增强图片
keras实时应用数据准备和图像增强。
这种方式在内存使用方面效率较高,但是,你可能需要这些增强的图片用于训练。例如,可能你想使用不同的图片处理库来处理这些图片,或者你想一次生成这些图片,然后在不同的深度学习模型中使用它们。
Keras允许你在训练的过程中保存这些生成的图片。在训练你的模型之前,你可以事先设定flow()方法的directory, filename prefix 和image file type参数,这样,在训练过程中,生成的图片就会写入文件中。
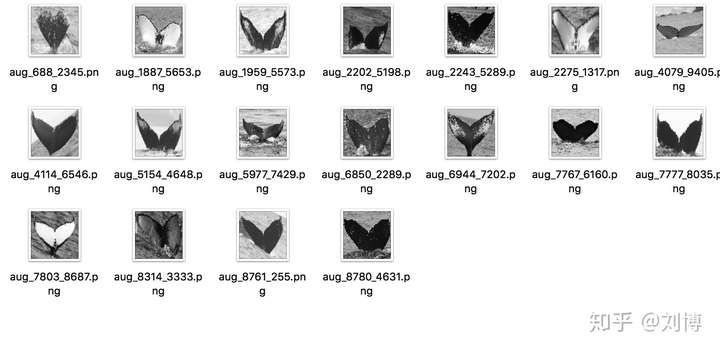
下面这个例子保存了9张图片到“aug_images”子文件夹,文件的前缀是"aug",图片类型是png。
import os
datagen = ImageDataGenerator()
# fit parameters from data
datagen.fit(x_train)
# configure batch size and retrieve one batch of images
try:
    os.makedirs('aug_images')
except:
    for X_batch, y_batch in datagen.flow(x_train, y_train.toarray(), batch_size=9, save_to_dir='aug_images', save_prefix='aug', save_format='png'):
        # create a grid of 3x3 images
        for i in range(0, 9):
            pyplot.subplot(330 + 1 + i)
            pyplot.imshow(X_batch[i].reshape(SIZE, SIZE), cmap=pyplot.get_cmap('gray'))
        # show the plot
        pyplot.show()
        break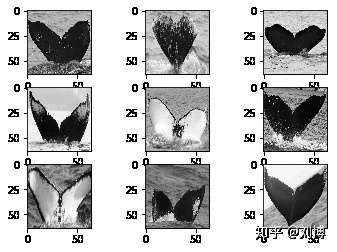
检查aug_images子文件夹,在训练过程中生成的图片已经被保存。
其他增强方式
以下是ImageDataGenerator类可以设置的其他参数,这里不一一演示,读者可以自行探索,这里仅列出并说明。
- shear_range: 对图像进行斜切,参数是延逆时针方向斜切的度数。
- zoom_range:对图像进行放大,参数设置是放大的百分比,[0-1],如果是0.5,就是放大一倍
- channel_shift_range:通道转换范围,对RGB通道的数值进行转换
- fill_mode:填充方式,默认为“近邻填充”,还有多种填充方式{"constant", "nearest", "reflect" or "wrap"},读者可以探索.
- cval:当
fill_mode设置为"constant"时,设定填充的值。 - rescale:重新缩放,在应用所有变换之前,先对所有像素乘以这个rescale数值,一般可以设置1.0/255
- preprocessing_function:自定义函数,可以设置自定义函数,这个函数的输入为一个Numpy tensor 格式的3维数组。
- data_format:图片格式,通道在前还是通道在后,如果是"channels_first"就是输入图片的第一个维度代表通道,如果是"channels_last"代表输入图片的第三个维度代表通道。
- validation_split:验证比例,设置一个0到1的比例,该比例的图片作为验证集数据。
使用keras做图片增强的技巧
图像数据的独特性在于,你可以检查数据并且转换数据,并快速的在模型中得到验证,理解图像转换的效果。
以下是一些处理技巧:
- 检查数据集。花一些时间详细的检查你的数据集。查看图片,记录可以使你的模型训练收益的图片增强方式,例如你需要应用不同的转换、翻转、旋转等。
- 检查增强后的图片。在对图像进行增强后检查样本图像。知道你在使用什么样的增强图像是一回事,检查样例是另一回事。检查你正在使用的单个增强图像,以及你计划使用的全部。您可能会想到简化或进一步加强模型训练过程的方法。
- 评估多种图像转换技术。尝试使用不止一种图像准备和增强模式。你会被一些你以为没啥用的数据准备模型惊艳到。
总结
这篇文章探讨了keras的keras.preprocessing.image.ImageDataGenerator类。
你学习了一些列的简单易用的图像处理方法。
- Keras的ImageDataGenerator API,用于实时转换图像。
- 样本级的以及特征级的像素标准化。
- ZCA白化转换
- 随机翻转、转换、旋转图像.
- 如何保存图像到本地
感谢阅读,欢迎留言讨论!
