React Native在Android当中实践(一)——背景介绍
React Native在Android当中实践(二)——搭建开发环境
React Native在Android当中实践(三)——集成到Android项目当中
React Native在Android当中实践(四)——代码集成
React Native在Android当中实践(五)——常见问题
代码集成
Android Studio的环境配置完成之后 接下来我们开始对代码进行集成
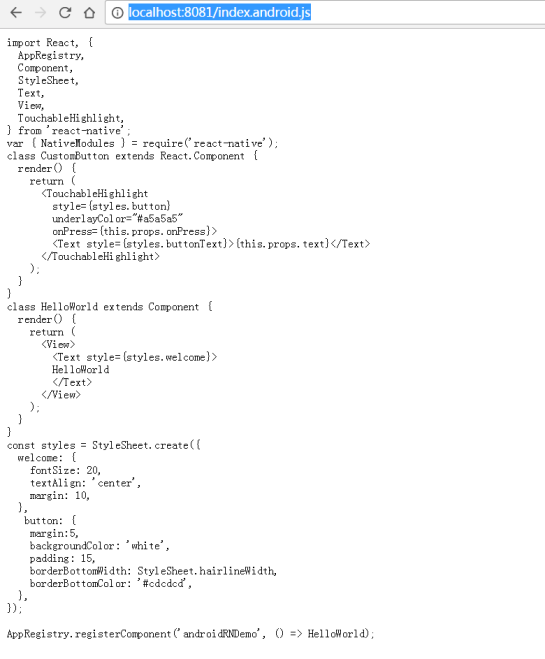
index.js文件
首先在项目根目录中创建一个空的index.js文件。(注意在0.49版本之前是index.android.js文件) index.js是React Native应用在Android上的入口文件。而且它是不可或缺的!
添加你自己的React Native代码
在这里方便测试 我们只是简简单单写一个js文件进行测试
import React from 'react';import {
  AppRegistry,
  StyleSheet,
  Text,
  View
} from 'react-native';
class HelloWorld extends React.Component {
  render() {
    return (
      <View style={styles.container}>
        <Text style={styles.hello}>Hello, World</Text>
      </View>
    )
  }
}var styles = StyleSheet.create({
  container: {
    flex: 1,
    justifyContent: 'center',
  },
  hello: {
    fontSize: 20,
    textAlign: 'center',
    margin: 10,
  },
});

AppRegistry.registerComponent('MyReactNativeApp', () => HelloWorld);
在这里特别要注意的是:

配置权限以便开发当中的红屏错误能够正确的显示。
如果你的应用会运行在Android 6.0(API level 23)或更高版本,请确保你在开发版本中有打开悬浮窗(overlay)权限。你可以在代码中使用Settings.canDrawOverlays(this);来检查。之所以需要这一权限,是因为我们会把开发中的报错显示在悬浮窗中(仅在开发阶段需要)。在Android 6.0(API level 23)中用户需要手动同意授权。具体请求授权的做法是在onCreate()中添加如下代码。其中OVERLAY_PERMISSION_REQ_CODE是用于回传授权结果的字段。
if (Build.VERSION.SDK_INT >= Build.VERSION_CODES.M) {
    if (!Settings.canDrawOverlays(this)) {
        Intent intent = new Intent(Settings.ACTION_MANAGE_OVERLAY_PERMISSION,
                                   Uri.parse("package:" + getPackageName()));
        startActivityForResult(intent, OVERLAY_PERMISSION_REQ_CODE);
    }
}
Finally, the onActivityResult() method (as shown in the code below) has to be overridden to handle the permission Accepted or Denied cases for consistent UX.
@Overrideprotected void onActivityResult(int requestCode, int resultCode, Intent data) {
    if (requestCode == OVERLAY_PERMISSION_REQ_CODE) {
        if (Build.VERSION.SDK_INT >= Build.VERSION_CODES.M) {
            if (!Settings.canDrawOverlays(this)) {
                // SYSTEM_ALERT_WINDOW permission not granted...
            }
        }
    }
}
如果不需要开发者,则不需要以上相关配置。
运行React Native
首先需要在一个Activity中创建一个ReactRootView对象,然后在这个对象之中启动React Native应用,并将它设为界面的主视图。 如果你想在安卓5.0以下的系统上运行,请用 com.android.support:appcompat 包中的 AppCompatActivity 代替 Activity 。
public class MyReactActivity extends Activity implements DefaultHardwareBackBtnHandler {
    private ReactRootView mReactRootView;
    private ReactInstanceManager mReactInstanceManager;

    @Override
    protected void onCreate(Bundle savedInstanceState) {
        super.onCreate(savedInstanceState);

        mReactRootView = new ReactRootView(this);
        mReactInstanceManager = ReactInstanceManager.builder()
                .setApplication(getApplication())
                .setBundleAssetName("index.android.bundle")
                .setJSMainModuleName("index.android")
                .addPackage(new MainReactPackage())
                .setUseDeveloperSupport(BuildConfig.DEBUG)
                .setInitialLifecycleState(LifecycleState.RESUMED)
                .build();

        // 注意这里的MyReactNativeApp必须对应“index.android.js”中的
        // “AppRegistry.registerComponent()”的第一个参数
        mReactRootView.startReactApplication(mReactInstanceManager, "MyReactNativeApp", null);

        setContentView(mReactRootView);
    }

    @Override
    public void invokeDefaultOnBackPressed() {
        super.onBackPressed();
    }
}
如果你使用的是 Android Studio , 可以使用Alt + Enter快捷键来自动为MyReactActivity类补上缺失的import语句。注意BuildConfig应该是在你自己的包中自动生成,无需额外引入。千万不要从com.facebook...的包中引入! 我们需要把 MyReactActivity 的主题设定为 Theme.AppCompat.Light.NoActionBar ,因为里面有许多组件都使用了这一主题。
 <activity
   android:name=".MyReactActivity"
   android:label="@string/app_name"
   android:theme="@style/Theme.AppCompat.Light.NoActionBar">
 </activity>
一个ReactInstanceManager可以在多个activities或fragments间共享。 You will want to make your own ReactFragment or ReactActivity and have a singleton holder that holds a ReactInstanceManager. When you need the ReactInstanceManager (e.g., to hook up the ReactInstanceManager to the lifecycle of those Activities or Fragments) use the one provided by the singleton. 下一步我们需要把一些activity的生命周期回调传递给ReactInstanceManager:
@Overrideprotected void onPause() {
    super.onPause();

    if (mReactInstanceManager != null) {
        mReactInstanceManager.onHostPause(this);
    }
}
@Overrideprotected void onResume() {
    super.onResume();

    if (mReactInstanceManager != null) {
        mReactInstanceManager.onHostResume(this, this);
    }
}
@Overrideprotected void onDestroy() {
    super.onDestroy();

    if (mReactInstanceManager != null) {
        mReactInstanceManager.onHostDestroy();
    }
}
我们还需要把后退按钮事件传递给React Native:
@Override
 public void onBackPressed() {
    if (mReactInstanceManager != null) {
        mReactInstanceManager.onBackPressed();
    } else {
        super.onBackPressed();
    }
}
@Overridepublic boolean onKeyUp(int keyCode, KeyEvent event) {
    if (keyCode == KeyEvent.KEYCODE_MENU && mReactInstanceManager != null) {
        mReactInstanceManager.showDevOptionsDialog();
        return true;
    }
    return super.onKeyUp(keyCode, event);
}
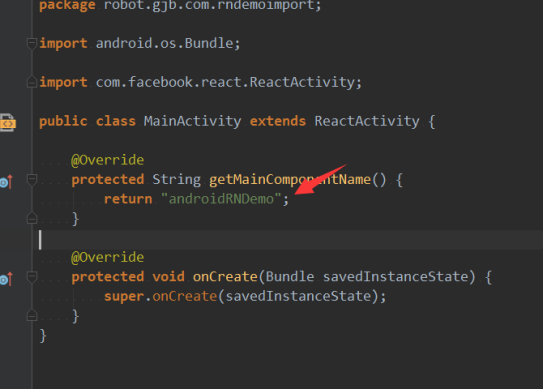
现在activity已就绪,可以运行一些JavaScript代码了。 在新版本的React Native的集成不必这么麻烦 只需要简单的继承 ReactActivity 然后实现以下几个方法
@Override
protected String getMainComponentName() {
    return null;
}

@Override
protected boolean getUseDeveloperSupport() {
    return false;
}

@Override
protected List<ReactPackage> getPackages() {
    return null;
}

@Override
protected void onCreate(Bundle savedInstanceState) {
    super.onCreate(savedInstanceState);
}
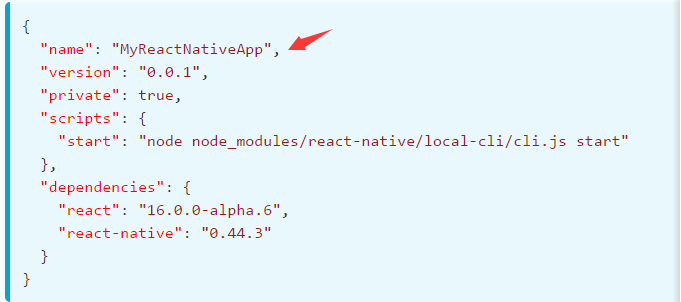
其中
protected String getMainComponentName() {
    return null;
}
方法需要返回的名称即为
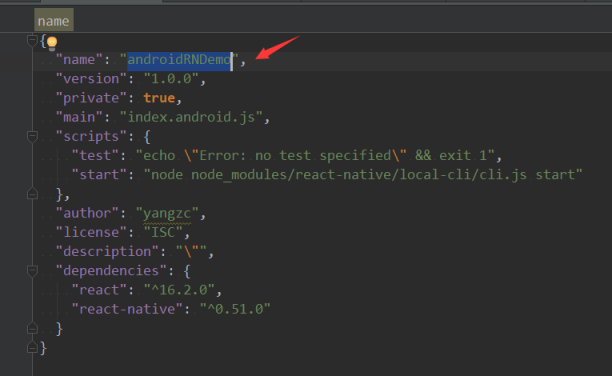
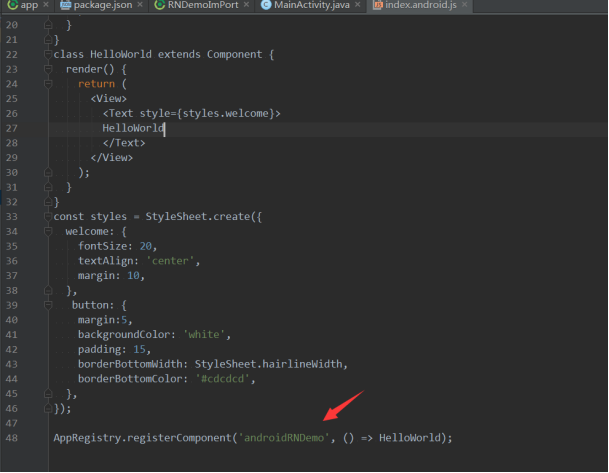
注意这里的MyReactNativeApp必须对应“index.android.js”中的
“AppRegistry.registerComponent()”的第一个参数
名称。
如图:

public class MyApplication extends Application implements ReactApplication {
@Override
public ReactNativeHost getReactNativeHost() {
return mReactNativeHost;
}
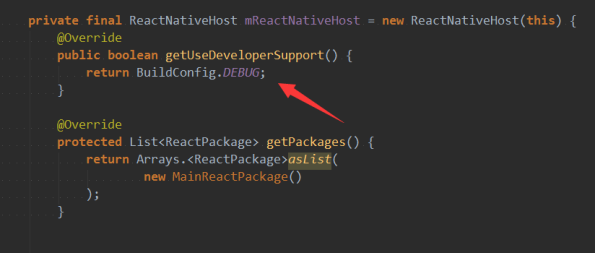
private final ReactNativeHost mReactNativeHost = new ReactNativeHost(this) {
@Override
public boolean getUseDeveloperSupport() {
return BuildConfig.DEBUG;
}
@Override
protected List<ReactPackage> getPackages() {
return Arrays.<ReactPackage>asList(
new MainReactPackage()
);
}
};
}
在AndroidManifest.xml当中增加
<activity android:name="com.facebook.react.devsupport.DevSettingsActivity" />
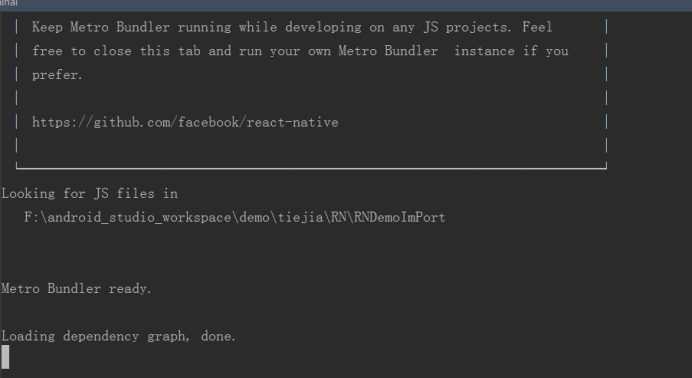
这个是调试的Activity,若需要我们要集成到我们项目中的。 到此为止,ReactNative 集成到已有项目中完成!!!迫不及待的运行试试吧!! 运行ReactNative 首先,在Terminal当中运行 npm start命令(若集成了yarn 则直接运行yarn start即可) 若出现