之前探究过 iOS 上通过 CoreImage、OpenGLES 等技术实现 LUT 滤镜的对比 -- iOS 针对 LUT 滤镜的实现对比,但是其实在图形处理这块,Apple 更推崇自家公司的 Metal,这是一个和 OpenGLES 类似的面向底层的图形编程接口,最早在 2014 年的 WWDC 的时候发布,可用于从 CPU 发送指令到 GPU 驱动 GPU 进行大量并行矩阵运算。
Metal 提供以下特性:
- 低开销接口。Metal 被设计用于消灭像状态检查一类的隐性性能瓶颈,你可以控制 GPU 的异步行为,以实现用于并行创建和提交命令缓冲区的高效多线程操作
- 内存和资源管理。Metal 框架提供了表示 GPU 内存分配的缓冲区和纹理对象,纹理对象具有确切的像素格式,能被用于纹理图像或附件
- 集成对图形和计算操作的支持。Metal 对图形操作和计算操作使用了相同的数据结构和资源(如 buffer、texture、command queue),Metal 的着色器语言同时支持图形函数和计算函数,Metal 框架支持在运行时接口(CPU)、图形着色器和计算方法间共享资源
- 预编译着色器。Metal 的着色器函数能与代码一同在编译器编译,并在运行时加载,这样的流程能提供更方便的着色器调试功能。
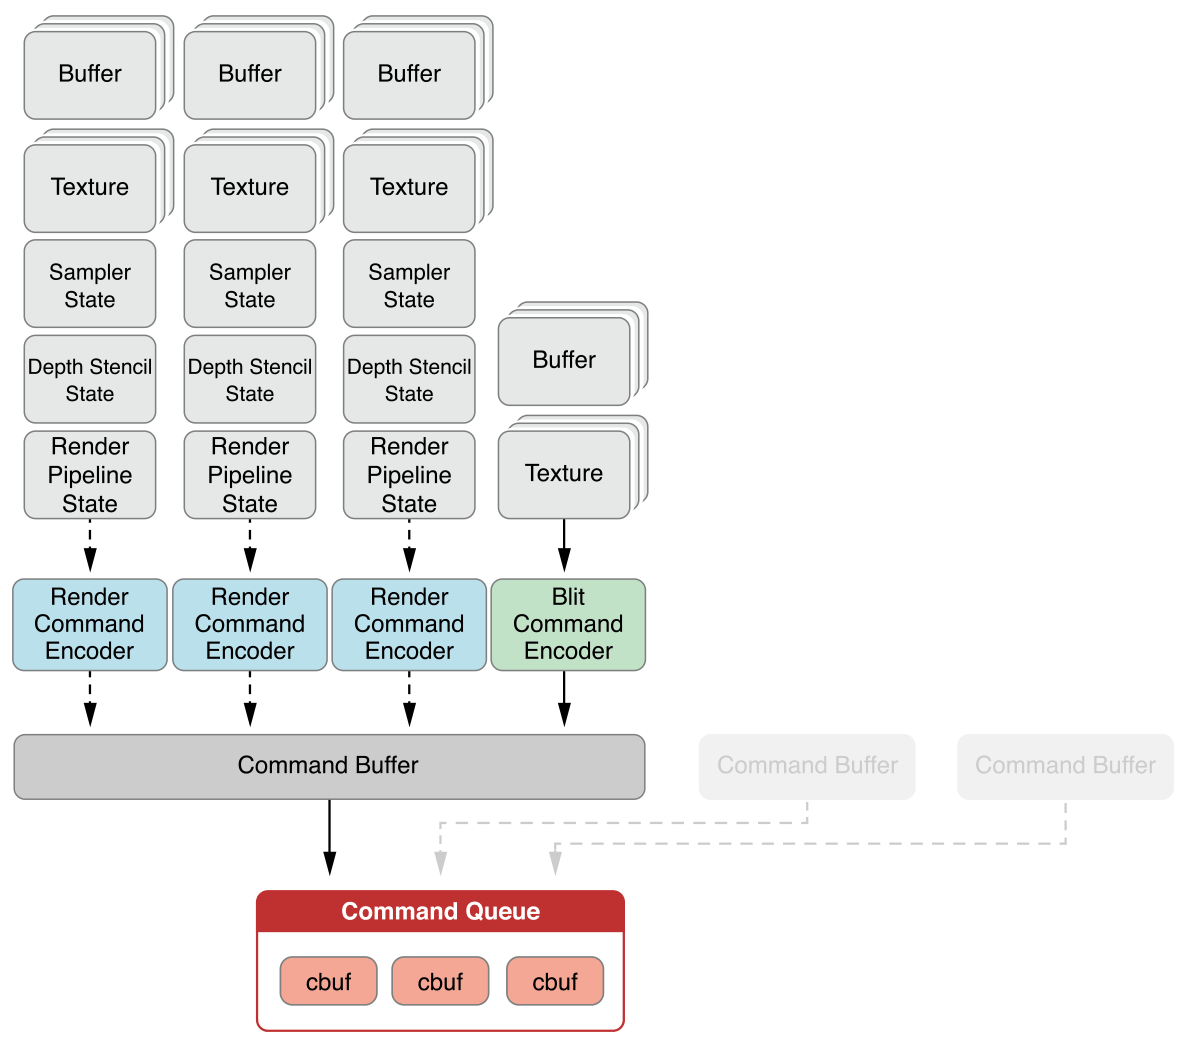
Metal 的对象关系如图所示
 image
image
其中连接 CPU 和 GPU 的就是命令队列 Command Queue,其上装载多个命令缓冲 Command Buffer,Command Buffer 里能承载 Metal 定义的多种图形、计算命令编码器,在编码器中就是开发者创建的实际的命令和资源,它们最终被传送到 GPU 中进行计算和渲染。
接下来就用 Metal 实现一个图片 LUT 滤镜。
1. 初始化
Metal 初始化工作主要将一些初始化开销大、能够复用的对象进行预先生成和持有.
首先初始化 GPU 接口,可以理解为持有 GPU,在 Metal 中它被定义为 MTLDevice 类型的对象
self.mtlDevice = MTLCreateSystemDefaultDevice(); // 获取 GPU 接口
其次初始化一个 MTKView,它相当于画布,用于 GPU 渲染内容到屏幕上
    [self.view addSubview:self.mtlView];
    [self.mtlView mas_makeConstraints:^(MASConstraintMaker *make) {
        make.left.top.equalTo(self.view);
        make.width.height.equalTo(self.view);
    }];
Metal 的渲染流程与 OpenGLES 很类似,大致如下图所示
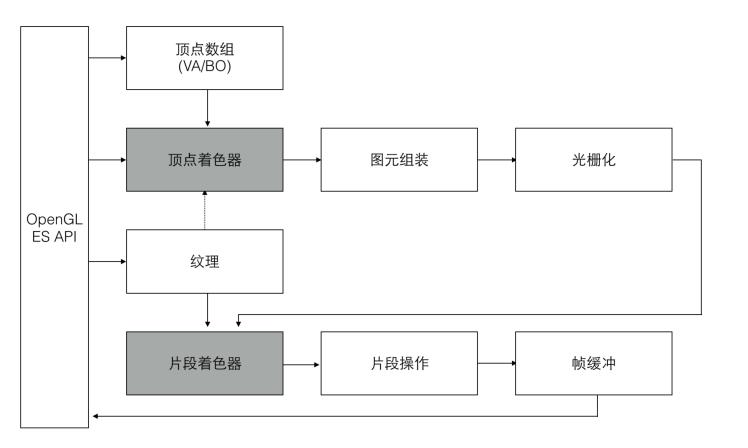
因此同样的,需要传入顶点数据、顶点着色器和片段着色器
顶点数据定义如下,每一行的前四个分量为顶点坐标,后两个分量为纹理坐标(归一化)。
static const float vertexArrayData[] = {
    -1.0, -1.0, 0.0, 1.0, 0, 1,
    -1.0, 1.0, 0.0, 1.0, 0, 0,
    1.0, -1.0, 0.0, 1.0, 1, 1,
    -1.0, 1.0, 0.0, 1.0, 0, 0,
    1.0, 1.0, 0.0, 1.0, 1, 0,
    1.0, -1.0, 0.0, 1.0, 1, 1
};
然后加载到顶点 buffer 中
self.vertexBuffer = [self.mtlDevice newBufferWithBytes:vertexArrayData length:sizeof(vertexArrayData) options:0]; // 利用数组初始化一个顶点缓存,MTLResourceStorageModeShared 资源存储在CPU和GPU都可访问的系统存储器中
Metal 搜索顶点着色器和片段着色器的范围是以 Bundle 为维度的,在一个 Bundle 内放进任意名称的 Metal 文件,其中的着色器函数都可以被 Metal 搜索并加载到内存中。
    id<MTLLibrary> library = [self.mtlDevice newDefaultLibraryWithBundle:[NSBundle bundleWithPath:[[NSBundle mainBundle] pathForResource:@"XXXXXX" ofType:@"bundle"]] error:nil];
    id<MTLFunction> vertextFunc = [library newFunctionWithName:@"vertex_func"];
    id<MTLFunction> fragFunc = [library newFunctionWithName:@"fragment_func"]; //从 bundle 中获取顶点着色器和片段着色器
接下来要将着色器函数装配到渲染管线上,需要用到 MTLRenderPipelineDescriptor 对象
    MTLRenderPipelineDescriptor *pipelineDescriptor = [MTLRenderPipelineDescriptor new];
    pipelineDescriptor.vertexFunction = vertextFunc;
    pipelineDescriptor.fragmentFunction = fragFunc;
    pipelineDescriptor.colorAttachments[0].pixelFormat = MTLPixelFormatBGRA8Unorm; //此设置配置像素格式,以便通过渲染管线的所有内容都符合相同的颜色分量顺序(在本例中为Blue(蓝色),Green(绿色),Red(红色),Alpha(阿尔法))以及尺寸(在这种情况下,8-bit(8位)颜色值变为 从0到255)
    self.pipelineState = [self.mtlDevice newRenderPipelineStateWithDescriptor:pipelineDescriptor error:nil]; // 初始化一个渲染管线状态描述位,相当于 CPU 和 GPU 之间建立的管道
最后是初始化渲染队列,以及创建纹理缓存
    self.commandQueue = [self.mtlDevice newCommandQueue]; // 获取一个渲染队列,其中装载需要渲染的指令 MTLCommandBuffer
    CVMetalTextureCacheCreate(NULL, NULL, self.mtlDevice, NULL, &_textureCache); // 创建纹理缓存
2. 图片纹理加载
Metal 为加载图片纹理提供了便捷类 MTKTextureLoader,能够根据多种参数生成 MTLTexture 纹理对象,但是实际使用中发现了两个问题:
- 问题1:BGRA 问题
Metal 的渲染视图 MTKView 默认支持的 pixelFormat 是 MTLPixelFormatBGRA8Unorm,而说明文档上说 MTKView 还支持以下格式
The color pixel format for the current drawable's texture. The pixel format for a MetalKit view must be MTLPixelFormatBGRA8Unorm, MTLPixelFormatBGRA8Unorm_sRGB, MTLPixelFormatRGBA16Float, MTLPixelFormatBGRA10_XR, or MTLPixelFormatBGRA10_XR_sRGB.
但是我尝试设置为其他值时都发生了 crash,所以整个渲染流程、命令编码过程中都需要设置 pixelFormat 为 BGRA 格式,这样遇到的问题就是针对一些内部像素排列顺序是 RGBA 格式的图片,生成的纹理和最终渲染出来的图片会发蓝,为了确保传入的图片都是 BGRA 格式的图片,我预先将传入的图片按 BGRA 渲染到 CGContext 上,再提取出 UIImage 对象传入
- (unsigned char *)bitmapFromImage:(UIImage *)targetImage
{
    CGImageRef imageRef = targetImage.CGImage;

    NSUInteger iWidth = CGImageGetWidth(imageRef);
    NSUInteger iHeight = CGImageGetHeight(imageRef);
    NSUInteger iBytesPerPixel = 4;
    NSUInteger iBytesPerRow = iBytesPerPixel * iWidth;
    NSUInteger iBitsPerComponent = 8;
    unsigned char *imageBytes = malloc(iWidth * iHeight * iBytesPerPixel);

    CGColorSpaceRef colorspace = CGColorSpaceCreateDeviceRGB();

    CGContextRef context = CGBitmapContextCreate(imageBytes,
                                                 iWidth,
                                                 iHeight,
                                                 iBitsPerComponent,
                                                 iBytesPerRow,
                                                 colorspace,
                                                 kCGBitmapByteOrder32Little | kCGImageAlphaPremultipliedFirst); // 转 BGRA 格式

    CGRect rect = CGRectMake(0, 0, iWidth, iHeight);
    CGContextDrawImage(context, rect, imageRef);
    CGColorSpaceRelease(colorspace);
    CGContextRelease(context);
    return imageBytes;
}

- (NSData *)imageDataFromBitmap:(unsigned char *)imageBytes imageSize:(CGSize)imageSize
{
    CGColorSpaceRef colorSpace = CGColorSpaceCreateDeviceRGB();
    CGContextRef context = CGBitmapContextCreate(imageBytes,
                                                 imageSize.width,
                                                 imageSize.height,
                                                 8,
                                                 imageSize.width * 4,
                                                 colorSpace,
                                                 kCGBitmapByteOrder32Little | kCGImageAlphaPremultipliedFirst);
    CGImageRef imageRef = CGBitmapContextCreateImage(context);
    CGContextRelease(context);
    CGColorSpaceRelease(colorSpace);

    UIImage *result = [UIImage imageWithCGImage:imageRef];
    NSData *imageData = UIImagePNGRepresentation(result);
    CGImageRelease(imageRef);
    return imageData;
}
- 问题2:sRGB 问题
这个问题的表现现象是最终渲染出来的图片偏暗,即使是原图也会偏暗,StackOverflow 上有很多对这个 strange color 问题的回答,均提到将 MTKTextureLoader 的 MTKTextureLoaderOptionSRGB 选项设置为 NO,它默认为 YES。
我的理解是,sRGB 实际上是一种对颜色的编码,其效果是增加暗色域的编码精度,降低亮色域的编码精度。那么针对 sRGB 编码的图片就需要进行一次 gamma 校正,以确保进行诸如 LUT 对照计算时能够严格按照线性 RGB 计算。但是实际上我传入的图片都是以 RGB 格式排列,因此不需要进行 gamma 校正,如果不设置关闭 sRGB 的校正,就会对线性 RGB 格式的数据进行校正,导致最终图片偏暗。这个问题在我做 CoreImage 的滤镜调研时也出现过,下面是效果图
- 最终代码
生成 LUT 纹理代码
    unsigned char *imageBytes = [self bitmapFromImage:lutImage];
    NSData *imageData = [self imageDataFromBitmap:imageBytes imageSize:CGSizeMake(CGImageGetWidth(lutImage.CGImage), CGImageGetHeight(lutImage.CGImage))];
    free(imageBytes);
    self.lutTexture = [loader newTextureWithData:imageData options:@{MTKTextureLoaderOptionSRGB:@(NO)} error:&err]; // 生成 LUT 滤镜纹理
生成原图纹理代码
    unsigned char *imageBytes = [self bitmapFromImage:image];
    NSData *imageData = [self imageDataFromBitmap:imageBytes imageSize:CGSizeMake(CGImageGetWidth(image.CGImage), CGImageGetHeight(image.CGImage))];
    free(imageBytes);
    MTKTextureLoader *loader = [[MTKTextureLoader alloc] initWithDevice:self.mtlDevice];
    NSError* err;
    self.originalTexture = [loader newTextureWithData:imageData options:@{MTKTextureLoaderOptionSRGB:@(NO)} error:&err];
3. 着色器代码
Metal 着色器代码与 OpenGLES 的着色器类似,因为它们的原理都是一样的
#include <metal_stdlib>
using namespace metal;

struct Vertex {
    packed_float4 position;
    packed_float2 texCoords;
};

struct ColoredVertex
{
    float4 position [[position]];
    float2 texCoords;
};

vertex ColoredVertex vertex_func(constant Vertex *vertices [[buffer(0)]], uint vid [[vertex_id]]) {
    Vertex inVertex = vertices[vid];
    ColoredVertex outVertex;
    outVertex.position = inVertex.position;
    outVertex.texCoords = inVertex.texCoords;

    return outVertex;
}

fragment half4 fragment_func(ColoredVertex vert [[stage_in]], texture2d<half> originalTexture [[texture(0)]], texture2d<half> lutTexture [[texture(1)]]) {
    // stage_in 修饰光栅化顶点
    float width = originalTexture.get_width();
    float height = originalTexture.get_height();
    uint2 gridPos = uint2(vert.texCoords.x * width ,vert.texCoords.y * height);

    half4 color = originalTexture.read(gridPos);

    float blueColor = color.b * 63.0;

    int2 quad1;
    quad1.y = floor(floor(blueColor) / 8.0);
    quad1.x = floor(blueColor) - (quad1.y * 8.0);

    int2 quad2;
    quad2.y = floor(ceil(blueColor) / 8.0);
    quad2.x = ceil(blueColor) - (quad2.y * 8.0);

    half2 texPos1;
    texPos1.x = (quad1.x * 0.125) + 0.5/512.0 + ((0.125 - 1.0/512.0) * color.r);
    texPos1.y = (quad1.y * 0.125) + 0.5/512.0 + ((0.125 - 1.0/512.0) * color.g);

    half2 texPos2;
    texPos2.x = (quad2.x * 0.125) + 0.5/512.0 + ((0.125 - 1.0/512.0) * color.r);
    texPos2.y = (quad2.y * 0.125) + 0.5/512.0 + ((0.125 - 1.0/512.0) * color.g);

    half4 newColor1 = lutTexture.read(uint2(texPos1.x * 512,texPos1.y * 512));
    half4 newColor2 = lutTexture.read(uint2(texPos2.x * 512,texPos2.y * 512));

    half4 newColor = mix(newColor1, newColor2, half(fract(blueColor)));
    half4 finalColor = mix(color, half4(newColor.rgb, 1.0), half(1.0));

    half4 realColor = half4(finalColor);
    return realColor;
}
此处不再赘述。
4. 渲染到屏幕
渲染过程首先要获取到下一个内容区缓存,即“画布”
    id<CAMetalDrawable> drawable = [(CAMetalLayer*)[self.mtlView layer] nextDrawable]; // 获取下一个可用的内容区缓存,用于绘制内容
    if (!drawable) {
        return;
    }
然后生成 MTLRenderPassDescriptor,相当于对此次渲染流程的描述符
    MTLRenderPassDescriptor *renderPassDescriptor = [self.mtlView currentRenderPassDescriptor]; // 获取当前的渲染描述符
    if (!renderPassDescriptor) {
        return;
    }
    renderPassDescriptor.colorAttachments[0].clearColor = MTLClearColorMake(0.5, 0.5, 0.5, 1.0); // 设置颜色附件的清除颜色
    renderPassDescriptor.colorAttachments[0].loadAction = MTLLoadActionClear; // 用于避免渲染新的帧时附带上旧的内容
接下来从命令队列中取出一个可用的命令 buffer,装载进去一个命令编码器,命令编码器里包含着色器所需的顶点、纹理等
    id<MTLCommandBuffer> commandBuffer = [self.commandQueue commandBuffer]; // 获取一个可用的命令 buffer
    id<MTLRenderCommandEncoder> commandEncoder = [commandBuffer renderCommandEncoderWithDescriptor:renderPassDescriptor]; // 通过渲染描述符构建 encoder
    [commandEncoder setCullMode:MTLCullModeBack]; // 设置剔除背面
    [commandEncoder setFrontFacingWinding:MTLWindingClockwise]; // 设定按顺时针顺序绘制顶点的图元是朝前的
    [commandEncoder setViewport:(MTLViewport){0.0, 0.0, self.mtlView.drawableSize.width, self.mtlView.drawableSize.height, -1.0, 1.0 }]; // 设置可视区域
    [commandEncoder setRenderPipelineState:self.pipelineState];// 设置渲染管线状态位
    [commandEncoder setVertexBuffer:self.vertexBuffer offset:0 atIndex:0]; // 设置顶点buffer
    [commandEncoder setFragmentTexture:self.originalTexture atIndex:0]; // 设置纹理 0,即原图
    [commandEncoder setFragmentTexture:self.lutTexture atIndex:1]; // 设置纹理 1,即 LUT 图
    [commandEncoder drawPrimitives:MTLPrimitiveTypeTriangle vertexStart:0 vertexCount:6]; // 绘制三角形图元
最终提交到队列中
    [commandEncoder endEncoding];
    [commandBuffer presentDrawable:drawable];
    [commandBuffer commit];
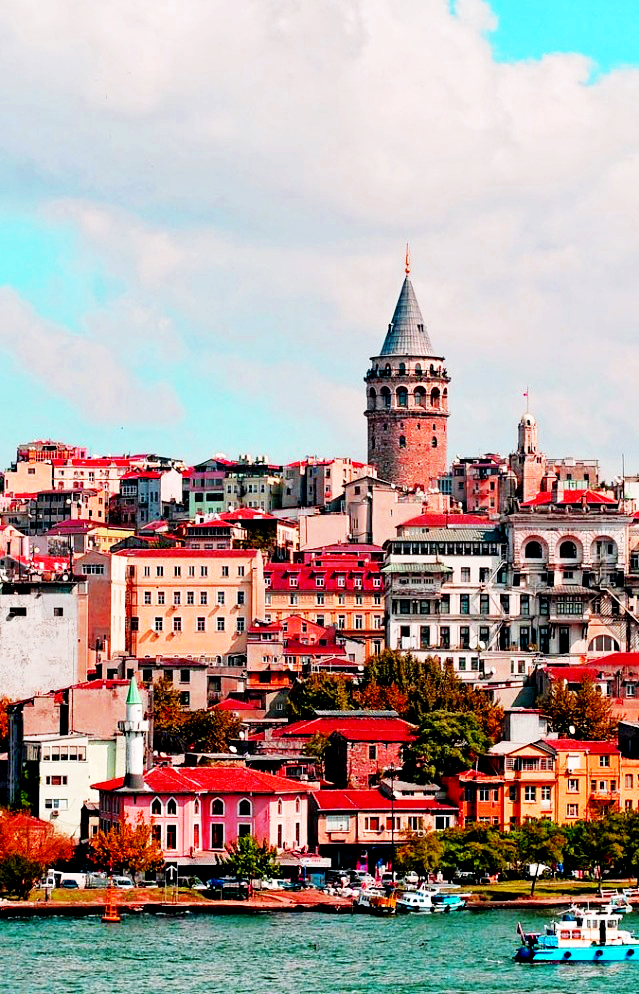
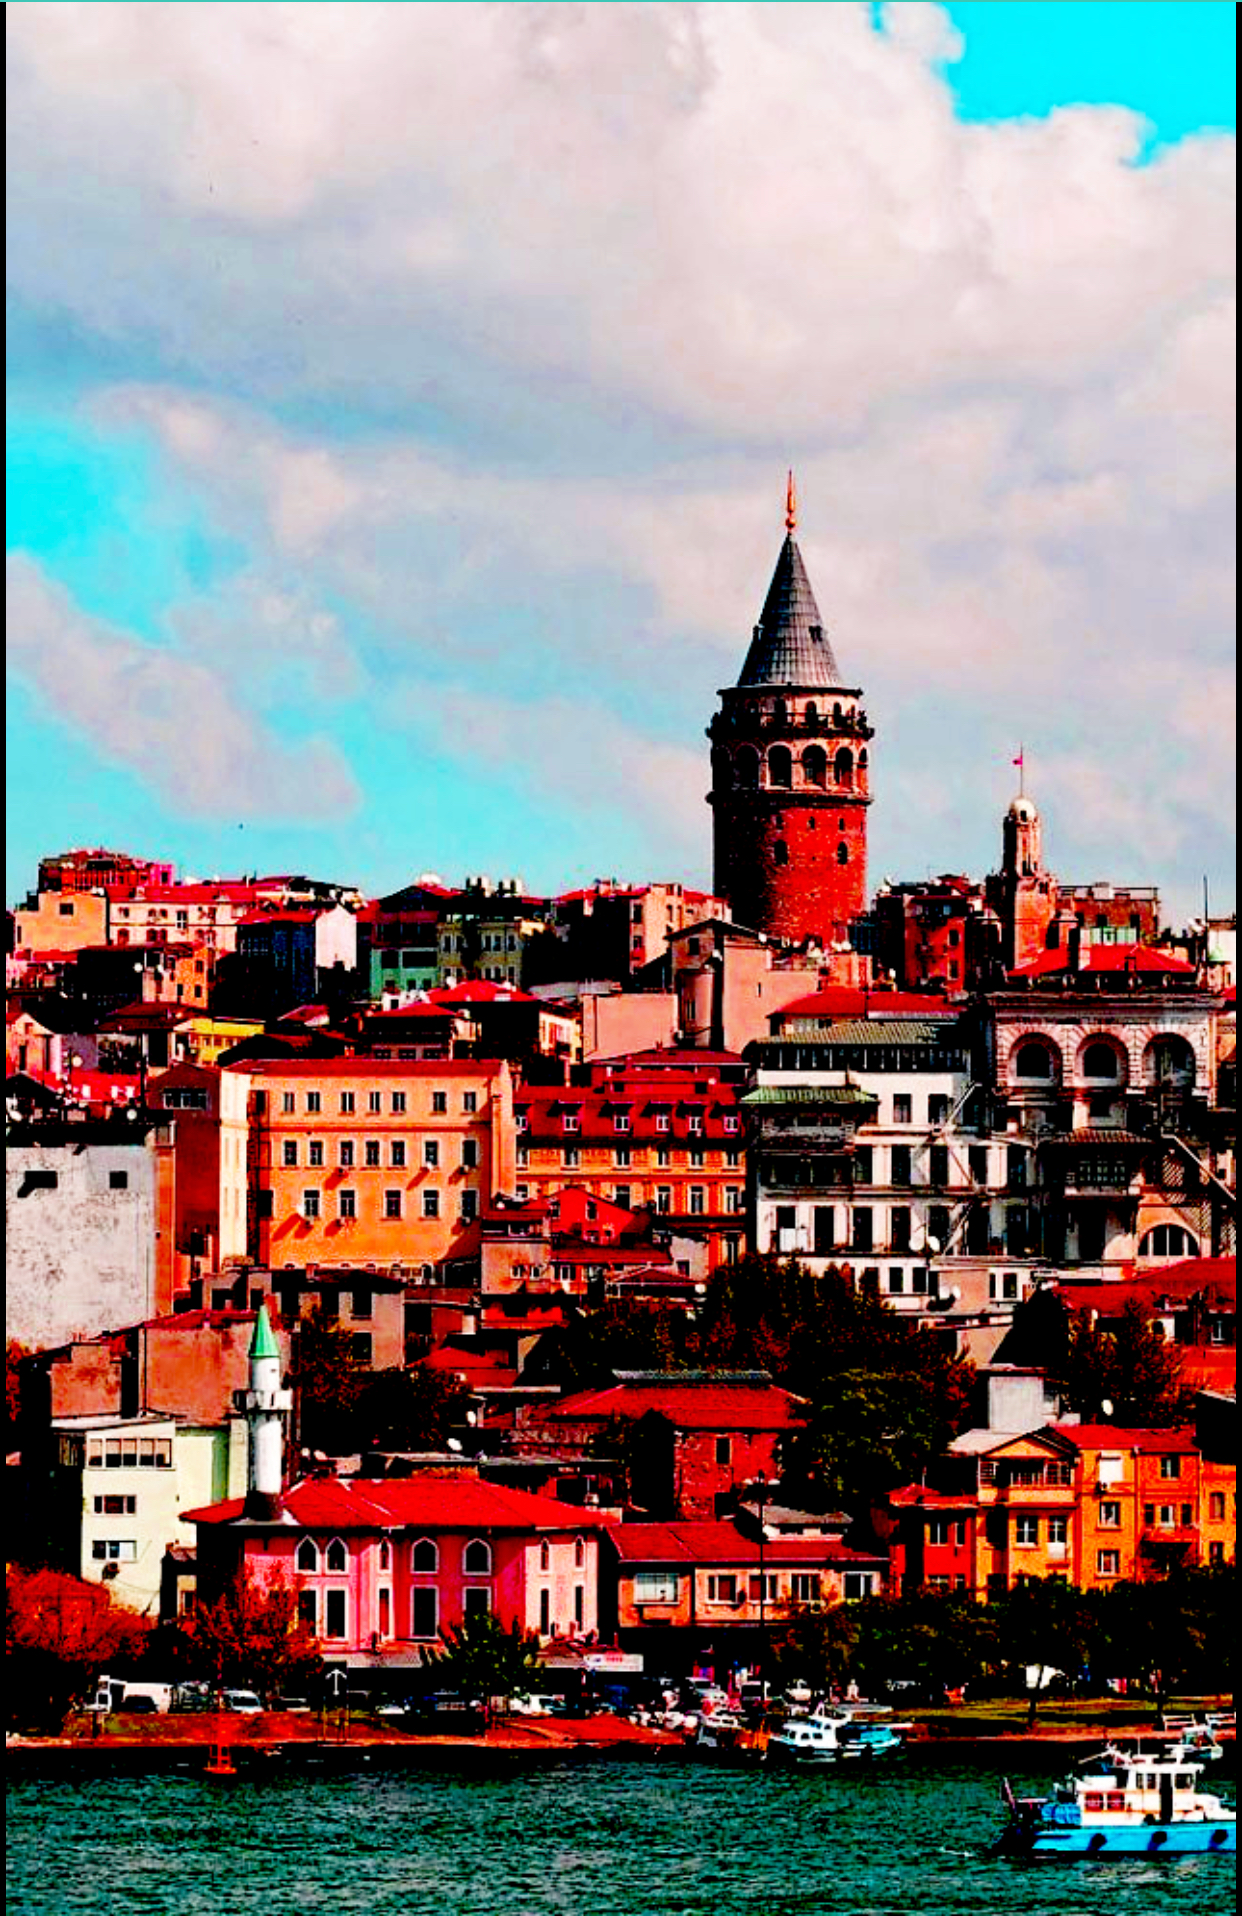
仍然选取如下原图做测试

选择如下 LUT 图
 lookup.png
最终滤镜效果