本文首发于公众号“AntDream”,欢迎微信搜索“AntDream”或扫描文章底部二维码关注,和我一起每天进步一点点
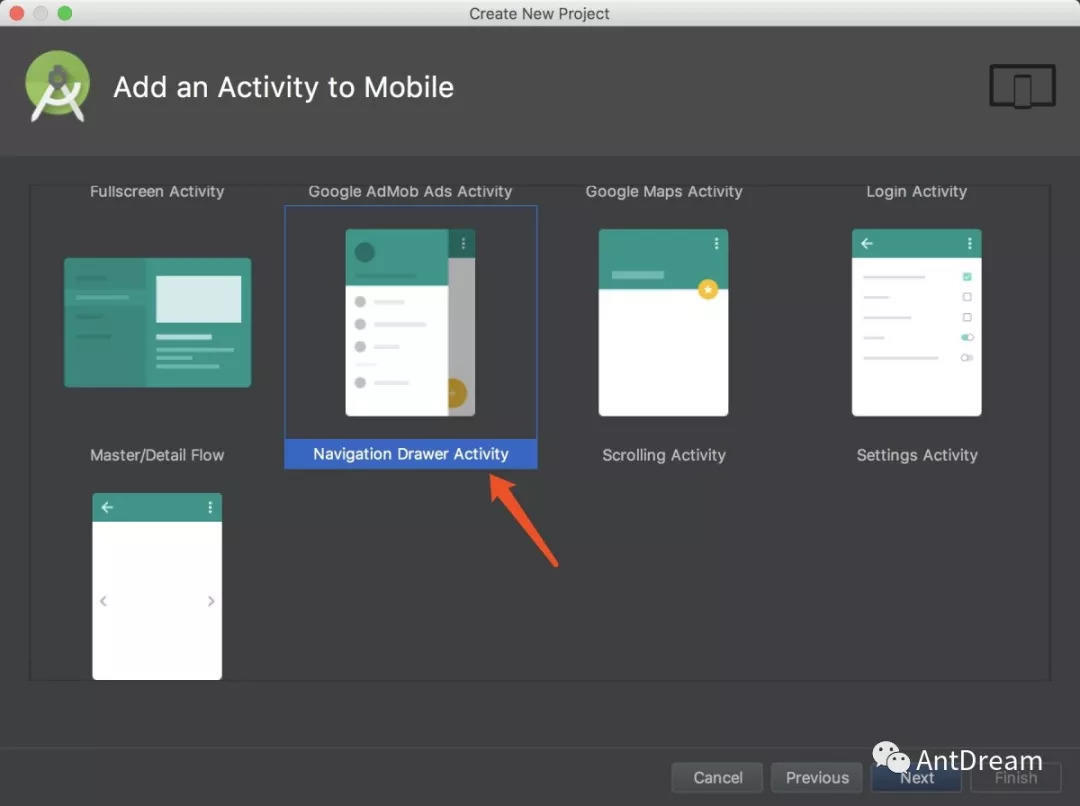
抽屉布局的样式很多应用中都有应用,比如滴滴。其实实现也比较简单,就是用官方的DrawerLayout和NavigationView。具体的代码实现如果不熟悉了的话可以用Android Studio新建一个项目,在添加Activity时选择NavigationDrawerActivity,就可以查看具体的实现代码了。
这次我们主要讲怎么自定义抽屉的布局,因为实际开发过程中我们很可能需要开发五花八门的样式。
其实实现的方式也很简单,就是用自定义的布局替换掉NavigationView。
常规的抽屉布局
我们按照文章开头的方式新建项目以后就可以看到MainActivity的布局大概是这样的:
//最外层是DrawerLayout
<android.support.v4.widget.DrawerLayout xmlns:android="http://schemas.android.com/apk/res/android"
    xmlns:app="http://schemas.android.com/apk/res-auto"
    xmlns:tools="http://schemas.android.com/tools"
    android:id="@+id/drawer_layout"
    android:layout_width="match_parent"
    android:layout_height="match_parent"
    android:fitsSystemWindows="true"
    tools:openDrawer="start">

    //这里是主页面
    <include
        layout="@layout/app_bar_main"
        android:layout_width="match_parent"
        android:layout_height="match_parent" />

    //这里是弹出的抽屉布局
    <android.support.design.widget.NavigationView
        android:id="@+id/nav_view"
        android:layout_width="wrap_content"
        android:layout_height="match_parent"
        android:layout_gravity="start"
        android:fitsSystemWindows="true"
        app:headerLayout="@layout/nav_header_main"
        app:menu="@menu/activity_main_drawer" />

</android.support.v4.widget.DrawerLayout>
可以看到结构很简单,就是最外层DrawerLayout,然后里面包了一个主页面的布局和抽屉布局。
原始的抽屉布局包括2部分:
- 头部布局:对应NavigationView的headerLayout属性
- 菜单:对应NavigationView的menu属性
自定义抽屉布局
好的,有些小伙伴可能已经猜到了。没错,要想自定义抽屉布局,我们需要把NavigationView给替换掉。
//最外层是DrawerLayout
<android.support.v4.widget.DrawerLayout xmlns:android="http://schemas.android.com/apk/res/android"
    xmlns:app="http://schemas.android.com/apk/res-auto"
    xmlns:tools="http://schemas.android.com/tools"
    android:id="@+id/drawer_layout"
    android:layout_width="match_parent"
    android:layout_height="match_parent"
    android:fitsSystemWindows="true"
    tools:openDrawer="start">

    //这里是主页面
    <include
        layout="@layout/app_bar_main"
        android:layout_width="match_parent"
        android:layout_height="match_parent" />

    //这里是弹出的抽屉布局
    <LinearLayout
        android:layout_width="160dp"
        android:layout_height="match_parent"
        android:orientation="vertical"
        android:layout_gravity="start"
        android:background="#fff"
        android:fitsSystemWindows="true"
        android:paddingTop="30dp">

        <ListView
            android:id="@+id/lvListViewRight"
            android:layout_width="160dp"
            android:layout_height="match_parent"
            android:dividerHeight="0dp"
            android:divider="@null"
            android:background="@null"/>

    </LinearLayout>

</android.support.v4.widget.DrawerLayout>
其中需要注意的是抽屉的方向,这个由layout_gravity属性来确定,start表示从左侧弹出,设置为end就是右侧的抽屉。
当然,这需要在代码中DrawerLayout相关方法的配合。
- 获取DrawerLayout
mDrawer = (DrawerLayout) findViewById(R.id.drawer_layout);
- 打开左侧的抽屉
if (!mDrawer.isDrawerOpen(GravityCompat.START)) {
    mDrawer.openDrawer(GravityCompat.START);
}
- 打开右侧的抽屉
if (!mDrawer.isDrawerOpen(GravityCompat.END)) {
    mDrawer.openDrawer(GravityCompat.END);
}
左右双抽屉
不知道小伙伴们有没有思路。
(1)思路一:2个抽屉,那我就上2个NavigationView呗!
//最外层是DrawerLayout
<android.support.v4.widget.DrawerLayout xmlns:android="http://schemas.android.com/apk/res/android"
    xmlns:app="http://schemas.android.com/apk/res-auto"
    xmlns:tools="http://schemas.android.com/tools"
    android:id="@+id/drawer_layout"
    android:layout_width="match_parent"
    android:layout_height="match_parent"
    android:fitsSystemWindows="true"
    tools:openDrawer="start">

    //这里是主页面
    <include
        layout="@layout/app_bar_main"
        android:layout_width="match_parent"
        android:layout_height="match_parent" />

    //这里是弹出的抽屉布局,左侧
    <android.support.design.widget.NavigationView
        android:id="@+id/nav_view_left"
        android:layout_width="wrap_content"
        android:layout_height="match_parent"
        android:layout_gravity="start"
        android:fitsSystemWindows="true"
        app:headerLayout="@layout/nav_header_main"
        app:menu="@menu/activity_main_drawer" />

    //这里是弹出的抽屉布局,右侧
    <android.support.design.widget.NavigationView
        android:id="@+id/nav_view_right"
        android:layout_width="wrap_content"
        android:layout_height="match_parent"
        android:layout_gravity="end"
        android:fitsSystemWindows="true"
        app:headerLayout="@layout/nav_header_main"
        app:menu="@menu/activity_main_drawer" />

</android.support.v4.widget.DrawerLayout>
只需要分别设置layout_gravity为start和end就行了,对应的DrawerLayout代码就不贴了。
(2)思路二:上面的灵活性不太够,满足不了需求,咋整?那就通通自定义!
//最外层是DrawerLayout
<android.support.v4.widget.DrawerLayout xmlns:android="http://schemas.android.com/apk/res/android"
    xmlns:app="http://schemas.android.com/apk/res-auto"
    xmlns:tools="http://schemas.android.com/tools"
    android:id="@+id/drawer_layout"
    android:layout_width="match_parent"
    android:layout_height="match_parent"
    android:fitsSystemWindows="true"
    tools:openDrawer="start">

    //这里是主页面
    <include
        layout="@layout/app_bar_main"
        android:layout_width="match_parent"
        android:layout_height="match_parent" />

    //这里是弹出的抽屉布局,左侧
    <LinearLayout
        android:layout_width="160dp"
        android:layout_height="match_parent"
        android:orientation="vertical"
        android:layout_gravity="start"
        android:background="#fff"
        android:fitsSystemWindows="true"
        android:paddingTop="30dp">

        <ListView
            android:id="@+id/lvListViewLeft"
            android:layout_width="160dp"
            android:layout_height="match_parent"
            android:dividerHeight="0dp"
            android:divider="@null"
            android:background="@null"/>

    </LinearLayout>

    //这里是弹出的抽屉布局,右侧
    <LinearLayout
        android:layout_width="160dp"
        android:layout_height="match_parent"
        android:orientation="vertical"
        android:layout_gravity="end"
        android:background="#fff"
        android:fitsSystemWindows="true"
        android:paddingTop="30dp">

        <ListView
            android:id="@+id/lvListViewRight"
            android:layout_width="160dp"
            android:layout_height="match_parent"
            android:dividerHeight="0dp"
            android:divider="@null"
            android:background="@null"/>

    </LinearLayout>

</android.support.v4.widget.DrawerLayout>
同样的,用LinearLayout的layout_gravity控制左右抽屉。
其他
不知道小伙伴们注意到一个细节没有,上面的布局文件中有一个属性无论是NavigationView还是自定义布局都用到了:
android:fitsSystemWindows="true"
这个是干啥的呢?
呃...你去掉试试看效果就知道了,哈哈!
欢迎关注我的微信公众号,和我一起每天进步一点点!