

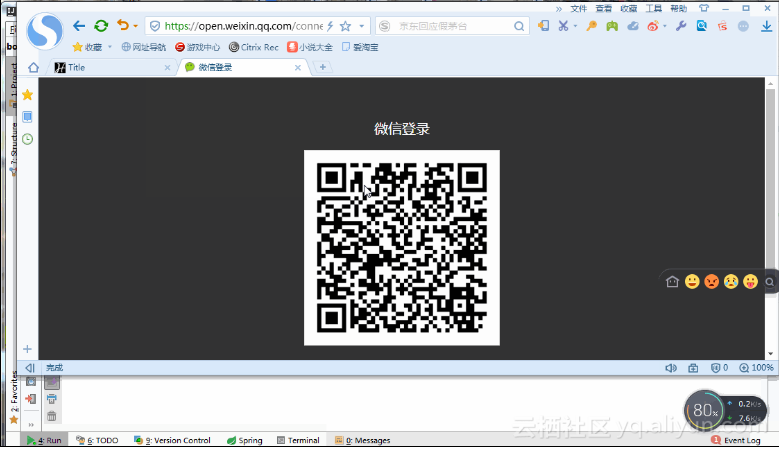
演示效果
准备工作
1. 需要一个微信开放平台账号,并创建一个网站应用
点击查看该应用,将appid appSecret获取下来,我们后面会用到。
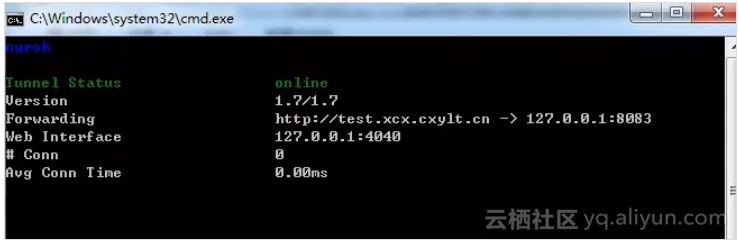
2. 本地启动ngrok,用来配合调试扫码登录授权回调
启动如下:
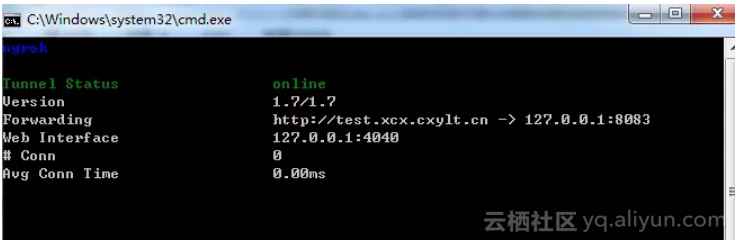
3. 将本地内网穿透的地址配置进网站应用里面的开发信息-授权回调域

本例所用到的技术
● Spring-Boot● Thymeleaf
● Httpclient
● Json
本例学习要达到的目标
● 生成全屏网页二维码以及定制化二维码,后者可以进行二维码大小调整,页面布局自行调整,前者则是固定的页面和二维码● 分析接入流程和实现功能
● 列出来的技术
实战
创建spring-boot项目 ,引入相关jar依赖
<dependency>
<groupId>org.springframework.boot</groupId>
<artifactId>spring-boot-starter-thymeleaf</artifactId>
</dependency>
<dependency>
<groupId>org.springframework.boot</groupId>
<artifactId>spring-boot-starter-web</artifactId>
</dependency>
<dependency>
<groupId>org.apache.httpcomponents</groupId>
<artifactId>httpclient</artifactId>
<version>4.1</version>
</dependency>
<dependency>
<groupId>org.json</groupId>
<artifactId>json</artifactId>
<version>20160810</version>
</dependency>
配置文件
spring.thymeleaf.prefix: classpath:/templates/
spring.thymeleaf.suffix: .html
#微信开放平台创建的网站应用的appsecret
appsecret=
#微信开放平台创建的网站应用的appid
appid=
scope=snsapi_login
#微信开放平台创建的网站 设置的授权回调域
domain=http://test.xcx.cxylt.cn/
server.port=8083
授权流程说明
微信OAuth2.0授权登录让微信用户使用微信身份安全登录第三方应用或网站,在微信用户授权登录已接入微信OAuth2.0的第三方应用后,第三方可以获取到用户的接口调用凭证(access_token),通过access_token可以进行微信开放平台授权关系接口调用,从而可实现获取微信用户基本开放信息和帮助用户实现基础开放功能等。
微信OAuth2.0授权登录目前支持authorization_code模式,适用于拥有server端的应用授权。该模式整体流程为:
1.第三方发起微信授权登录请求,微信用户允许授权第三方应用后,微信会拉起应用或重定向到第三方网站,并且带上授权临时票据code参数;2.通过code参数加上AppID和AppSecret等,通过API换取access_token;
3.通过access_token进行接口调用,获取用户基本数据资源或帮助用户实现基本操作
简单来讲就是用户在页面生成二维码扫码后进入回调地址,回调地址可以获取code,通过code可以获取accessToken,通过accessToken则可以获取用户的全部信息
第一个二维码页面
后端代码,生成授权地址,让用户点击扫码登录
@RequestMapping("/")
public String index(Model model) throws UnsupportedEncodingException {
String oauthUrl = "https://open.weixin.qq.com/connect/qrconnect?appid=APPID&redirect_uri=REDIRECT_URI&response_type=code&scope=SCOPE&state=STATE#wechat_redirect";
String redirect_uri = URLEncoder.encode(callBack, "utf-8"); ;
oauthUrl = oauthUrl.replace("APPID",appid).replace("REDIRECT_URI",redirect_uri).replace("SCOPE",scope);
model.addAttribute("name","liuzp");
model.addAttribute("oauthUrl",oauthUrl);
return "index";
}
前端代码
<!DOCTYPE html>
<html lang="en" xmlns:th="http://www.thymeleaf.org">
<head>
<meta charset="UTF-8">
<title>Title</title>
</head>
<body>
<h1>hello! <label th:text="${name}"></label></h1>
<a th:href="${oauthUrl}">点击扫码登录</a>
</body>
</html>
编写授权后回调方法
@RequestMapping("/callBack")
public String callBack(String code,String state,Model model) throws Exception{
logger.info("进入授权回调,code:{},state:{}",code,state);
//1.通过code获取access_token
String url = "https://api.weixin.qq.com/sns/oauth2/access_token?appid=APPID&secret=SECRET&code=CODE&grant_type=authorization_code";
url = url.replace("APPID",appid).replace("SECRET",appsecret).replace("CODE",code);
String tokenInfoStr = HttpRequestUtils.httpGet(url,null,null);
JSONObject tokenInfoObject = new JSONObject(tokenInfoStr);
logger.info("tokenInfoObject:{}",tokenInfoObject);
//2.通过access_token和openid获取用户信息
String userInfoUrl = "https://api.weixin.qq.com/sns/userinfo?access_token=ACCESS_TOKEN&openid=OPENID";
userInfoUrl = userInfoUrl.replace("ACCESS_TOKEN",tokenInfoObject.getString("access_token")).replace("OPENID",tokenInfoObject.getString("openid"));
String userInfoStr = HttpRequestUtils.httpGet(userInfoUrl,null,null);
logger.info("userInfoObject:{}",userInfoStr);
model.addAttribute("tokenInfoObject",tokenInfoObject);
model.addAttribute("userInfoObject",userInfoStr);
return "result";
}
回调后跳转页面,这个页面记录授权获取的信息
<!DOCTYPE html>
<html lang="en" xmlns:th="http://www.thymeleaf.org">
<head>
<meta charset="UTF-8">
<title>授权结果页</title>
</head>
<script src="http://res.wx.qq.com/connect/zh_CN/htmledition/js/wxLogin.js"></script>
<body>
<h2>你好,授权成功!</h2><br>
<h3>通过code换取access_token 结果:</h3>
<p th:text="${tokenInfoObject}"></p>
<h3>通过access_token获取用户信息 结果:</h3>
<p th:text="${userInfoObject}"></p>
</body>
</html>
自定义二维码页面
后端路由
@RequestMapping("/1")
public String index1(Model model) throws UnsupportedEncodingException {
String redirect_uri = URLEncoder.encode(callBack, "utf-8"); ;
model.addAttribute("name","liuzp");
model.addAttribute("appid",appid);
model.addAttribute("scope",scope);
model.addAttribute("redirect_uri",redirect_uri);
return "index1";
}
前台页面
<!DOCTYPE html>
<html lang="en" xmlns:th="http://www.thymeleaf.org">
<head>
<meta charset="UTF-8">
<title>内嵌(自定义二维码)</title>
</head>
<script src="http://res.wx.qq.com/connect/zh_CN/htmledition/js/wxLogin.js"></script>
<body>
<h1>hello! <label th:text="${name}"></label></h1>
<div id="login_container"></div>
<script th:inline="javascript">
var obj = new WxLogin({
self_redirect:true,
id:"login_container",
appid: [[${appid}]],
scope: [[${scope}]],
redirect_uri: [[${redirect_uri}]],
state: "",
style: "",
href: ""
});
</script>
</body>
</html>
两个页面结果页和回调地址都是一致的,这里只是提供两种做法。
原文发布时间为:2018-09-11
本文作者:Java葵花宝典
