

在开发时,我们有时候会遇到需要定时对UIView进行重绘的需求,进而让view产生不同的动画效果。
本文项目
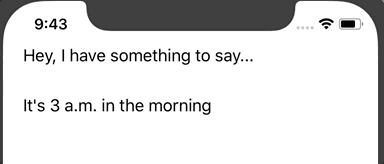
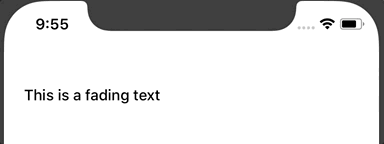
效果图


初探 CADisplayLink
定时对View进行定时重绘可能会第一时间想到使用NSTimer,但是这样的动画实现起来是不流畅的,因为在timer所处的runloop中要处理多种不同的输入,导致timer的最小周期是在50到100毫秒之间,一秒钟之内最多只能跑20次左右。
但如果我们希望在屏幕上看到流畅的动画,我们就要维持60帧的刷新频率,也就意味着每一帧的间隔要在0.016秒左右,NSTimer是无法实现的。所以要用到Core Animation的另一个timer,CADisplayLink。
在CADisplayLink的头文件中,我们可以看到它的使用方法跟NSTimer是十分类似的,其同样也是需要注册到RunLoop中,但不同于NSTimer的是,它在屏幕需要进行重绘时就会让RunLoop调用CADisplayLink指定的selector,用于准备下一帧显示的数据。而NSTimer是需要在上一次RunLoop整个完成之后才会调用制定的selector,所以在调用频率与上比NSTimer要频繁得多。
另外和NSTimer不同的是,NSTimer可以指定timeInterval,对应的是selector调用的间隔,但如果NSTimer触发的时间到了,而RunLoop处于阻塞状态,其触发时间就会推迟到下一个RunLoop。而CADisplayLink的timer间隔是不能调整的,固定就是一秒钟发生60次,不过可以通过设置其frameInterval属性,设置调用一次selector之间的间隔帧数。另外需要注意的是如果selector执行的代码超过了frameInterval的持续时间,那么CADisplayLink就会直接忽略这一帧,在下一次的更新时候再接着运行。
配置 RunLoop
在创建CADisplayLink的时候,我们需要指定一个RunLoop和RunLoopMode,通常RunLoop我们都是选择使用主线程的RunLoop,因为所有UI更新的操作都必须放到主线程来完成,而在模式的选择就可以用NSDefaultRunLoopMode,但是不能保证动画平滑的运行,所以就可以用NSRunLoopCommonModes来替代。但是要小心,因为如果动画在一个高帧率情况下运行,会导致一些别的类似于定时器的任务或者类似于滑动的其他iOS动画会暂停,直到动画结束。
private func setup() {
	_displayLink = CADisplayLink(target: self, selector: #selector(update))
	_displayLink?.isPaused = true
	_displayLink?.add(to: RunLoop.main, forMode: .commonModes)
}
实现不同的字符变换动画
在成功建立CADisplayLink计时器后,就可以着手对字符串进行各类动画操作了。在这里我们会使用NSAttributedString来实现效果
在setupAnimatedText(from labelText: String?)这个方法中,我们需要使用到两个数组,一个是durationArray,一个是delayArray,通过配置这两个数组中的数值,我们可以实现对字符串中各个字符的出现时间和出现时长的控制。
打字机效果的配置
- 每个字符出现所需时间相同
- 下一个字符等待上一个字符出现完成后再出现
- 通过修改
NSAttributedStringKey.baselineOffset调整字符位置
case .typewriter:
	attributedString.addAttribute(.baselineOffset, value: -label.font.lineHeight, range: NSRange(location: 0, length: attributedString.length))
	let displayInterval = duration / TimeInterval(attributedString.length)
	for index in 0..<attributedString.length {
		durationArray.append(displayInterval)
		delayArray.append(TimeInterval(index) * displayInterval)
	}
闪烁效果的配置
- 每个字符出现所需时间随机
- 确保所有字符能够在
duration内均完成出现 - 修改
NSAttributedStringKey.foregroundColor的透明度来实现字符的出现效果
case .shine:
	attributedString.addAttribute(.foregroundColor, value: label.textColor.withAlphaComponent(0), range: NSRange(location: 0, length: attributedString.length))
	for index in 0..<attributedString.length {
		delayArray.append(TimeInterval(arc4random_uniform(UInt32(duration) / 2 * 100) / 100))
		let remain = duration - Double(delayArray[index])
		durationArray.append(TimeInterval(arc4random_uniform(UInt32(remain) * 100) / 100))
	}
渐现效果的配置
- 每个字符出现所需时间渐减
- 修改
NSAttributedStringKey.foregroundColor的透明度来实现字符的出现效果
case .fade:
	attributedString.addAttribute(.foregroundColor, value: label.textColor.withAlphaComponent(0), range: NSRange(location: 0, length: attributedString.length))
	let displayInterval = duration / TimeInterval(attributedString.length)
	for index in 0..<attributedString.length  {
		delayArray.append(TimeInterval(index) * displayInterval)
		durationArray.append(duration - delayArray[index])
	}
完善每一帧的字符串更新效果
接下来就需要完善刚才在CADisplayLink中配置的update方法了,在这个方法中我们会根据我们刚才配置的两个数组中的相关数据对字符串进行变换。
核心代码
- 通过开始时间与当前时间获取动画进度
- 根据字符位置对应
duationArray与delayArray中的数据 - 根据
durationArray与delayArray中的数据计算当前字符的显示进度
var percent = (CGFloat(currentTime - beginTime) - CGFloat(delayArray[index])) / CGFloat(durationArray[index])
percent = fmax(0.0, percent)
percent = fmin(1.0, percent)
attributedString.addAttribute(.baselineOffset, value: (percent - 1) * label!.font.lineHeight, range: range)
随后便可以将处理完的NSAttributedString返回给label进行更新
番外:利用正弦函数实现波纹进度
波纹路径
首先介绍一下正弦函数:y = A * sin(ax + b)
- 在 x 轴方向平移 b 个单位(左加右减)
- 横坐标伸长(0 < a < 1)或者缩短(a > 1) 1/a 倍
- 纵坐标伸长(A > 1)或者缩短(0 < A < 1)A 倍
在简单了解了这些知识后,我们回到wavePath()方法中,在这个方法我们使用正弦函数来绘制一段UIBezierPath:
let originY = (label.bounds.size.height + label.font.lineHeight) / 2
let path = UIBezierPath()
path.move(to: CGPoint(x: 0, y: _waveHeight!))
var yPosition = 0.0
for xPosition in 0..<Int(label.bounds.size.width) {
	yPosition = _zoom! * sin(Double(xPosition) / 180.0 * Double.pi - 4 * _translate! / Double.pi) * 5 + _waveHeight!
	path.addLine(to: CGPoint(x: Double(xPosition), y: yPosition))
}
path.addLine(to: CGPoint(x: label.bounds.size.width, y: originY))
path.addLine(to: CGPoint(x: 0, y: originY))
path.addLine(to: CGPoint(x: 0, y: _waveHeight!))
path.close()
波纹高度与动画的更新
- 随着进度高度不断升高
- 随着进度波纹不断波动
在CADisplayLink注册的update的方法中,我们对承载了波纹路径的Layer进行更新
_waveHeight! -= duration / Double(label!.font.lineHeight)
_translate! += 0.1
if !_reverse {
	_zoom! += 0.02
	if _zoom! >= 1.2 {
		_reverse = true
	}
} else {
	_zoom! -= 0.02
	if _zoom! <= 1.0 {
		_reverse = false
	}
}
shapeLayer.path = wavePath()
结语
以上就是我对CADisplayLink的一些运用,其实它的使用方法还有很多,可以利用它实现更多更复杂而精美的动画,同时希望各位如果有更好的改进也能与我分享。
如果你喜欢这个项目,欢迎到GitHub上给我一个star。
