

前言
由于公司业务的需要,需要实现热修复功能,由于是微信官方的 Android 热补丁解决方案,因而选择它。下面简单看下各大方案的对比:
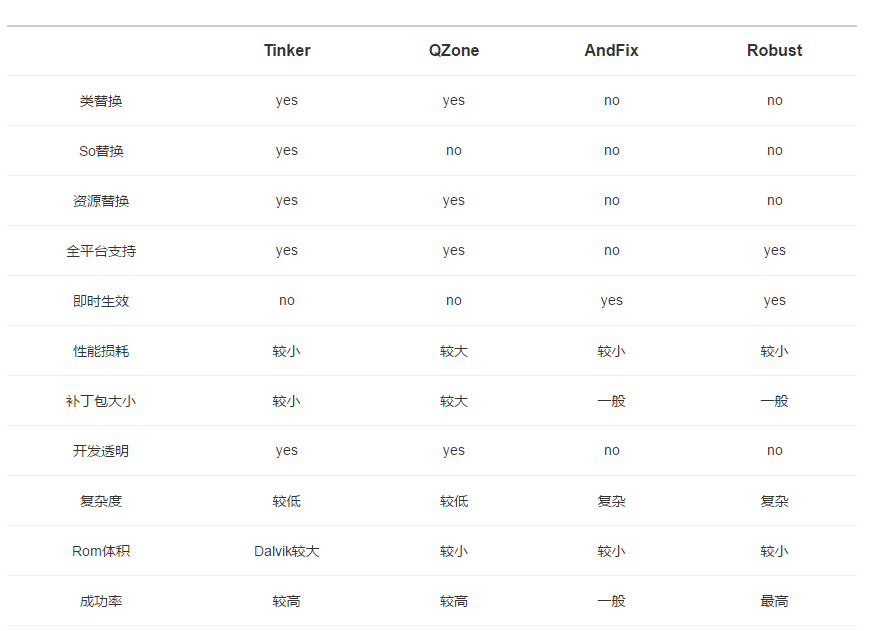
数据来自Tinker官网。可以看出Tinker是一种综合优势较为明显的方案。
集成
首先在你项目的根目录下的build.gradle,加入如下依赖:
dependencies {
    classpath 'com.android.tools.build:gradle:3.0.1'
    classpath "com.tinkerpatch.sdk:tinkerpatch-gradle-plugin:1.2.5"


    // NOTE: Do not place your application dependencies here; they belong
    // in the individual module build.gradle files
}
在到app下面的build.gradle如下:
apply plugin: 'com.android.application'

android {
    compileSdkVersion 26

    signingConfigs {
        debug {
            storeFile rootProject.file("/debug.keystore")
        }
    }
    defaultConfig {
        applicationId "com.dangbei.hotpatch"
        minSdkVersion 21
        targetSdkVersion 26
        versionCode 1
        versionName "1.0.0"
    }
    buildTypes {
        release {
            minifyEnabled true
            shrinkResources true
            signingConfig signingConfigs.debug

            proguardFiles 'proguardRules.pro', getDefaultProguardFile('proguard-android.txt')
        }
    }
}

dependencies {
    implementation fileTree(dir: 'libs', include: ['*.jar'])
    implementation 'com.android.support:leanback-v17:26.1.0'
    implementation 'com.android.support:appcompat-v7:26.1.0'
    implementation 'com.github.bumptech.glide:glide:3.8.0'
    implementation "com.android.support:multidex:1.0.2"
    compile("com.tinkerpatch.sdk:tinkerpatch-android-sdk:1.2.5")

}
apply from: 'tinkerpatch.gradle'
再来看下tinkerpatch.gradle:
apply plugin: 'tinkerpatch-support'

/**
 */
def bakPath = file("${buildDir}/bakApk/")
def baseInfo = "app-1.0.0-0329-20-02-09"
def variantName = "release"

/**
 * 对于插件各参数的详细解析请参考
 * http://tinkerpatch.com/Docs/SDK
 */
tinkerpatchSupport {
    /** 可以在debug的时候关闭 tinkerPatch **/
    /** 当disable tinker的时候需要添加multiDexKeepProguard和proguardFiles,
        这些配置文件本身由tinkerPatch的插件自动添加,当你disable后需要手动添加
        你可以copy本示例中的proguardRules.pro和tinkerMultidexKeep.pro,
        需要你手动修改'tinker.sample.android.app'本示例的包名为你自己的包名, com.xxx前缀的包名不用修改
     **/
    tinkerEnable = true
    reflectApplication = true
    /**
     * 是否开启加固模式,只能在APK将要进行加固时使用,否则会patch失败。
     * 如果只在某个渠道使用了加固,可使用多flavors配置
     **/
    protectedApp = false
    /**
     * 实验功能
     * 补丁是否支持新增 Activity (新增Activity的exported属性必须为false)
     **/
    supportComponent = true

    autoBackupApkPath = "${bakPath}"

    appKey = "5fb893e112463fb3"

    /** 注意: 若发布新的全量包, appVersion一定要更新 **/
    appVersion = "1.0.0"

    def pathPrefix = "${bakPath}/${baseInfo}/${variantName}/"
    def name = "${project.name}-${variantName}"

    baseApkFile = "${pathPrefix}/${name}.apk"
    baseProguardMappingFile = "${pathPrefix}/${name}-mapping.txt"
    baseResourceRFile = "${pathPrefix}/${name}-R.txt"

    /**
     *  若有编译多flavors需求, 可以参照: https://github.com/TinkerPatch/tinkerpatch-flavors-sample
     *  注意: 除非你不同的flavor代码是不一样的,不然建议采用zip comment或者文件方式生成渠道信息(相关工具:walle 或者 packer-ng)
     **/
}

/**
 * 用于用户在代码中判断tinkerPatch是否被使能
 */
android {
    defaultConfig {
        buildConfigField "boolean", "TINKER_ENABLE", "${tinkerpatchSupport.tinkerEnable}"
    }
}

/**
 * 一般来说,我们无需对下面的参数做任何的修改
 * 对于各参数的详细介绍请参考:
 * https://github.com/Tencent/tinker/wiki/Tinker-%E6%8E%A5%E5%85%A5%E6%8C%87%E5%8D%97
 */
tinkerPatch {
    ignoreWarning = false
    useSign = true
    dex {
        dexMode = "jar"
        pattern = ["classes*.dex"]
        loader = []
    }
    lib {
        pattern = ["lib/*/*.so"]
    }

    res {
        pattern = ["res/*", "r/*", "assets/*", "resources.arsc", "AndroidManifest.xml"]
        ignoreChange = []
        largeModSize = 100
    }

    packageConfig {
    }
    sevenZip {
        zipArtifact = "com.tencent.mm:SevenZip:1.1.10"
//        path = "/usr/local/bin/7za"
    }
    buildConfig {
        keepDexApply = false
    }
}具体里面参数意思可以参考官方说明。
然后初始化 TinkerPatch SDK,官方说明中有两种方法可以选择,这里我们选择第一种,继承
Application的方式,如下:
package com.dangbei.tinkerdemo;

import android.app.Application;
import android.content.Context;
import android.support.multidex.MultiDex;

import com.tencent.tinker.loader.app.ApplicationLike;
import com.tinkerpatch.sdk.TinkerPatch;
import com.tinkerpatch.sdk.loader.TinkerPatchApplicationLike;

public class MyApplication extends Application {
    private static final String TAG = "Tinker.SampleApp";

    private ApplicationLike tinkerApplicationLike;
    public MyApplication() {

    }

    @Override
    public void attachBaseContext(Context base) {
        super.attachBaseContext(base);
        //you must install multiDex whatever tinker is installed!
        MultiDex.install(base);
    }


    /**
     * 由于在onCreate替换真正的Application,
     * 我们建议在onCreate初始化TinkerPatch,而不是attachBaseContext
     */
    @Override
    public void onCreate() {
        super.onCreate();
        initTinkerPatch();
    }

    /**
     * 我们需要确保至少对主进程跟patch进程初始化 TinkerPatch
     */
    private void initTinkerPatch() {
        // 我们可以从这里获得Tinker加载过程的信息
        if (BuildConfig.TINKER_ENABLE) {
            tinkerApplicationLike = TinkerPatchApplicationLike.getTinkerPatchApplicationLike();

            // 初始化TinkerPatch SDK
            TinkerPatch.init(tinkerApplicationLike)
                    .reflectPatchLibrary()
                    .setPatchRollbackOnScreenOff(true)
                    .setPatchRestartOnSrceenOff(true);
            TinkerPatch.with().fetchPatchUpdate(true);

        }
    }

}
到Tinker的集成就结束了。
开发调试
首先你需要到Tinker官网添加一个app,具体步骤看官方文档,这个时候会拿到一个AppKey,需要把tinkerpatch.gradle中的appKey换掉。简单说下我的MainActivity,其实就是一个text为Hello world的TextView,点击之后弹出Hello world 的Toaste.
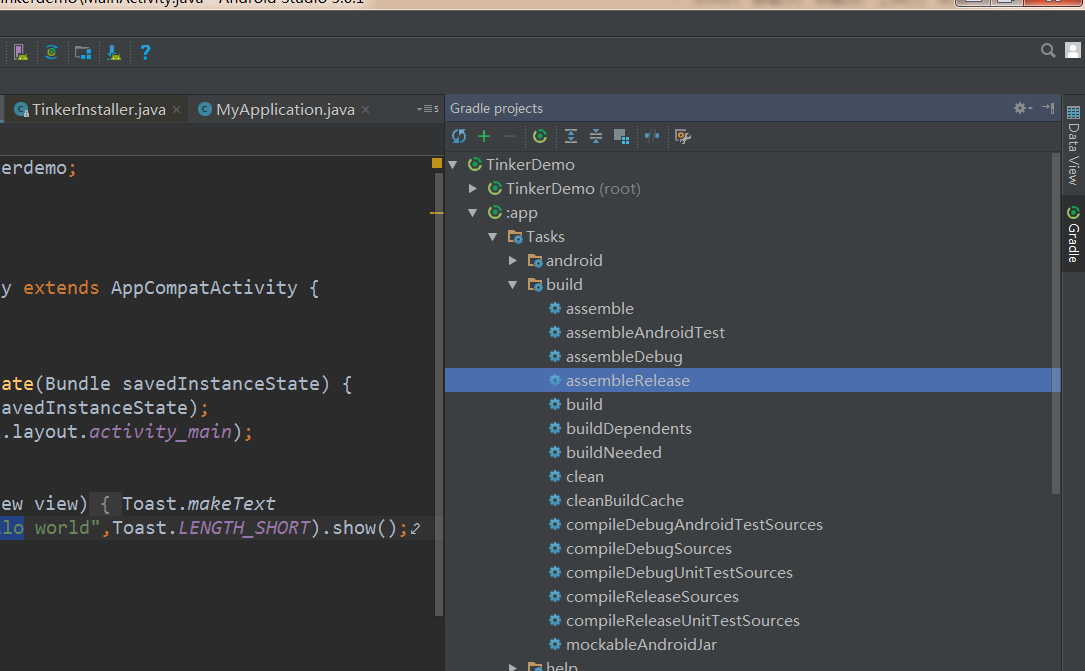
先执行assembleRelease task如图:
会在项目的bulid目录下生成底包,如图:
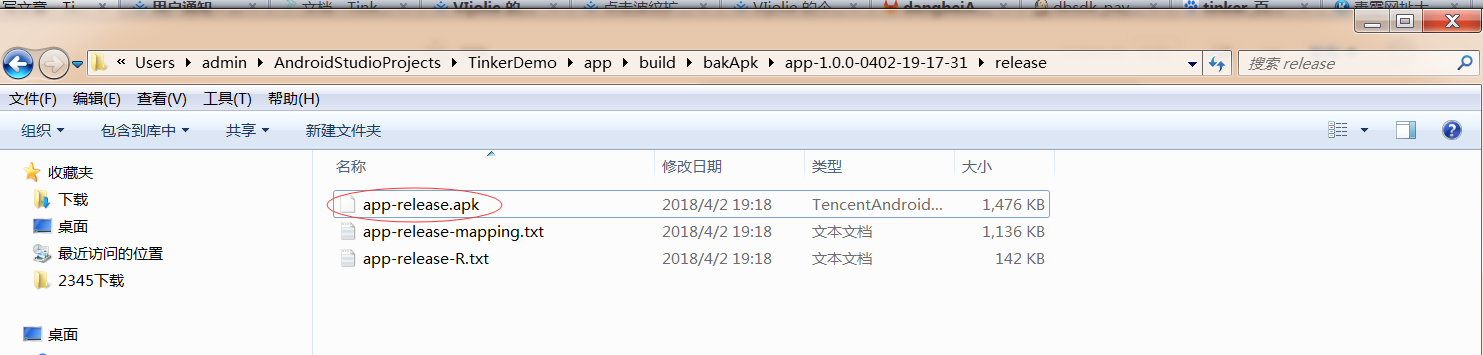
当然这些都是可以配置的在tinkerpatch.gradle中,注意的是,这三个文件要记得保存起来,因为要作为下次发布补丁的参数输入,路径要正确,建议放在一起,Tinker才能打出差异包。
然后把上图中的apk安装到手机里,接下来我们TextView的文本改成“补丁生效”,Toaste文本也改成“补丁生效”,运行如图的task
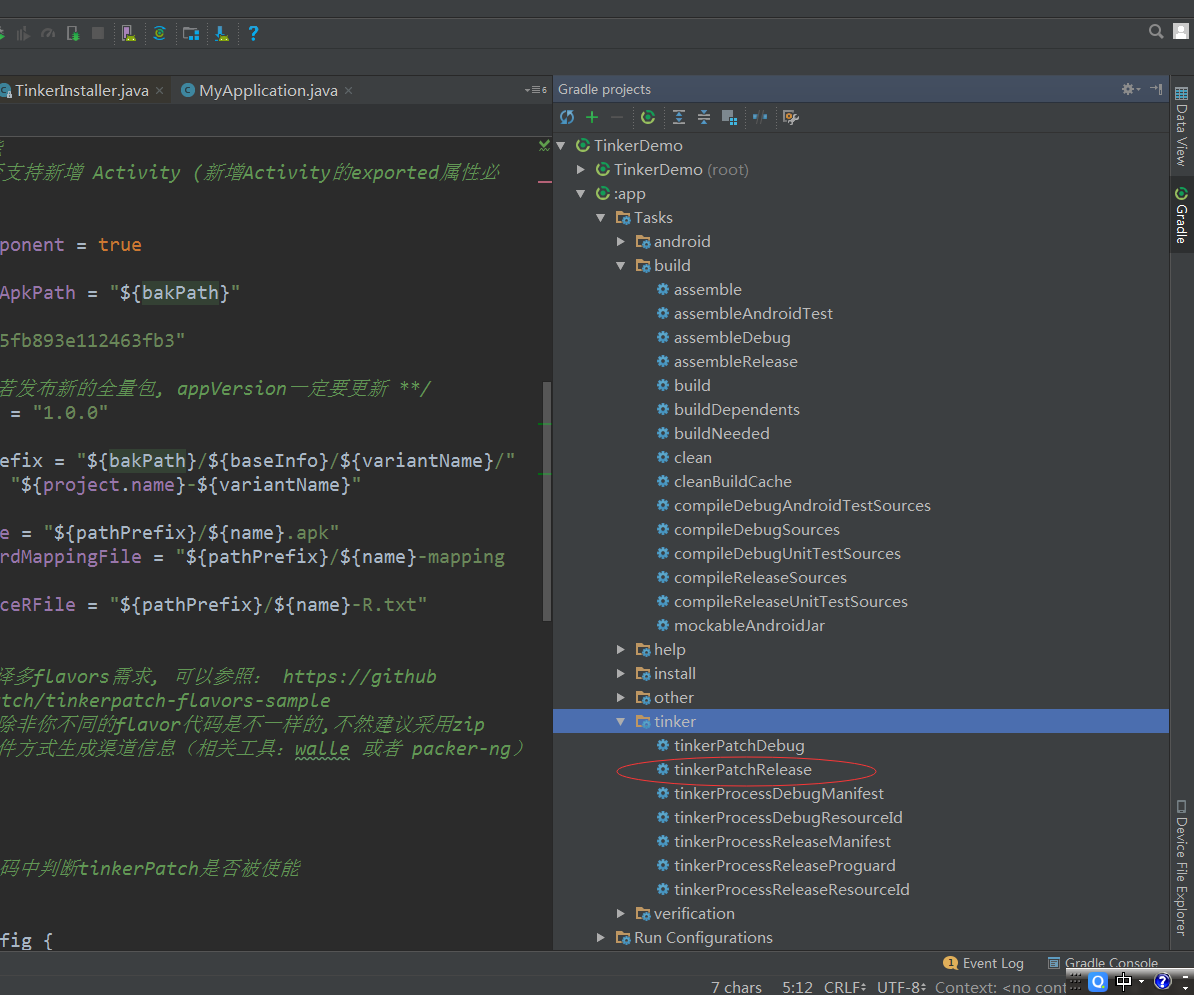
会在如图的目录下生成补丁
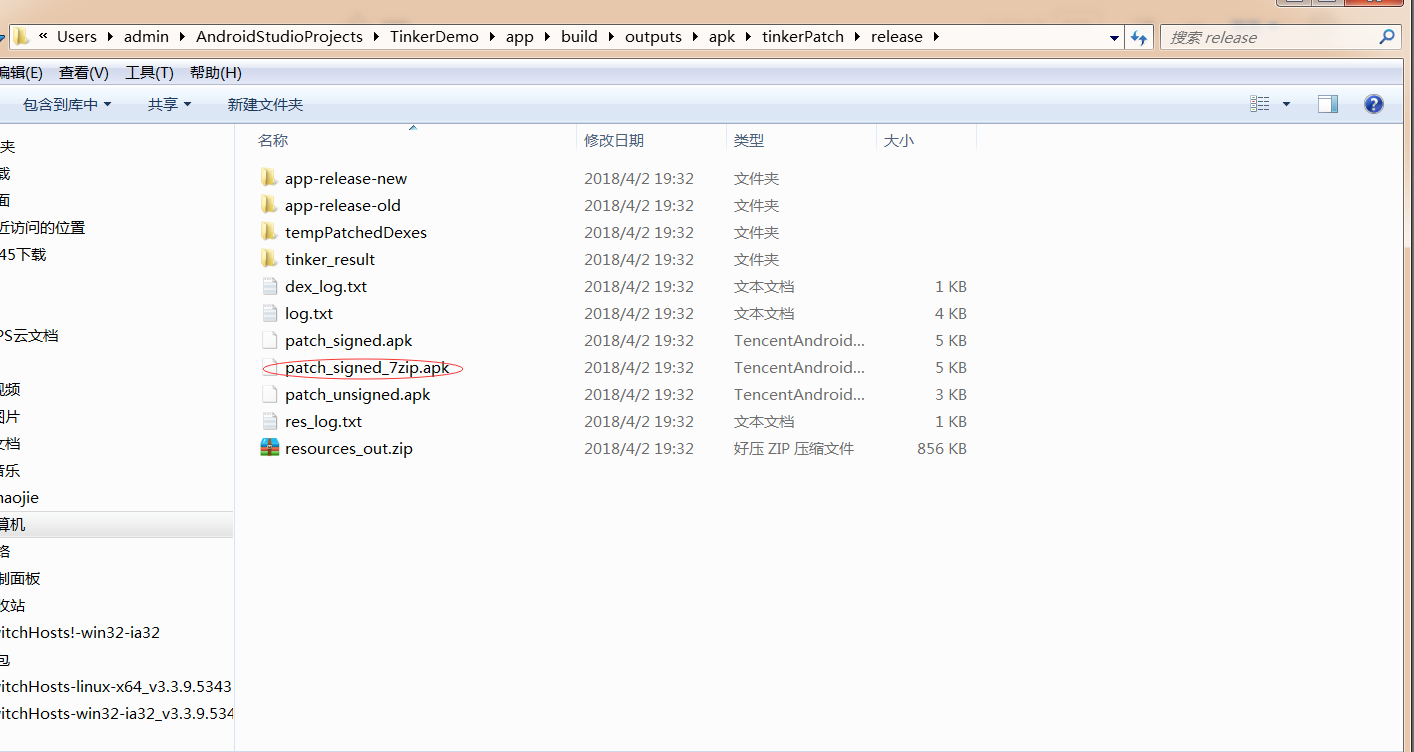
接下来参考http://www.tinkerpatch.com/Docs/start这里添加app版本,注意版本号要合gradle里的versionName一致,添加上图中红色圈里的文件,按照官方文档进行开发预览,如果是测试项目可以直接全量下发。对手机进行锁屏亮屏就可以加载到补丁包。
