

说起handler,相信大家一定都不陌生,因为太常用了,而关于handler的机制,现在网上也是一大堆,但是我还是要在这里讲一遍,毕竟知识这个东西是要自己讲出来才能表示自己已经理解了嘛!
概念
handler在我的理解中,就是处理自己发送的消息,跟个接口回调似的,这里一调用接口方法,那里的接口实现就有动静了,然后处理消息。 大白话就是:从前有个记忆里超级差的人,他叫小明,因为他记忆力很差,经常忘记要做的事情,于是他就给自己买了个本子,上面记录着他要做的事情,每有一件事情的时候就在这个本子上记录一件事情,比如做A事情的时候,他的老板又给他安排了一个任务,然后他又会记录在小本子上,继续做A事情,小明也会经常去看这个计划表上有没有事情,如果有,就会去做这件事情。
故事讲完了,然而你们并没有看懂这个handler有啥关系,……¥##%……&*(& 下一节
用法
我们使用handler的套路往往如下:
public class MainActivity extends AppCompatActivity implements View.OnClickListener {

    private Button button;

    Handler handler = new Handler(new Handler.Callback() {
        @Override
        public boolean handleMessage(Message msg) {
            if (msg.what == 1) {
                Toast.makeText(MainActivity.this, "hello handler", Toast.LENGTH_SHORT).show();
            }
            return false;
        }
    });

    @Override
    protected void onCreate(Bundle savedInstanceState) {
        super.onCreate(savedInstanceState);
        setContentView(R.layout.activity_main);
        initView();
    }

    private void initView() {
        button = (Button) findViewById(R.id.button);
        button.setOnClickListener(this);
    }

    @Override
    public void onClick(View v) {
        switch (v.getId()) {
            case R.id.button:
                handler.sendEmptyMessage(1);
                break;
        }
    }
}
基本就是在主线程中声明一个handler,并实现他的handleMessage方法,发送消息的时候通过msg.what判断一下是个啥消息,然后根据不同的消息类型进行不同的处理。
但是我们也经常把handler用于更新UI,牛逼的是在子线程中发个消息也能更新UI,不知道他是咋实现的,今天,我们的目的也是要探索这是咋实现的。
handler的声明
我们从我们能够理解的角度开始看handler,首先看看是怎么声明的吧,说白了就是看看构造方法里面干了啥。 handler给我们提供了4种构造方法:
public Handler()
public Handler(Callback callback)
public Handler(Looper looper)
public Handler(Looper looper, Callback callback)
有的构造方法里面要传一个looper或者callback,但不知道是啥啊,为了安全起见,我们还是看没有参数的最简单的无参构造方法吧。
public Handler(Callback callback) {
        this(callback, false);
    }
小套路,跳到另外的构造方法里面,我跳!(不要紧张下面的代码量,会简化)
public Handler(Callback callback, boolean async) {
        if (FIND_POTENTIAL_LEAKS) {
            final Class<? extends Handler> klass = getClass();
            if ((klass.isAnonymousClass() || klass.isMemberClass() || klass.isLocalClass()) &&
                    (klass.getModifiers() & Modifier.STATIC) == 0) {
                Log.w(TAG, "The following Handler class should be static or leaks might occur: " +
                    klass.getCanonicalName());
            }
        }

        mLooper = Looper.myLooper();
        if (mLooper == null) {
            throw new RuntimeException(
                "Can't create handler inside thread that has not called Looper.prepare()");
        }
        mQueue = mLooper.mQueue;
        mCallback = callback;
        mAsynchronous = async;
    }
卧槽?这是啥,这么多,仔细一看,方法里面居然一半都是为了打印个日志,我删!
public Handler(Callback callback, boolean async) {
        mLooper = Looper.myLooper();
        if (mLooper == null) {
            throw new RuntimeException(
                "Can't create handler inside thread that has not called Looper.prepare()");
        }
        mQueue = mLooper.mQueue;
        mCallback = callback;
        mAsynchronous = async;
    }
首先得到了个looper,这个looper还不能为空,也不知道这个looper是干啥的,继续看吧,looper里面还有个queue,翻译成中文“队列“,也不知道干啥的,难道——
MessageQueue mQueue;果然是消息队列啊,消息应该就是存放在这里的吧,就跟小明的记事本一样。
继续看,callback是干啥的啊,好像是个回调,这个应该比较好欺负一点,看看这个
public interface Callback {
        public boolean handleMessage(Message msg);
}
handleMessage这个方法好眼熟,不就是我们使用handler的时候实现的方法吗,原来消息处理就是通过回调完成的。 mAsynchronous是个boolean型的,不知道啥时候用,不管他。
好了,现在我们知道handler构造方法中的callback是啥了,就是我们处理消息的地方,然而还是不知道looper是干啥的,我们进去看看。
looper篇
进入looper这个类发现这个类里面的东西实在太多,根本不知道先看哪个,也不知道这个类是干嘛的,这多尴尬啊,看哪个方法啊。 嗯?好像handler构造方法里面looper是这么来的:
mLooper = Looper.myLooper();那我们来看看这个myLooper() 方法,
public static @Nullable Looper myLooper() {
    return sThreadLocal.get();
}
是在sThreadLocal里面直接get的,那么我们来看看sThreadLocal是个啥,怎么get的
static final ThreadLocal<Looper> sThreadLocal = new ThreadLocal<Looper>();哎哟喂,居然是个ThreadLocal,我记得通过ThreadLocal创建的变量只能被当前线程访问,其他线程则无法访问和修改啊。也就是说,我们通过在主线程中声明的handler,可以在任何线程中拿到属于主线程的Looper,让我们来试试:
public class MainActivity extends AppCompatActivity {

    private static final String TAG = "MainActivity";

    private static Handler handler = new Handler();

    @Override
    protected void onCreate(Bundle savedInstanceState) {
        super.onCreate(savedInstanceState);
        setContentView(R.layout.activity_main);

        final Looper looper = handler.getLooper();

        new Thread() {
            @Override
            public void run() {
                super.run();
                Looper looper1 = handler.getLooper();
                if (looper == looper1) {
                    Log.e(TAG, "run: 我们是同一个looper" );
                }else{
                    Log.e(TAG, "run: 我们不是同一个looper" );
                }
            }
        }.start();

    }

}
运行结果和我们预料的一样:
run: 我们是同一个looper哈哈!果然是这样,所以在子线程中可以通过handler更新UI,因为只要是通过主线程的handler,无论在哪个线程都得到了主线程的Looper,所以这个looper绝对是关键人物。
我们还得看看sThreadLocal是在啥时候把looper放进去的,找着了,在这里
public static void prepare() {
        prepare(true);
}

private static void prepare(boolean quitAllowed) {
        if (sThreadLocal.get() != null) {
            throw new RuntimeException("Only one Looper may be created per thread");
        }
        sThreadLocal.set(new Looper(quitAllowed));
}这~,如果sThreadLocal.get不为空就直接抛异常了?为空然后就set一个新的looper,说明prepare这个方法只能调用一次啊,我们是不是可以理解为,一个线程只能调用一次Looper.prepare(),也就是说,每个线程最多只允许存在一个Looper,我们来看看looper的构造方法了:
private Looper(boolean quitAllowed) {
    mQueue = new MessageQueue(quitAllowed);
    mThread = Thread.currentThread();
}
新建一个MessageQueue,记录当前线程,嗯~,没毛病。所以一个Looper对应一个线程,对应一个MessageQueue,子线程由于可以很容易拿到主线程的Looper,就可以拿到主线程的MessageQueue,现在我们已经知道是怎么在子线程拿到主线程的MessageQueue了,我觉得我们可以开始看handler是怎么发送消息的了。
handler
我们首先来看看handler发送消息的方法:
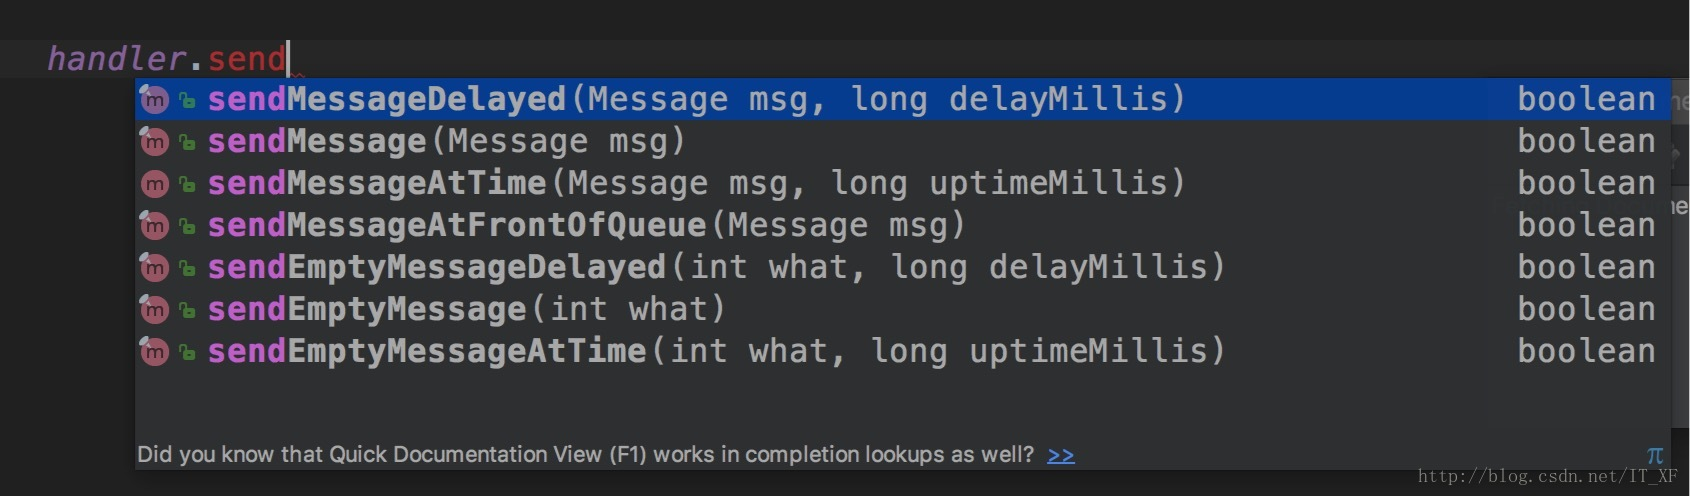
我们拿第一个为例:sendMessageDelayed(Message msg, long delayMillis) 进入源码:
public final boolean sendMessageDelayed(Message msg, long delayMillis){
    if (delayMillis < 0) {
        delayMillis = 0;
    }
    return sendMessageAtTime(msg, SystemClock.uptimeMillis() + delayMillis);
}
根据源码,最终跳入sendMessageAtTime
public boolean sendMessageAtTime(Message msg, long uptimeMillis) {
        MessageQueue queue = mQueue;
        if (queue == null) {
            RuntimeException e = new RuntimeException(
                    this + " sendMessageAtTime() called with no mQueue");
            Log.w("Looper", e.getMessage(), e);
            return false;
        }
        return enqueueMessage(queue, msg, uptimeMillis);
    }
根据源码,最终跳入enqueueMessage:
private boolean enqueueMessage(MessageQueue queue, Message msg, long uptimeMillis) {
        msg.target = this;
        if (mAsynchronous) {
            msg.setAsynchronous(true);
        }
        return queue.enqueueMessage(msg, uptimeMillis);
    }
如果我们看了handler发送消息的源码,我们可以发现,所有发送消息的方法最终都会跳入enqueueMessage,跳入的顺序如下:
- sendEmptyMessage -> sendEmptyMessageDelayed -> sendMessageDelayed -> sendMessageAtTime -> enqueueMessage
- sendEmptyMessageAtTime -> sendMessageAtTime -> enqueueMessage
- sendEmptyMessageDelayed -> sendMessageDelayed -> sendMessageAtTime -> enqueueMessage
- sendMessage -> sendMessageDelayed -> sendMessageAtTime -> enqueueMessage
- sendMessageAtFrontOfQueue -> enqueueMessage
- sendMessageAtTime -> enqueueMessage
- sendMessageDelayed -> sendMessageAtTime -> enqueueMessage
也就是说,无论使用了哪个方法发送消息,这个消息最终会放入MessageQueue中,而这个MessageQueue就是Looper的那个MessageQueue。我们甚至可以这样理解,目前我们根据源码得到的知识有如下几点(不知道有没有漏的):
- 一个线程只能存在一个looper
- 一个looper对应一个MessageQueue
- 可以通过不同线程中声明的handler获取相应的线程中的looper
- 通过A线程的handler发送的消息会保存在A线程持有的MessageQueue中,A线程可以代表任何线程
番外篇: 通过以上条件,我们大胆猜测,如果我们在主线程声明多个handler,那么这些不同的handler发送的消息都应该会堆积到同一个MessageQueue里面,虽然在同一个MessageQueue中,但由于发送消息的handler不同,所以处理消息也不会乱套,我们来做个实验:
public class MainActivity extends AppCompatActivity {

    private static final String TAG = "MainActivity";

    private static Handler handler1 = new Handler(){
        @Override
        public void handleMessage(Message msg) {
            super.handleMessage(msg);
            Log.e(TAG, "handleMessage: handler1");
        }
    };
    private static Handler handler2 = new Handler(){
        @Override
        public void handleMessage(Message msg) {
            super.handleMessage(msg);
            Log.e(TAG, "handleMessage: handler2");
        }
    };

    @RequiresApi(api = Build.VERSION_CODES.M)
    @Override
    protected void onCreate(Bundle savedInstanceState) {
        super.onCreate(savedInstanceState);
        setContentView(R.layout.activity_main);

        Looper looper1 = handler1.getLooper();
        Looper looper2 = handler2.getLooper();

        MessageQueue queue1 = looper1.getQueue();
        MessageQueue queue2 = looper2.getQueue();

        if (queue1 == queue2) {
            Log.e(TAG, "onCreate: 是相同的MessageQueue");
        } else {
            Log.e(TAG, "onCreate: 不是相同的MessageQueue");
        }

        handler1.sendEmptyMessage(1);
        handler2.sendEmptyMessage(1);

    }

}
结果如我们所猜测:
onCreate: 是相同的MessageQueue
handleMessage: handler1
handleMessage: handler2
好的让我们回到主题,我们再来看看handler是怎么拿到MessageQueue中的消息的,我们必须又要回到Looper中去看了,looper翻译成中文大概是做循环的人,所以做循环肯定就是他主要的操作,进入Looper类中,发现了一个loop方法,这方法绝壁是关键:(不要紧张下面的代码量,会简化)
public static void loop() {
        final Looper me = myLooper();
        if (me == null) {
            throw new RuntimeException("No Looper; Looper.prepare() wasn't called on this thread.");
        }
        final MessageQueue queue = me.mQueue;

        // Make sure the identity of this thread is that of the local process,
        // and keep track of what that identity token actually is.
        Binder.clearCallingIdentity();
        final long ident = Binder.clearCallingIdentity();

        for (; ; ) {
            Message msg = queue.next(); // might block
            if (msg == null) {
                // No message indicates that the message queue is quitting.
                return;
            }

            // This must be in a local variable, in case a UI event sets the logger
            final Printer logging = me.mLogging;
            if (logging != null) {
                logging.println(">>>>> Dispatching to " + msg.target + " " +
                        msg.callback + ": " + msg.what);
            }

            final long slowDispatchThresholdMs = me.mSlowDispatchThresholdMs;

            final long traceTag = me.mTraceTag;
            if (traceTag != 0 && Trace.isTagEnabled(traceTag)) {
                Trace.traceBegin(traceTag, msg.target.getTraceName(msg));
            }
            final long start = (slowDispatchThresholdMs == 0) ? 0 : SystemClock.uptimeMillis();
            final long end;
            try {
                msg.target.dispatchMessage(msg);
                end = (slowDispatchThresholdMs == 0) ? 0 : SystemClock.uptimeMillis();
            } finally {
                if (traceTag != 0) {
                    Trace.traceEnd(traceTag);
                }
            }
            if (slowDispatchThresholdMs > 0) {
                final long time = end - start;
                if (time > slowDispatchThresholdMs) {
                    Slog.w(TAG, "Dispatch took " + time + "ms on "
                            + Thread.currentThread().getName() + ", h=" +
                            msg.target + " cb=" + msg.callback + " msg=" + msg.what);
                }
            }

            if (logging != null) {
                logging.println("<<<<< Finished to " + msg.target + " " + msg.callback);
            }

            // Make sure that during the course of dispatching the
            // identity of the thread wasn't corrupted.
            final long newIdent = Binder.clearCallingIdentity();
            if (ident != newIdent) {
                Log.wtf(TAG, "Thread identity changed from 0x"
                        + Long.toHexString(ident) + " to 0x"
                        + Long.toHexString(newIdent) + " while dispatching to "
                        + msg.target.getClass().getName() + " "
                        + msg.callback + " what=" + msg.what);
            }

            msg.recycleUnchecked();
        }
    }
代码太多了,但是仔细看代码,发现里面还是有不少打印日志的操作和各种不会影响我们看逻辑的操作,所以老规矩,删!
public static void loop() {

        final Looper me = myLooper();
        if (me == null) {
            throw new RuntimeException("No Looper; Looper.prepare() wasn't called on this thread.");
        }
        final MessageQueue queue = me.mQueue;

        for (; ; ) {
            Message msg = queue.next(); // might block
            if (msg == null) {
                return;
            }

            msg.target.dispatchMessage(msg);
        }
    }
诶,这样看着就舒服多了,我们一步一步的来看。
首先是调用了myLooper方法,就是拿到当前线程的Looper。
如果为空,自然是没调用Looper.prepare()方法,然后拿到looper的MessageQueue,也就是当前线程的MessageQueue。
接下来牛逼了,for (; ; )。
这死循环的节奏是闹哪样,原来是通过一个死循环不断的从MessageQueue中得到消息,得到不为空的消息后就msg.target.dispatchMessage(msg)。
所以这个target是啥,点进去发现是个handler,这说明是这个消息的发送者handler执行的dispatchMessage。
这就能说明为什么在主线程明明就一个MessageQueue,但在主线程声明无数个handler,这些handler都发送同一个m s g.what的消息,这些消息都到了同一个MessageQueue中,为什么系统不会搞乱。
走,我们去dispatchMessage这个方法里面耍耍:
public void dispatchMessage(Message msg) {
        if (msg.callback != null) {
            handleCallback(msg);
        } else {
            if (mCallback != null) {
                if (mCallback.handleMessage(msg)) {
                    return;
                }
            }
            handleMessage(msg);
        }
    }
msg.callback是调用handler.post才有的,所以去else里面看看,最终是调用了handleMessage,终于又回到这里了,由于该方法我们经常重写,所以最后进入的就是我们所实现的handleMessage方法。
handler流程总结
我们来大概总结下handler的大概流程。
这里以主线程为例
首先handler机制主要是由以下几个东西构建成的
- Handler
- Looper
- MessageQueue
- Message
我们整理下每个东西是干吗的:
- Handler:发送消息到MessageQueue中,并处理消息
- Looper:从对应线程中取出消息并分配给发送该消息的handler
- MessageQueue:保存消息
- Message:(我就是消息^_^),记录发送我的handler
所以大概流程就是这样的:
起步是我们在主线程中声明了一个handler,在handler构造方法中,我们得到了主线程的Looper,并且拿到了主线程的MessageQueue,而且Looper.loop()方法也开始运作了,开始无限制的在MessageQueue中提取消息,当handler发送消息的时候,该消息就会进入到MessageQueue中,然后Looper就会把MessageQueue中的消息拿出来,并且分配给发送该消息的handler,再调用handleMessage方法。
简化版:
handler发送的Message保存到了MessageQueue中,Looper把MessageQueue中的Message拿出来,调用发送该Message的handler的handleMessage方法。
终于讲完了,handler大概流程就是这样,如果大家发现哪里写的不对或者不明白的地方希望指出来,我再做修改,谢谢!
以下为番外篇,感兴趣的同学可以看一下
番外篇1—主线程的Looper是啥时候声明的
Looper有个prepareMainLooper(),看名字就知道是给主线程玩的,至于地方嘛,来自ActivityThread#main(String[] args),
超级简化后为:
public static void main(String[] args) {

        Looper.prepareMainLooper();

        Looper.loop();

        throw new RuntimeException("Main thread loop unexpectedly exited");
    }
我们可以看到调用了Looper.prepareMainLooper后,马上就调用了无限循环的Looper.loop()方法。
番外篇2—如何在子线程新建handler
因为在主线程中,系统已经帮我们创建好了Looper,并调用了他的loop方法,所以我们只需要写handler就行了,但是如果要在一个啥都没有的子线程中,我们应该按照系统的方法做,所以:
public class MainActivity extends AppCompatActivity {

    private static final String TAG = "MainActivity";

    private Handler handler;

    @Override
    protected void onCreate(Bundle savedInstanceState) {
        super.onCreate(savedInstanceState);
        setContentView(R.layout.activity_main);

        new Thread() {
            @Override
            public void run() {
                super.run();

                Looper.prepare();
                handler = new Handler() {
                    @Override
                    public void handleMessage(Message msg) {
                        super.handleMessage(msg);
                        Log.e(TAG, "handleMessage: ");
                    }
                };
                Looper.loop();

            }
        }.start();

    }

    public void click(View view) {
        handler.sendEmptyMessage(1);
    }
}
在子线程中,我们要手动调用 Looper.prepare()和 Looper.loop(),这样,我们通过该线程中的handler发送的消息就都在子线程中处理啦。
