

使用theme-next,对个人hexo博客进行一次华丽丽的升级!
Hexo Static Blog已经使用有三年多了,期间也换了几次主题,距离上一次的网站主题更新也快有一年多了,是一个相当简洁轻量的响应式主题 hexo-theme-BlueLake,虽然关注数不是很高,但却也是一个简洁可塑的主题。言归正传,由于最近一年多,陆续发现很多网友的hexo主题都更换成了NexT,个人对其的简约和扁平化也是一见钟情,因此就有了这篇软文了。
安装Hexo
下面一切的一切配置,都出于你了解和拥有hexo blog为前提的,因此如果你还没安装,可以通过点击传送门
hexo.io/zh-cn/docs/ 学习并构建你的基础站点。
话说Hexo的说明比起4年前是真的简单易懂了很多,现在基本有基础的同学都能开箱即用了。
安装 NexT
下载主题
在终端窗口下,定位到 Hexo 站点目录下。使用 Git checkout 代码:
$ cd your-hexo-site
$ git clone https://github.com/iissnan/hexo-theme-next themes/next
启用主题
打开站点目录下的配置文件 _config.yml 文件,通过配置 theme 变量,启用主题:
theme: next
验证启用
通过在hexo-site站点根目录,执行 hexo s --debug 命令,启动本地调试服务,此时命令行会提示:
INFO Hexo is running at http://0.0.0.0:4000/. Press Ctrl+C to stop.
当看到这样的提示时,意味着你已经成功启动服务,通过浏览器打开 http://localhost:4000 检查主题是否可用。
NexT子主题设定
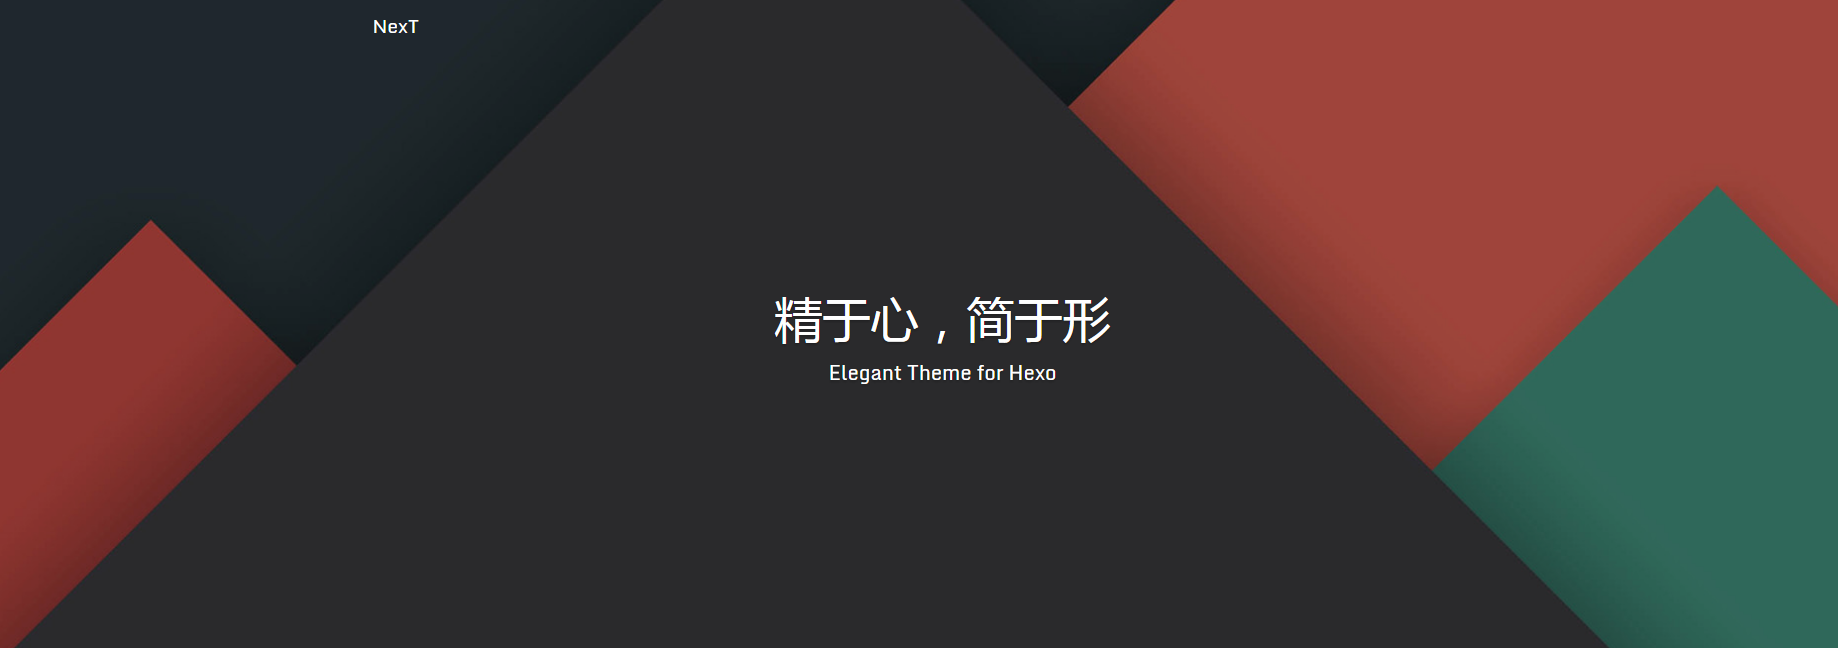
Scheme 是 NexT 提供的一种特性,借助于 Scheme,NexT 为你提供多种不同的外观。同时,几乎所有的配置都可以 在 Scheme 之间共用。目前 NexT 支持三种 Scheme,他们是:
Muse - 默认 Scheme,这是 NexT 最初的版本,黑白主调,大量留白
Mist - Muse 的紧凑版本,整洁有序的单栏外观
Pisces - 双栏 Scheme,小家碧玉似的清新
通过更改主题配置文件,即 /next/_config.yml 中的 scheme 关键字,通过注销前面的# 进行配置
#scheme: Muse
#scheme: Mist
scheme: Pisces
设置菜单
默认情况下,菜单配置包括了home,archives 和 tags,但是为了方便管理文章,我们可以把其他菜单通过配置开启。通过打开主题配置文件 /next/_config.yml中对 menu选项进行解除注释的方式进行启用:
menu:
  home: /
  archives: /archives
  #about: /about
  #categories: /categories
  tags: /tags
  #commonweal: /404.html
当然配置后,需要新建对应同名文件,才可以把对应的菜单连接对应到页面中,如下是新建了categories ,about 和 tags页面:
hexo new page categories
hexo new page tags
hexo new page about
在categories里对 index.md 进行初始化设置
---
title: categories
date: 2017-08-27 20:30:10
type: "categories"
---
在tags里对 index.md 进行初始化设置
---
title: tags
date: 2017-08-27 20:30:10
type: "tags"
---
配置完成后,以后在创建文章的时候,只需添加好对应的 tags 和 categories即可
title: theme-next!Hexo博客的一次华丽升级
date: 2017-08-27 20:12:16
categories: 前端技术
tags: ['hexo']
keywords: 'theme-next,hexo'
主题个性化设置
设置RSS
NexT 中 RSS 有三个设置选项,满足特定的使用场景。 更改 主题配置文件,设定 rss 字段的值:
false:禁用 RSS,不在页面上显示 RSS 连接。
留空:使用 Hexo 生成的 Feed 链接。 你可以需要先安装 hexo-generator-feed 插
件。具体的链接地址:适用于已经烧制过 Feed 的情形。
代码高亮
Next 默认有5款主题可供选择:normal, night, night blue, night bright, night eighties:
通过更改 highlight_theme 字段可以设置你喜欢的主题:
# Code Highlight theme
# Available value: normal | night | night eighties | night blue | night bright
# https://github.com/chriskempson/tomorrow-theme
highlight_theme: night bright
侧栏社交链接
侧栏部分,可以开启 Github, Twitter等社交圈子的个人主页链接,通过配置主题配置文件 /next/_config.yml中的 social字段:
# Social links
social:
  GitHub: https://github.com/your-user-name
  Twitter: https://twitter.com/your-user-name
  微博: http://weibo.com/your-user-name
  豆瓣: http://douban.com/people/your-user-name
  知乎: http://www.zhihu.com/people/your-user-name
  # 等等
打赏功能
赞文章,不如打赏文章,Next主题默认提供了二维码图片的打赏功能,通过对主题配置文件 /next/_config.yml配置如下选项
reward_comment: 坚持原创技术分享,您的支持将鼓励我继续创作!
wechatpay: /path/to/wechat-reward-image
alipay: /path/to/alipay-reward-image
注意,要将个人的二维码导出后,放到对应的images目录中,不然是无效的。
订阅微信公众号
和打赏功能类似,也是通过二维码图片的方式进行使用,通过对主题配置文件 /next/_config.yml配置如下选项
# Wechat Subscriber
wechat_subscriber:
  enabled: true
  qcode: /uploads/wechat-qcode.jpg
  description: 欢迎您扫一扫上面的微信公众号,订阅我的博客!
主题动画
Next天生的为主题博客,提供了动画,通过对主题配置文件 /next/_config.yml配置 user_motion
use_motion: true  # 开启动画效果
use_motion: false # 关闭动画效果
编辑 主题配置文件, 搜索 canvas_nest 或 three_waves,根据您的需求设置值为 true 或者 false 即可:
canvas_nest
# canvas_nest
canvas_nest: true //开启动画
canvas_nest: false //关闭动画
three_waves
# canvas_nest
three_waves: true //开启动画
three_waves: false //关闭动画
集成三方服务
添加 Fork me on Github
打开官方页面 github.com/blog/273-gi…,选取一款自己喜欢的样式,并复制textarea中的代码, 并将代码放置在themes\next\layout_layout.swig的body标签中合适的位置:
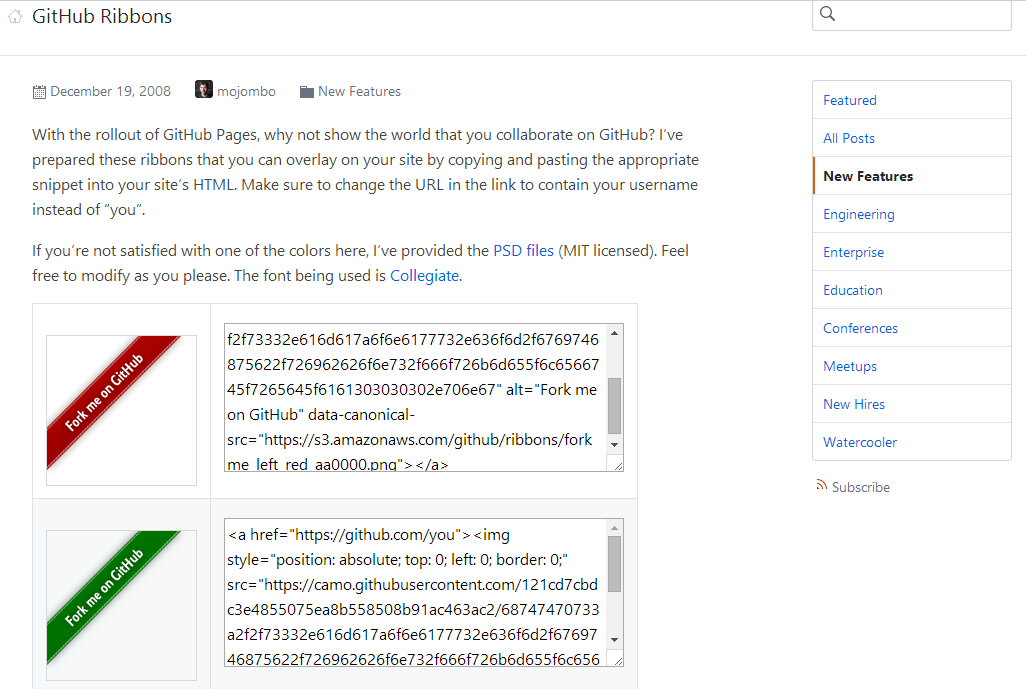
注意,在复制代码后,要注意把url中的 you 换成自己的GitHub地址。
不蒜子统计
编辑 主题配置文件, 搜索 busuanzi_count 根据您的需求设置值为 true 或者 false 即可:
# Show PV/UV of the website/page with busuanzi.
# Get more information on http://ibruce.info/2015/04/04/busuanzi/
busuanzi_count:
  # count values only if the other configs are false
  enable: true
  # custom uv span for the whole site
  site_uv: true
  site_uv_header: <i class="fa fa-user"></i> 访问用户 :
  site_uv_footer: 人
  # custom pv span for the whole site
  site_pv: true
  site_pv_header: <i class="fa fa-eye"></i> 访问次数 :
  site_pv_footer: 次
  # custom pv span for one page only
  page_pv: true
  page_pv_header: <i class="fa fa-file-o"></i> 点击量
  page_pv_footer: 次
自定义其他统计
除此以外,我们日常一些需要的增加一些其他的统计平台的嵌入代码,此时,我们可以在 主题配置文件 /next/_config.yml中,通过自定义的方式,增加对应的 pid,如下就是我增加了国内的百度统计 和 GrowingIo 以及国外的 Heap的代码:
# Swiftype Search API Key
#swiftype_key:

# Baidu Analytics ID
baidu_analytics: 2129cd61363d382d1734d5e8c0ead722

# growingio Analytics ID
growingio_analytics: 87fe382bdb2695f2

# heap Analytics ID
heap_analytics: 256127732
同时,我们还需要在 baidu-analytics.swig模板页中加入其他的的产品代码,如下
{% if theme.baidu_analytics %}
  <script type="text/javascript">
    var _hmt = _hmt || [];
    (function() {
      var hm = document.createElement("script");
      hm.src = "https://hm.baidu.com/hm.js?{{ theme.baidu_analytics }}";
      var s = document.getElementsByTagName("script")[0];
      s.parentNode.insertBefore(hm, s);
    })();
  </script>
{% endif %}

{% if theme.growingio_analytics %}
  <script type='text/javascript'>
      var _vds = _vds || [];
      window._vds = _vds;
      (function(){
        _vds.push(['setAccountId', '{{ theme.growingio_analytics }}']);
        (function() {
          var vds = document.createElement('script');
          vds.type='text/javascript';
          vds.async = true;
          vds.src = ('https:' == document.location.protocol ? 'https://' : 'http://') + 'dn-growing.qbox.me/vds.js';
          var s = document.getElementsByTagName('script')[0];
          s.parentNode.insertBefore(vds, s);
        })();
      })();
  </script>
{% endif %}

{% if theme.heap_analytics %}
  <script type='text/javascript'>
      window.heap=window.heap||[],heap.load=function(e,t){window.heap.appid=e,window.heap.config=t=t||{};var r=t.forceSSL||"https:"===document.location.protocol,a=document.createElement("script");a.type="text/javascript",a.async=!0,a.src=(r?"https:":"http:")+"//cdn.heapanalytics.com/js/heap-"+e+".js";var n=document.getElementsByTagName("script")[0];n.parentNode.insertBefore(a,n);for(var o=function(e){return function(){heap.push([e].concat(Array.prototype.slice.call(arguments,0)))}},p=["addEventProperties","addUserProperties","clearEventProperties","identify","removeEventProperty","setEventProperties","track","unsetEventProperty"],c=0;c<p.length;c++)heap[p[c]]=o(p[c])};
      heap.load("{{ theme.heap_analytics }}");
  </script>
{% endif %}
文章字数统计
默认的,NexT是有提供了文章字数统计的选项,通过打开 /next/_config.yml文件中,搜索post_wordcount,进行配置
# Post wordcount display settings
# Dependencies: https://github.com/willin/hexo-wordcount
post_wordcount:
  item_text: true
  wordcount: true
  min2read: true
  separated_meta: true
我这里配置后,发现没有结果,查看 hexo-site根目录,发现 node_modules中没有相关的依赖包,此时我们需要手动安装:
npm install hexo-wordcount --save
默认情况下,统计数据只有数值没有单位,我们可以在 themes\next\layout_macro\post.swig 模板文件中,增加自己想要的单位,如:
{% if theme.post_wordcount.wordcount or theme.post_wordcount.min2read %}
           <div class="post-wordcount">
             {% if theme.post_wordcount.wordcount %}
               <span class="post-meta-item-icon">
                 <i class="fa fa-edit"></i>
               </span>
                 {% if theme.post_wordcount.item_text %}
                   <span class="post-meta-item-text">{{ __('post.wordcount') }}</span>
                 {% endif %}
                   <span title="{{ __('post.wordcount') }}" }}">
                     {{ wordcount(post.content) }} 字                   </span>
             {% endif %}
             {% if theme.post_wordcount.wordcount and theme.post_wordcount.min2read %}
               <span class="post-meta-divider">|</span>
             {% endif %}
             {% if theme.post_wordcount.min2read %}
               <span class="post-meta-item-icon">
                 <i class="fa fa-clock-o"></i>
               </span>
                 {% if theme.post_wordcount.item_text %}
                   <span class="post-meta-item-text">{{ __('post.min2read') }}</span>
                 {% endif %}
                   <span title="{{ __('post.min2read') }}" }}">
                     {{ min2read(post.content) }} 分钟
                   </span>
             {% endif %}
           </div>
         {% endif %}
评论服务
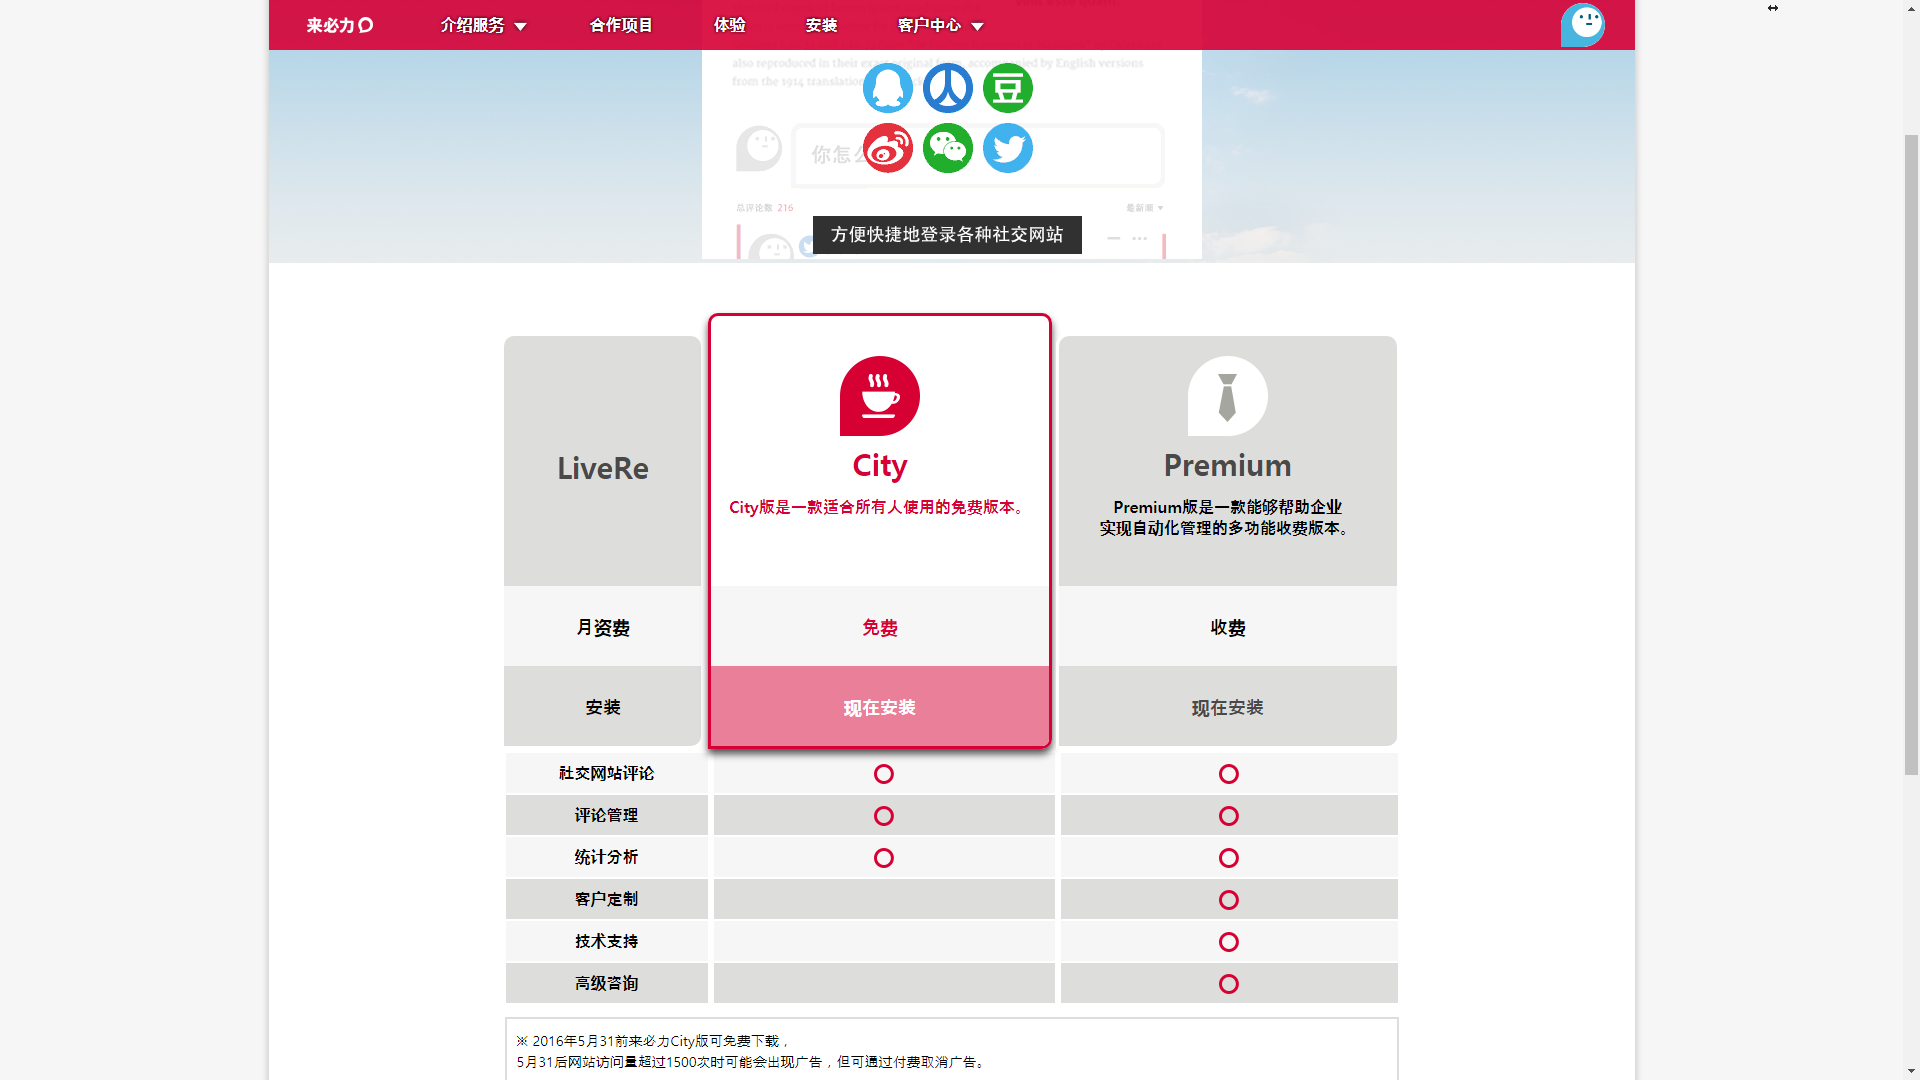
原来使用的多说已经停止了服务,在参考官方的推荐以后,选取了日韩风极强的来必力,猪厂出品,感觉短时间不会停牌,因此,这里使用liveRe评论系统,在注册过程中,发现有点坑,发过来的验证邮件全是思密达,这里简单的说下配置过程:
首先进入来必力官网,点击右上角的注册,通过输入邮件地址和密码,然后把邮箱中接收到验证码输入到框中,直接按enter跳过。
然后选择个人免费city版,并立即安装
输入个人站点信息,并提交确认
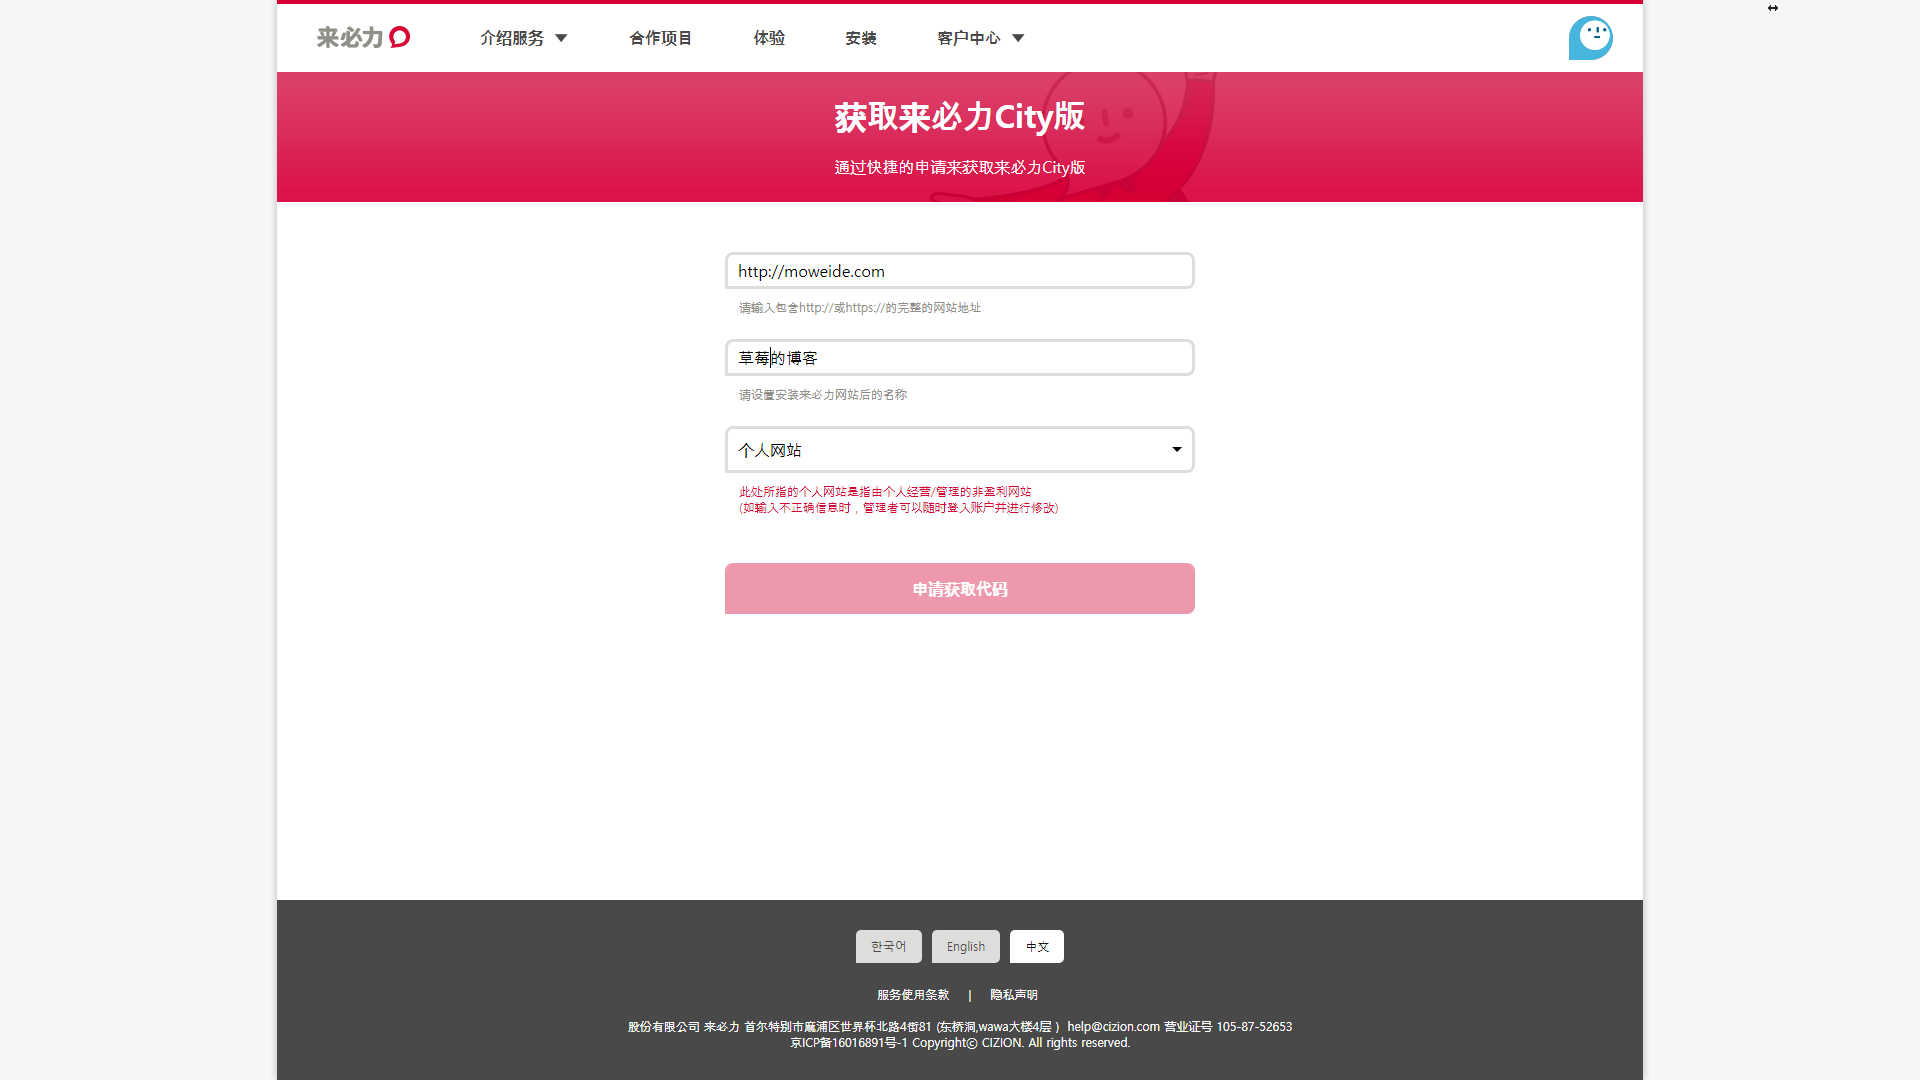
最后开启来必力的选项,在主题配置文件 /next/_config.yml中配置
livere_uid: MTAyMC8zMDY4NC83MjM2
其他三方服务
由于蝙蝠有限,其他的三方服务可以参考 Next官网-更多第三方服务
自定义样式
样式修改
原始的Next虽然十分简洁,但是由于每个人都使用的话,可能会雷同感爆棚,因此出于人有我优的心理,我们有追求地对NexT主题进行了简单修改,在修改的过程中,发现了 main.styl中温馨的加入了 @import "_custom/custom"; 即用户通过重写该文件,可以达到快速修改和恢复主题的样式。
如我们需要对banner进行重构,只需编写 themes\next\source\css\_custom\custom.styl文件:
.header {
        height: 24vh;
        background:#f5f5f5 url('../../images/houses.png') ;
        background-size: cover;
}
首页文章内容摘要
NexT主题允许我们在首页的文章面板上添加摘要,摘要既可以有文字和图片,这里分享一下如何添加摘要的文字和图片
我们打开一个文章的 md 文件,通过在标题和正文之间添加 <!-- more -->,则在标题和<!-- more -->中间就可以插入图片和文字,具体操作方式如下:
title: theme-next!Hexo博客的一次华丽升级
date: 2017-08-27 20:12:16
categories: 前端技术
tags: ['hexo']
keywords: 'theme-next,hexo'
---

使用theme-next,对个人hexo博客进行一次华丽丽的升级!
<!-- more -->
总结
在使用 hexo-theme-next过程中,对整个工程的文件架构,从文章页面,到styl样式,再到swig模板以及如果读取 _config.yml的配置有了个概貌了解,你会发现一个简约的博客主题,并不简单,同时也可以看到前端项目的工程化日益增强。
最后说句,人未老的时候,该折腾的时候还得折腾下哈~
