

目录
-
UICollectionView的定义 -
UICollectionView快速构建GridView网格视图 -
UICollectionView拖拽重排处理(iOS8.x-/iOS9.x+) -
UICollectionView实现简单轮播
UICollectionView的定义
UICollectionView同UITableView一样,是iOS中最常用到数据展示视图。
-
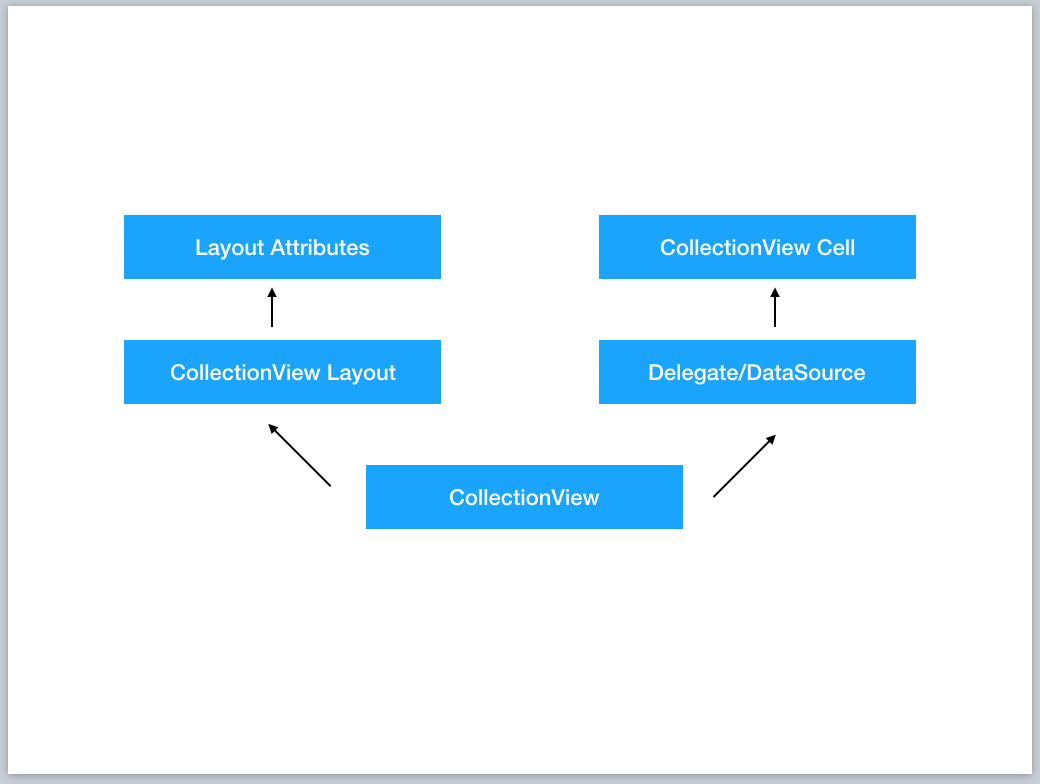
UICollectionView显示内容时:- 通过
dataSource获取cell - 通过
UICollectionViewLayout获取layout attributes布局属性 - 通过对应的
layout attributes对cell进行调整,完成布局
- 通过
-
UICollectionView交互则是通过丰富的delegate方法实现
UICollectionView视图
一个标准的UICollectionView视图包括以下三个部分
-
UICollectionViewCell视图展示单元 -
SupplementaryView追加视图,类似我们熟悉的UITableView中的HeaderView、FooterVIew -
DecorationView装饰视图
1.UICollectionView依然采用Cell重用的方式减小内存开支,所以需要我们注册并标记,同样,注册分为Class及nib两类
// register cell
    if (_cellClassName) {
        [_collectionView registerClass:NSClassFromString(_cellClassName) forCellWithReuseIdentifier:ReuseIdentifier];
    }
    if (_xibName) {// xib
        [_collectionView registerNib:[UINib nibWithNibName:_xibName bundle:nil] forCellWithReuseIdentifier:ReuseIdentifier];
}2.Father Apple同样将重用机制带给了SupplementaryView,注册方法同Cell类似
// UIKIT_EXTERN NSString *const UICollectionElementKindSectionHeader NS_AVAILABLE_IOS(6_0);
// UIKIT_EXTERN NSString *const UICollectionElementKindSectionFooter NS_AVAILABLE_IOS(6_0);
- (void)registerClass:(nullable Class)viewClass forSupplementaryViewOfKind:(NSString *)elementKind withReuseIdentifier:(NSString *)identifier;
- (void)registerNib:(nullable UINib *)nib forSupplementaryViewOfKind:(NSString *)kind withReuseIdentifier:(NSString *)identifier;对于它尺寸的配置,同样交由Layout处理,如果使用的是UICollectionViewFlowLayout,可以直接通过headerReferenceSize或footerReferenceSize赋值
3.DecorationView装饰视图,是我们在自定义Custom Layout时使用
UICollectionViewDataSource及UICollectionViewDelegate
这个部分使用频率极高想必大家都非常熟悉,所以笔者列出方法,不再赘述。
UICollectionViewDataSource( 需要着重关注下iOS9后出现的两个新数据源方法,在下文中介绍拖拽重排时会用到他们 )
@required

- (NSInteger)collectionView:(UICollectionView *)collectionView numberOfItemsInSection:(NSInteger)section;

// The cell that is returned must be retrieved from a call to -dequeueReusableCellWithReuseIdentifier:forIndexPath:
- (__kindof UICollectionViewCell *)collectionView:(UICollectionView *)collectionView cellForItemAtIndexPath:(NSIndexPath *)indexPath;

@optional

- (NSInteger)numberOfSectionsInCollectionView:(UICollectionView *)collectionView;

// The view that is returned must be retrieved from a call to -dequeueReusableSupplementaryViewOfKind:withReuseIdentifier:forIndexPath:
- (UICollectionReusableView *)collectionView:(UICollectionView *)collectionView viewForSupplementaryElementOfKind:(NSString *)kind atIndexPath:(NSIndexPath *)indexPath;

- (BOOL)collectionView:(UICollectionView *)collectionView canMoveItemAtIndexPath:(NSIndexPath *)indexPath NS_AVAILABLE_IOS(9_0);
- (void)collectionView:(UICollectionView *)collectionView moveItemAtIndexPath:(NSIndexPath *)sourceIndexPath toIndexPath:(NSIndexPath*)destinationIndexPath NS_AVAILABLE_IOS(9_0);
UICollectionViewDelegate
- (void)collectionView:(UICollectionView *)collectionView didSelectItemAtIndexPath:(NSIndexPath *)indexPath;
- (void)collectionView:(UICollectionView *)collectionView didDeselectItemAtIndexPath:(NSIndexPath *)indexPath;
- (void)collectionView:(UICollectionView *)collectionView willDisplayCell:(UICollectionViewCell *)cell forItemAtIndexPath:(NSIndexPath *)indexPath NS_AVAILABLE_IOS(8_0);
- (void)collectionView:(UICollectionView *)collectionView willDisplaySupplementaryView:(UICollectionReusableView *)view forElementKind:(NSString *)elementKind atIndexPath:(NSIndexPath *)indexPath NS_AVAILABLE_IOS(8_0);
- (void)collectionView:(UICollectionView *)collectionView didEndDisplayingCell:(UICollectionViewCell *)cell forItemAtIndexPath:(NSIndexPath *)indexPath;
- (void)collectionView:(UICollectionView *)collectionView didEndDisplayingSupplementaryView:(UICollectionReusableView *)view forElementOfKind:(NSString *)elementKind atIndexPath:(NSIndexPath *)indexPath;

- (BOOL)collectionView:(UICollectionView *)collectionView shouldHighlightItemAtIndexPath:(NSIndexPath *)indexPath;
- (void)collectionView:(UICollectionView *)collectionView didHighlightItemAtIndexPath:(NSIndexPath *)indexPath;
- (void)collectionView:(UICollectionView *)collectionView didUnhighlightItemAtIndexPath:(NSIndexPath *)indexPath;
- (BOOL)collectionView:(UICollectionView *)collectionView shouldSelectItemAtIndexPath:(NSIndexPath *)indexPath;
- (BOOL)collectionView:(UICollectionView *)collectionView shouldDeselectItemAtIndexPath:(NSIndexPath *)indexPath;
官方注释解释了交互后调用的顺序
// (when the touch begins)
// 1. -collectionView:shouldHighlightItemAtIndexPath:
// 2. -collectionView:didHighlightItemAtIndexPath:
//
// (when the touch lifts)
// 3. -collectionView:shouldSelectItemAtIndexPath: or -collectionView:shouldDeselectItemAtIndexPath:
// 4. -collectionView:didSelectItemAtIndexPath: or -collectionView:didDeselectItemAtIndexPath:
// 5. -collectionView:didUnhighlightItemAtIndexPath:使用代理的方式处理数据及交互,好处是显而易见的,代码功能分工非常明确,但是也造成了一定程度上的代码书写的繁琐。所以本文会在快速构建部分,介绍如何使用Block实现链式传参书写
UICollectionViewLayout布局
不同于UITableView的简单布局样式,UICollectionView提供了更加强大的布局能力,将布局样式任务分离成单独一个类管理,就是我们初始化时必不可少UICollectionViewLayout
Custom Layout通过UICollectionViewLayoutAttributes,配置不同位置Cell的诸多属性
@property (nonatomic) CGRect frame;
@property (nonatomic) CGPoint center;
@property (nonatomic) CGSize size;
@property (nonatomic) CATransform3D transform3D;
@property (nonatomic) CGRect bounds NS_AVAILABLE_IOS(7_0);
@property (nonatomic) CGAffineTransform transform NS_AVAILABLE_IOS(7_0);
@property (nonatomic) CGFloat alpha;
@property (nonatomic) NSInteger zIndex; // default is 0同样也可以通过Layout提供诸多行为接口动态修改Cell的布局属性
贴心的Father Apple为了让我们具备快速构建网格视图的能力,封装了大家都非常熟悉的线性布局UICollectionViewFlowLayout,同样不做赘述
@property (nonatomic) CGFloat minimumLineSpacing;
@property (nonatomic) CGFloat minimumInteritemSpacing;
@property (nonatomic) CGSize itemSize;
@property (nonatomic) CGSize estimatedItemSize NS_AVAILABLE_IOS(8_0); // defaults to CGSizeZero - setting a non-zero size enables cells that self-size via -preferredLayoutAttributesFittingAttributes:
@property (nonatomic) UICollectionViewScrollDirection scrollDirection; // default is UICollectionViewScrollDirectionVertical
@property (nonatomic) CGSize headerReferenceSize;
@property (nonatomic) CGSize footerReferenceSize;
@property (nonatomic) UIEdgeInsets sectionInset;

// 悬浮Header、Footer官方支持
// Set these properties to YES to get headers that pin to the top of the screen and footers that pin to the bottom while scrolling (similar to UITableView).
@property (nonatomic) BOOL sectionHeadersPinToVisibleBounds NS_AVAILABLE_IOS(9_0);
@property (nonatomic) BOOL sectionFootersPinToVisibleBounds NS_AVAILABLE_IOS(9_0);本文中不展开讨论如何定义Custom Layout实现诸如悬浮Header、瀑布流、堆叠卡片等效果,鶸笔者会在近期写一篇文章详细介绍布局配置及有趣的TransitionLayout,感兴趣的同学可以关注一下
有趣的UICollectionViewTransitionLayout
UICollectionView快速构建GridView网格视图
日常工作中,实现一个简单的网格布局CollectionView的步骤大致分成以下几步:
- 配置
UICollectionViewFlowLayout:滑动方向、itemSize、内边距、最小行间距、最小列间距 - 配置
UICollectionView:数据源、代理、注册Cell、背景颜色
完成这些,代码已经写了一大堆了,如果App网格视图部分很多的话,一遍遍的写,很烦-。- 所以封装一个简单易用的UICollectionView显得非常有必要,相信各位大佬也都做过了。
这里笔者介绍一下自己封装的CollectionView
- 基于UIView(考虑到使用storyboard或xib快速构建时,添加UIView占位的情况)
- 使用
UICollectionViewFlowLayout满足最常见的开发需求 - 提供点击交互方法,提供
Block及Delegate两种方式 - 提供普通传参及链式传参两种方式
- 支持常见轮播
- 支持拖拽重排
普通构建方式示例:
// 代码创建
    SPEasyCollectionView *easyView = [[SPEasyCollectionView alloc] initWithFrame:CGRectMake(0, 20, [UIScreen mainScreen].bounds.size.width, 200)];
    easyView.delegate = self;
    easyView.itemSize = CGSizeMake([UIScreen mainScreen].bounds.size.width, 200);
    easyView.scrollDirection = SPEasyScrollDirectionHorizontal;
    easyView.xibName = @"EasyCell";
    easyView.datas = @[@"1",@"2",@"3",@"4"];
    [self.view addSubview:easyView];
链式传参
// chain calls
    _storyboardTest.sp_cellClassName(^NSString *{
        return @"TestCell";
    }).sp_itemsize(^CGSize{
        return CGSizeMake(100, 100);
    }).sp_minLineSpace(^NSInteger{
        return 20;
    }).sp_minInterItemSpace(^NSInteger{
        return 10;
    }).sp_scollDirection(^SPEasyScrollDirection{
        return SPEasyScrollDirectionVertical;
    }).sp_inset(^UIEdgeInsets{
        return UIEdgeInsetsMake(20, 20, 20, 20);
    }).sp_backgroundColor(^UIColor *{
        return [UIColor colorWithRed:173/255.0 green:216/255.0 blue:230/255.0 alpha:1];
});//LightBLue #ADD8E6 173,216,230这里分享一下链式的处理,希望对感兴趣的同学有所启发。其实很简单,就是Block传值
定义
// chain calls
typedef SPEasyCollectionView *(^SPEasyCollectionViewItemSize)(CGSize(^)(void));
属性示例
// chain calls
@property (nonatomic, readonly) SPEasyCollectionViewItemSize sp_itemsize;
属性处理示例
- (SPEasyCollectionViewItemSize)sp_itemsize{
    return ^SPEasyCollectionView *(CGSize(^itemSize)()){
        self.itemSize = itemSize();
        return self;
    };
}
UICollectionView拖拽重排处理(iOS8.x-/iOS9.x+)
Strike/Freedom/Destiny有没有胶友
拖拽重排功能的实现,在iOS9之前,需要开发者自己去实现动画、边缘检测以及数据源更新,比较繁琐。iOS9之后,官方替我们处理了相对比较复杂的前几步,只需要开发者按照正确的原则在重排完成时更新数据源即可。
拖拽重排的触发,一般都是通过长按手势触发。无论是哪种系统环境下,都需要LongpressGestureRecognizer的协助,所以我们事先将它准备好
// 添加长按手势
- (void)addLongPressGestureRecognizer{

    UILongPressGestureRecognizer *longPress = [[UILongPressGestureRecognizer alloc] initWithTarget:self action:@selector(handleLongPressGesture:)];
    longPress.minimumPressDuration = self.activeEditingModeTimeInterval?_activeEditingModeTimeInterval:2.0f;
    [self addGestureRecognizer:longPress];
    self.longGestureRecognizer = longPress;

}
说明一下手势处理的几种状态
| GestureRecognizerState | 说明 |
|---|---|
| UIGestureRecognizerStateBegan | 手势开始 |
| UIGestureRecognizerStateChanged | 手势变化 |
| UIGestureRecognizerStateEnded | 手势结束 |
| UIGestureRecognizerStateCancelled | 手势取消 |
| UIGestureRecognizerStateFailed | 手势失败 |
| UIGestureRecognizerStatePossible | 默认状态,暂未识别 |
对手势的不同状态分别进行处理
- (void)handleEditingMode:(UILongPressGestureRecognizer *)recognizer{

    switch (recognizer.state) {
        case UIGestureRecognizerStateBegan: {
            [self handleEditingMoveWhenGestureBegan:recognizer];
            break;
        }
        case UIGestureRecognizerStateChanged: {
            [self handleEditingMoveWhenGestureChanged:recognizer];
            break;
        }
        case UIGestureRecognizerStateEnded: {
            [self handleEditingMoveWhenGestureEnded:recognizer];
            break;
        }
        default: {
            [self handleEditingMoveWhenGestureCanceledOrFailed:recognizer];
            break;
        }
    }

}
iOS8.x-拖拽重排处理
iOS8.x及以前的系统,对拖拽重排并没有官方的支持。
动手之前,我们先来理清实现思路
- 长按Cell触发编辑模式
- 手势开始时:对当前
active cell进行截图并添加snapView在cell的位置 隐藏触发Cell,需要记录当前手势触发点距离active cell的中心点偏移量center offset - 手势移动时:根据当前触摸点的位置及
center offset更新snapView位置 - 手势移动时:判断
snapView同visibleCells的初active cell外所有cell的中心点距离,当交叉位置超过cell面积的1/4时,利用系统提供的- (void)moveItemAtIndexPath:(NSIndexPath *)indexPath toIndexPath:(NSIndexPath *)newIndexPath;进行交换,该接口在调用时,有默认 动画,时间0.25s - 手势移动时:需要添加边缘检测功能,如果当前
snapView边缘靠近CollectionView的边缘一定距离时,需要开始滚动视图,与边缘交叉距离变化时,需要根据比例进行加速或减速。同时第4点中用的动画效果,也应该相应的改变速度 -
手势结束时:通过系统api交换Cell时有动画效果,而且它仅仅只是个动画效果,所以我们需要在手势结束时,对数据源进行更新,这就要求我们记录交互开始时
indexPath信息并确定当前结束时的位置信息。同时,需要将snapView移除,将activeCell的显示并取消选中状态
为了帮助实现边缘检测功能,笔者绘制了下图,标注UICollectionView整体布局相关的几个重要参数,复习一下UICollectionView的ContentSize/frame.size/bounds.size/edgeInset之间的关系。因为我们需要借助这几个参数,确定拖拽方向及contentOffset变化范围
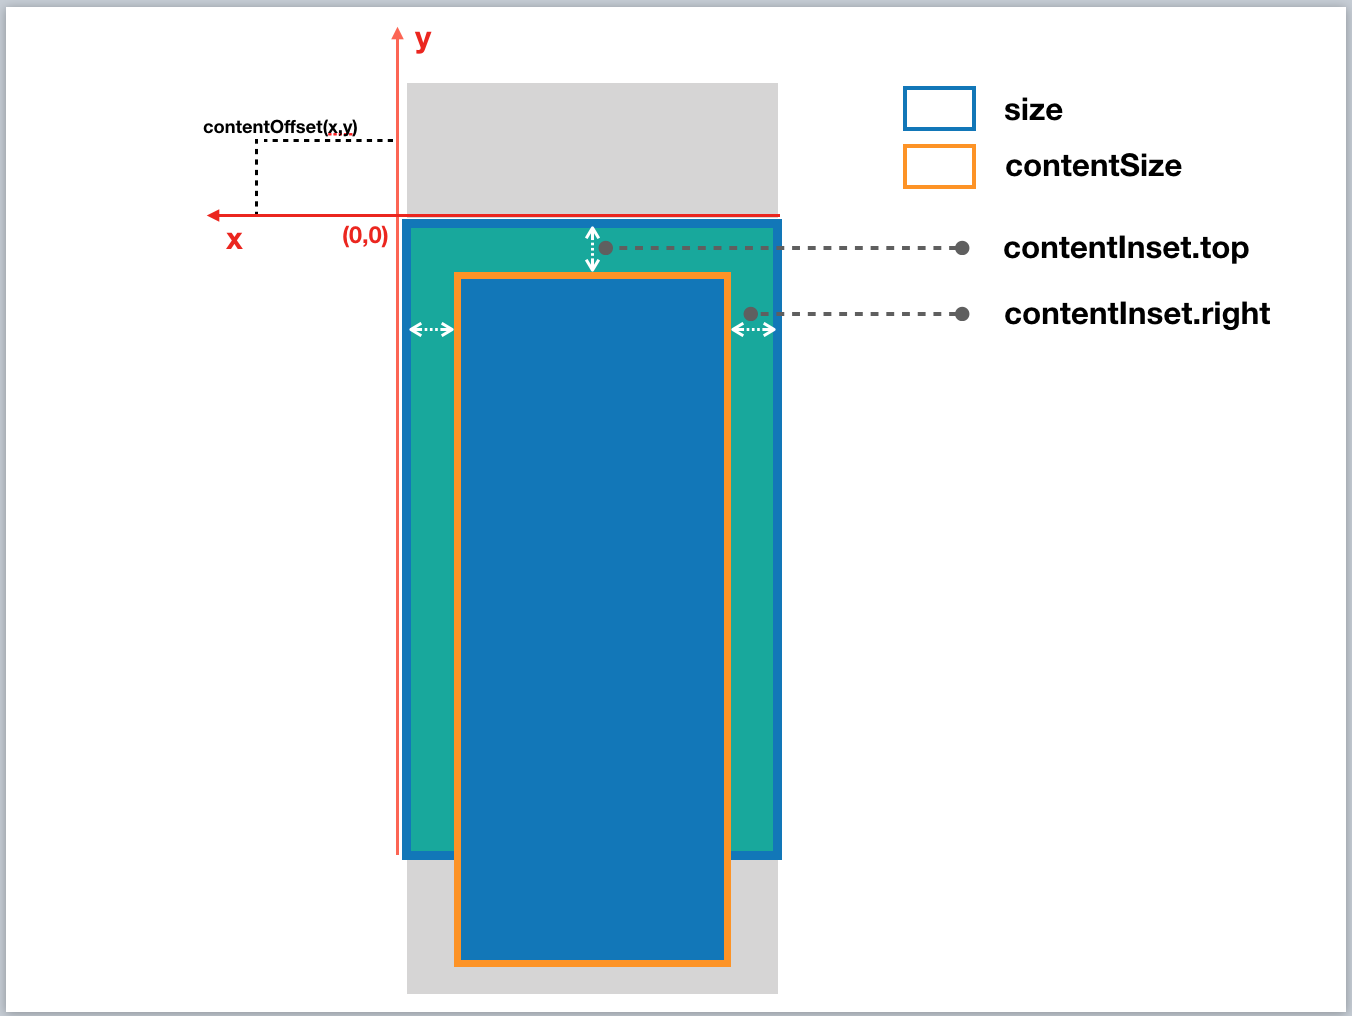
我们按照上文中准备好的的手势处理方法,逐步介绍
- handleEditingMoveWhenGestureBegan
- (void)handleEditingMoveWhenGestureBegan:(UILongPressGestureRecognizer *)recognizer{

    CGPoint pressPoint = [recognizer locationInView:self.collectionView];
    NSIndexPath *selectIndexPath = [self.collectionView indexPathForItemAtPoint:pressPoint];
    SPBaseCell *cell = (SPBaseCell *)[_collectionView cellForItemAtIndexPath:selectIndexPath];
    self.activeIndexPath = selectIndexPath;
    self.sourceIndexPath = selectIndexPath;
    self.activeCell = cell;
    cell.selected = YES;

    self.centerOffset = CGPointMake(pressPoint.x - cell.center.x, pressPoint.y - cell.center.y);

    self.snapViewForActiveCell = [cell snapshotViewAfterScreenUpdates:YES];
    self.snapViewForActiveCell.frame = cell.frame;
    cell.hidden = YES;
    [self.collectionView addSubview:self.snapViewForActiveCell];

}- handleEditingMoveWhenGestureChanged
- (void)handleEditingMoveWhenGestureChanged:(UILongPressGestureRecognizer *)recognizer{

    CGPoint pressPoint = [recognizer locationInView:self.collectionView];

    _snapViewForActiveCell.center = CGPointMake(pressPoint.x - _centerOffset.x, pressPoint.y-_centerOffset.y);
    [self handleExchangeOperation];// 交换操作
    [self detectEdge];// 边缘检测

}handleExchangeOperation:处理当前snapView与visibleCells的位置关系,如果交叉超过面积的1/4,则将隐藏的activeCell同当前cell进行交换,并更新当前活动位置
- (void)handleExchangeOperation{

    for (SPBaseCell *cell in self.collectionView.visibleCells)
    {
        NSIndexPath *currentIndexPath = [_collectionView indexPathForCell:cell];
        if ([_collectionView indexPathForCell:cell] == self.activeIndexPath) continue;

        CGFloat space_x = fabs(_snapViewForActiveCell.center.x - cell.center.x);
        CGFloat space_y = fabs(_snapViewForActiveCell.center.y - cell.center.y);
        // CGFloat space = sqrtf(powf(space_x, 2) + powf(space_y, 2));
        CGFloat size_x = cell.bounds.size.width;
        CGFloat size_y = cell.bounds.size.height;

        if (currentIndexPath.item > self.activeIndexPath.item)
        {
            [self.activeCells addObject:cell];
        }

        if (space_x <  size_x/2.0 && space_y < size_y/2.0)
        {
            [self handleCellExchangeWithSourceIndexPath:self.activeIndexPath destinationIndexPath:currentIndexPath];
            self.activeIndexPath = currentIndexPath;
        }
    }

}
handleCellExchangeWithSourceIndexPath: destinationIndexPath:对cell进行交换处理,对跨列或者跨行的交换,需要考虑cell的交换方向,我们定义moveForward变量,作为向上(-1)/下(1)移动、向左(-1)/右(1)移动的标记,moveDirection == -1时,cell反向动画,越靠前的cell越早移动,反之moveDirection == 1时,越靠后的cell越早移动。代码中出现的changeRatio,是我们在边缘检测中得到的比例值,用来加速
动画
- (void)handleCellExchangeWithSourceIndexPath:(NSIndexPath *)sourceIndexPath destinationIndexPath:(NSIndexPath *)destinationIndexPath{

    NSInteger activeRange = destinationIndexPath.item - sourceIndexPath.item;
    BOOL moveForward = activeRange > 0;
    NSInteger originIndex = 0;
    NSInteger targetIndex = 0;

    for (NSInteger i = 1; i <= labs(activeRange); i ++) {

        NSInteger moveDirection = moveForward?1:-1;
        originIndex = sourceIndexPath.item + i*moveDirection;
        targetIndex = originIndex  - 1*moveDirection;

        if (!_isEqualOrGreaterThan9_0) {
            CGFloat time = 0.25 - 0.11*fabs(self.changeRatio);
            NSLog(@"time:%f",time);
            [UIView beginAnimations:nil context:nil];
            [UIView setAnimationDuration:time];
            [_collectionView moveItemAtIndexPath:[NSIndexPath indexPathForItem:originIndex inSection:sourceIndexPath.section] toIndexPath:[NSIndexPath indexPathForItem:targetIndex inSection:sourceIndexPath.section]];
            [UIView commitAnimations];

        }


    }

}detectEdge:边缘检测。定义枚举类型SPDragDirection记录拖拽方向,我们设置边缘检测的范围是,当snapView的边距距离最近的CollectionView显示范围边距距离小于10时,启动CADisplayLink,按屏幕刷新率调整CollectionView的contentOffset,当手势离开这个范围时,需要将变化系数ChangeRatio清零并销毁CADisplayLink,减少不必要的性能开支。同时需要更新当前snapView的位置,因为这次位置的变化并不是LongPressGesture引起的,所以当手指不移动时,并不会触发手势的Changed状态,我们需要在修改contentOffset的位置根据视图滚动的方向去判断修改snapView.center。这里需要注意的一点细节,在下面的代码中,我们对baseOffset使用了向下取整的操作,因为浮点型数据精度的问题,很容易出现1.000001^365这种误差增大问题。笔者在实际操作时,出现了逐渐偏移现象,所以这里特别指出,希望各位同学以后处理类似问题时注意
typedef NS_ENUM(NSInteger,SPDragDirection) {
    SPDragDirectionRight,
    SPDragDirectionLeft,
    SPDragDirectionUp,
    SPDragDirectionDown
};
static CGFloat edgeRange = 10;
static CGFloat velocityRatio = 5;
- (void)detectEdge{
CGFloat baseOffset = 2;
CGPoint snapView_minPoint = self.snapViewForActiveCell.frame.origin;
CGFloat snapView_max_x = CGRectGetMaxX(_snapViewForActiveCell.frame);
CGFloat snapView_max_y = CGRectGetMaxY(_snapViewForActiveCell.frame);
// left
if (snapView_minPoint.x - self.collectionView.contentOffset.x < edgeRange &&
self.collectionView.contentOffset.x > 0){
CGFloat intersection_x = edgeRange - (snapView_minPoint.x - self.collectionView.contentOffset.x);
intersection_x = intersection_x < 2*edgeRange?2*edgeRange:intersection_x;
self.changeRatio = intersection_x/(2*edgeRange);
baseOffset = baseOffset * -1 - _changeRatio* baseOffset *velocityRatio;
self.edgeIntersectionOffset = floorf(baseOffset);
self.dragDirection = SPDragDirectionLeft;
[self setupCADisplayLink];
NSLog(@"Drag left - vertical offset:%f",self.edgeIntersectionOffset);
NSLog(@"CollectionView offset_X:%f",self.collectionView.contentOffset.x);
}
// up
else if (snapView_minPoint.y - self.collectionView.contentOffset.y < edgeRange &&
self.collectionView.contentOffset.y > 0){
CGFloat intersection_y = edgeRange - (snapView_minPoint.y - self.collectionView.contentOffset.y);
intersection_y = intersection_y > 2*edgeRange?2*edgeRange:intersection_y;
self.changeRatio = intersection_y/(2*edgeRange);
baseOffset = baseOffset * -1 - _changeRatio* baseOffset *velocityRatio;
self.edgeIntersectionOffset = floorf(baseOffset);
self.dragDirection = SPDragDirectionUp;
[self setupCADisplayLink];
NSLog(@"Drag up - vertical offset:%f",self.edgeIntersectionOffset);
NSLog(@"CollectionView offset_Y:%f",self.collectionView.contentOffset.y);
}
// right
else if (snapView_max_x + edgeRange > self.collectionView.contentOffset.x + self.collectionView.bounds.size.width && self.collectionView.contentOffset.x + self.collectionView.bounds.size.width < self.collectionView.contentSize.width){
CGFloat intersection_x = edgeRange - (self.collectionView.contentOffset.x + self.collectionView.bounds.size.width - snapView_max_x);
intersection_x = intersection_x > 2*edgeRange ? 2*edgeRange:intersection_x;
self.changeRatio = intersection_x/(2*edgeRange);
baseOffset = baseOffset + _changeRatio * baseOffset * velocityRatio;
self.edgeIntersectionOffset = floorf(baseOffset);
self.dragDirection = SPDragDirectionRight;
[self setupCADisplayLink];
NSLog(@"Drag right - vertical offset:%f",self.edgeIntersectionOffset);
NSLog(@"CollectionView offset_X:%f",self.collectionView.contentOffset.x);
}
// down
else if (snapView_max_y + edgeRange > self.collectionView.contentOffset.y + self.collectionView.bounds.size.height && self.collectionView.contentOffset.y + self.collectionView.bounds.size.height < self.collectionView.contentSize.height){
CGFloat intersection_y = edgeRange - (self.collectionView.contentOffset.y + self.collectionView.bounds.size.height - snapView_max_y);
intersection_y = intersection_y > 2*edgeRange ? 2*edgeRange:intersection_y;
self.changeRatio = intersection_y/(2*edgeRange);
baseOffset = baseOffset + _changeRatio* baseOffset * velocityRatio;
self.edgeIntersectionOffset = floorf(baseOffset);
self.dragDirection = SPDragDirectionDown;
[self setupCADisplayLink];
NSLog(@"Drag down - vertical offset:%f",self.edgeIntersectionOffset);
NSLog(@"CollectionView offset_Y:%f",self.collectionView.contentOffset.y);
}
// default
else{
self.changeRatio = 0;
if (self.displayLink)
{
[self invalidateCADisplayLink];
}
}
}CADisplayLink
- (void)setupCADisplayLink{

    if (self.displayLink) {
        return;
    }
    CADisplayLink *displayLink = [CADisplayLink displayLinkWithTarget:self selector:@selector(handleEdgeIntersection)];
    [displayLink addToRunLoop:[NSRunLoop mainRunLoop] forMode:NSRunLoopCommonModes];
    self.displayLink = displayLink;

}

- (void)invalidateCADisplayLink{

    [self.displayLink setPaused:YES];
    [self.displayLink invalidate];
    self.displayLink = nil;

}更新contentOffset及snapView.center
- (void)handleEdgeIntersection{

    [self handleExchangeOperation];

    switch (_scrollDirection) {
        case SPEasyScrollDirectionHorizontal:
        {
            if (self.collectionView.contentOffset.x + self.inset.left < 0 &&
                self.dragDirection == SPDragDirectionLeft){
                return;
            }
            if (self.collectionView.contentOffset.x >
                self.collectionView.contentSize.width - (self.collectionView.bounds.size.width - self.inset.left) &&
                self.dragDirection == SPDragDirectionRight){
                    return;
            }

            [self.collectionView setContentOffset:CGPointMake(_collectionView.contentOffset.x + self.edgeIntersectionOffset, _collectionView.contentOffset.y) animated:NO];
            self.snapViewForActiveCell.center = CGPointMake(_snapViewForActiveCell.center.x + self.edgeIntersectionOffset, _snapViewForActiveCell.center.y);
        }
            break;
        case SPEasyScrollDirectionVertical:
        {

            if (self.collectionView.contentOffset.y + self.inset.top< 0 &&
                self.dragDirection == SPDragDirectionUp) {
                return;
            }
            if (self.collectionView.contentOffset.y >
                self.collectionView.contentSize.height - (self.collectionView.bounds.size.height - self.inset.top) &&
                self.dragDirection == SPDragDirectionDown) {
                return;
            }

            [self.collectionView setContentOffset:CGPointMake(_collectionView.contentOffset.x, _collectionView.contentOffset.y +  self.edgeIntersectionOffset) animated:NO];
            self.snapViewForActiveCell.center = CGPointMake(_snapViewForActiveCell.center.x, _snapViewForActiveCell.center.y + self.edgeIntersectionOffset);
        }
            break;
    }

}- handleEditingMoveWhenGestureEnded
手势结束时,我们应该使用动画,将snapView的Center调整到已经交换到位的activeCell位置上,动画结束时,移除截图并将activeCell显示出来,销毁计时器、重置参数
(呼~终于大功告成了~~ 还没有啊喂,同学,这里得敲黑板了哈~前面可是提到了要注意动画仅仅是动画,不更新数据源的)
- (void)handleEditingMoveWhenGestureEnded:(UILongPressGestureRecognizer *)recognizer{

        [self.snapViewForActiveCell removeFromSuperview];
        self.activeCell.selected = NO;
        self.activeCell.hidden = NO;

        [self handleDatasourceExchangeWithSourceIndexPath:self.sourceIndexPath destinationIndexPath:self.activeIndexPath];
        [self invalidateCADisplayLink];
        self.edgeIntersectionOffset = 0;
        self.changeRatio = 0;

}因为数据源并不需要实时更新,所以我们只需要最初位置以及最后的位置即可,交换方法复制了上面的exchangeCell方法,其实不用moveForward参数了,全都是因为懒......
- (void)handleDatasourceExchangeWithSourceIndexPath:(NSIndexPath *)sourceIndexPath destinationIndexPath:(NSIndexPath *)destinationIndexPath{

    NSMutableArray *tempArr = [self.datas mutableCopy];

    NSInteger activeRange = destinationIndexPath.item - sourceIndexPath.item;
    BOOL moveForward = activeRange > 0;
    NSInteger originIndex = 0;
    NSInteger targetIndex = 0;

    for (NSInteger i = 1; i <= labs(activeRange); i ++) {

        NSInteger moveDirection = moveForward?1:-1;
        originIndex = sourceIndexPath.item + i*moveDirection;
        targetIndex = originIndex  - 1*moveDirection;

        [tempArr exchangeObjectAtIndex:originIndex withObjectAtIndex:targetIndex];

    }
    self.datas = [tempArr copy];
    NSLog(@"##### %@ #####",self.datas);
}- handleEditingMoveWhenGestureCanceledOrFailed
失败或者取消手势时,我们直接让snapView回去就好了嘛~必要步骤,销毁定时器,重置参数
- (void)handleEditingMoveWhenGestureCanceledOrFailed:(UILongPressGestureRecognizer *)recognizer{
[UIView animateWithDuration:0.25f animations:^{
self.snapViewForActiveCell.center = self.activeCell.center;
} completion:^(BOOL finished) {
[self.snapViewForActiveCell removeFromSuperview];
self.activeCell.selected = NO;
self.activeCell.hidden = NO;
}];
[self invalidateCADisplayLink];
self.edgeIntersectionOffset = 0;
self.changeRatio = 0;
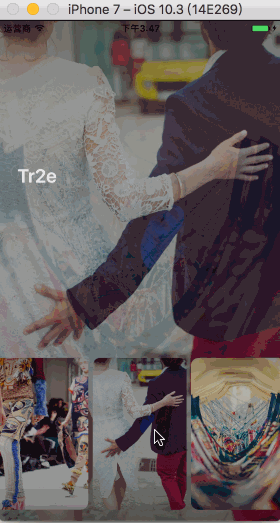
}至此,我们实现了单Section拖拽重排的UICollectionView,看一下效果,是不是感觉还蛮好
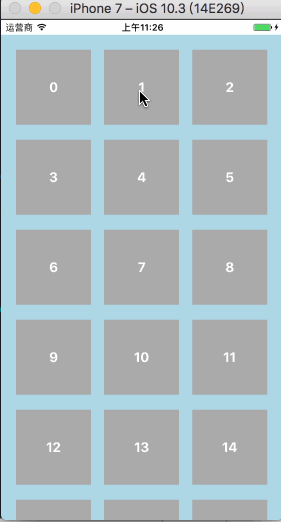
iOS8.x-_demo.gif
iOS9.x+拖拽重排处理
Father Apple在iOS9以后,为我们处理了上文中提到的手势处理、边缘检测等复杂计算,我们只需要在合适的位置,告诉系统位置信息即可。当然,这里苹果替我们做的动画,依然仅仅是动画。
上报位置 处理步骤如下:
- handleEditingMoveWhenGestureBegan:
这里是上报的当前Cell的IndexPath,而且苹果并没有设置类似上文中我们设置的centerOffset,它是将当前触摸点,直接设置成选中cell的中心点。[self.collectionView beginInteractiveMovementForItemAtIndexPath:selectIndexPath]; - handleEditingMoveWhenGestureChanged:
这里上报的是当前触摸点的位置[self.collectionView updateInteractiveMovementTargetPosition:pressPoint]; - handleEditingMoveWhenGestureEnded:
简单粗暴,上报结束[self.collectionView endInteractiveMovement]; -
handleEditingMoveWhenGestureCanceledOrFailed:
简单粗暴,上报取消,这里我们需要将选中状态清除self.activeCell.selected = NO; [self.collectionView cancelInteractiveMovement]; -
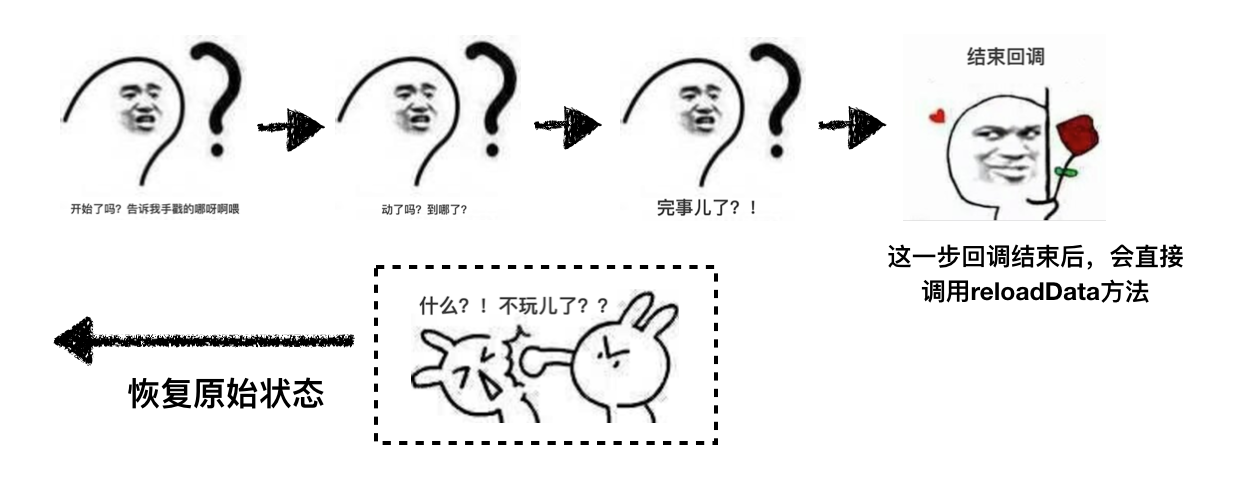
系统新的数据源方法:
处理结束回调,根据交换信息,更新数据源供回调完成后系统自动调用reloadData方法使用
- (void)collectionView:(UICollectionView *)collectionView moveItemAtIndexPath:(NSIndexPath *)sourceIndexPath toIndexPath:(NSIndexPath *)destinationIndexPath{

    BOOL canChange = self.datas.count > sourceIndexPath.item && self.datas.count > destinationIndexPath.item;
    if (canChange) {
        [self handleDatasourceExchangeWithSourceIndexPath:sourceIndexPath destinationIndexPath:destinationIndexPath];
    }

}
上述手势处理,可以直接合并到上文中的各手势阶段的处理中,只需要对系统版本号做判断后分情况处理即可
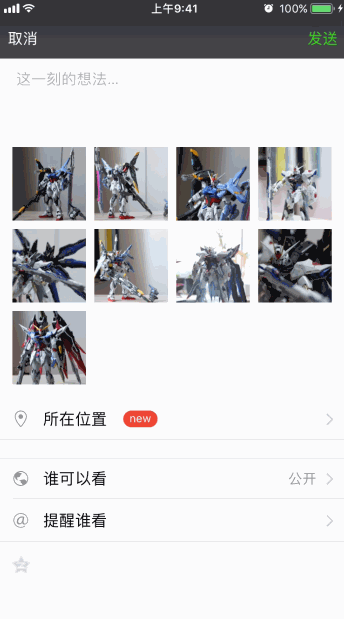
看一下系统的效果:
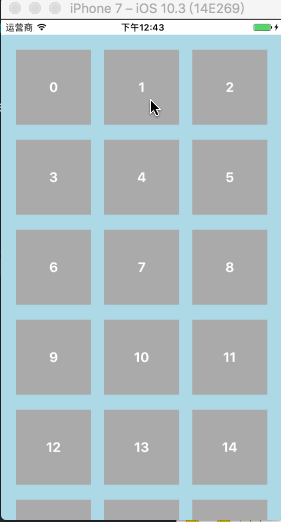
iOS9.0+_demo.gif
UICollectionView实现简单轮播
图片轮播器,几乎是现在所有App的必要组成部分了。实现轮播器的方式多种多样,这里笔者简单介绍一下,如何通过UICollectionView实现,对更好的理解UICollectionView及轮播器也许会有帮助( 毕竟封装进去了嘛( ͡° ͜ʖ ͡° )
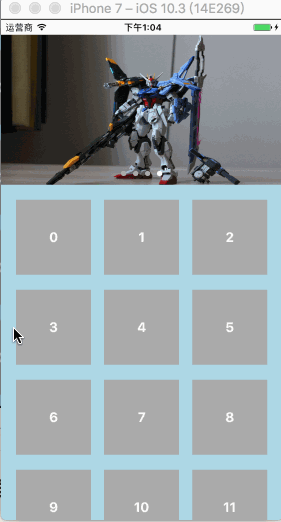
cycle_pic.gif
思路分析:
- 先确定是否需要轮播,决定开启定时器
Timer,使用scrollToItemAtIndexPath执行定时滚动 - 赋值数据源后,如果需要轮播,创建
UIPageControl,并设置collection的cell数为_totalItemCount = _needAutoScroll?datas.count * 500:datas.count; - 考虑一下几种特殊情况的处理
- 当滚动到总数最后一张时,应该返回第0张,此时动画效果设置为NO
- 当我们手动滑动拖拽CollectionView时,需要停止定时器,停止拖拽时,再次开启定时器
- 通过
contentOffset及itemSize判断当前位置,并结合数据源data.count计算取值位置为cell及pageControl当前位置赋值
几处关键代码:
- 滚动及位置处理
#pragma mark - cycle scroll actions
- (void)autoScroll{

    if (!_totalItemCount) return;
    NSInteger currentIndex = [self currentIndex];
    NSInteger nextIndex = [self nextIndexWithCurrentIndex:currentIndex];
    [self scroll2Index:nextIndex];

}

- (void)scroll2Index:(NSInteger)index{

    [_collectionView scrollToItemAtIndexPath:[NSIndexPath indexPathForItem:index inSection:0] atScrollPosition:UICollectionViewScrollPositionNone animated:index?YES:NO];

}

- (NSInteger)nextIndexWithCurrentIndex:(NSInteger)index{

    if (index == _totalItemCount - 1) {
        return 0;
    }else{
        return index + 1;
    }

}

- (NSInteger)currentIndex{

    if (_collectionView.frame.size.width == 0 || _collectionView.frame.size.height == 0) {
        return 0;
    }

    int index = 0;
    if (_layout.scrollDirection == UICollectionViewScrollDirectionHorizontal) {
        index = (_collectionView.contentOffset.x + _layout.itemSize.width * 0.5) / _layout.itemSize.width;
    } else {
        index = (_collectionView.contentOffset.y + _layout.itemSize.height * 0.5) / _layout.itemSize.height;
    }

    return MAX(0, index);
}-
数据源处理
-
数据
- (void)setDatas:(NSArray *)datas{
    _datas = datas;

    _totalItemCount = _needAutoScroll?datas.count * 500:datas.count;
    if (_needAutoScroll) {
        [self setupPageControl];
    }
    [self.collectionView reloadData];
}- 数据源
- (NSInteger)numberOfSectionsInCollectionView:(UICollectionView *)collectionView{
    return 1;
}

- (NSInteger)collectionView:(UICollectionView *)collectionView numberOfItemsInSection:(NSInteger)section{
    return _totalItemCount;
}

- (UICollectionViewCell *)collectionView:(UICollectionView *)collectionView cellForItemAtIndexPath:(NSIndexPath *)indexPath{

    SPBaseCell *cell = [collectionView dequeueReusableCellWithReuseIdentifier:ReuseIdentifier forIndexPath:indexPath];
    cell.data = self.datas[_needAutoScroll?[self getRealShownIndex:indexPath.item]:indexPath.item];

    return cell;

}

- (NSInteger)getRealShownIndex:(NSInteger)index{

    return index%_datas.count;

}
代理方法,处理交互中NSTimer创建/销毁及PageControl.currentPage数据更新
- (void)scrollViewDidScroll:(UIScrollView *)scrollView{

    if (!self.datas.count) return;
     _pageControl.currentPage = [self getRealShownIndex:[self currentIndex]];

}

- (void)scrollViewWillBeginDragging:(UIScrollView *)scrollView{
    if (_needAutoScroll) [self invalidateTimer];
}

-(void)scrollViewDidEndDragging:(UIScrollView *)scrollView willDecelerate:(BOOL)decelerate{
    if (_needAutoScroll) [self setupTimer];
}

- (void)willMoveToSuperview:(UIView *)newSuperview{
    if (!newSuperview) {
        [self invalidateTimer];
    }
}
总结
UICollectionView作为最最最重要的视图组件之一,我们不仅需要熟练掌握,同时它dataSource/delegate+layout,分离布局的编程思想,也很值得我们去思考学习。
笔者博客地址:iOS-UICollectionView快速构造/拖拽重排/轮播实现介绍
Github传送门:
SPEasyCollectionView
[]~( ̄▽ ̄)~*
