

学习及实践笔记
记录iOS动画的学习及实践
目录
- 显示层(UIView)动画
- 初级动画
- 关键帧动画
- 逐帧动画
- Gif动画的处理
- 内容层(CALayer)动画
- CoreAnimation结构
- CABasicAnimation
- CAKeyFrameAnimation
- CAGroupAnimation
- CATransition
- CAEmitterLayer 粒子动画
- CAGradientLayer 梯度动画
- CAShapeLayer 绘制动画
- CAReplicatorLayer 复制动画
动画的分类
根据动画的实现“位置”,可以分为 显示层(UIView)动画 和 内容层(CALayer)动画
显示层(UIView)动画
初级动画
初级动画,是最为常见的一种动画。通过UIView属性的修改,配合UIView的两种动画apiblock、方法形式实现
api使用示范
// 动画方法形式
    [UIView beginAnimations:nil context:nil];
    [UIView setAnimationDuration:0.35f];
    [UIView setAnimationRepeatAutoreverses:NO];// 自动翻转
    [UIView setAnimationDelegate:self];// 需设置代理
    [UIView setAnimationDidStopSelector:@selector(testForAutoreverses)];
    self.testButton.backgroundColor = [UIColor lightGrayColor];
    [UIView commitAnimations];

// 动画block形式
    [UIView animateWithDuration:2.0f animations:^{
        self.testButton.backgroundColor = [UIColor whiteColor];
    }];
根据简单动画的效果,最常见的显示层(UIView)属性修改分为以下几类
-
frame属性相关的位置形状变化 -
alpha属性相关 -
transform属性相关
如果希望使用弹跳效果,系统也同样提供了api供开发者使用
+ (void)animateWithDuration:(NSTimeInterval)duration delay:(NSTimeInterval)delay usingSpringWithDamping:(CGFloat)dampingRatio initialSpringVelocity:(CGFloat)velocity options:(UIViewAnimationOptions)options animations:(void (^)(void))animations completion:(void (^ __nullable)(BOOL finished))completion参数介绍:dampingRatio:速度衰减比例。取值范围0 ~ 1,值越低震动越强velocity:初始速度,越大速度越快
关键帧动画
使我们具备控制一段连贯时间内,精确到某个时间点(关键帧)上的连续变化的能力
// 系统api
+ (void)animateKeyframesWithDuration:(NSTimeInterval)duration delay:(NSTimeInterval)delay options:(UIViewKeyframeAnimationOptions)options animations:(void (^)(void))animations completion:(void (^ __nullable)(BOOL finished))completion NS_AVAILABLE_IOS(7_0);
+ (void)addKeyframeWithRelativeStartTime:(double)frameStartTime relativeDuration:(double)frameDuration animations:(void (^)(void))animations NS_AVAILABLE_IOS(7_0); // start time and duration are values between 0.0 and 1.0 specifying time and duration relative to the overall time of the keyframe animationapi中的options参数解释 官方文档
    UIViewKeyframeAnimationOptionCalculationModeLinear     = 0 << 10, // 线性运算模式.The option to use a simple linear calculation when interpolating between keyframe values.
    UIViewKeyframeAnimationOptionCalculationModeDiscrete   = 1 << 10, // 离散运算模式,展示关键帧.The option to not interpolate between keyframe values, but rather to jump directly to each new keyframe value.
    UIViewKeyframeAnimationOptionCalculationModePaced      = 2 << 10, // 均匀运算模式.The option to compute intermediate keyframe values using a simple pacing algorithm. This option results in an evenly paced animation.
    UIViewKeyframeAnimationOptionCalculationModeCubic      = 3 << 10, // The option to compute intermediate frames using a default Catmull-Rom spline that passes through the keyframe values. You cannot adjust the parameters of this algorithm.
UIViewKeyframeAnimationOptionCalculationModeCubicPaced = 4 << 10 // The option to compute intermediate frames using the cubic scheme while ignoring the timing properties of the animation. Instead, timing parameters are calculated implicitly to give the animation a constant velocity.最后两种Cubic运算模式,附上实验代码及效果图:(可达鸭眉头一皱,发现这两个参数并不简单)
- (void)viewDidLoad {
[super viewDidLoad];
self.redCircle = [[UIView alloc] init];
_redCircle.backgroundColor = [UIColor redColor];
_redCircle.frame = CGRectMake(0, 0, 50, 50);
_redCircle.layer.cornerRadius = 5;
[_redCircle.layer masksToBounds];
[self.view addSubview:_redCircle];
}
- (void)touchesBegan:(NSSet<UITouch *> *)touches withEvent:(UIEvent *)event{
[self keyframeAnimation];
}
- (void)keyframeAnimation{
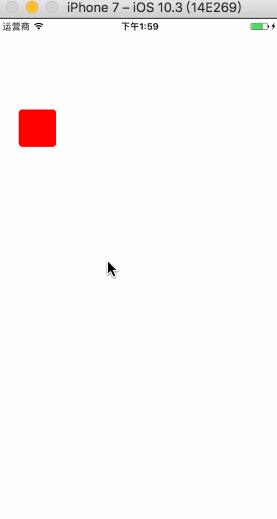
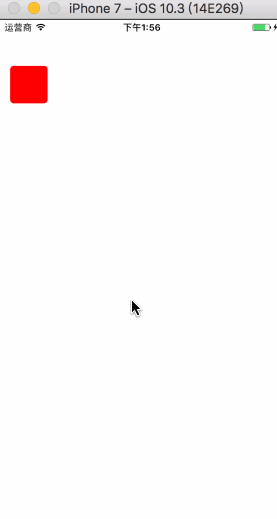
[UIView animateKeyframesWithDuration:10 delay:0 options:UIViewKeyframeAnimationOptionCalculationModeCubic animations:^{
[UIView addKeyframeWithRelativeStartTime:0.0 relativeDuration:1/5.0 animations:^{
self.redCircle.frame = CGRectMake(50, 200, 50, 50);
}];
[UIView addKeyframeWithRelativeStartTime:1/5.0 relativeDuration:1/5.0 animations:^{
self.redCircle.frame = CGRectMake(100, 250, 50, 50);
}];
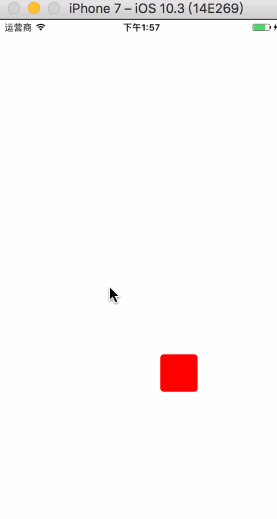
[UIView addKeyframeWithRelativeStartTime:2/5.0 relativeDuration:1/5.0 animations:^{
self.redCircle.frame = CGRectMake(150, 275, 50, 50);
}];
[UIView addKeyframeWithRelativeStartTime:3/5.0 relativeDuration:1/5.0 animations:^{
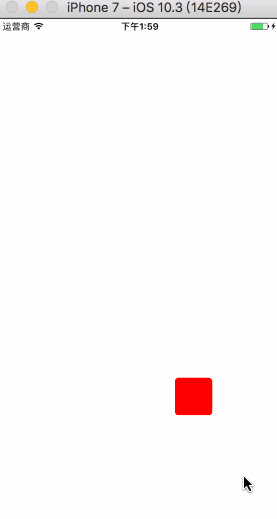
self.redCircle.frame = CGRectMake(200, 350, 50, 50);
}];
[UIView addKeyframeWithRelativeStartTime:4/5.0 relativeDuration:1/5.0 animations:^{
self.redCircle.frame = CGRectMake(250, 500, 50, 50);
}];
} completion:^(BOOL finished) {
}];
}-
CalculationModeCubic是一种特殊的贝塞尔曲线(关于贝塞尔曲线原理,文下文中有详细解释),就像官方文档中指出的,通过default Catmull-Rom spline在关键帧值中插入两个运算点,让贝塞尔曲线能够穿过所有的点而实现运算得出的动画速度更加平滑,防止出现因动画时间过短造成的动画突变的情况
cubic-normal.gif
cubic-reverse.gif
-
CalculationModeCubicPaced:暂且解释为均匀平滑模式,可能是因为忽略了时间属性?特殊情况下仍会出现突转的情况
cubicPaced-normal
cubicPaced-reverse.gif
通过实例对比,不管是下落还是突转,cubic的效果都更加平滑
逐帧动画
- 如果是图片序列的展示,系统提供了序列帧的接口
示例代码:
    self.view.backgroundColor = [UIColor lightGrayColor];
    self.animationView = [[UIImageView alloc] init];
    self.animationView.image = [UIImage imageNamed:@"m2_10001"];
    [self.animationView sizeToFit];
    self.animationView.center = self.view.center;
    [self.view addSubview:self.animationView];


    NSMutableArray *imgArr = [NSMutableArray new];
    for (int i = 1; i < 67; i ++) {
        UIImage *img = [UIImage imageNamed:[NSString stringWithFormat:@"m2_1%04d",i]];
        [imgArr addObject:img];
    }

    self.animationView.animationImages = [imgArr copy];
    self.animationView.animationDuration = 67/30.0;
    [self.animationView startAnimating];
序列帧动画
- 如果用到了图形上下文的绘制,就需要
NSTimer或者CADisplayLink实现帧速率的控制,设置好相应的timeinterval或者frameinterval即可。(CADisplayLink固定刷新率60Hz,frameInterval属性的赋值n,实际间隔时间为n x 1/60`,频率固定,推荐使用 )
drawrect.gif
Gif动画
Gif相关
image i/o
Image I/O框架提供了不透明数据类型来读取图像数据和写图像数据到一个目的地(CGImageSourceRef和CGImageDestinationRef)。它支持很多图像格式,包括标准web格式、搞动态范围图像,和原始相机数据。Image I/O还有许多其他特性:
1.mac平台上的最快的图像解码和编码。
2.逐步加载图片的能力。
3.支持图像元数据。
4.缓存效果。
你可以通过下面的对象来创建image source和image destination:
1.URL:即CFURLRef对象。
2.Core Foundation对象:CFDataRef和CFmutableDataRef。
3.Quartz data consumer(CGDataConsumerRef)和data provider(CGDataProviderRef)对象。
1.使用Image I/O框架:#import <ImageIO/ImageIO.h>
2.使用UTType:#import <MobileCoreServices/MobileCoreServices.h>
2、支持的图像格式:例如JPEG、JPEG2000、RAW、TIFF、BMP、PNG。在不同的平台不是所有的格式都支持。你可以调用下列函数来获得支持的格式:
1)CGImageSourceCopyTypeIdentifiers:返回同一类型修饰符的数组,表示支持的图像源
2)CGImageDestinationCopyTypeIdentifiers:返回支持的目的地的Uniform Type Identifiers(UTIs)
相关知识链接
image i/o
UTType官方文档
UTIs
Gif播放
iOS原生是不支持gif格式图片的,所以当我们想要使用一张gif图片时,需要将gif图片通过image i/o转换成相应的序列帧图片后,生成UIImage使用
具体步骤如下图
Gif使用流程
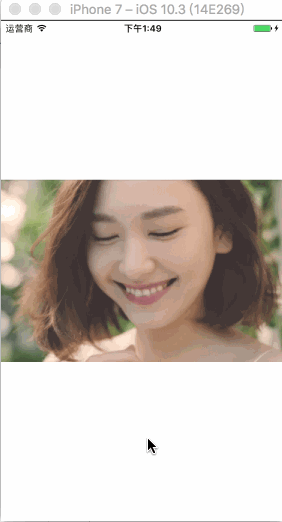
我们要使用的GIF图片

gakki2.gif
下面请看我们转换的具体代码:
NSString *path = [[NSBundle mainBundle] pathForResource:@"gakki2" ofType:@"gif"];
UIImage *animateImg = [UIImage imageWithContentsOfFile:path];
UIImageView *gifImageView = [[UIImageView alloc] initWithImage:animateImg];
[gifImageView sizeToFit];
gifImageView.center = self.view.center;
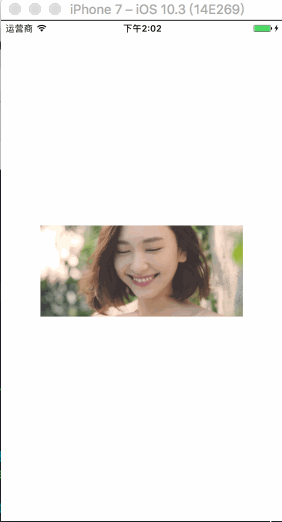
[self.view addSubview:gifImageView];看一下效果
gakkiUnmove.gif
不出所料,果然直接使用是行不通的对吗?但是Gakki还是很好看有木有~
我们按照正确的方式打开
/**
 *  GIF -> NSData -> ImageIO -> UIImage
 */
- (void)testOfGif{

    NSString *path = [[NSBundle mainBundle] pathForResource:@"gakki2" ofType:@"gif"];
//    UIImage *animateImg = [UIImage imageWithContentsOfFile:path];

    NSData *gifData = [NSData dataWithContentsOfFile:path];

    CGImageSourceRef gifdataSource = CGImageSourceCreateWithData((__bridge CFDataRef)gifData, NULL);
    size_t count = CGImageSourceGetCount(gifdataSource);

    UIImage *animateImg = nil;
    if (count <= 1)
    {
        animateImg = [UIImage imageWithData:gifData];
    }
    else
    {
        NSMutableArray *imgArr = [[NSMutableArray alloc] init];
        CGFloat timeinterval = 0.0f;

        for (size_t i = 0; i < count; i ++) {
            CGImageRef imgRf = CGImageSourceCreateImageAtIndex(gifdataSource, i, NULL);

            if (!imgRf) {
                continue;
            }

            timeinterval += [self getKeyFrameDurationWithIndex:i andSoureceRef:gifdataSource];

            UIImage *img = [UIImage imageWithCGImage:imgRf scale:[UIScreen mainScreen].scale orientation:UIImageOrientationUp];
            [imgArr addObject:img];
            CGImageRelease(imgRf);

        }

        CFRelease(gifdataSource);

        animateImg = [UIImage animatedImageWithImages:imgArr duration:timeinterval];

    }


    UIImageView *gifImageView = [[UIImageView alloc] initWithImage:animateImg];
    [gifImageView sizeToFit];
    gifImageView.center = self.view.center;

    [self.view addSubview:gifImageView];

}

- (CGFloat)getKeyFrameDurationWithIndex:(size_t )index andSoureceRef:(CGImageSourceRef )soureRef{

    CGFloat frameDuration = 0.1f;

    CFDictionaryRef cfFrameProperties = CGImageSourceCopyPropertiesAtIndex(soureRef, index, NULL);
    NSDictionary *frameProperties = (__bridge NSDictionary *)cfFrameProperties;

    NSDictionary *gifProperties = frameProperties[(NSString *)kCGImagePropertyGIFDictionary];

    NSNumber *duration = gifProperties[(NSString *)kCGImagePropertyGIFUnclampedDelayTime];

    if (duration)
    {
        frameDuration = duration.floatValue;
    }
    else
    {
        NSNumber *duration = gifProperties[(NSString *)kCGImagePropertyGIFDelayTime];
        if (duration) frameDuration = duration.floatValue;
    }

    if (frameDuration < 0.011f) {
        frameDuration = 0.1f;
    }

    CFRelease(cfFrameProperties);

    return frameDuration;

}
注意点:
- 因为
image i/o属于Core Foundation,所以出现了大量的__bridge处理。书写的时候有点不习惯,不过看一下xcode的错误信息便能知道原因 - 我们的第二步处理,是通过
CGImageSourceRef读取单帧图片的时间信息。这里需要注意一下,因为我们在用序列帧图片数组合成gif文件时,需要对每一张图片的该信息赋值 - 操作CF信息的时,最后都要进行
CFRelease操作 - 仔细看代码的同学也许会注意到下面对于当前帧时间的处理,我们按照
SDWebImage中相关处理的备注做出解释:if (frameDuration < 0.011f) { frameDuration = 0.1f; }SDWebImage: UIImage + GIF.m
Many annoying ads specify a 0 duration to make an image flash as quickly as possible.
We follow Firefox's behavior and use a duration of 100 ms for any frames that specify a duration of <= 10 ms. See rdar://problem/7689300 and webkit.org/b/36082 for more information.
看一下我们运行的效果:帧速率的效果跟原图保持一致
gakkiAwake.gif
序列帧生成Gif
它可以实际应用于视频转Gif的操作,因为视频我们可以按照时间去进行相应的截图,如果控制好时间间隔,循环截图,通过以下方法生成Gif应该可以实现。这里就暂时不实验了,感兴趣的同学可以试一下。附视频截图方法
// 通过视频url截取封面
+ (UIImage*) thumbnailImageForVideo:(NSURL *)videoURL {

    AVURLAsset *asset = [[AVURLAsset alloc] initWithURL:videoURL options:nil];

    AVAssetImageGenerator *gen = [[AVAssetImageGenerator alloc] initWithAsset:asset];

    gen.appliesPreferredTrackTransform = YES;

    CMTime time = CMTimeMakeWithSeconds(1.0, 600);// 设置时间

    NSError *error = nil;

    CMTime actualTime;

    CGImageRef image = [gen copyCGImageAtTime:time actualTime:&actualTime error:&error];
    UIImage *thumbImg = [[UIImage alloc] initWithCGImage:image];
    if (image) {
        CFRelease(image);
    }
    return thumbImg;

}
言归正传,还记得我们前面讲逐帧动画时,用到的图片数组吗?我们利用它们,来合成一张gif被进行沙盒存储

Gif合成流程
代码实现,此处再次提醒大家需要导入的头文件
1.使用Image I/O框架:#import <ImageIO/ImageIO.h>
2.使用UTType:#import <MobileCoreServices/MobileCoreServices.h>
/**
 *  序列帧图片的读取 -> 创建Gif文件,获取CGImageDestinationRef -> 为单帧图片CGImageRef属性赋值 -> 为Gif设置相关属性 -> 通过CGImageDestinationRef合成gif
 */
- (void)createGifFile{

    NSMutableArray *imgArr = [NSMutableArray new];
    for (int i = 1; i < 67; i ++) {
        UIImage *img = [UIImage imageNamed:[NSString stringWithFormat:@"m2_1%04d",i]];
        [imgArr addObject:img];
    }

    NSString *path = [NSSearchPathForDirectoriesInDomains(NSDocumentDirectory, NSUserDomainMask, YES) firstObject];
    NSString *magicPath = [path stringByAppendingString:@"/magic.gif"];

    NSLog(@"magicPath : %@",magicPath);

    CFURLRef URLRef = CFURLCreateWithFileSystemPath(kCFAllocatorDefault, (__bridge CFStringRef)magicPath, kCFURLPOSIXPathStyle, NO);
    CGImageDestinationRef gifRef = CGImageDestinationCreateWithURL(URLRef, kUTTypeGIF,imgArr.count, NULL);

    NSDictionary *keyFrameDict = @{(NSString *)kCGImagePropertyGIFDelayTime:@(1/30.0)};// 30fps
    NSDictionary *gifKeyFrameDict = @{(NSString *)kCGImagePropertyGIFDictionary:keyFrameDict};

    for (UIImage *image in imgArr) {// 每帧图片进行设置

        CGImageRef imageRef = [image CGImage];
        CGImageDestinationAddImage(gifRef, imageRef, (__bridge CFDictionaryRef) gifKeyFrameDict);

    }

    NSDictionary *gifSettingDict = @{

                                     // 色彩空间格式
                                     (NSString *)kCGImagePropertyColorModel:(NSString *)kCGImagePropertyColorModelGray,
                                     // 色彩深度
                                     (NSString *)kCGImagePropertyDepth:@(8),
                                     // gif执行次数
                                     (NSString *)kCGImagePropertyGIFLoopCount:@(1)

                                     };

    NSDictionary *gifDict = @{

                              (NSString *)kCGImagePropertyGIFDictionary : gifSettingDict

                              };

    CGImageDestinationSetProperties(gifRef, (__bridge CFDictionaryRef) gifDict);

    CGImageDestinationFinalize(gifRef);

}
在设置gif图片的属性时,我们用到了 色彩空间格式 、 色彩深度 两个参数,色彩格式我们采用最为常见的RGB格式,色彩深度我们设置为@(8)。需要大家根据自己的实际需要去设置。
| 图像类型 | 色阶位数 |
|---|---|
| 黑白图像 | 1 |
| 灰度图像 | 8 |
| 彩色图像 | 16 或 32 |
我们看一下沙盒中我们生成的Gif :finder shift + command + g
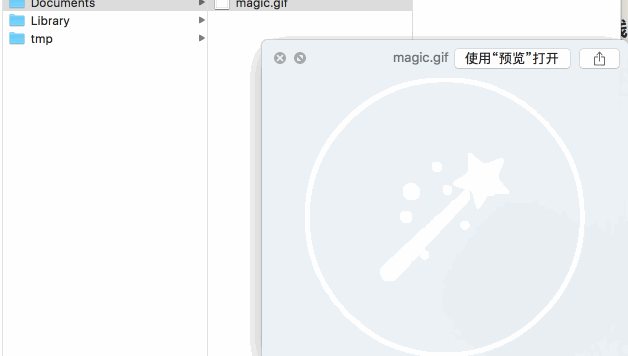
magicgif.gif
内容层(CALayer)动画
内容层动画,是指在一定时间内,对layer的Animatable Property进行修改所产生的动画。所以,熟悉CALayer的常见属性,会对我们后边用CoreAnimation实现 内容层动画 大有帮助。
- 下边我们列举一些常见的属性并做了必要备注
- positon
- cornerRadius
- translation.x/y/z
- transform.scale/rotation
- borderWidth/borderColor
- opacity ( like UIView's alpha )
- shadowOpacity
- shadowRadius ( default is 3.0f )
- shadowOffset ( default is (.0f,-3.0f) )
- backgroundColor
( when we want to change color,we need to use UIColor like this :(__bridge id _Nullable)([UIColor greenColor].CGColor) )
这里需要注意的是,如果一个layer对象存在对应着的View,则称这个layer是一个Root Layer, 非 Root Layer 一般都是通过CALayer或其子类直接创建的。
所有的非Root Layer在设置Animatable Properties的时候都存在着隐式动画,默认的duration是0.25秒.
我们看一个简单CAShapeLayer隐式动画的例子
- (void)testForCALayer{

    self.testLayer = [[CAShapeLayer alloc] init];
    _testLayer.strokeEnd = 0;
    _testLayer.strokeColor = [UIColor redColor].CGColor;
    _testLayer.fillColor = [UIColor clearColor].CGColor;
    _testLayer.lineWidth = 3;
    _testLayer.path = [UIBezierPath bezierPathWithArcCenter:self.view.center radius:100 startAngle:-M_PI_2 endAngle:3/2.0*M_PI clockwise:YES].CGPath;
    [self.view.layer addSublayer:_testLayer];

}

- (void)animationForLayer{

    self.testLayer.strokeEnd = 1;

}在touchesBegan方法中调用animationForLayer的方法,可以发现,我们并没有设置任何动画相关的语句 效果如下
Layer的隐式动画.gif
CoreAnimation结构
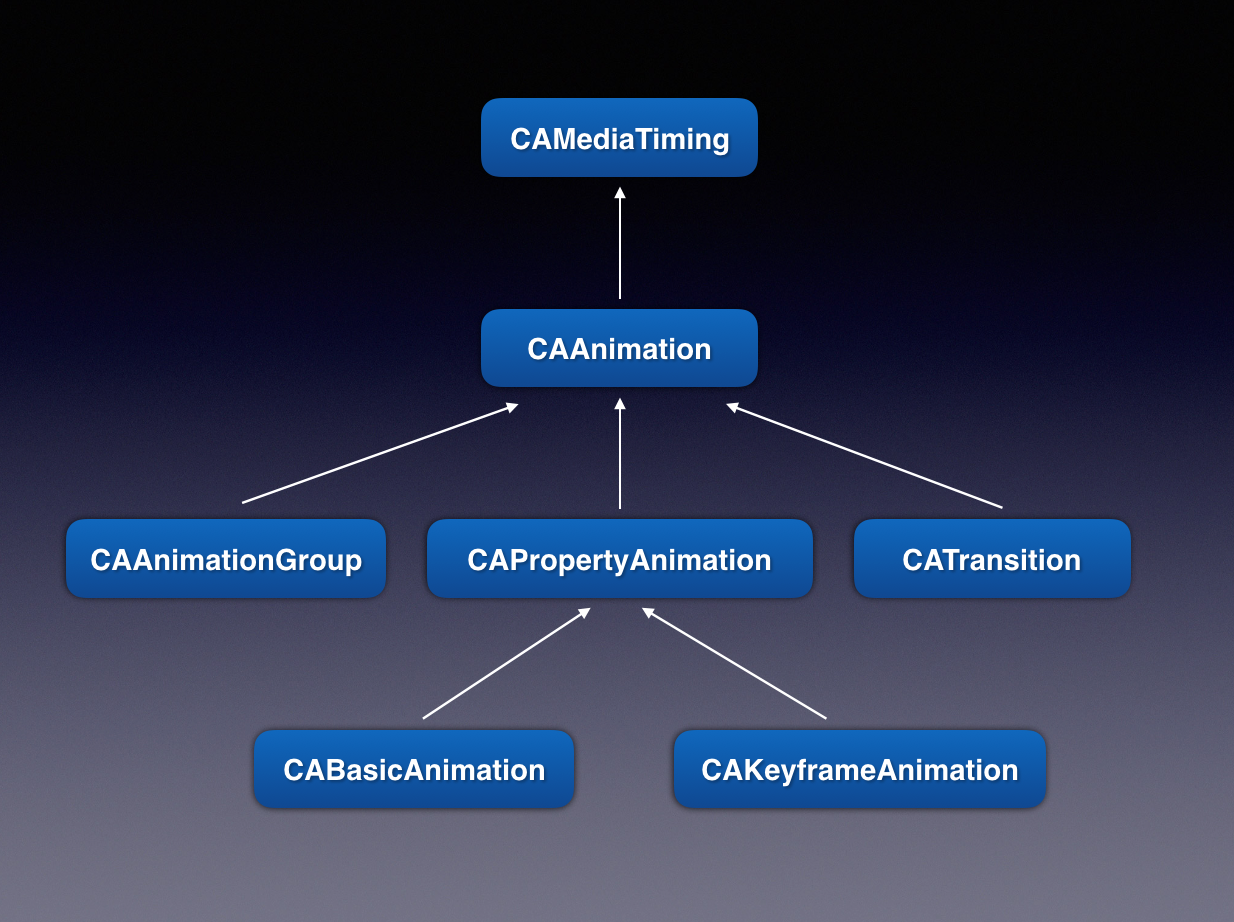
CA structure
CABasicAnimation
CABasicAnimation
CABasicAnimation必要属性的设置:
-
keyPath传入layer的属性字符串 -
duration设置基本动画时长 -
- (void)setRomovedOnCompletion默认为YES,会在动画结束时,将动画从render tree中一次性移除,恢复初始状态。通常我们设置为NO,保留动画结束时的效果 -
fillModel属性决定当前对象过了非active时间段的行为,通常我们选择kCAFillModeForwards-
kCAFillModeRemoved这个是默认值,也就是说当动画开始前和动画结束后,动画对layer都没有影响,动画结束后,layer会恢复到之前的状态 -
kCAFillModeForwards当动画结束后,layer会一直保持着动画最后的状态 -
kCAFillModeBackwards同kCAFillModeForwards是相对的,就是在动画开始前,你只要将动画加入了一个layer,layer便立即进入动画的初始状态并等待动画开始.你可以这样设定测试代码,将一个动画加入一个layer的时候延迟5秒执行.然后就会发现在动画没有开始的时候,只要动画被加入了layer,layer便处于动画初始状态 -
kCAFillModeBoth理解了上面两个,这个就很好理解了,这个其实就是上面两个的合成.动画加入后开始之前,layer便处于动画初始状态,动画结束后layer保持动画最后的状态.
-
以下三个属性,参照官方描述,很容易理解
fromValuetoValue-
byValue/* Father's Love * The objects defining the property values being interpolated between. * All are optional, and no more than two should be non-nil. The object * type should match the type of the property being animated (using the * standard rules described in CALayer.h). The supported modes of * animation are: * * - both `fromValue' and `toValue' non-nil. Interpolates between * `fromValue' and `toValue'. * * - `fromValue' and `byValue' non-nil. Interpolates between * `fromValue' and `fromValue' plus `byValue'. * * - `byValue' and `toValue' non-nil. Interpolates between `toValue' * minus `byValue' and `toValue'. * * - `fromValue' non-nil. Interpolates between `fromValue' and the * current presentation value of the property. * * - `toValue' non-nil. Interpolates between the layer's current value * of the property in the render tree and `toValue'. * * - `byValue' non-nil. Interpolates between the layer's current value * of the property in the render tree and that plus `byValue'. */
如果希望加入显示层动画中的spring效果,Father Apple贴心的为我们准备了CABasicAnimation的子类CASpringAnimation,推荐使用。控制弹性动画的属性
dampinginitialVelocitymassstiffness
简单demo演示
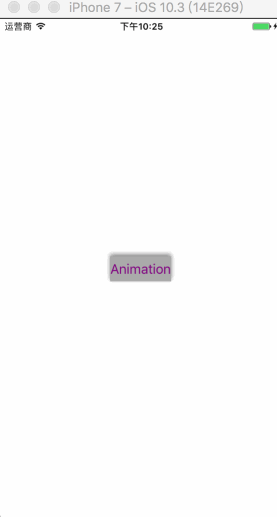
BasicAnimation.gif
- (void)testForCABasicAnimation{

    UIButton *button = [UIButton buttonWithType:UIButtonTypeCustom];
    [button setTitle:@"Animation" forState:UIControlStateNormal];
    [button setBackgroundColor:[UIColor lightGrayColor]];
    [button setTitleColor:[UIColor purpleColor] forState:UIControlStateNormal];
    [button sizeToFit];
    button.center = self.view.center;
    button.layer.borderColor = [UIColor redColor].CGColor;
    [self.view addSubview:button];
    self.testButton = button;

    self.testButton.layer.shadowColor = [UIColor blackColor].CGColor;
    self.testButton.layer.shadowOpacity = 0.5;

    NSLog(@"\nshadowOffset:%f,%f",self.testButton.layer.shadowOffset.width,self.testButton.layer.shadowOffset.height);
    NSLog(@"\nshadowRadius:%f",self.testButton.layer.shadowRadius);

}

- (void)callBasicAnimation{

    CASpringAnimation *basic = [[CASpringAnimation alloc] init];
    basic.keyPath = @"cornerRadius";
    basic.toValue =  @15;
    basic.duration = 2.0f;
    basic.fillMode = kCAFillModeForwards;
    [basic setRemovedOnCompletion:NO];
    basic.damping = 6;
    basic.initialVelocity = 5;
    basic.mass = 0.5;

    [self.testButton.layer addAnimation:basic forKey:nil];

}
CAKeyFrameAnimation
同显示层动画中的关键帧动画类似,提供更加精确的动画控制能力
常用属性
-
values数组类型,描述每个关键帧的相关属性 -
keyTimesNSNumber泛型数组类型,描述关键帧时间信息,范围
[0,1],时间点:keytime * duration 同addKeyframeWithRelativeStartTime中的时间描述类似,不再赘述 -
path属性,更加精确的控制动画的路径
简单demo演示
CAKeyframeAnimation.gif
- (void)callKeyframeAnimation{// CAKeyframeAnimation

    CAKeyframeAnimation *keyframe = [[CAKeyframeAnimation alloc] init];
    keyframe.keyPath = @"position";
    keyframe.duration = 5.0f;
//    keyframe.repeatCount = MAXFLOAT;
    keyframe.fillMode = kCAFillModeForwards;
    keyframe.calculationMode = kCAAnimationCubic;
    [keyframe setRemovedOnCompletion:NO];
//    keyframe.values = @[
//                        (__bridge id _Nullable)[UIColor redColor].CGColor,
//                        (__bridge id _Nullable)[UIColor yellowColor].CGColor,
//                        (__bridge id _Nullable)[UIColor greenColor].CGColor,
//                        (__bridge id _Nullable)[UIColor blueColor].CGColor,
//                        (__bridge id _Nullable)[UIColor purpleColor].CGColor
//                        ];

    keyframe.path = [self keyframePath];

    [self.testButton.layer addAnimation:keyframe forKey:nil];


}

- (CGMutablePathRef )keyframePath{

    CGMutablePathRef path = CGPathCreateMutable();
    CGPathMoveToPoint(path, NULL, 100, 100);
    CGPathAddLineToPoint(path, NULL, 100, 200);
    CGPathAddLineToPoint(path, NULL, 200, 350);

    CGPathAddArc(path, NULL, 200, 350, 100, 0, M_PI, NO);

    return path;

}
CAGroupAnimation
提供了animations数组接口,提供多个动画进行组合的能力
简单demo演示
CAAnimationGroup.gif
- (void)callAnimationGroup{

    CAKeyframeAnimation *keyframe = [[CAKeyframeAnimation alloc] init];
    keyframe.keyPath = @"position";
    keyframe.path = [self keyframePath];

    CAKeyframeAnimation *colors = [[CAKeyframeAnimation alloc] init];
    colors.keyPath = @"backgroundColor";
    colors.values = @[
                        (__bridge id _Nullable)[UIColor redColor].CGColor,
                        (__bridge id _Nullable)[UIColor yellowColor].CGColor,
                        (__bridge id _Nullable)[UIColor greenColor].CGColor,
                        (__bridge id _Nullable)[UIColor blueColor].CGColor,
                        (__bridge id _Nullable)[UIColor purpleColor].CGColor
                        ];

    CAAnimationGroup *group = [[CAAnimationGroup alloc] init];
    group.animations = @[keyframe,colors];
    group.duration = 5.0f;
    group.fillMode = kCAFillModeForwards;
    [group setRemovedOnCompletion:NO];

    [self.testButton.layer addAnimation:group forKey:nil];

}
CATransition
用于不同视图场景之间的切换使用过程相对简单
- 实例化
CATransition,设置相应的转场动画key - 设置合适的转场动画属性,比如
duration,type,subtype等 - 将动画效果添加到相应视图的
layer中
系统提供的相关Api(已做必要注释)
- 公有type Api
// 淡入淡出效果 CA_EXTERN NSString * const kCATransitionFade CA_AVAILABLE_STARTING (10.5, 2.0, 9.0, 2.0); // 移动效果 CA_EXTERN NSString * const kCATransitionMoveIn CA_AVAILABLE_STARTING (10.5, 2.0, 9.0, 2.0); // 推送效果 CA_EXTERN NSString * const kCATransitionPush CA_AVAILABLE_STARTING (10.5, 2.0, 9.0, 2.0); // 揭开效果 CA_EXTERN NSString * const kCATransitionReveal CA_AVAILABLE_STARTING (10.5, 2.0, 9.0, 2.0); -
私有type Api(只能使用字符串表示 使用有风险,上传需谨慎)
- pageCurl 向上翻页
- pageUnCurl 向下翻页
- cube 立方体翻转
- oglFlip 翻转效果
- stuckEffect 收缩效果
- rippleEffect 水滴波纹效果
- cameraIrisHollowOpen 相机打开效果
- cameraIrisHollowClose 相机关闭效果
-
subtypes 转场方向
CA_EXTERN NSString * const kCATransitionFromRight
  CA_AVAILABLE_STARTING (10.5, 2.0, 9.0, 2.0);
CA_EXTERN NSString * const kCATransitionFromLeft
  CA_AVAILABLE_STARTING (10.5, 2.0, 9.0, 2.0);
CA_EXTERN NSString * const kCATransitionFromTop
  CA_AVAILABLE_STARTING (10.5, 2.0, 9.0, 2.0);
CA_EXTERN NSString * const kCATransitionFromBottom
  CA_AVAILABLE_STARTING (10.5, 2.0, 9.0, 2.0);
简单demo演示

CATransition.gif
- (void)setImgViewForCATransiton{

    UIImageView *imageView = [[UIImageView alloc] initWithFrame:CGRectMake(0, 0, 200, 200)];
    imageView.center = self.view.center;
    imageView.image = [UIImage imageNamed:@"pic_1"];
    imageView.contentMode = UIViewContentModeScaleAspectFill;
    imageView.layer.cornerRadius = 5;
    imageView.layer.masksToBounds = YES;

    self.testImgView = imageView;
    [self.view addSubview:imageView];

}

// CATransition
- (void)testForCATransition{

    self.testImgView.image = [UIImage imageNamed:@"pic_2"];

    CATransition *transition = [[CATransition alloc] init];
    transition.type = kCATransitionReveal;
    transition.subtype = kCATransitionFromTop;
    transition.duration = 2;

    [self.testImgView.layer addAnimation:transition forKey:nil];

}
题外话
- 笔者在之前的文章中,介绍过
CATransition同NSTimer结合使用,实现登录界面fade效果的轮播,有兴趣的同学可以看一下《iOS-几行代码实现登录页Fade效果的图片轮播》 - 这里谈到了
Transition,那么就不得不提一下iOS中的转场动画,之前笔者在这篇文章中,也有所介绍《iOS-自定义转场》
特殊的CALayer动画
CAEmitterLayer 粒子动画
粒子系统,由CAEmitterLayer粒子发射器图层及CAEmitterCell粒子发射单元组成
- CAEmitterLayer
@interface CAEmitterLayer : CALayer
// 粒子单元数组
@property(nullable, copy) NSArray<CAEmitterCell *> *emitterCells;
// 粒子的创建速率,默认值为1s Animatable
@property float birthRate;
// 粒子的存活时间系数,默认值为1s Animatable
@property float lifetime;
// 发射器在xy平面的位置 Animatable
@property CGPoint emitterPosition;
// 发射器在z平面的位置 Animatable
@property CGFloat emitterZPosition;
// 发射器的尺寸大小
@property CGSize emitterSize;
// 发射器的深度
@property CGFloat emitterDepth;
// 发射器形状 包括'point' (the default)点, 'line'线, 'rectangle'矩形,'circle'圆形, 'cuboid'立方体 and 'sphere'球形
@property(copy) NSString *emitterShape;
// 发射器的发射模式 包括'points'发射器内部发出, 'outline'发射器边缘发出, 'surface'发射器表面发出 and 'volume' (the default)发射器中点发出
@property(copy) NSString *emitterMode;
// 发射器渲染模式 'unordered' (the default)粒子无序, 'oldestFirst'越早声明的粒子渲染层级越高,'oldestLast'越晚声明的粒子渲染层级越高, 'backToFront' (i.e. sorted into Z order) 按照z轴的顺序渲染and 'additive'粒子混合. The first four use source-over compositing, the last uses additive compositing.
@property(copy) NSString *renderMode;
// 开启深度显示(三维空间效果)
@property BOOL preservesDepth;
// 粒子速度系数 * cell速度 默认1 Animatable
@property float velocity;
// 粒子缩放系数 * cellscale 默认1 Animatable
@property float scale;
// 粒子旋转位置系数 *cellspin 默认1 Animatable
@property float spin;
// 初始化随机的粒子种子 默认0
@property unsigned int seed;

@end- CAEmitterCell
// 构建方法
+ (instancetype)emitterCell;
// 发射单元名称,用来构建 keyPath
@property(nullable, copy) NSString *name;
// 是否允许被渲染
@property(getter=isEnabled) BOOL enabled;
// 每秒创建的粒子数,默认值0 Animatable
@property float birthRate;
// 粒子平均存活时间及存活时间容差
@property float lifetime;
@property float lifetimeRange;
// 发射纬度:z轴方向的发射角度 发射经度:x-y平面中,相对x轴的发射角度 Animatable
@property CGFloat emissionLatitude;
@property CGFloat emissionLongitude;
// 发射角度的容差 Animatable
@property CGFloat emissionRange
// 粒子平均速度及容差 默认值0 Animatable
@property CGFloat velocity;
@property CGFloat velocityRange;
//  粒子在各个方向的加速度 Animatable
@property CGFloat xAcceleration;
@property CGFloat yAcceleration;
@property CGFloat zAcceleration;
// 粒子平均缩放相关属性 Animatable
@property CGFloat scale;
@property CGFloat scaleRange;
@property CGFloat scaleSpeed;
// 粒子平均旋转相关属性 Animatable
@property CGFloat spin;
@property CGFloat spinRange;
// 粒子的主颜色 及 R/G/B/Alpha 的容差 Animatable
@property(nullable) CGColorRef color;
@property float redRange;// 默认 0
@property float greenRange;// 默认 0
@property float blueRange;// 默认 0
@property float alphaRange;// 默认 0
// 粒子的主颜色基础上 R/G/B/Alpha变化速度 Defaults to (0, 0, 0, 0) Animatable
@property float redSpeed;
@property float greenSpeed;
@property float blueSpeed;
@property float alphaSpeed;
// 渲染粒子,可以设置为一个CGImage的对象
@property(nullable, strong) id contents;
// 渲染范围
@property CGRect contentsRect;
// image的像素尺寸同视图大小的比例,默认为1.0
@property CGFloat contentsScale;
项目中,粒子动画的应用场景,大多是配合弹框提示出现的
简单demo演示
实现彩带喷撒动画的效果
- 初始化粒子系统,实现基本效果(需要注意的是,Acceleration属性的设置,我们给y方向设置为9.8,热爱物理的童鞋有木有想起什么来呢~~)
- (void)testForCAEmitterLayer{

    // 初始化发射器图层
    CAEmitterLayer *emitterLayer = [CAEmitterLayer layer];
    emitterLayer.birthRate = 1;
    emitterLayer.lifetime = 10;
    emitterLayer.emitterPosition = self.view.center;
    emitterLayer.emitterSize = self.waveButton.frame.size;
    emitterLayer.emitterShape = kCAEmitterLayerRectangle;
    emitterLayer.emitterMode = kCAEmitterLayerOutline;
    emitterLayer.renderMode = kCAEmitterLayerOldestFirst;

    // 初始化发射单元并标记name,方便通过keypath修改相关属性
    CGSize particleSize = CGSizeMake(15, 25);
    CAEmitterCell *blueCell = [self demo_CAEmitterCellWithImage:[self createImageWithColor:[UIColor blueColor] andSize:particleSize]];
    blueCell.name = @"blue";
    CAEmitterCell *yellowCell = [self demo_CAEmitterCellWithImage:[self createImageWithColor:[UIColor yellowColor] andSize:particleSize]];
    yellowCell.name = @"yellow";
    CAEmitterCell *redCell = [self demo_CAEmitterCellWithImage:[self createImageWithColor:[UIColor redColor] andSize:particleSize]];
    redCell.name = @"red";

    // 将发射单元添加至发射器
    emitterLayer.emitterCells = @[blueCell,yellowCell,redCell];

    // 在目标位置添加发射器
    [self.view.layer addSublayer:emitterLayer];

}

- (CAEmitterCell *)demo_CAEmitterCellWithImage:(UIImage *)image{

    CAEmitterCell *emitterCell = [CAEmitterCell emitterCell];
    // contents
    emitterCell.contents = (__bridge id _Nullable)(image.CGImage);
    // birthRate
    emitterCell.birthRate = 10;
    // lifetime
    emitterCell.lifetime = 40;
    emitterCell.lifetimeRange = 20;
    // emission
    // emitterCell.emissionLongitude
    // emitterCell.emissionLatitude
    emitterCell.emissionRange = M_PI_2;
    // volocity
    emitterCell.velocity = 200;
    emitterCell.velocityRange = 20;
    // Acceleration
    emitterCell.xAcceleration = 0;
    emitterCell.yAcceleration = 9.8;
    // scale
    emitterCell.scale = 0.6;
    emitterCell.scaleRange = 0.6;
    // spin
    emitterCell.spin = M_PI * 2;
    emitterCell.spinRange = M_PI * 2;
    // color
    // emitterCell.redRange = 0.1f;
    // emitterCell.greenRange = 0.1f;
    // emitterCell.blueRange = 0.1f;
    // emitterCell.alphaRange = 1;
    // color speed
    // emitterCell.alphaSpeed = 10;


    return emitterCell;

}

- (UIImage *)createImageWithColor:(UIColor *)color andSize:(CGSize)size{

    UIGraphicsBeginImageContext(size);
    CGContextRef context = UIGraphicsGetCurrentContext();
    CGContextSetFillColorWithColor(context, color.CGColor);
    CGContextFillRect(context, CGRectMake(0, 0, size.width, size.height));

    UIImage *image = UIGraphicsGetImageFromCurrentImageContext();
    UIGraphicsEndImageContext();

    return image;

}
效果如下
CAEmitterLayer_1.gif
- 添加内容层动画,优化效果(因为
EmitterLayer继承自CALayer,所以显示层的CoreAnimation对它同样适用。同时,这里就用到了我们设置的EmitterCell的name属性值)
CAAnimationGroup *demo_ParticleAnimation(){

    CABasicAnimation *blue = [CABasicAnimation animation];
    blue.keyPath = @"emitterCells.blue.birthRate";
    blue.fromValue = @30;
    blue.toValue = @0;

    CABasicAnimation *red = [CABasicAnimation animation];
    red.keyPath = @"emitterCells.red.birthRate";
    red.fromValue = @30;
    red.toValue = @0;

    CABasicAnimation *yellow = [CABasicAnimation animation];
    yellow.keyPath = @"emitterCells.yellow.birthRate";
    yellow.fromValue = @30;
    yellow.toValue = @0;

    CAAnimationGroup *group = [[CAAnimationGroup alloc] init];
    group.animations = @[blue,red,yellow];
    group.duration = 1.0f;
    group.fillMode = kCAFillModeForwards;
    [group setRemovedOnCompletion:NO];

    return group;

}
合适位置给发射器添加动画
// 添加发射动画
[emitterLayer addAnimation:demo_ParticleAnimation() forKey:nil];
效果如下

CAEmitterLayer_2.gif
CAGradientLayer 梯度动画
CAGradientLayer是系统提供的颜色梯度变化能力的类,使用相对比较简单
下面看一下头文件中的几个简单接口
// CGColorRef颜色数组
@property(nullable, copy) NSArray *colors;
// 控制颜色范围的数组[0,1] 类比`KeyFrameAnimation`中的`keyTimes`理解
@property(nullable, copy) NSArray<NSNumber *> *locations;
// 类似`anchorPoint`,是相对于视图本身映射关系的相对位置,要来绝对梯度变化的方向
@property CGPoint startPoint;
@property CGPoint endPoint;
项目中似乎用到的地方不多,也许在音频的应用中做些跑马灯(此处手动滑稽)或者正常点的二维码扫描动画中用到。其他的应用场景暂时想不出,如果这篇文章真的有读者的话,欢迎补充交流
简单demo演示
接下来,我们像经典致敬,山寨一个活动解锁效果
直接上代码
// GradientLayer
- (void)testForGradientLayer{

    CAGradientLayer *gradientLayer = [[CAGradientLayer alloc] init];
    gradientLayer.frame = self.label.bounds;
    gradientLayer.startPoint = CGPointMake(0, 0);// 类似anchor point的映射关系
    gradientLayer.endPoint = CGPointMake(1, 0);
    gradientLayer.colors = @[(__bridge id _Nullable)[UIColor clearColor].CGColor,(__bridge id _Nullable)[UIColor whiteColor].CGColor,(__bridge id _Nullable)[UIColor clearColor].CGColor];
    gradientLayer.locations = @[@0,@0,@0.3];// [0,1]

    CABasicAnimation *basic = [CABasicAnimation animation];
    basic.keyPath = @"locations";
    basic.toValue = @[@0.7,@1,@1];
    basic.duration = 3.0;
    basic.fillMode = kCAFillModeForwards;

    [basic setRemovedOnCompletion:NO];
    basic.repeatCount = MAXFLOAT;

    [gradientLayer addAnimation:basic forKey:nil];

    // 设置蒙板
    self.label.layer.mask = gradientLayer;

}

- (void)setupUI4GradientLayer{

    self.label = [[UILabel alloc] init];
    _label.text = @"Slide To Unlock";
    _label.textColor = [UIColor whiteColor];
    _label.textAlignment = NSTextAlignmentCenter;
    _label.font = [UIFont systemFontOfSize:18 weight:UIFontWeightMedium];
    _label.frame = CGRectMake(30, CGRectGetHeight(self.view.bounds) -  100, CGRectGetWidth(self.view.bounds) - 60, 60);

    [self.view addSubview:_label];
    self.view.backgroundColor = [UIColor blackColor];

}
效果如下(似乎还蛮不错的-。-)
CAGradientLayer.gif
CAShapeLayer 绘制动画
CAShapeLayer配合CGPathRef或者UIBezierPath路径,堪称绘图利器。上文中演示隐式动画时已经提到,下面再通过例子,演示几种常见的用法
- UIBezierPath(不了解贝塞尔曲线原理的同学,请移步本文第二章贝塞尔曲线)
- CGPath
CAShapeLayer.gif
- (void)touchesBegan:(NSSet<UITouch *> *)touches withEvent:(UIEvent *)event{

    self.testLayer.strokeEnd = 1;
    self.testLayer2.strokeEnd = 1;
    self.testLayer3.strokeEnd = 1;

}

// CAshapeLayer
- (void)testForCAShapeLayer{

    // bezierPath
    CGRect screenBounds = [UIScreen mainScreen].bounds;
    UIBezierPath *path = [UIBezierPath bezierPath];
    [path moveToPoint:CGPointMake(20, 200)];
    [path addCurveToPoint:CGPointMake(screenBounds.size.width - 20, 200) controlPoint1:CGPointMake(screenBounds.size.width/2, 50) controlPoint2:CGPointMake(screenBounds.size.width/2, 350)];

    CAShapeLayer *shapeLayer = [[CAShapeLayer alloc] init];
    shapeLayer.strokeEnd = 0;
    shapeLayer.strokeColor = [UIColor redColor].CGColor;
    shapeLayer.fillColor = [UIColor clearColor].CGColor;
    shapeLayer.lineWidth = 3;
    shapeLayer.path = path.CGPath;

    self.testLayer = shapeLayer;
    [self.view.layer addSublayer:shapeLayer];

    // CGPath
    CGMutablePathRef mutablePath = CGPathCreateMutable();
    CGPathMoveToPoint(mutablePath, NULL, 20, 200);
    CGPathAddLineToPoint(mutablePath, NULL, screenBounds.size.width/2, 50);
    CGPathAddLineToPoint(mutablePath, NULL, screenBounds.size.width/2, 350);
    CGPathAddLineToPoint(mutablePath, NULL, screenBounds.size.width - 20, 200);

    CAShapeLayer *shapeLayer2 = [[CAShapeLayer alloc] init];
    shapeLayer2.strokeEnd = 0;
    shapeLayer2.strokeColor = [UIColor lightGrayColor].CGColor;
//    shapeLayer2.fillColor = [[UIColor blueColor] colorWithAlphaComponent:0.1].CGColor;
    shapeLayer2.fillColor = [UIColor clearColor].CGColor;
    shapeLayer2.lineWidth = 5;
    shapeLayer2.lineCap = kCALineCapRound;
    shapeLayer2.lineJoin = kCALineJoinBevel;
    shapeLayer2.path = mutablePath;

    self.testLayer2 = shapeLayer2;
    [self.view.layer addSublayer:shapeLayer2];


    CGMutablePathRef mutablePath2 = CGPathCreateMutable();
    CGPathMoveToPoint(mutablePath2, NULL, screenBounds.size.width/2, screenBounds.size.height - 50);
    CGPathAddLineToPoint(mutablePath2, NULL, screenBounds.size.width/2, 380);


    CAShapeLayer *shapeLayer3 = [CAShapeLayer layer];
    shapeLayer3.strokeColor = [UIColor purpleColor].CGColor;
    shapeLayer3.lineWidth = 20;
    shapeLayer3.path = mutablePath2;
    shapeLayer3.strokeEnd = 0;

    self.testLayer3 = shapeLayer3;
    [self.view.layer addSublayer:shapeLayer3];


    // slider
    UISlider *slider = [[UISlider alloc] initWithFrame:CGRectMake(20, screenBounds.size.height - 50, screenBounds.size.width - 40, 50)];
    slider.minimumValue = 0;
    slider.maximumValue = 1;
    slider.value = 1;
    [slider addTarget:self action:@selector(valueChanged:) forControlEvents:UIControlEventValueChanged];
    [self.view addSubview:slider];

}

- (void)valueChanged:(UISlider *)slider{

    self.testLayer.strokeEnd = slider.value;
    self.testLayer2.strokeEnd = slider.value;
    self.testLayer3.strokeEnd = slider.value;

}
CAReplicatorLayer 复制动画
顾名思义,这个Layer是让我们具备了复制能力。通过复制一些带动画的layer,实现有层次感的动画,因为接口较少,且容易理解,特别注意下instanceTransform属性即可。有兴趣的同学直接进代码

// sound wave
    CAShapeLayer *circle = [CAShapeLayer layer];
    circle.bounds = CGRectMake(0, 0, 100, 100);
    circle.position = self.view.center;
    circle.opacity = 1;

    UIBezierPath *circlepath  = [UIBezierPath bezierPathWithArcCenter:CGPointMake(50, 50) radius:15 startAngle:0 endAngle:2 * M_PI  clockwise:YES];
    circle.fillColor = ThemeColor.CGColor;
    circle.path = circlepath.CGPath;


    CABasicAnimation *opacity = [CABasicAnimation animation];
    opacity.keyPath = @"opacity";
    opacity.fromValue = @1;
    opacity.toValue = @0;


    CABasicAnimation *scale = [CABasicAnimation animation];
    scale.keyPath = @"transform.scale";
    scale.fromValue = @1;
    scale.toValue = @(0.3);

    CAAnimationGroup *group = [CAAnimationGroup animation];
    group.duration = 0.8;
    group.fillMode = kCAFillModeForwards;
    [group setRemovedOnCompletion:YES];
    group.animations = @[scale];
    group.autoreverses = YES;
    group.repeatCount = MAXFLOAT;
    [circle addAnimation:group forKey:nil];


    CAReplicatorLayer *gradientLayer = [CAReplicatorLayer layer];
    [gradientLayer addSublayer:circle];
    gradientLayer.instanceCount = 3;
    gradientLayer.instanceDelay = 0.3;

//    [self.view.layer addSublayer:gradientLayer];

    // loading ball
    CAReplicatorLayer *instanceGradient = [CAReplicatorLayer layer];
    [instanceGradient addSublayer:circle];
    instanceGradient.instanceCount = 3;
    instanceGradient.instanceDelay = 0.2;
    instanceGradient.instanceTransform = CATransform3DMakeTranslation(50, 0, 0);

    [self.view.layer addSublayer:instanceGradient];
总结实践
带点击水纹及加载提示的button动画
- 关键点:
- 水波:
NSTimer逐帧动画 - 位置:显示层动画,修改
frame及center - 形状:内容层动画,使用
AnimationGroup组合cornerRadius及opacity的修改 - 旋转:
CADisplayLink逐帧动画 - 对号:修改
CAShapeLayer的strokeEnd属性实现的CABasicAnimation动画
- 水波:
效果如下:
demo.gif
(demo地址在文章最后)
贝塞尔曲线
原理描述:给定n+1个数据点,p0(x0,y0)...pn(xn,yn),生成一条曲线,使得该曲线与这些点所连接的折线相近
Bezier.gif
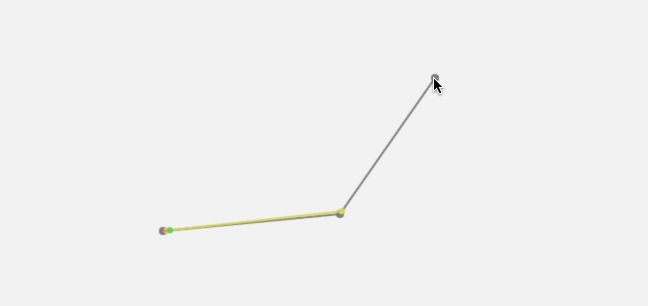
可以看到,上图中折线的中间点,即为我们所说的控制点,他的位置变化,直接影响了曲线的走向
常见案例
可手动移除的动态Badgeview
手机QQ中最早出现(强迫症福音有木有),可以根据手势滑动的距离动态改变badge的形状
我们可以大致根据下图中绘制的样例,理解贝塞尔曲线在这个例子中的作用
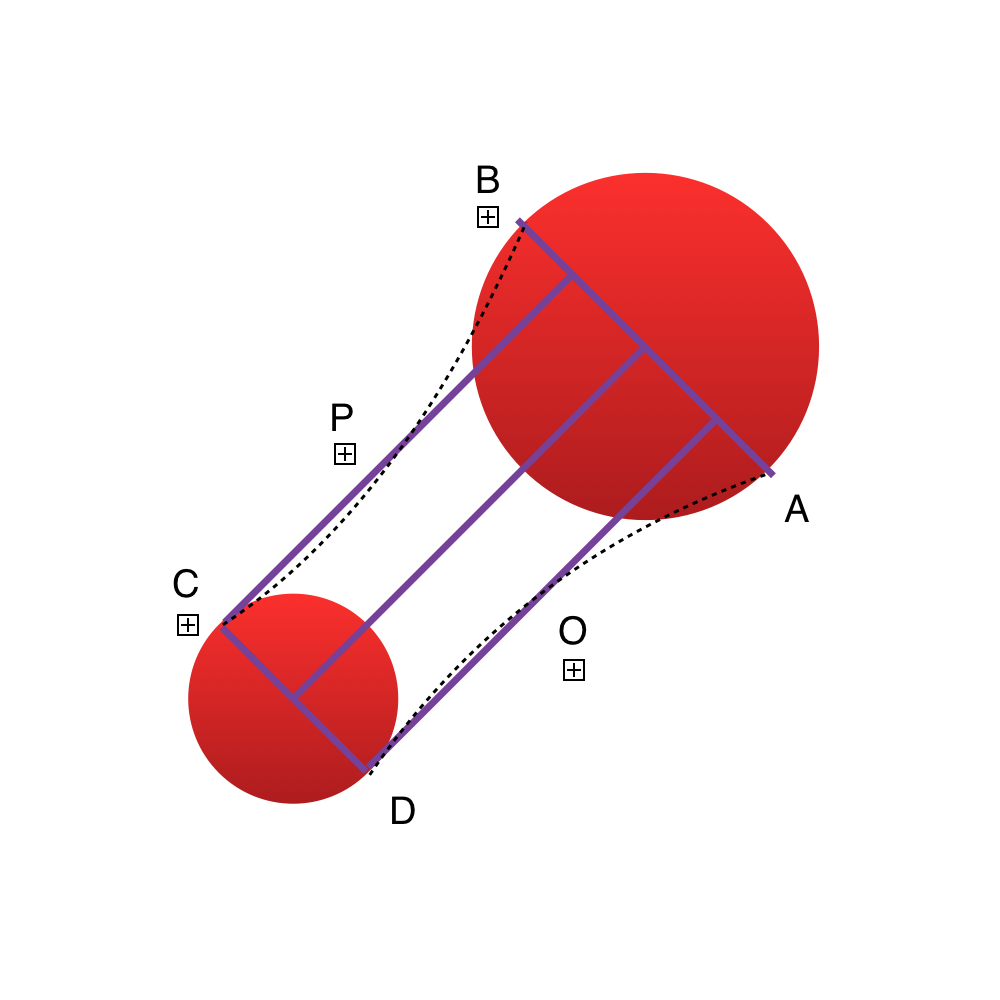
这个Badgeview由以下几部分组成:
- 上方跟随手势的小球
- 下方固定位置的小球
- 中间需要填充红色的绘制区域 (注:确定上半部分曲线的三个点为
C/P/B,确定下半部分曲线的三个点为D/O/A,这几个点的位置确定,用到了最基础的正弦函数余弦函数以及三角形求变长的简单计算)
总结
所有的复杂动画,都是由基本显示层动画、内容层动画组合而成。尝试做过一些练习后,笔者这只鶸,发现动画真的是一件有意思的事情呢!
笔者博客地址:iOS-动画知识梳理
传送门:Demo
[]~( ̄▽ ̄)~*
