

简介
微调框提供一种方法,让用户可以从值集中快速选择一个值。默认状态下,微调框显示其当前所选的值。 触摸微调框可显示下拉菜单,其中列有所有其他可用值,用户可从中选择一个新值。

使用方法
<Spinner
    android:id="@+id/planets_spinner"
    android:layout_width="fill_parent"
    android:layout_height="wrap_content" />
属性值
| XML属性值 | 含义 |
|---|---|
| android:dropDownHorizontalOffset | 下拉框横向偏移量 |
| android:dropDownSelector | 下拉列表被选中行背景 |
| android:dropDownVerticalOffset | 下拉列表的纵向偏移量,相对于spinner控件 |
| android:dropDownWidth | 下拉列表子项宽度 |
| android:gravity | 选中项的位置摆放 |
| android:popupBackground | 下拉列表背景 |
| android:prompt | 弹出对话框的标题,只能使用字符串引用,不能直接使用字符串,”dialog”模式下可用 |
| android:spinnerMode | “spinner”,”dialog” 两种模式 |
| android:entries | 显示可选数据源,”@array/xxx”,这个属性继承自AbsSpinner |
注意:
Android:dropDownHorizontalOffset使用过程中没有任何效果,
Google Issue跟踪
code.google.com/p/android/i…
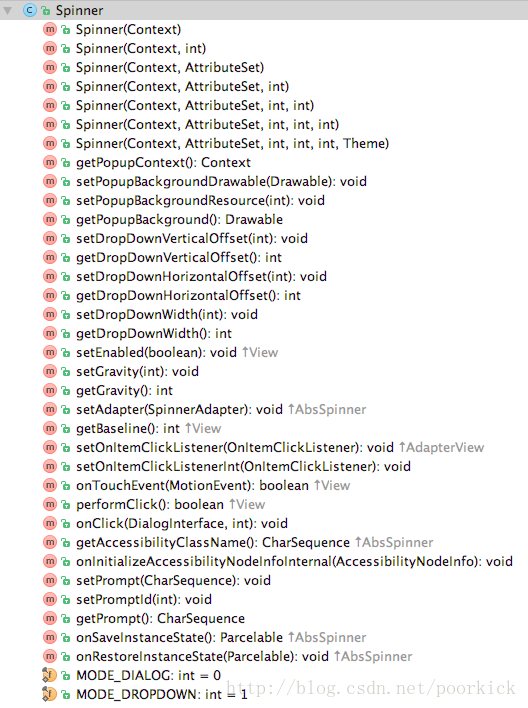
主要方法
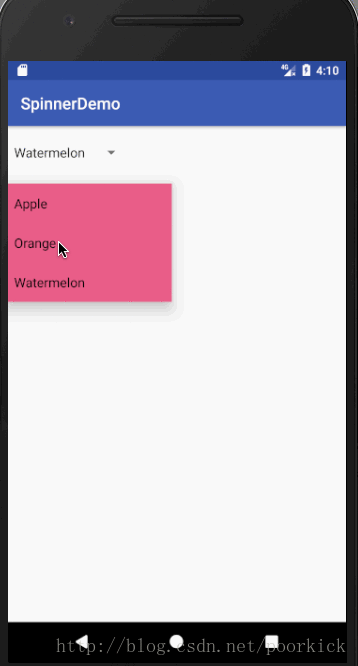
两种模式简单使用
Spinner
<?xml version="1.0" encoding="utf-8"?>
<LinearLayout
    xmlns:android="http://schemas.android.com/apk/res/android"
    xmlns:tools="http://schemas.android.com/tools"
    android:id="@+id/container"
    android:layout_width="match_parent"
    android:layout_height="match_parent"
    android:orientation="vertical">

    <Spinner
        android:id="@+id/sp"
        android:layout_width="wrap_content"
        android:layout_height="wrap_content"
        android:layout_marginTop="20dp"
        android:dropDownSelector="@color/colorPrimaryDark"
        android:dropDownVerticalOffset="50dp"
        android:dropDownWidth="200dp"
        android:entries="@array/fruit"
        android:gravity="center_horizontal"
        android:popupBackground="@color/colorAccent"
        android:spinnerMode="dropdown"
    />
</LinearLayout>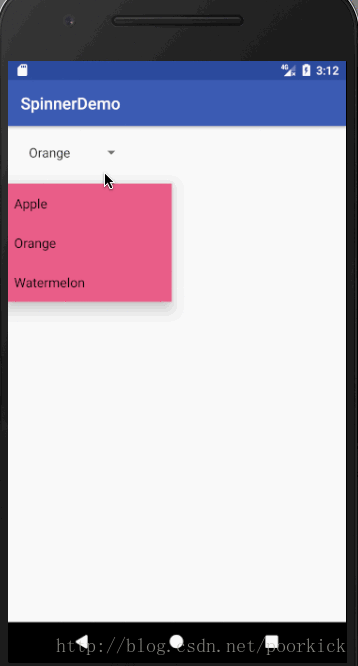
Dialog
<?xml version="1.0" encoding="utf-8"?>
<LinearLayout
    xmlns:android="http://schemas.android.com/apk/res/android"
    android:id="@+id/container"
    android:layout_width="match_parent"
    android:layout_height="match_parent"
    android:orientation="vertical">

    <Spinner
        android:id="@+id/sp"
        android:layout_width="wrap_content"
        android:layout_height="wrap_content"
        android:layout_marginTop="20dp"
        android:entries="@array/fruit"
        android:prompt="@string/app_name"
        android:spinnerMode="dialog"
    />
</LinearLayout>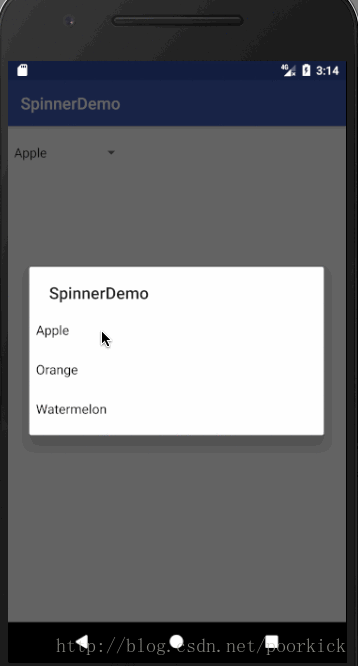
数据填充
看下当我们设置”android:entries”,系统是如何帮我处理数据的。
Spinner继承AbsSpinner, android:entries属性也是从其继承过来。
public AbsSpinner(Context context, AttributeSet attrs, int defStyleAttr, int defStyleRes) {
        super(context, attrs, defStyleAttr, defStyleRes);
        initAbsSpinner();
        final TypedArray a = context.obtainStyledAttributes(
                attrs, R.styleable.AbsSpinner, defStyleAttr, defStyleRes);
        //获取entrie对应的字符串数组
        final CharSequence[] entries = a.getTextArray(R.styleable.AbsSpinner_entries);
        if (entries != null) {
            //构建 ArrayAdapter,使用默认布局
            final ArrayAdapter<CharSequence> adapter = new ArrayAdapter<CharSequence>(
                    context, R.layout.simple_spinner_item, entries);
      //设置下拉列表子项的布局      adapter.setDropDownViewResource(R.layout.simple_spinner_dropdown_item);
       // 和Spinner绑定
            setAdapter(adapter);
        }

        a.recycle();
    }
倘若我们不使用”android:entries”属性,依然可以使用简洁的代码来实现以上效果:
Spinner mSp = (Spinner)findViewById(R.id.sp);

ArrayAdapter<CharSequence> adapter = ArrayAdapter.createFromResource(this,
R.array.fruit, android.R.layout.simple_spinner_item);
        adapter.setDropDownViewResource(android.R.layout.simple_spinner_dropdown_item);

mSp.setAdapter(adapter);
从代码上看和系统帮我们完成的内容相似,只是获取字符串数组的方式不一样了而已。
createFromResource() 方法允许从字符串数组创建 ArrayAdapter。 此方法的第三个参数是布局资源,其定义所选选择如何显示在微调框控件中。 simple_spinner_item 布局由平台提供,是默认布局,除非您想为微调框外观定义自己的布局,否则应使用此布局。
然后,应调用 setDropDownViewResource(int) 指定适配器应用于显示微调框选择列表的布局(simple_spinner_dropdown_item 是平台定义的另一标准布局)。
调用 setAdapter() 以将适配器应用到 Spinner。
为微调框提供的选择可来自任何来源,但必须通过 SpinnerAdapter 来提供,例如,如果选择可通过数组获取,则通过 ArrayAdapter)来提供,如果选择可通过 数据库查询获取,则通过 CursorAdapter 来提供。
从上面的代码可以看出,我们可以自定义的地方还是很多的,比如说两个布局:
android.R.layout.simple_spinner_item
android.R.layout.simple_spinner_dropdown_item
我们可以替换成自己的布局,实现一些自定义的效果
响应用户选择
当用户从下拉菜单中选择一个项目时,Spinner 对象会收到一个 on-item-selected 事件。
要为微调框定义选择事件处理程序,请实现 AdapterView.OnItemSelectedListener 接口以及相应的 onItemSelected() 回调方法。
mSp.setOnItemSelectedListener(new AdapterView.OnItemSelectedListener() {
         //parent The AdapterView where the selection happened
         //view The view within the AdapterView that was clicked
         //position The position of the view in the adapter
         //id The row id of the item that is selected
     @Override
     public void onItemSelected(AdapterView<?> parent, View view, int position, long id) {
        TextView textView = (TextView)view;
        Toast.makeText(MainActivity.this, textView.getText().toString() + " was selected and position is " + position, Toast.LENGTH_SHORT).show();
      }

     @Override
     public void onNothingSelected(AdapterView<?> parent) {
           Toast.makeText(MainActivity.this, "nothing selected ", Toast.LENGTH_SHORT).show();
       }
   });
AdapterView.OnItemSelectedListener 需要 onItemSelected() 和 onNothingSelected() 回调方法。
备注
参考Google官方内容:
