

Github
github地址:https://github.com/Bigmercu/ACheckBox
热烈欢迎 star 和 issue.
动画部分
做了两种动画可以选择
hook 
用pathMeasure实现
pathMeasure
setPath可以为pathMeasure设置一条pathgetLength()可以得到pathMeasure的总长度
pathMeasure 很简单,就是通过先往pathMeasure里加入一条路径,后续可以通过getSegment来取出其中的一段.
mPath = new Path();
pathMeasure = new PathMeasure();
mPath.addRect(wStart,hStart,wSize + wStart,hSize + hStart, Path.Direction.CW);
pathMeasure.setPath(mPath,true);
pathLenth = pathMeasure.getLength();
动画之动力
发射一些数值,可以是你希望变化的角度,可以是一段长度,可以是任何你能想到的数值变化.
再给他们设定好拦截器setInterpolator,以及设定好时长setDuration就可以等待发射了.
valueAnimator = ValueAnimator.ofInt(255, 0);
            valueAnimator.addUpdateListener(new ValueAnimator.AnimatorUpdateListener() {
                public void onAnimationUpdate(ValueAnimator animation) {
                    AnimationValue = (int) animation.getAnimatedValue();
            });
            valueAnimator1 = ValueAnimator.ofInt(180, 225);
            valueAnimator1.addUpdateListener(new ValueAnimator.AnimatorUpdateListener() {
                public void onAnimationUpdate(ValueAnimator animation) {
                    AnimationValue1 = (int) animation.getAnimatedValue();
            });
            valueAnimator2 = ValueAnimator.ofFloat(hSize + wSize, wSize * 2 / 5);
            valueAnimator2.addUpdateListener(new ValueAnimator.AnimatorUpdateListener() {
                public void onAnimationUpdate(ValueAnimator animation) {
                    AnimationValue2 = (float) animation.getAnimatedValue();
            });
            valueAnimator3 = ValueAnimator.ofFloat(hSize + wSize, hSize + wSize * 2);
            valueAnimator3.addUpdateListener(new ValueAnimator.AnimatorUpdateListener() {
                public void onAnimationUpdate(ValueAnimator animation) {
                    AnimationValue3 = (float) animation.getAnimatedValue();
            });
onDraw
首先我想获取它的padding后面使用,因为没有padding会显的太挤了,所以我默认加了10px的padding
int paddingLeft = getPaddingLeft() + 10;
int paddingRight = getPaddingRight() + 10;
int paddingTop = getPaddingTop() + 10;
int paddingBottom = getPaddingBottom() + 10;然后要做的就是绘制了,因为pathMeasure本身有一个bug,所以第一步需要
mDst.reset();
mDst.lineTo(0,0);- 我先保存了一下画布是为了后面可以
restore来画一个border - 先移动画布坐标是为了让我画的东西有padding,
drawText绘制文字部分. - 对于CW矩形而言:
pathMeasure.getSegment(0)是矩形的右下角,往左增加再往上… - 我分几段获取了需要绘制的部分,通过两个画笔
mPaint和mPaintAfterALPHA属性的变化来让整个动画有颜色变化. - 最后
canvas.restore();恢复前面保存的画布状态,绘制border如果有要求的话
mDst.lineTo(0,0);
          canvas.translate(wStart + paddingLeft, hStart + paddingTop);
          if(isShowBorder) {
              canvas.save();
          canvas.drawText(boxText, wStart  + wSize + 18, (hSize + textSize )/2, mPaintText);
          canvas.translate(-AnimationValue4 * wSize, (float) (-AnimationValue4 * hSize * 1.5));
           * 如果 startWithMoveTo 为 true, 则被截取出来到Path片段保持原状,如果 startWithMoveTo 为 false,
           * 则会将截取出来的 Path 片段的起始点移动到 dst 的最后一个点,以保证 dst 的连续性。
           * */
          pathMeasure.getSegment(AnimationValue3, pathLenth, mDst, true);
          pathMeasure.getSegment(0, wSize * 2 / 5, mDst, true);
          pathMeasure.getSegment(wSize * 2 / 5, AnimationValue2, mDst, true);
          mPaint.setAlpha(AnimationValue);
          mPaintAfter.setAlpha(255 - AnimationValue);
          canvas.rotate(AnimationValue1, wStart  + wSize / 2, hStart  + hSize / 2);
          canvas.drawPath(mDst, mPaint);
          canvas.drawPath(mDst, mPaintAfter);
          if(isShowBorder) {
              canvas.restore();
canvas.drawRect(wStart, hStart, wStart + wSize, hSize + hStart, mPaintText);最后再开始所有的valueAnimator并且postInvalidate();即可.
fork 
用 valueAnimator实现
这个很简单,我通过计算一个矩形的四个角的位置,再用一个valueAnimator来发射矩形的半径,连接矩形的左上角,顶边中点(Y轴增加valueAnimator),右上角,右边中点(X轴减少valueAnimator),右下角…
最后就能得到一个矩形变化为叉的动画.
同样要注意处理padding,自定义View不会帮你处理padding,你不处理padding就不会有效果.
mDst.lineTo(0,0);
           canvas.translate(wStart+ paddingLeft , hStart + paddingTop );
           if(isShowBorder) {
               canvas.save();
           canvas.drawText(boxText, wStart  + wSize + 18, (hSize + textSize )/2, mPaintText);
           mDst.moveTo((float) (wStart + cAnimationValue * 0.3), (float) (hStart + cAnimationValue * 0.3));
           mDst.lineTo(wStart + wSize/2, (float) (hStart + cAnimationValue + cAnimationValue * 0.2));
           mDst.lineTo((float) (wStart+ wSize - cAnimationValue * 0.2), (float) (hStart + cAnimationValue * 0.2));
           mDst.lineTo((float) (wStart+ wSize -cAnimationValue - cAnimationValue * 0.2),hSize/2 + hStart );
           mDst.lineTo((float) (wStart+ wSize - cAnimationValue * 0.2), (float) (hStart  + hSize - cAnimationValue * 0.2));
           mDst.lineTo(wStart+ wSize/2, (float) (hStart  + hSize - cAnimationValue - cAnimationValue * 0.2));
           mDst.lineTo((float) (wStart + cAnimationValue * 0.2), (float) (hStart  + hSize - cAnimationValue * 0.2));
           mDst.lineTo((float) (wStart + cAnimationValue + cAnimationValue * 0.2),hStart  + hSize/2);
           mDst.lineTo((float) (wStart + cAnimationValue * 0.3), (float) (hStart + cAnimationValue * 0.3));
           mPaint.setAlpha((int) cAnimationValue2);
           canvas.drawPath(mDst,mPaint);
           mPaintAfter.setAlpha((int) (255-cAnimationValue2));
           canvas.drawPath(mDst,mPaintAfter);
           if(isShowBorder) {
               canvas.restore();
               canvas.drawRect(wStart, hStart, wStart + wSize, hSize + hStart, mPaintText);
wrap_content 处理
重写onMeasure
计算View的宽高,根据不同的SpecMode来设置不同的Dimension,最终达到wrap_content的效果.
在这里面:
我的View宽是:2 `strokeWidth + wStart + wSize + 20 + paddingLeft + textSize boxText.length()`
2乘以边框宽度+左边边距 + 矩形宽度 + 20是字和边框的距离 + padding + 字符串的宽度我的View高是:
hStart + hSize + paddingTop + paddingBottom + 2 * strokeWidth
上边距+ 顶部padding + 矩形高度 + 底部padding + 2乘以边框宽度
有了这两个View的宽高以后就可以套路进去的到wrap_content的效果了.
protected void onMeasure(int widthMeasureSpec, int heightMeasureSpec) {
super.onMeasure(widthMeasureSpec, heightMeasureSpec);
int widthSpecSize = MeasureSpec.getSize(widthMeasureSpec);
int heightSpecSize = MeasureSpec.getSize(heightMeasureSpec);
int widthSpecMode = MeasureSpec.getMode(widthMeasureSpec);
int heightSpecMode = MeasureSpec.getMode(heightMeasureSpec);
int paddingLeft = getPaddingLeft() + 10;
int paddingRight = getPaddingRight() + 10;
int paddingTop = getPaddingTop() + 10;
int paddingBottom = getPaddingBottom() + 10;
if(widthSpecMode == MeasureSpec.AT_MOST && heightSpecMode == MeasureSpec.AT_MOST){
setMeasuredDimension(2* strokeWidth + wStart + wSize + 20 + paddingLeft + textSize * boxText.length(),hStart + hSize + paddingTop + paddingBottom + 2 * strokeWidth);
Log.d(TAG, wStart+" "+ wSize +" "+ textSize * boxText.length() + " " +boxText.length());
}else if(widthSpecMode == MeasureSpec.AT_MOST){
setMeasuredDimension(2* strokeWidth +wStart + wSize + paddingLeft + 20 + textSize * boxText.length(),widthSpecSize);
}else if(heightSpecMode == MeasureSpec.AT_MOST){
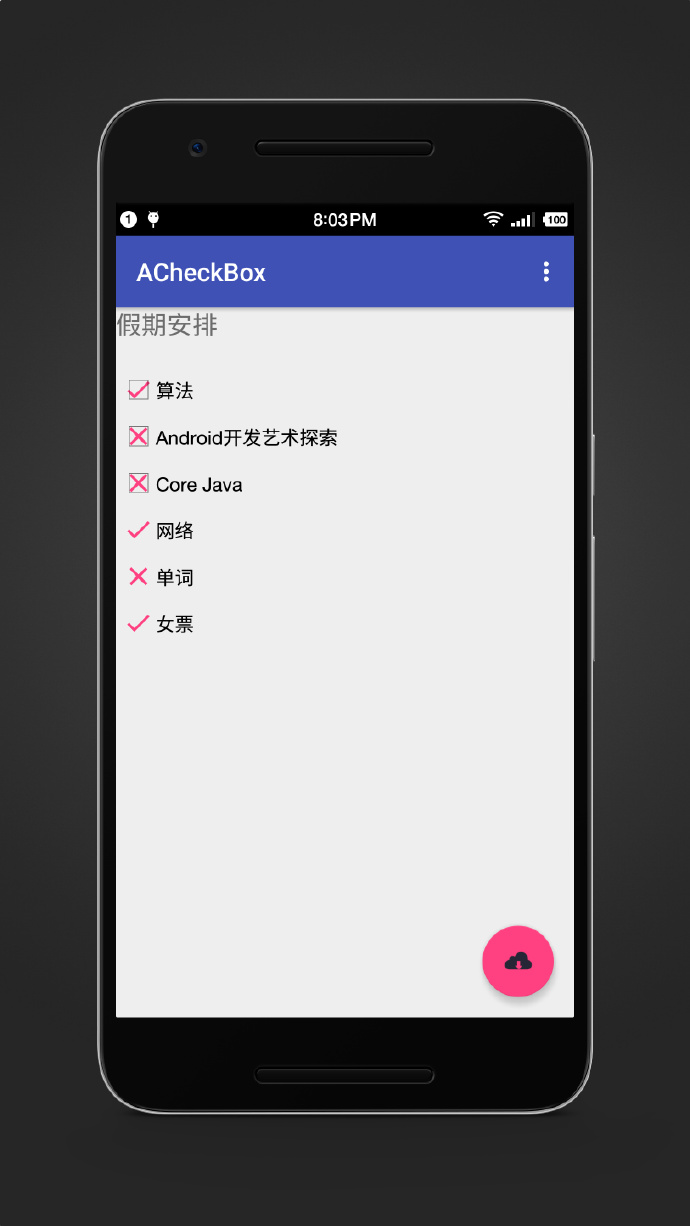
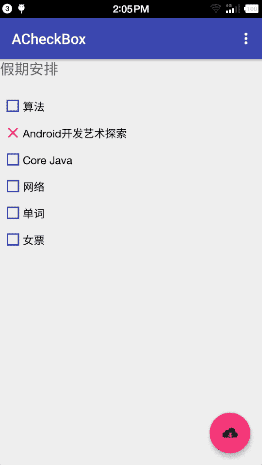
setMeasuredDimension(heightSpecSize,hStart + hSize + paddingTop + paddingBottom+ 2 * strokeWidth);效果

上传Jcenter
classpath 'com.jfrog.bintray.gradle:gradle-bintray-plugin:1.7.1'
classpath 'com.github.dcendents:android-maven-gradle-plugin:1.4.1'- 插入到你要上传的module的build.gradle里面原来的代码之下
apply plugin: 'com.github.dcendents.android-maven'
apply plugin: 'com.jfrog.bintray'
version = "1.05" //版本号
def siteUrl = "https://github.com/Bigmercu/ACheckBox" //要上传的项目主页
def gitUrl = "git@github.com:Bigmercu/ACheckBox.git" //要上传的项目git地址
group = "com.bigmercu.checkbox" //包名 直接关系最后生成的 gradle 连接
install {
    repositories.mavenInstaller {
        // This generates POM.xml with proper parameters
        pom {
            project {
                packaging 'aar'
                name 'This is a simple checkbox with cool animation for android by bigmercu.'
                url siteUrl
                licenses {
                    license {
                        name 'The Apache Software License, Version 2.0'
                        url 'http://www.apache.org/licenses/LICENSE-2.0.txt'
                developers {
                    developer {
                        id "bigmercu" //你的bintray.com id
                        name "wallace" //你的bintray.com name
                        email "bigmercu@gmail.com"
                scm {
                    connection gitUrl
                    developerConnection gitUrl
                    url siteUrl
                    task sourcesJar(type: Jar) {
    from android.sourceSets.main.java.srcDirs
    classifier = 'sources'
    task javadoc(type: Javadoc) {
    source = android.sourceSets.main.java.srcDirs
    classpath += project.files(android.getBootClasspath().join(File.pathSeparator))
    task javadocJar(type: Jar, dependsOn: javadoc) {
    classifier = 'javadoc'
    from javadoc.destinationDir
    artifacts {
    archives javadocJar
    archives sourcesJar
    Properties properties = new Properties()
properties.load(project.rootProject.file('local.properties').newDataInputStream())
bintray {
    user = properties.getProperty("bintray.user")
    key = properties.getProperty("bintray.apikey")
    configurations = ['archives']
    pkg {
        repo = "maven"
        name = "bCheckbox" //项目名字
        websiteUrl = siteUrl
        vcsUrl = gitUrl
        licenses = ["Apache-2.0"]
publish = true- 在project根目录下的local.propreties中插入你的信息
bintray.user=你的id
bintray.apikey=你的key
步骤二 按步骤运行task
一定要按步骤 全部运行成功
- javadocjar
- sourcesjar
- install
- bintrayUpload
如下图

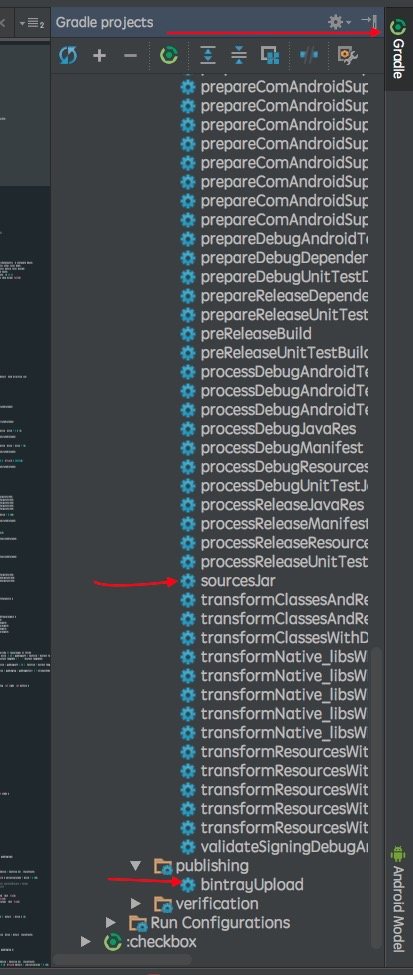
运行不出现错误基本就没有问题,成功上传bintray了,后续加入jcenter之类的就简单了.
