

在本篇博客中,笔者可能会因为代码长度的关系,不去做关闭资源等操作,读者要自己注意
0.前言
NIO是java1.4新引入的Java I/O类库,其目的在与提高速度,尤其是在文件IO与网络IO当中。NIO与IO的不同之处就在于NIO是面向缓冲区的,IO是面向流的。NIO是java中比较难懂的部分,虽然目前我在Android当中并没有使用过(经历浅),但是大名鼎鼎的OkHttp可以用NIO来进行读写的,因此,我们还是有必要去了解的。
NIO中有几个比较核心的概念,下文我们将围绕这几个概念展开描述。
在Thinking in java一书中,将Channnel(通道)和Buffer(缓冲器)有个很有意思的比喻,将channel比喻成煤层,将buffer比喻成卡车,我们从卡车(buffer)中获取数据,也可以向卡车发送数据(将卡车派到通道),好吧,我承认,这一段我描述的不好。
1.Buffer
Buffer的类型有哪些呢?请看下面。
- ByteBuffer
- CharBuffer
- DoubleBuffer
- FloatBuffer
- IntBuffer
- LongBuffer
- ShortBuffer
可以看到,8中基本类型当中,除了boolean类型,其他都有。
在Buffer中,有4个比较重要的索引(或者说是标记.),这些索引高效的访问和操纵数据如下:
提示:由于没法将这些标记以图标的形式展示,文字描述难免会难理解
- mark 标记
- position 位置
- limit 界限
- capacity 容量
在默认的情况下,有如下描述:
- capacity、limit都位于末尾,
- position位于首部
- 调用mark方法能将mark标记设置为当前position的值,
- 调用put或者get方法写入数据的时候,position会向后移
- 调用reset方法 会将position设置为mark的值。
- limit方法,可以设置limit值,在该值之后的数据将不可操作
- ….
需要注意到的是,当我们需要对读取写入buffer中的数据的时候,我们需要调用flip()函数,这个函数的代码如下:
    public final Buffer flip() {
        limit = position;
        position = 0;
        mark = -1;
        return this;
    }
将limit设置为position,position设为0,这样就进入了读状态。如果我们需要清除buffer中的数据,只需要的调用clear()方法就能将buffer设置为初始化状态了。额,好像忘了怎么初始化了。调用实际类型buffer的allocate(size)函数就初始化了一个size大小的对应数组,当然,如果是ByteBuffer的话,还有一个allocateDirect(size)方法,这个能达到更高的速度,但是相应的开支也会变大。
2.Channel
Channel为管道,是双向的,在NIO中,有4中Channel,分别为:
- FileChannel 文件
- DatagramChannel UDP
- SocketChannel TCP client
- ServerSocketChannel TCP Server
接下来,将用几个例子来说明这些的用法。
2.1 FileChannel
    public static void main(String[] args){
        FileChannel fc = null;
        try {
            fc = new RandomAccessFile("./1.txt","rw").getChannel();
            ByteBuffer bf = ByteBuffer.allocate(1024);
            fc.read(bf);
            bf.flip();
            while (bf.hasRemaining()){
                System.err.println((char) bf.get());
            }
            fc.close();
        } catch (FileNotFoundException e) {
            e.printStackTrace();
        } catch (IOException e) {
            e.printStackTrace();
        } finally {
            if (fc.isOpen()){
                try {
                    fc.close();
                } catch (IOException e) {
                    e.printStackTrace();
                }
            }
        }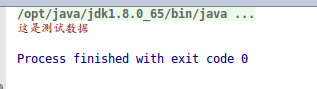
}- 1.txt 文件是在根目录下的一个文件,里面只有一个”some”英语单词。
- 注意普通的File对象是不具备Channel的。
- 注意flip
- 好吧,写操作我就不写了
接下来我们看下输出结果。
2.2 DatagramChannel
在下面这些与网络IO的里面,我就暂时不将Selector加进去了
这里需要分为客户端和服务端。我们先看客户端的代码。
    public static void main(String[] args){
        DatagramChannel channel ;
        try {
            channel = DatagramChannel.open();
            ByteBuffer byteBuffer = ByteBuffer.allocate(1024);
            byteBuffer.put(new String("你好,我是客户端").getBytes("utf-8"));
            byteBuffer.flip();
            channel.send(byteBuffer,new InetSocketAddress("192.168.0.114",3335));
        } catch (IOException e) {
            e.printStackTrace();
        }
}- 注意DatagramChannel.open()打开channel通道
- 通过send(ByteBuffer,SocketAddress) 来向服务端发送数据
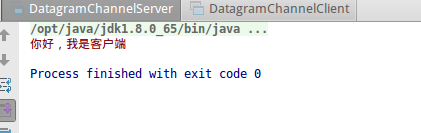
- 我在这里只发送了一句你好,我是客户端。
好的,我们接着看下服务端的代码,同样很简单。
    public static void main(String[] args){
        DatagramChannel datagramChannel
        try {
            datagramChannel = DatagramChannel.open()
            datagramChannel.socket().bind(new InetSocketAddress(3335))
            ByteBuffer byteBuffer = ByteBuffer.allocate(1024)
            datagramChannel.receive(byteBuffer)
            System.err.println(new String(byteBuffer.array()).trim())
        } catch (IOException e) {
            e.printStackTrace()
        }
}- 同样,使用open来打开通道,
- 使用datagramChannel.socket().bind方法来绑定端口
- 通过receive来读取数据
- ps:请容忍代码中不关闭通道的low b写法,我也是为了省点空间,方便大家阅读嘛。
看下执行效果,先启动服务端,在启动客户端。

2.3 SocketChannel And ServerSocketChannel
我承认上一个小例子过于简单,所以,这次,我要让服务器收到数据之后,返回一条数据。
客户端代码如下:
public static void main(String[] args){
SocketChannel socketChannel;
try {
socketChannel = SocketChannel.open();
socketChannel.connect(new InetSocketAddress("192.168.0.114",3334));
socketChannel.configureBlocking(false);
ByteBuffer byteBuffer = ByteBuffer.allocate(1024);
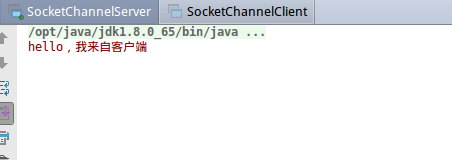
byteBuffer.put(new String("hello,我来自客户端").trim().getBytes("utf-8"));
byteBuffer.flip();
socketChannel.write(byteBuffer);
byteBuffer.clear();
new Thread(new ReadFromServer(socketChannel)).start();
} catch (IOException e) {
e.printStackTrace();
}
}
static class ReadFromServer implements Runnable{
private SocketChannel socketChannel;
public ReadFromServer(SocketChannel socketChannel){
this.socketChannel = socketChannel;
}
@Override
public void run() {
ByteBuffer byteBuffer = ByteBuffer.allocate(1024);
while (true){
try {
while (socketChannel.read(byteBuffer) != -1){
if (byteBuffer.get(0) != 0){
System.err.println(new String(byteBuffer.array()).trim());
return;
}
}
} catch (IOException e) {
e.printStackTrace();
}
}
}
}- 通过SocketChannel的open方法打开通道。
- 通过connet方法链接 (注意,这里和DatagromChannel的细微差别)
- configureBlocking 设置为非阻塞
- write方法将buffer中的数据读到channel中
- 开启一个线程去检查服务器的返回结果
接下来,我们看下服务端的写法。(ServerSocketChannel)
    public static void main(String[] args){
        ServerSocketChannel serverSocketChannel
        try {
            serverSocketChannel = ServerSocketChannel.open()
            serverSocketChannel.socket().bind(new InetSocketAddress(3334))
            while (true){
                SocketChannel socketChannel = serverSocketChannel.accept()
                socketChannel.configureBlocking(false)
                ByteBuffer byteBuffer = ByteBuffer.allocate(1024)
                socketChannel.read(byteBuffer)
                System.err.println(new String(byteBuffer.array()).trim())
                byteBuffer.clear()
                byteBuffer.put(new String("好的,我收到了").getBytes("utf-8"))
                byteBuffer.flip()
                socketChannel.write(byteBuffer)


            }
        } catch (IOException e) {
            e.printStackTrace()
        }
}- open打开通道
- channel.socket().bind 绑定端口
- read 读取channel中的数据
- write向channel中写入数据
好,按照先启动服务端,在启动客户端的套路来看下输出结果。
3.Selector
为什么要用Selector,举个例子?银行办业务,如果给每个办业务的人都开个窗口,那就呵呵了,所以,开一定数量的窗口,当窗口空闲的时候叫号就是一种很好的选择了。Selector就是类似这样的。
我们通过Selector.open()去创建selector对象,并且需要将channel注册到selector中,这里需要注意的是,这个通道必须设置为非阻塞行的。channel.register(selector,感兴趣的事件)。
这里的感兴趣的事件是什么呢?就是说我空闲了会接受那些,比如说普通办业务的窗口,去办信用卡肯定是不合适的。这里有这么几种类型。
- SelectionKey.OP_CONNECT
- SelectionKey.OP_ACCEPT
- SelectionKey.OP_READ
- SelectionKey.OP_WRITE
当然,我们可以通过|操作符链接多种感兴趣的事件。
我们注册了感兴趣的事件了,那么我们如何选择通道呢?有下面三种方法。
- select
- select(timeout)
- selectNow
如果调用select返回了一个或多个通道的话,我们就可以通过selector的selectedKeys()方法,访问“已选择键集(selected key set)”中的就绪通道,并且通过这个集合判断通道类型。做相应的操作。下面,来举个例子。
服务器端代码如下:
    public static void main(String[] args){

        Selector selector
        ServerSocketChannel ssc

        try {
            selector = Selector.open()
            ssc = ServerSocketChannel.open()
            ssc.socket().bind(new InetSocketAddress(3333))
            ssc.configureBlocking(false)
            int ops = ssc.validOps()
            ssc.register(selector, ops,null)

            while (true){
                if (selector.select(3000) == 0){
                    System.err.println("没有合适的,继续等待")
                    continue
                }
                Iterator iterator = selector.selectedKeys().iterator()
                while (iterator.hasNext()){
                    SelectionKey key = iterator.next()
                    if (key.isAcceptable()){
                        SocketChannel socketChannel = ssc.accept()
                        socketChannel.configureBlocking(false)
                        socketChannel.register(selector,SelectionKey.OP_READ)
                        System.err.println("Connection accept : -----------" + socketChannel.getLocalAddress())
                    }else if (key.isReadable()){
                        SocketChannel socketChannel = (SocketChannel) key.channel()
                        ByteBuffer byteBuffer = ByteBuffer.allocate(1024)
                        socketChannel.read(byteBuffer)
                        String string = new String(byteBuffer.array()).trim()
                        System.err.println("Message received---->" + string)
                        if ("end".equals(string)){
                            socketChannel.register(selector,SelectionKey.OP_WRITE)
                        }
                    }else if (key.isWritable()){
                        byte[] b = new String("好的,你的消息我收到了").getBytes("utf-8")
                        ByteBuffer byteBuffer = ByteBuffer.wrap(b)
                        SocketChannel socketChannel = (SocketChannel) key.channel()
                        socketChannel.write(byteBuffer)
                        socketChannel.close()
                        ssc.close()
                    }
                    iterator.remove()
                }
            }

        } catch (IOException e) {
            e.printStackTrace()
        }

}- 刚开始我们注册 OP_ACCEPT的通道
- 当我们接收到这中通道的时候,我们在注册OP_READ通道
- 当我们收到OP_READ通道的时候,我们打印客户端输入的内容,并且在客户端输入的内容为end的时候,我们注册OP_WRITE事件,表明我们现在想输出到客户端数据了。
- 接收到OP_WRITE的通道,输出数据
相应的,我们看下客户端的代码。
    public static void main(String[] args){
        try {
            SocketChannel socketChannel = SocketChannel.open(new InetSocketAddress("192.168.0.114",3333));
            ArrayList messages = new ArrayList();
            messages.add("hello");
            messages.add("world");
            messages.add("my name");
            messages.add("quanshijie");
            messages.add("end");

            for (String message : messages) {
                byte[] b = new String(message).getBytes();
                ByteBuffer buffer = ByteBuffer.wrap(b);
                socketChannel.write(buffer);
                buffer.clear();
                Thread.sleep(3000);
            }
            new Thread(new ReadWork(socketChannel)).start();
        } catch (Exception e) {

            e.printStackTrace();
        }
    }

    static class ReadWork implements Runnable{

        SocketChannel socketChannel;

        public ReadWork(SocketChannel socketChannel){
            this.socketChannel = socketChannel;
        }

        @Override
        public void run() {
            while (true){
                ByteBuffer buffer = ByteBuffer.allocate(1024);
                while (true){
                    try {
                        while (socketChannel.read(buffer) != -1){
                            System.err.println("啊哈,我收到服务端的消息---->"+new String(buffer.array()).trim());
                        }
                    } catch (IOException e) {
                        e.printStackTrace();
                    }
                }
            }
        }
    }
很简单,没什么说的,我们看下控制台的输出结果。


4.Pipe
管道,用于在两个线程之间读写,管道中包含两个通道,一个Source(读数据)、一个Sink(写入数据)。由于这部分内容比较简单,这里就不过多的介绍了。直接给出例子。
    public static void main(String[] args){
        Pipe pipe;
        Pipe.SinkChannel sinkChannel;
        Pipe.SourceChannel sourceChannel;

        try {
            pipe = Pipe.open();
            new Thread(new ReadWork(pipe.source())).start();
            new Thread(new WriteWork(pipe.sink())).start();

        } catch (IOException e) {
            e.printStackTrace();
        }
    }


    public static class WriteWork implements Runnable{

        public Pipe.SinkChannel sinkChannel;

        public WriteWork(Pipe.SinkChannel sinkChannel){
            this.sinkChannel = sinkChannel;
        }

        @Override
        public void run() {
            ByteBuffer byteBuffer = ByteBuffer.allocate(1024);
            try {
                byteBuffer.put(new String("输入的数据").getBytes("utf-8"));
                byteBuffer.flip();
                sinkChannel.write(byteBuffer);
                byteBuffer.clear();
            } catch (UnsupportedEncodingException e) {
                e.printStackTrace();
            } catch (IOException e) {
                e.printStackTrace();
            }

        }
    }

    public static class ReadWork implements Runnable{

        public Pipe.SourceChannel sourceChannel;

        public ReadWork(Pipe.SourceChannel sourceChannel){
            this.sourceChannel = sourceChannel;
        }

        @Override
        public void run() {
            ByteBuffer byteBuffer = ByteBuffer.allocate(1024);
            while (true){
                try {
                    while (sourceChannel.read(byteBuffer) != -1){
                        System.err.println("读取到的数据 "+ new String(byteBuffer.array()).trim());
                        return;
                    }
                } catch (IOException e) {
                    e.printStackTrace();
                }
            }
        }
    }
5.内存映射文件
内存映射文件允许我们创建和修改那些因为太大而不能直接放入内存的文件。举个例子直观的看下用法。
    static int length = 0x8FFFFFF ;
    public static void main(String[] args){
        try {
            MappedByteBuffer mappedByteBuffer = new RandomAccessFile("./1.txt","rw").getChannel().map(
                    FileChannel.MapMode.READ_WRITE,0,length);
            for (int i = 0; i < length; i++) {
                mappedByteBuffer.put((byte)'x');
            }
            System.err.println("end");
        } catch (IOException e) {
            e.printStackTrace();
        }
    }
MappedByteBuffer是一种特殊类型的直接缓冲器,需要注意的是:
- 初始化的时候必须指定开始位置和长度
- 映射文件中所有输出必须使用RandomAccessFile
那好,我们输出完毕,看看 文件大小。

好吧,真的大。。
6.总结
NIO基础就暂时说道这里,稍后会将文中用到的代码push到我的JavaNote,有帮助的同学可以star一下,我会将一些java的复习笔记不定时的更新。
