

We know design is important in today’s uber tech world; but it still happens, in many teams design thinking ends up at a stand still once the deliverables are passed down the chain to marketing or development. Recently, with the rise of rapid prototyping tools, designers are gaining more traction when it comes to stakeholder meetings. Designers want the best experience for users, and we also want to collaborate with our teams by bridging the gap from design to development as much as possible. Now, we have an opportunity to take what is in our mind and flesh it out in real-life scenarios. Welcome user interface animation. Everyone loves animations, and they’re not just for use in the movies anymore! Stakeholders, folks on Dribbble, and of course the end users of software that we design for all enjoy useful animations. With meaningful animations, we can pass off our designs to the powers that be and then off to development giving us more influence for the outcome of our products.
Keynote is one of my go-to applications when it comes to microinteraction UI tools. It’s definitely not the end-all-be-all of rapid prototyping, but it’s a swift way to audition different effects and create a software narrative. Keynote is free, and works seamlessly with Sketch or any .svg file for that matter. A simple drag and drop of an asset allows a designer to build the interface quickly, so we can get to the animation stages even sooner.
Note: Sketch and Keynote are for OS X only.
We want a swift way of auditioning meaningful animations to pass off to the development team. I’ll be showing you how to create a simple FAB confirmation button using the build and transition features of Keynote. This will all happen in one slide. The end result will look like the .gif below.

First choose the standard white presentation theme.

After the presentation opens, we’ll want to customize the slide size. On the top right of Keynote, select the document inspector, and then choose custom slide size. The dimensions 1080 x 1920 will work great for HD animations in portrait.

Now, with Sketch open, simply ⌘+ C and ⌘+V or drag and drop the various elements from Sketch to the Keynote template to build the layers.


Now, wasn’t that easy? It may look like a mess, but let’s get to building! Keynote handles builds and transitions separately. Builds consist of three parts: a build in, animate, and build out feature. Transitions are between slides. For our interactions, we’ll be focusing on the build feature. Each item has to come onto the page, animate, then it may or may not disappear afterwards.

As you can see, the send mail button is already present for the user to push on stage. The primary action could be useful as a plugin or in-app action for support, feedback, or a primary email action for an email app.


To animate the button being pressed, pull up the build inspector. Let’s adjust the speed. First it will scale up then it will scale down. Feel free to play around with the speeds. You may prefer a more elastic approach, longer bounce time, larger scale, etc. Keep in mind, builds happen simultaneously or with a delay. We’ll get back to that in awhile.


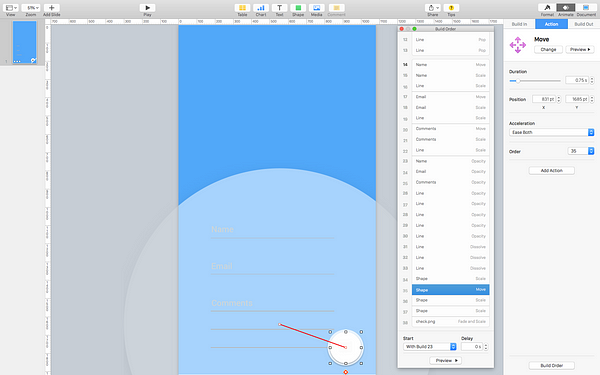
After we animate the button press, we’ll then have the button disappear and morph into the form with input fields. This is simply the circle growing and moving a percentage beyond the viewport. To smooth out the movement, adjust the timing and the path by which the circle moves to a more central location in the viewport. You can see below with the red line how the circle moves inward.

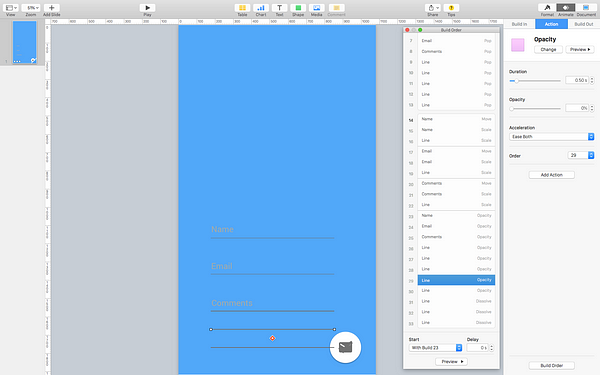
Next, we’ll want to introduce the form fields now that the background is in place. Observe how the build inspector changes from an after build to a with build 6 option for the lines coming onto the screen. This allows multiple elements to come on screen at the same time. Note: this can occur the same when items are being removed from the view.


Now that we have our form, let’s fill it in and scale the form text — in material fashion — and show some input. For each form field, rinse and repeat the below builds.


Now that we’ve changed the form and shrunk the inputs, we’ll need elements to begin disappearing to confirm the user’s input of the form.

You can see that the opacity and dissolve methods are perfect ways to have our elements disappear off stage.


We’re almost there! The final step is to get our background scaled down to normal button size and have it confirm for our user that the email was sent successfully.


With the final builds in place, the background shrinks in place and we have ourselves an animated form input. You did it! Now, can the developers? Yes, of course they can. Our point, once again, is that we could bridge the gap between what we intended to dream up in six static frames to one fluid animated concept in Keynote.
From Static To Animated


Keynote has handy guides like any image editor. Check them out by simply dragging from the edge of a ruler to the presentation slide to line up elements.

The help menu of Keynote also provides very insightful details as to how the program is intended to function.

UI animation is like theatrical performance. Each item is staged to have a purpose and tell part of the story. Keynote is a fine tool for being free, and it can audition small animations very well. It’s another item to add to the designer belt of rapid prototyping tools.
I hope this walk through was helpful! Definitely let me know of any feedback, and send me a tweet with your own creations @_jshmllr.
For your own experiments —
Download the keynote presentation here: cl.ly/0Y0E2t193I0…
Download the sketch file here: cl.ly/1u1F403g0R1…
Download Keynote (free), Sketch (free trial or $99 full)
Icons used are from the Material Design icon pack here: https://www.google.com/design/icons/
