首先新建一个页面,设置为custom
"pages": [{
"path": "pages/index/index",
"style": {
"navigationBarTitleText": "首页",
"navigationStyle": "custom",
}
}]
自定义获取手机设备信息方法,新建common文件,文件下新建system-info.js文件
用来获取设备各种信息

文件内容
const systemInfo = function() {
let systemInfomations = uni.getSystemInfoSync()
let scaleFactor = 750 / systemInfomations.windowWidth
let windowHeight = systemInfomations.windowHeight * scaleFactor
let windowWidth = systemInfomations.windowWidth * scaleFactor
let statusBarHeight = (systemInfomations.statusBarHeight) * scaleFactor
let navHeight = 0
const menuButtonInfo = wx.getMenuButtonBoundingClientRect()
let menuButtonHeight = menuButtonInfo.height * scaleFactor
let menuButtonWidth = menuButtonInfo.width * scaleFactor
let menuButtonTop = menuButtonInfo.top * scaleFactor
let menuButtonRight = menuButtonInfo.right * scaleFactor
let menuButtonBottom = menuButtonInfo.bottom * scaleFactor
let menuButtonLeft = menuButtonInfo.left * scaleFactor
navHeight = menuButtonHeight + (menuButtonTop - statusBarHeight) * 2
return {
scaleFactor,
windowHeight,
windowWidth,
statusBarHeight,
menuButtonHeight,
menuButtonWidth,
menuButtonTop,
menuButtonRight,
menuButtonBottom,
menuButtonLeft,
navHeight
}
return {
scaleFactor,
windowHeight,
windowWidth,
statusBarHeight
}
}
export {
systemInfo
}
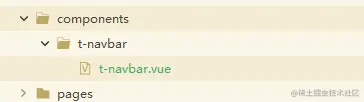
将想要导航栏封装成组件,这里命名为t-navbar.vue
t-navbar.vue代码较多,根据项目需求自行删改
<template>
<view>
<view class="wx-head-mod" :style="{height:navHeight+'rpx'}">
<view class="wx-head-mod-nav" :style="{height:navigationBarHeight+'rpx',top:statusBarHeight+'rpx'}">
<view class="wx-head-mod-nav-content"
:style="{height:customHeight+'rpx',justifyContent:'center'}">
<view class="wx-head-mod-nav-content-mian"
:style="{lineHeight:customHeight + 'rpx'}">
{{title}}
</view>
</view>
</view>
</view>
</view>
</template>
<script>
import {systemInfo} from '@/common/system-info.js'
export default {
name: "HeadView",
props: {
title: {
type: String,
default: ''
}
},
data() {
return {
statusBarHeight: 0,
navHeight: 0,
navigationBarHeight:0,
customHeight: 0,
scaleFactor: 0,
menubarLeft:0,
windowWidth: 0
};
},
methods: {
},
created() {
const SystemInfomations = systemInfo()
this.statusBarHeight = SystemInfomations.statusBarHeight
this.scaleFactor = SystemInfomations.scaleFactor
this.windowWidth = SystemInfomations.windowWidth
this.navHeight = SystemInfomations.navHeight + SystemInfomations.statusBarHeight
this.navigationBarHeight = SystemInfomations.navHeight
this.customHeight = SystemInfomations.menuButtonHeight
this.menubarLeft = SystemInfomations.menuButtonLeft
}
}
</script>
<style>
.wx-head-mod {
box-sizing: border-box;
width: 100%;
position: fixed;
top: 0;
left: 0;
}
.wx-head-mod-nav {
box-sizing: border-box;
width: 100%;
position: absolute;
left: 0;
display: flex;
justify-content: center;
align-items: center;
}
.wx-head-mod-nav-content {
box-sizing: border-box;
width: 100%;
display: flex;
justify-content: left;
align-items: center;
position: relative;
}
.wx-head-mod-nav-content-mian {
box-sizing: border-box;
height: 100%;
text-align: center;
white-space: nowrap;
text-overflow: ellipsis;
overflow: hidden;
color:#fff;
font-size:36rpx;
}
.wx-head-mod-nav-content-back {
box-sizing: border-box;
width: 60rpx;
height: 100%;
position: absolute;
top: 0;
left: 32rpx;
display: flex;
align-items: center;
justify-content: left;
}
.wx-head-mod-nav-content-back-img {
box-sizing: border-box;
}
</style>
app.vue文件引入(使用可自行决定)
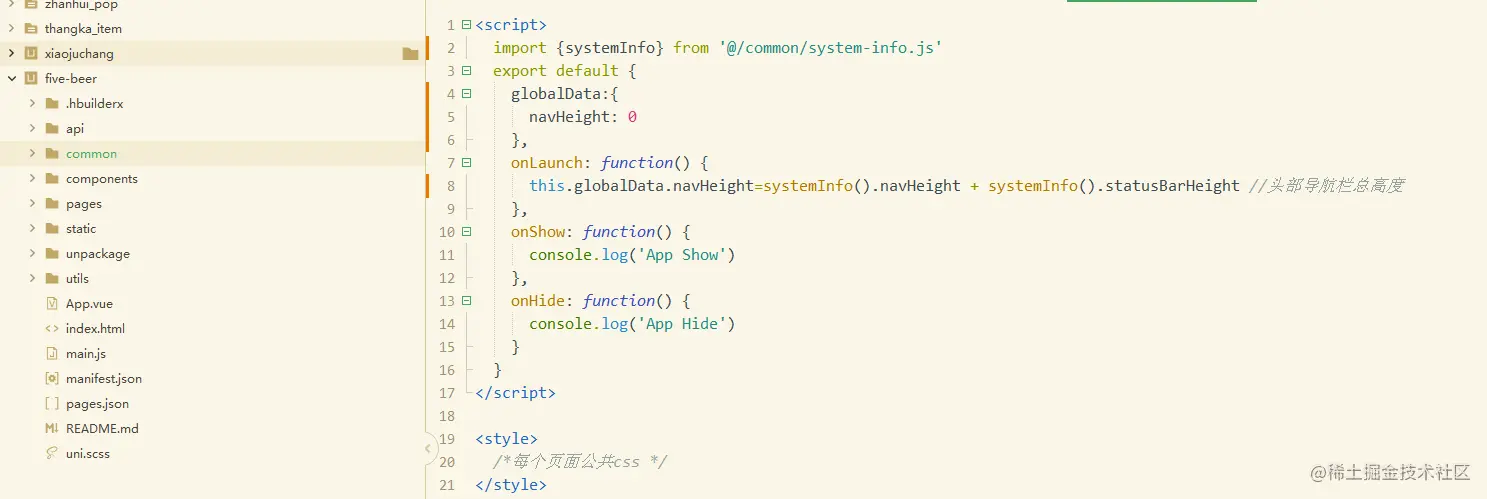
<script>
import {systemInfo} from '@/common/system-info.js'
export default {
globalData:{
navHeight: 0
},
onLaunch: function() {
this.globalData.navHeight=systemInfo().navHeight + systemInfo().statusBarHeight
},
onShow: function() {
console.log('App Show')
},
onHide: function() {
console.log('App Hide')
}
}
</script>
index页面引入自定义导航并传递title
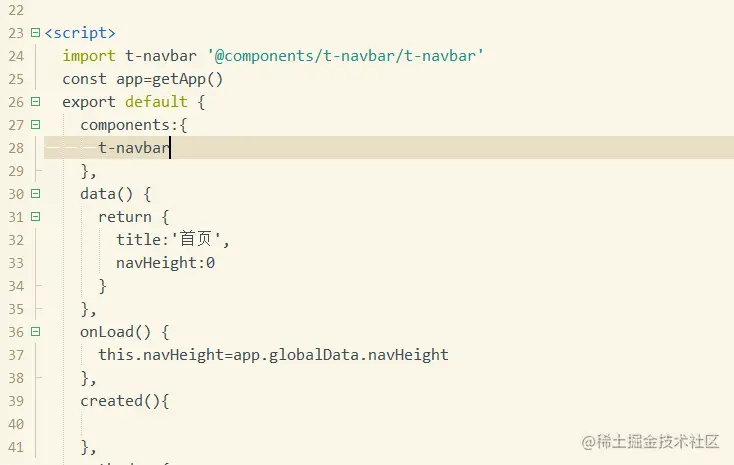
	import t-navbar '@components/t-navbar/t-navbar'
	const app=getApp()
	export default {
		components:{
			t-navbar
		},
		data() {
			return {
				title:'首页',
				navHeight:0
			}
		},
		onLoad() {
			this.navHeight=app.globalData.navHeight
		},
	}
使用

传递更多参数可参照title


