

**TL/DR:**让我们看看在Spring Boot Web和Spring Boot Security中构建自定义错误处理逻辑所需的一切。
在Spring Boot中开发的REST应用程序会自动利用其默认的错误处理逻辑。具体来说,只要发生错误,就会返回包含一些信息的默认响应。问题是,这些信息可能很差或不足以让API调用者正确处理错误。这就是为什么实现自定义错误处理逻辑是如此常见和理想的任务。实现它所需要的努力比你想象的要多,你需要深入研究一些Spring Boot的基本概念。让我们看看在Spring Boot和Java中开始自定义错误处理所需的一切。
先决条件
以下是跟随文章的所有先决条件的列表:
- Java >= 1.8 (建议使用Java >= 13)
- Spring Boot >= 2.5
- Spring Boot Starter Web>= 2.5
- Spring Security>= 5.5
- 项目 Lombok>= 1.18
- Gradle >= 4.x 或 Maven 3.6.x
Spring Boot中的默认错误处理
默认情况下,Spring Boot提供了一个后备错误处理页面,以及在REST请求中的错误处理响应。特别是,Spring Boot在启动过程中会寻找端点的映射。 /error端点的映射。这个映射取决于在一个 ViewResolver类上的设置。如果找不到有效的映射,Spring Boot会自动配置一个默认的回退错误页面。这个所谓的白标错误页不过是一个包含HTTP状态代码和模糊错误信息的白色HTML页面。这就是这样一个页面的样子。
<html>
   <head></head>
   <body data-new-gr-c-s-check-loaded="14.1026.0" data-gr-ext-installed="">
      <h1>Whitelabel Error Page</h1>
      <p>This application has no explicit mapping for /error, so you are seeing this as a fallback.</p>
      <div id="created">Sun Aug 15 14:32:17 UTC 2021</div>
      <div>There was an unexpected error (type=Internal Server Error, status=500).</div>
      <div></div>
   </body>
</html>
这就是白标HTML页面在浏览器中的样子。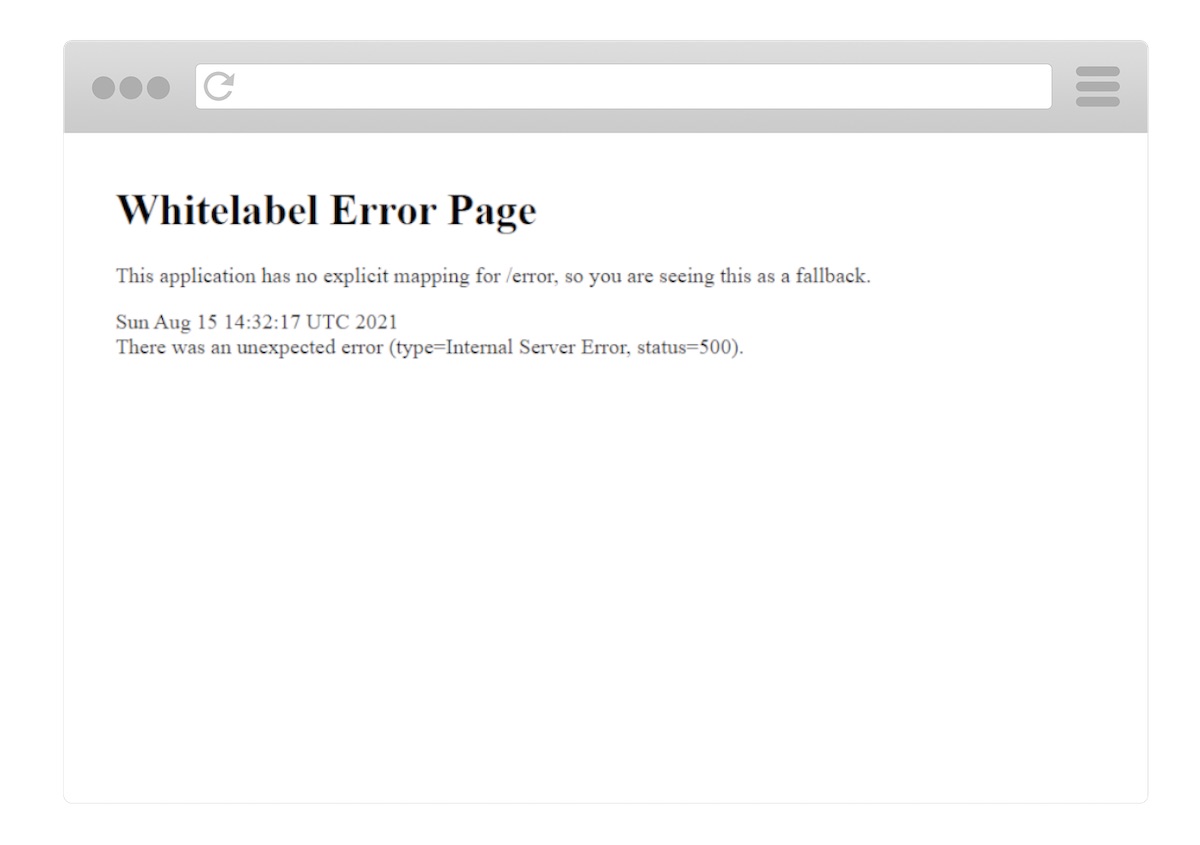
Spring Boot白标HTML错误页面
同样,在处理REST请求时,Spring Boot会在出现错误时自动返回一个默认的JSON响应。这包含与上述白标HTML错误页面相同的信息,看起来如下。
{
  "timestamp": "2021-15-08T14:32:17.947+0000",
  "status": 500,
  "error": "Internal Server Error",
  "path": "/test"
}
正如你所看到的,REST的默认Spring Boot错误处理响应并没有提供很多信息。这很快就会成为一个问题,特别是在试图调试的时候。这对前端开发人员来说也是个问题,他们需要来自API错误响应信息的详细信息,以便能够向最终用户正确解释发生了什么。
让我们看看如何用自定义的信息来取代这个默认的响应。虽然这看起来很容易,但这实际上是一个棘手的任务。要实现它,你首先需要了解一些Spring Boot的基本原理。让我们进一步了解它们。
Spring Boot中的自定义错误处理
你将看到Spring Boot REST应用程序中自定义错误处理的两种不同方法。这两种方法都是基于一个@ControllerAdvice 注释的类来处理所有可能发生的异常。因此,让我们首先看看什么是@ControllerAdvice 注释类,为什么要使用它,如何使用,以及何时使用。然后,你将学习如何详细地实现这两种不同的方法。最后,将解释每种方法的优点和缺点。
处理异常@ControllerAdvice
该 @ControllerAdvice注解是在Spring 3.2中引入的,目的是使异常处理逻辑更简单,而且完全可以在一个地方定义。事实上,@ControllerAdvice 允许你在整个应用程序中处理异常处理。换句话说,一个单一的@ControllerAdvice 注解的类可以处理从你的应用程序中任何地方抛出的异常。因此,用@ControllerAdvice 注释的类是强大而灵活的工具。它们不仅允许你将异常处理逻辑集中到一个全局组件中,而且还可以让你控制主体响应以及HTTP状态代码。这在试图实现自定义错误处理时尤其重要。让我们看看@ControllerAdvice 的运作。
现在,你即将看到实现两种基于@ControllerAdvice 的自定义错误处理方法所需的一切。首先,你应该克隆支持这篇文章的GitHub仓库。通过分析代码库,浏览这篇文章将变得更加容易。而且,你将能够立即看到这两种方法的运行情况。
所以,用下面的命令克隆仓库。
git clone https://github.com/Tonel/spring-boot-custom-error-handling
然后,按照Spring Boot官方文档中的这个指南,运行DemoApplication 主类,并到达以下4个端点之一,查看自定义错误处理响应。
http://localhost:8080/test-custom-data-not-found-exceptionhttp://localhost:8080/test-custom-parameter-constraint-exception?value=12http://localhost:8080/test-custom-error-exceptionhttp://localhost:8080/test-generic-exception
前两个API应用了你将要看到的第一种错误处理方法,而第三个API则使用了第二种方法。第四个也是最后一个API显示了上面提出的回退错误处理逻辑的作用。现在,让我们深入了解一下在Spring Boot中实现这两种自定义错误处理的方法。
这两种方法都依赖于一个ErrorMessage 类,代表放在error 包中的自定义错误主体,包含处理自定义错误处理逻辑所需的一切。这可以按以下方式实现。
// src/main/java/com/customerrorhandling/demo/errors/ErrorResponse.java

package com.customerrorhandling.demo.errors;

import com.fasterxml.jackson.annotation.JsonFormat;
import lombok.Getter;
import lombok.Setter;
import org.springframework.http.HttpStatus;
import java.util.Date;

@Getter
@Setter
public class ErrorResponse {
    // customizing timestamp serialization format
    @JsonFormat(shape = JsonFormat.Shape.STRING, pattern = "dd-MM-yyyy hh:mm:ss")
    private Date timestamp;

    private int code;

    private String status;

    private String message;

    private String stackTrace;

    private Object data;

    public ErrorResponse() {
        timestamp = new Date();
    }

    public ErrorResponse(
            HttpStatus httpStatus,
            String message
    ) {
        this();

        this.code = httpStatus.value();
        this.status = httpStatus.name();
        this.message = message;
    }

    public ErrorResponse(
            HttpStatus httpStatus,
            String message,
            String stackTrace
    ) {
        this(
                httpStatus,
                message
        );

        this.stackTrace = stackTrace;
    }

    public ErrorResponse(
            HttpStatus httpStatus,
            String message,
        String stackTrace,
            Object data
    ) {
        this(
                httpStatus,
                message,
        stackTrace
        );

        this.data = data;
    }
}
该 @Getter和 @Setter注释在上面的代码例子中使用,是属于 Project Lombok.它们被用来自动生成getters和setters。这不是强制性的,只是一种避免模板代码的额外方式。阅读这篇文章,了解更多关于Lombok的信息。
ErrorResponse 携带的信息包括HTTP状态 和 ,表明错误发生时间的 ,一个可选的错误 ,一个可选的code name timestamp messageexception stacktrace以及一个包含任何类型的data 的可选对象。你应该尽量为前三个字段提供值,而后者应该只在需要时使用。特别是,stackTrace 字段应该只在staging或开发环境中使用,在此说明。同样地,数据字段应该只在需要额外数据时使用。具体来说,就是要详细解释发生了什么,或者让前端更好地处理错误。
在用@ControllerAdvice 处理异常时,可以用这个类来实现自定义响应,如下图。
// src/main/java/com/customerrorhandling/demo/errors/CustomControllerAdvice.java

package com.customerrorhandling.demo.errors;

import exceptions.CustomDataNotFoundException;
import exceptions.CustomErrorException;
import exceptions.CustomParameterConstraintException;
import org.springframework.http.HttpStatus;
import org.springframework.http.ResponseEntity;
import org.springframework.web.bind.annotation.ControllerAdvice;
import org.springframework.web.bind.annotation.ExceptionHandler;
import java.io.PrintWriter;
import java.io.StringWriter;

@ControllerAdvice
class CustomControllerAdvice {
    @ExceptionHandler(NullPointerException.class) // exception handled
    public ResponseEntity<ErrorResponse> handleNullPointerExceptions(
        Exception e
    ) {
        // ... potential custom logic

        HttpStatus status = HttpStatus.NOT_FOUND; // 404

        return new ResponseEntity<>(
            new ErrorResponse(
              status,
              e.getMessage()
            ),
            status
        );
    }

    // fallback method
    @ExceptionHandler(Exception.class) // exception handled
    public ResponseEntity<ErrorResponse> handleExceptions(
        Exception e
    ) {
        // ... potential custom logic

        HttpStatus status = HttpStatus.INTERNAL_SERVER_ERROR; // 500

    // converting the stack trace to String
    StringWriter stringWriter = new StringWriter();
    PrintWriter printWriter = new PrintWriter(stringWriter);
    e.printStackTrace(printWriter);
    String stackTrace = stringWriter.toString();

        return new ResponseEntity<>(
            new ErrorResponse(
              status,
              e.getMessage(),
              stackTrace // specifying the stack trace in case of 500s
            ),
            status
        );
    }
}
正如你所看到的,@ControllerAdvice ,通过采用 @ExceptionHandler方法级注解。这个注解允许你定义在发生错误时应该调用哪个方法。具体来说,抛出的异常与作为参数传递给@ExceptionHandler 的异常根据类型进行比较。第一个有匹配的方法被调用。如果没有匹配,则测试异常的父类,以此类推。这也是为什么你应该实现一个回退方法来覆盖所有剩余的情况。你可以通过将 Exception类到@ExceptionHandler 注解,就像在handleExceptions 方法中一样。事实上,Java中的任何异常都必须将Exception 作为其继承链中的一个祖先。所以,它们都直接--或作为子类--扩展了Exception 这个超类。
然后,每个方法都会处理错误,甚至可能实现自定义逻辑,如记录。在这个例子中,每个异常的处理是通过返回一个 ResponseEntity具有所需的 HttpStatus.这将被用作与错误响应相关的HTTP状态代码。同样,传递给ResponseEntity 构造函数的ErrorResponse 实例将被自动序列化为JSON格式,并作为消息体使用。这样一来,自定义错误处理就刚刚实现。
现在,你将深入了解如何使用@ConfrollerAdvice ,实现Spring Boot Web中REST的两种不同的自定义错误处理方法。第一种涉及到模板代码,但它是干净的、基于最佳实践的。相比之下,第二种方法在便利性方面是一个很好的解决方案,尽管它有点脏。
定义许多自定义异常
这种方法涉及到在你的@ControllerAdvice ,你想处理多少HTTP错误状态代码就有多少方法。这些方法将与一个或多个异常相关,并返回带有特定HTTP状态码的错误信息。实现这样一个方法需要三个步骤。首先,你必须考虑你希望你的应用程序返回的所有HTTP错误状态代码。然后,你必须在你的@ControllerAdvice 注释的类中为它们的每一个定义一个方法。最后,你必须用@ExceptionHandler 注解将这些方法与它们的异常联系起来。
这意味着所有特定类型的异常将被追溯到它们在@ControllerAdvice 注释的类中的相对方法。这可能代表了一个问题,特别是考虑到有些异常比其他的更常见,比如说 NullPointerException.由于这些异常可以在你的逻辑的许多部分抛出,它们可能有不同的含义。因此,它们代表各种错误,因此也代表其他的HTTP状态码。
解决办法是引入新的自定义异常来包装这些频繁出现的异常。例如,一个NullPointerException 可以在控制器层成为一个CustomParameterConstraintException 异常,而在DAO(数据访问对象)层成为一个CustomDataNotFoundException 。在这种情况下,第一个异常可以与400坏请求相关联,第二个异常可以与404未找到的HTTP状态相关联。这些异常背后的想法是给发生的错误一个更具体的含义。这样可以更好地描述错误,使其在@ControllerAdvice 注释的类中得到相应的处理。所以,你应该为每个你想处理的特定错误定义一个自定义的异常。另外,使用自定义异常类无疑代表了一种干净的代码原则。因此,通过采用它,你将会有不止一个好处。
那么,让我们通过一个例子来看看这种方法的作用。首先,你必须定义自定义异常,如图所示。
// src/main/java/exceptions/CustomParameterConstraintException.java

package exceptions;

public class CustomParameterConstraintException extends RuntimeException {
    public CustomParameterConstraintException() {
        super();
    }

    public CustomParameterConstraintException(String message) {
        super(message);
    }
}
// src/main/java/exceptions/CustomDataNotFoundException.java

package exceptions;

public class CustomDataNotFoundException extends RuntimeException {
    public CustomDataNotFoundException() {
        super();
    }

    public CustomDataNotFoundException(String message) {
        super(message);
    }
}
然后,用它们来包住经常出现的异常,或者在代表业务逻辑错误的特殊情况下抛出这些异常。让我们通过两个例子来看看。
// DAO-level method
public Foo retrieveFooById(
    int id
) {
    try {
        // data retrieving logic
    } catch (NullPointerException e) {
        throw new CustomDataNotFoundException(e.getMessage());
    }
}
如上所示,一个通用的NullPointerException ,变成了一个更有意义的CustomDataNotFoundException 。
// controller-level method method
public ResponseEntity<Void> performOperation(
    int numberOfAttempts
) {
    if (numberOfAttempts <= 0 || numberOfAttempts >= 5)
        throw new CustomParameterConstraintException("numberOfAttempts must be >= 0 and <= 5!");

    // business logic
}
在这里,一个不应该发生的特殊行为被拦截了。然后,描述它的自定义CustomParameterConstraintException 异常被抛出。
最后,你所要做的就是在你的@ControllerAdvice 注释的类中添加两个特定的方法,每个特定的错误一个。
// src/main/java/com/customerrorhandling/demo/errors/CustomControllerAdvice.java

package com.customerrorhandling.demo.errors;

import exceptions.CustomDataNotFoundException;
import exceptions.CustomErrorException;
import exceptions.CustomParameterConstraintException;
import org.springframework.http.HttpStatus;
import org.springframework.http.ResponseEntity;
import org.springframework.web.bind.annotation.ControllerAdvice;
import org.springframework.web.bind.annotation.ExceptionHandler;
import java.io.PrintWriter;
import java.io.StringWriter;

@ControllerAdvice
class CustomControllerAdvice {
    // ...

    @ExceptionHandler(CustomDataNotFoundException.class)
    public ResponseEntity<ErrorResponse> handleCustomDataNotFoundExceptions(
        Exception e
    ) {
        HttpStatus status = HttpStatus.NOT_FOUND; // 404

    // converting the stack trace to String
    StringWriter stringWriter = new StringWriter();
    PrintWriter printWriter = new PrintWriter(stringWriter);
    e.printStackTrace(printWriter);
    String stackTrace = stringWriter.toString();

        return new ResponseEntity<>(
            new ErrorResponse(
              status,
              e.getMessage(),
          stackTrace, // assuming to be in staging environment, otherwise stackTrace should not be valorized
            ),
            status
        );
    }

    @ExceptionHandler(CustomParameterConstraintException.class)
    public ResponseEntity<ErrorResponse> handleCustomParameterConstraintExceptions(
        Exception e
    ) {
        HttpStatus status = HttpStatus.BAD_REQUEST; // 400

        return new ResponseEntity<>(
            new ErrorResponse(
              status,
              e.getMessage()
            ),
            status
        );
    }

    // ...
}
Et voilà!原本与同一个异常相关的两个错误首先被定性,然后被相应地处理。
现在,让我们看看其中的区别。这是默认的错误响应在404错误中的样子。
{
  "timestamp": "2021-15-08T14:32:17.947+0000",
  "status": 404,
  "error": "Not Found",
  "path": "/test404"
}
而这是刚刚实现的自定义错误响应的样子。
{
  "timestamp": "2021-15-08 14:32:17",
  "code": 404,
  "status": "NOT_FOUND",
  "message": "Resource not found",
  "stackTrace": "Exception in thread \"main\" com.example.demo.exceptions.CustomDataNotFoundException
        at com.example.demo.AuthorController.getAuthor(AuthorController.java:16)
        at com.example.demo.AuthorService.getAuthor(AuthorService.java:37)
        at com.example.demo.AuthorDao.getById(AuthorDao.java:24)"
}
定义一个携带所有数据的单个自定义异常
这种方法包括定义一个自定义异常,携带HTTP状态,以及描述发生的错误所需的所有数据。我们的想法是把每一个你想处理的异常,或者你想在特殊情况下抛出的异常,都变成这个特殊异常的实例。这样,你就把错误定性的逻辑分散到你所有的代码中。所以,你只需要在你的@ControllerAdvice 注释的类中添加一个新的方法来相应地处理这个自定义异常。
首先,你必须定义一个自定义的错误处理异常。这可以通过以下方式实现。
// src/main/java/exceptions/CustomErrorException.java

package exceptions;

import lombok.Getter;
import lombok.Setter;
import org.springframework.http.HttpStatus;

@Getter
@Setter
public class CustomErrorException extends RuntimeException {
    private HttpStatus status = null;

    private Object data = null;

    public CustomErrorException() {
      super();
    }

   public CustomErrorException(
      String message
   ) {
      super(message);
   }

    public CustomErrorException(
        HttpStatus status,
        String message
    ) {
        this(message);
        this.status = status;
    }

    public CustomErrorException(
        HttpStatus status,
        String message,
        Object data
    ) {
        this(
          status,
      message
        );
        this.data = data;
    }
}
同样,在 @Getter和 @Setter注解是用来避免模板代码的,并不是强制性的。正如你所看到的,CustomErrorException 类携带的数据与ErrorResponse 类中使用的数据相同,以更好地描述所发生的事情,并将错误呈现给终端用户。
所以,你可以用这个异常来包装其他的异常,或者在业务逻辑中出现特殊情况构成错误时抛出这个异常。现在,让我们通过两个例子来看看如何实现。
// DAO-level method
public Foo retrieveFooById(
    int id
) {
    try {
        // data retrieving logic
    } catch (NullPointerException e) {
        throw new CustomErrorException(
          HttpStatus.NOT_FOUND,
          e.getMessage(),
          (Integer) id
        );
    }
}
在这里,一个不够显著的NullPointerException ,变成一个更详细的CustomErrorException ,包含所有的数据来描述错误发生的原因。
// controller-level method method
public ResponseEntity<Void> performOperation(
    int numberOfAttempts
) {
    if (numberOfAttempts <= 0 || numberOfAttempts >= 5) {
        throw new CustomErrorException(
          HttpStatus.BAD_REQUEST,
          "numberOfAttempts must be >= 0 and <= 5!",
          (Integer) numberOfAttempts
        );
    }

    // business logic
}
同样地,一个不应该发生的特殊行为被拦截。因此,一个包含所有有用数据的CustomErrorException 异常被抛出,以表示该错误。
最后,在你的@ControllerAdvice 注释的类中添加一个方法来处理CustomErrorException 异常实例,如下所示。
// src/main/java/com/customerrorhandling/demo/errors/CustomControllerAdvice.java

package com.customerrorhandling.demo.errors;

import exceptions.CustomDataNotFoundException;
import exceptions.CustomErrorException;
import exceptions.CustomParameterConstraintException;
import org.springframework.http.HttpStatus;
import org.springframework.http.ResponseEntity;
import org.springframework.web.bind.annotation.ControllerAdvice;
import org.springframework.web.bind.annotation.ExceptionHandler;
import java.io.PrintWriter;
import java.io.StringWriter;

@ControllerAdvice
class CustomControllerAdvice {
    // ...

    @ExceptionHandler(CustomErrorException.class)
    public ResponseEntity<ErrorResponse> handleCustomErrorExceptions(
            Exception e
    ) {
        // casting the generic Exception e to CustomErrorException
        CustomErrorException customErrorException = (CustomErrorException) e;

        HttpStatus status = customErrorException.getStatus();

        // converting the stack trace to String
        StringWriter stringWriter = new StringWriter();
        PrintWriter printWriter = new PrintWriter(stringWriter);
        customErrorException.printStackTrace(printWriter);
        String stackTrace = stringWriter.toString();

        return new ResponseEntity<>(
                new ErrorResponse(
                        status,
                        customErrorException.getMessage(),
                        stackTrace,
                        customErrorException.getData()
                ),
                status
        );
    }

    // ...
}
请注意,@ExceptionHandler 可以接受一个以上的异常类型。这意味着代表异常的方法的参数必须被下移。否则,一个 ClassCastException将会被抛出。所以,在方法里面将异常e 上传到CustomErrorException 。然后,你就可以访问它的特定字段,并定义一个有效的ErrorResponse 实例。
完成了!这样一来,每个发生的错误都被封装成了一个异常,包含了描述它所需要的一切。
现在,让我们看看区别。这是404错误的默认错误响应的样子。
{
  "timestamp": "2021-15-08T14:32:17.947+0000",
  "status": 404,
  "error": "Not Found",
  "message": "",
  "path": "/test404"
}
而这是刚刚实现的自定义错误响应的样子。
{
  "timestamp": "2021-15-08 14:32:17",
  "code": 404,
  "status": "NOT_FOUND",
  "message": "Resource not found",
  "stackTrace": "Exception in thread \"main\" com.example.demo.exceptions.CustomErrorException
        at com.example.demo.AuthorController.getAuthor(AuthorController.java:16)
        at com.example.demo.AuthorService.getAuthor(AuthorService.java:37)
        at com.example.demo.AuthorDao.getById(AuthorDao.java:24)"
}
每种方法的优点和缺点
当你不想在你的代码库中散布错误处理逻辑时,应该使用第一种方法。事实上,HTTP状态码只与你的@ControllerAdvice 注释的类中的错误相关联。这意味着没有一层知道错误将如何被处理并呈现给用户。尽管这应该是理想的行为,因为它尊重最小特权原则,但它确实涉及到模板代码。事实上,你可能很容易就会有几十个自定义的异常,而定义这些异常是一个繁琐的、不可扩展的方法。
所以,你可能想要一个限制较少的方法,这就是为什么提出了第二个方法。不幸的是,这个绝对是比较脏的。事实上,它要求你在代码的许多不同点上传播关于错误处理逻辑的细节。相比之下,它是可扩展的,而且实现起来更快。因此,尽管不是最干净的方法,但它可以让你以很少的努力达到预期的结果。另外,它比第一种方法更容易维护,因为它只涉及一个自定义的异常。
Spring Security中的自定义错误处理
Spring Security是一个强大的、高度可定制的框架,它提供认证和授权。它是使用最广泛的Spring依赖项之一,代表了保护Spring Boot应用程序的事实标准。
在认证和授权失败的情况下。 AuthenticationException和 AccessDeniedException分别被抛出。然后,Spring Security负责将它们封装在默认的错误处理响应中。如果你想定制它们,上面介绍的两种方法就没有用了。这是因为@ControllerAdvice 只能处理控制器抛出的异常,但AuthenticationException 和AccessDeniedException 是由Spring Security AbstractSecurityInterceptor组件抛出的--它不是一个控制器。换句话说,一个@ControllerAdvice 注释的类不能捕捉它们。实现这一点需要自定义逻辑。
在Spring Security中实现自定义错误处理逻辑
让我们来看看如何在Spring Security中实现自定义错误处理。幸运的是,这并不复杂,因为你可以轻松地为Spring Security提供两个组件,分别处理认证和授权错误。你所需要做的是为 AuthenticationFailureHandler接口和实现,如下所示。
// src/main/java/com/auth0/hotsauces/security/CustomAuthenticationFailureHandler.java

package com.auth0.hotsauces.security;

import com.fasterxml.jackson.annotation.JsonFormat;
import com.fasterxml.jackson.databind.ObjectMapper;
import org.springframework.http.HttpStatus;
import org.springframework.security.core.AuthenticationException;
import org.springframework.security.web.authentication.AuthenticationFailureHandler;
import java.util.*;
import javax.servlet.http.HttpServletRequest;
import javax.servlet.http.HttpServletResponse;
import java.util.HashMap;

public class CustomAuthenticationFailureHandler implements AuthenticationFailureHandler {
    // Jackson JSON serializer instance
    private ObjectMapper objectMapper = new ObjectMapper();

    @Override
    public void onAuthenticationFailure(
      HttpServletRequest request,
      HttpServletResponse response,
      AuthenticationException exception
    ) throws IOException, ServletException {
        HttpStatus httpStatus = HttpStatus.UNAUTHORIZED; // 401

        Map<String, Object> data = new HashMap<>();
        data.put(
          "timestamp",
          new Date()
        );
        data.put(
          "code",
          httpStatus.value();
        );
        data.put(
          "status",
          httpStatus.name();
        );
        data.put(
          "message",
          exception.getMessage()
        );

        // setting the response HTTP status code
        response.setStatus(httpStatus.value());

        // serializing the response body in JSON
        response
          .getOutputStream()
          .println(
              objectMapper.writeValueAsString(data)
          );
    }
}
这将被用来处理AuthenticationExceptions 。
同样地,你可以提供 AccessDeniedHandler接口和实现来处理AccessDeniedExceptions 。
// src/main/java/com/auth0/hotsauces/security/CustomAccessDeniedHandler.java

package com.auth0.hotsauces.security;

import com.fasterxml.jackson.annotation.JsonFormat;
import com.fasterxml.jackson.databind.ObjectMapper;
import org.springframework.http.HttpStatus;
import org.springframework.security.core.AuthenticationException;
import org.springframework.security.web.authentication.AuthenticationFailureHandler;
import java.util.*;
import javax.servlet.http.HttpServletRequest;
import javax.servlet.http.HttpServletResponse;
import java.util.HashMap;

public class CustomAccessDeniedHandler implements AccessDeniedHandler {
    // Jackson JSON serializer instance
    private ObjectMapper objectMapper = new ObjectMapper();

    @Override
    public void handle(
      HttpServletRequest request,
      HttpServletResponse response,
      AccessDeniedException exception
    ) throws IOException, ServletException {
        HttpStatus httpStatus = HttpStatus.FORBIDDEN; // 403

        Map<String, Object> data = new HashMap<>();
        data.put(
          "timestamp",
          new Date()
        );
        data.put(
          "code",
          httpStatus.value();
        );
        data.put(
          "status",
          httpStatus.name();
        );
        data.put(
          "message",
          exception.getMessage()
        );

        // setting the response HTTP status code
        response.setStatus(httpStatus.value());

        // serializing the response body in JSON
        response
          .getOutputStream()
          .println(
              objectMapper.writeValueAsString(data)
          );
    }
}
现在,你只需要将这两个自定义实现注册为认证和授权错误处理程序。你可以像下面这样做。
// src/main/java/com/auth0/hotsauces/security/SecurityConfig.java

package com.auth0.hotsauces.security;

import org.springframework.beans.factory.annotation.Value;
import org.springframework.context.annotation.Bean;
import org.springframework.security.config.annotation.web.builders.HttpSecurity;
import org.springframework.security.config.annotation.web.configuration.EnableWebSecurity;
import org.springframework.security.config.annotation.web.configuration.WebSecurityConfigurerAdapter;
import org.springframework.security.oauth2.core.DelegatingOAuth2TokenValidator;
import org.springframework.security.oauth2.core.OAuth2TokenValidator;
import org.springframework.security.oauth2.jwt.*;
import org.springframework.security.oauth2.server.resource.web.BearerTokenAuthenticationFilter;
import org.springframework.security.web.access.AccessDeniedHandler;
import org.springframework.security.web.authentication.AuthenticationFailureHandler;

@EnableWebSecurity
public class SecurityConfig extends WebSecurityConfigurerAdapter {
    // ...

    @Override
    protected void configure(HttpSecurity http)
      throws Exception {
        http
          .authorizeRequests()
          .anyRequest()
          .authenticated()
          .and()
          .formLogin()
          .failureHandler(authenticationFailureHandler())
          .and()
          .exceptionHandling()
          .accessDeniedHandler(accessDeniedHandler());
    }

    @Bean
    public AuthenticationFailureHandler authenticationFailureHandler() {
        return new CustomAuthenticationFailureHandler();
    }

    @Bean
    public AccessDeniedHandler accessDeniedHandler() {
        return new CustomAccessDeniedHandler();
    }
}
Et voilà!由于有了failureHandler 和accessDeniedHandler 方法,Spring Boot中的自定义错误处理刚刚实现,它允许你注册一个自定义认证错误处理程序和一个自定义授权错误处理程序。
Spring Security自定义错误处理的操作
现在,让我们看看如何在一个真实世界的例子中实现它。首先,阅读这篇关于如何用Spring Security和Auth0保护API的文章。在该文章中制作的演示应用程序中,没有实现自定义错误处理。因此,如果向受保护的API发出请求,包括一个错误的访问令牌,就会应用默认的Spring Boot错误处理逻辑。让我们来测试一下。
如果你是macOS或Linux用户,在终端输入这个命令。
curl -i --request GET \
     --url http://localhost:8080/api/hotsauces/ \
     -H "Content-Type: application/json" \
     -H "authorization: Bearer wrong-token"
否则,如果你是Windows用户,在PowerShell中输入这个命令。
$accessToken = "wrong-token"
$headers = @{
    Authorization = "Bearer $accessToken"
}
$response = Invoke-RestMethod "http://localhost:8080/api/hotsauces/" `
    -Headers $headers
$response | ConvertTo-Json
然后,将返回以下响应。
Invoke-WebRequest: The remote server returned an error: (401) Unauthorized.
At line:1 char:1
+ Invoke-WebRequest "http://localhost:8080/api/hotsauces/"
+ ~~~~~~~~~~~~~~~~~~~~~~~~~~~~~~~~~~~~~~~~~~~~~~~~~~~~~~~~
+ CategoryInfo          : InvalidOperation: (System.Net.HttpWebRequest:HttpWebRequest) [Invoke-WebRequest], WebExc
   eption
+ FullyQualifiedErrorId : WebCmdletWebResponseException,Microsoft.PowerShell.Commands.InvokeWebRequestCommand
正如你所看到的,一个401错误状态代码被返回,但没有关于发生什么的细节。
现在,让我们测试一下用自定义错误处理逻辑扩展的演示应用程序。你可以在这个GitHub资源库中找到它。除了错误处理逻辑,该应用程序与之前的应用程序完全相同。特别是,上述提出的逻辑得到了实现。
在这种情况下,通过启动上面的命令,将返回这个消息。
Invoke-RestMethod : {"code":401,"message":"An error occurred while attempting to decode the Jwt: Invalid JWT serialization: Missing dot delimiter(s)","timestamp":1629880611013,"status":"UNAUTHORIZED"}
At line:1 char:1
+ $response = Invoke-RestMethod "http://localhost:8080/api/hotsauces/"  ...
+ ~~~~~~~~~~~~~~~~~~~~~~~~~~~~~~~~~~~~~~~~~~~~~~~~~~~~~~~~
+ CategoryInfo          : InvalidOperation: (System.Net.HttpWebRequest:HttpWebRequest) [Invoke-WebRequest], WebExc
   eption
+ FullyQualifiedErrorId : WebCmdletWebResponseException,Microsoft.PowerShell.Commands.InvokeWebRequestCommand
正如你所看到的,代表自定义错误处理逻辑的JSON消息被如期返回。这包含状态代码、异常信息、时间戳和HTTP状态代码名称,如下所示。
{
  "code": 401,
  "message": "An error occurred while attempting to decode the Jwt: Invalid JWT serialization: Missing dot delimiter(s)",
  "timestamp": 1629880611013,
  "status": "UNAUTHORIZED"
}
结论
在这篇文章中,我们研究了在Spring Boot中处理REST应用程序时如何实现自定义错误处理逻辑。这并不像看起来那么容易,它需要了解一些Spring Boot的基础知识。首先,我们深入研究了Spring Boot中的默认错误处理,看到了反应有多差。然后,我们研究了@ControllerAdvice ,了解了实现自定义错误处理逻辑所需的一切。特别是,展示了两种不同的方法。两者都允许你定义自定义错误处理响应,但都有具体的优点和缺点。最后,我们学习了在处理Spring Boot安全错误时如何实现同样的结果,这需要特定的逻辑。如图所示,在Spring Boot中实现自定义错误处理并不容易,但绝对是可能的,而解释何时、为何以及如何做到这一点正是本文的目的所在。
谢谢你的阅读!我希望你觉得这篇文章对你有帮助。如有任何问题、评论或建议,请随时与我联系。
