

创建自己的对话框,不使用任何包!

前言
在本文中,我们将学习如何创建我们自己的 showDialog() 函数,并了解到底发生了什么。
正文
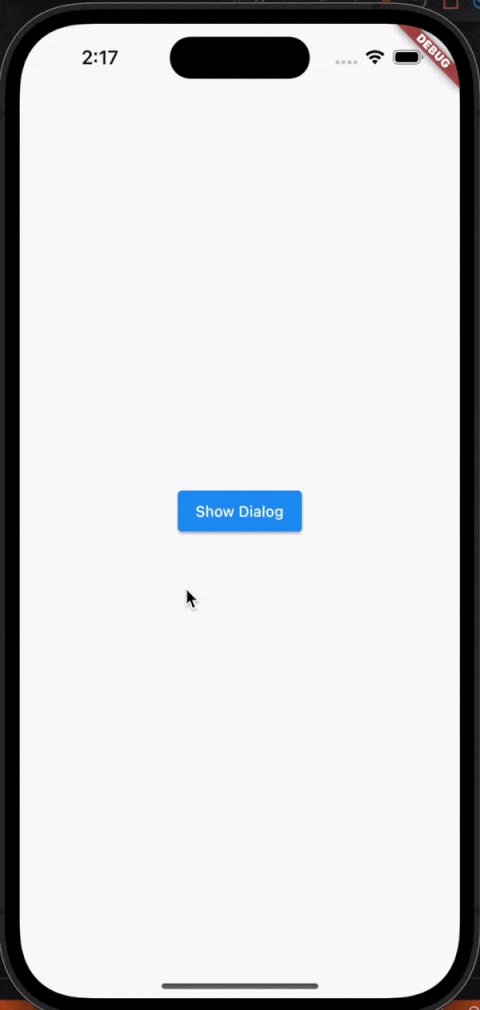
先看效果
让我们首先检查 showDialog,看看它里面有什么!
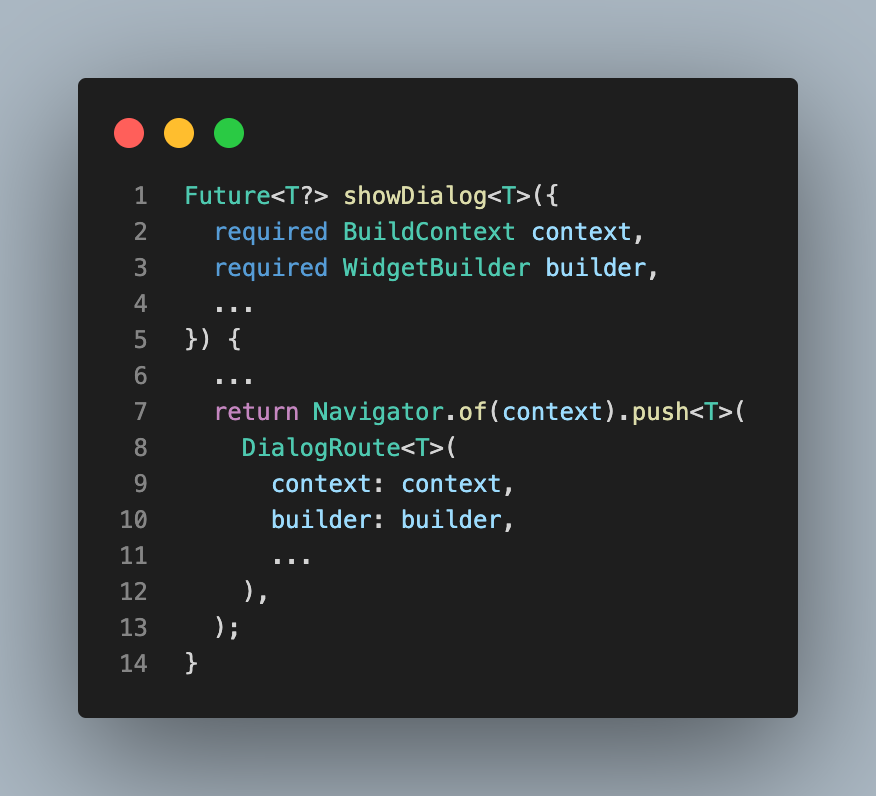
正如您所看到的,showDialog ()所做的就是获取小部件并将其作为 DialogRoute 使用 Navigator 进行推送。没什么特别的!
因此,如果我们想创建一个对话框,我们应该使用导航器和路由,太!
但什么是导航器,为什么我们需要它的对话?

没错,导航器也是个 widget !
毕竟,一切都是一个 widget ,甚至是我,甚至是你,甚至是导航器本身ー匿名 Flutter 开发人员
本质上,Navigator 的工作是管理一堆 Route 对象,并在 Overlay widget 中的 widget 之间进行可视化切换。
什么是叠加,为什么它很重要?
基本上,Overlay 是一种特殊的 Stack widget ,它将应用程序包装在导航器中。
正如您所猜测的,Dialogs 仅仅是 UI 之上的 widget (就像吐司 widget 一样) ,但在这种情况下,导航器明智地使用 Routes 控制它们。这就是为什么他们让我们感觉像别的东西。
是的,我们也可以仅仅使用 Overlay widget 创建我们自己的 widget ,但是我们也想与导航器交互,因为我们不想重新发明轮子!如果我们不用领航员的话。我们必须处理所有的过渡、生命周期、后退按钮、可取消的障碍等等。
这就是为什么我们也应该知道路线!
记住,showDialog() 也使用 DialogRoute 是有原因的。
但是对话路由有什么特别之处呢?

对话路由继承模式
对话路线的超能力来自于它的祖先! 让我来告诉你怎么做!
让我们看看,在每一步,我们继承了什么!
Route -> A basic route

“Route is a base class that interacts with the navigator.”
OverlayRoute -> A route that knows how to interact with Overlay

“A route that displays widgets in the Navigator’s Overlay.”
TransitionRoute -> A route that can do a magic trick

“A route with entrance and exit transitions.”
ModalRoute -> A route that has a barrier behind it

“A route that blocks interaction with previous routes.”
PopupRoute -> A route that shows up over the current route

“A modal route that overlays a widget over the current route.”
RawDialogRoute -> A pre-configured route for dialogs

“A general dialog route which allows for customization of the dialog popup.”
DialogRoute -> A ready-to-use, pre-designed route

“A dialog route with Material entrance and exit animations, modal barrier color, and modal barrier behavior”
(这些句子都参考了官方的 api 文档。)
这里的教训是: 当我们调用 showDialog() ,它调用导航器.push() ,当导航器推动某些东西,如果它是 PopupRoute,它得到生命周期(来自导航器) ,家庭(来自 OverlayRoute) ,过渡(来自过渡路线) ,障碍(来自 ModalRoute) ,并出现在路线上(来自自身)。
无论如何,如果我们得到了主要的想法,让我们看看代码,并学习如何创建我们自己的对话框!
对话框例子
1. 设计一个对话框
创建自己的对话框小部件
// Just a simple custom dialog, nothing special
class CustomDialog extends StatelessWidget {
  const CustomDialog({
    super.key,
    required this.title,
    required this.description,
    required this.confirmText,
    this.onTap,
  });

  final String title;
  final String description;
  final String confirmText;
  final void Function()? onTap;

  @override
  Widget build(BuildContext context) {
    return Center(
      child: Padding(
        padding: const EdgeInsets.all(32),
        child: Material(
          elevation: 4,
          borderRadius: const BorderRadius.all(Radius.circular(16)),
          child: Padding(
            padding: const EdgeInsets.all(24),
            child: Column(
              mainAxisSize: MainAxisSize.min,
              children: [
                Text(
                  title,
                  style: const TextStyle(
                    fontSize: 20,
                    fontWeight: FontWeight.bold,
                  ),
                ),
                const SizedBox(height: 12),
                Text(
                  description,
                  style: const TextStyle(color: Colors.grey),
                ),
                const SizedBox(height: 32),
                SizedBox(
                  width: double.infinity,
                  child: CupertinoButton.filled(
                    onPressed: onTap,
                    child: Text(confirmText),
                  ),
                ),
              ],
            ),
          ),
        ),
      ),
    );
  }
}
2. 创建自己的对话框
在这个例子中,我将使用 PopupRoute 来制作我自己的配置。如果需要预先配置的 Dialogs,可以使用 RawDialogRoute 或 DialogRoute,就像 showDialog ()所做的那样。
// Custom Dialog implementation
class CustomDialogRoute<T> extends PopupRoute<T> {
  CustomDialogRoute({
    required this.builder,
    super.settings,
  });
  // We're getting a widget with context
  final Widget Function(BuildContext context) builder;

  @override
  Widget buildPage(
    BuildContext context,
    Animation<double> animation,
    Animation<double> secondaryAnimation,
  ) {
    // return just a static widget
    return builder(context);
  }

  @override
  Widget buildTransitions(
    BuildContext context,
    Animation<double> animation,
    Animation<double> secondaryAnimation,
    Widget child,
  ) {
    // random animations go 🔪 🔪 🔪
    return RotationTransition(
      turns: Tween<double>(begin: 0.25, end: 0).animate(animation),
      child: ScaleTransition(
        scale: animation,
        child: child,
      ),
    );
  }

  @override
  Color? get barrierColor => Colors.black.withOpacity(.65);

  @override
  bool get barrierDismissible => true;

  @override
  String? get barrierLabel => 'CustomDialog';

  @override
  Duration get transitionDuration => const Duration(milliseconds: 250);
}
3. 为可重用代码创建 showCustomDialog 方法
为了让事情变得更简单,我把它变成了一种延伸。
extension DialogExtension on BuildContext {
  Future<T?> showCustomDialog<T extends Object?>(
    Widget child, {
    RouteSettings? settings,
  }) {
    return Navigator.of(this).push<T>(
      CustomDialogRoute<T>(
        builder: (_) => child,
        settings: settings,
      ),
    );
  }
}
4. 想在哪里用就在哪里用!
class HomePage extends StatelessWidget {
  const HomePage({super.key});

  @override
  Widget build(BuildContext context) {
    return Scaffold(
      body: Center(
        child: ElevatedButton(
          onPressed: () {
            context.showCustomDialog(
              CustomDialog(
                title: 'Hello Fellow!',
                description: "Don't you think Flutter is awesome?",
                confirmText: 'Absolutely!',
                onTap: () {
                  debugPrint('agreed');
                  Navigator.pop(context);
                },
              ),
            );
          },
          child: const Text('Show Dialog'),
        ),
      ),
    );
  }
}
代码
结束语
如果本文对你有帮助,请转发让更多的朋友阅读。
也许这个操作只要你 3 秒钟,对我来说是一个激励,感谢。
祝你有一个美好的一天~
© 猫哥
-
微信 ducafecat
