携手创作,共同成长!这是我参与「掘金日新计划 · 8 月更文挑战」的第15天,点击查看活动详情
注解
Java 注解(Annotation)又称 Java 标注,是 JDK5.0 引入的一种注释机制。
从以下几点了解:
- 注解语法
- 元注解
- java内置注解
- 注解的继承性
- 简单使用
注解语法
注解的定义很简单,使用
@interface声明,表示一个注解。
public @interface MyDefinitionAnnotation {
}
反编译查看,可得结论
- 所定义的注解就是一个接口
- 此接口继承自
Annotation接口所以定义注解时无需关系底层实现,编译器和虚拟机会帮我们完成底层的实现。
jad反编译:
public interface MyDefinitionAnnotation extends Annotation{
}
元注解
元注解起到对其他注解进行说明的作用,可以定义其他注解
元注解有四个:
- @Target
- @Retention
- @Documented
- @Inherited
@Documented&@Inherited
这两个注解分别表示,是否在JavaDoc中保存注解和是否允许子类继承父类注解。
这两个注解没有内部属性,都被
@Retention(RetentionPolicy.RUNTIME)
@Target(ElementType.ANNOTATION_TYPE)
注释,保留策略为Runtime,即会被VM加载进内存,可反射获取、类型属性为
ElementType.ANNOTATION_TYPE即只可定义在注解上。
@Target
@Target注解只可用于注解类型上、可保留进javadoc、保留策略为RUNTIME。
此注解有一个属性,为数组表示被@Target修饰的注解可用于什么地方,如果不使用@Targer注释则表示该注解可用于任何地方。
@Documented
@Retention(RetentionPolicy.RUNTIME)
@Target(ElementType.ANNOTATION_TYPE)
public @interface Target {
    ElementType[] value();
}
ElementType枚举值说明:
常用的:TYPE、FIELD、METHOD
public enum ElementType {
    /** Class, interface (including annotation type), or enum declaration */
    //标注此注解可用于 类、接口、注解、以及枚举上(注解就是接口、枚举就是类)
    TYPE,
    /** Field declaration (includes enum constants) */
    //标注此注解可用于字段属性上
    FIELD,
    /** Method declaration */
    //标注此注解可用于方法上
    METHOD,
    /** Formal parameter declaration */
    //标注此注解可用于方法参数上,比如@Valid @RequestBody
    PARAMETER,
    /** Constructor declaration */
    //标注此注解可用于构造方法上
    CONSTRUCTOR,
    /** Local variable declaration */
     //标注此注解可用于本地变量
    LOCAL_VARIABLE,
    /** Annotation type declaration */
     //标注此注解可用于注解上,元注解都有此属性
    ANNOTATION_TYPE,
    /** Package declaration */
    //可用于package-info.java中
    PACKAGE,
    /**
     * Type parameter declaration
     *
     * @since 1.8
     */
    TYPE_PARAMETER,
    /**
     * Use of a type
     *
     * @since 1.8
     */
    TYPE_USE
}
@Retention
保留策略,注解只是保留在代码中、还是编译进class文件中、还是在运行期间保留在虚拟机中(可以通过反射访问)
有一个RetentionPolicy value属性,RetentionPolicy 是一个枚举类型。
public enum RetentionPolicy {
    //表示只保留在javaDoc中,会被编译器忽略,被编译器忽略自然也不会加载进虚拟机
    SOURCE,
    //表示会被编译器编译生成class文件,但不会由VM在运行时保留
    CLASS,
    //会编译、也会由VM在运行时保留,注解为此保留策略可通过反射获取注解信息
    RUNTIME
}
java内置注解
Java内部定义了一套注解,共有10个,6 个在 java.lang 中,剩下 4 个在 java.lang.annotation 中,
除了三面提供的四个元注解(四个元注解都在 java.lang.annotation中),还有6个在
java.lang包下。
Deprecated
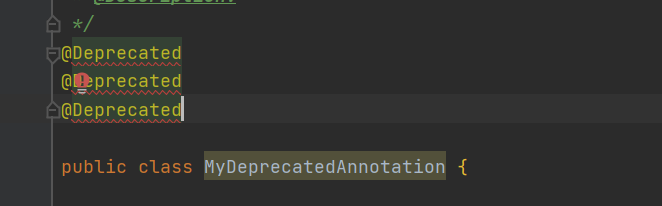
注释于构造器、属性、本地变量、方法、包、接口、方法上,表示过时的意思。
使用过时的类、方法、属性等,会有一个横线标识、不影响使用。
@Documented
@Retention(RetentionPolicy.RUNTIME)
@Target(value={CONSTRUCTOR, FIELD, LOCAL_VARIABLE, METHOD, PACKAGE, PARAMETER, TYPE})
public @interface Deprecated {
}
@SuppressWarnings
@SuppressWarnings("all"),抑制警告,
all代表抑制所有警告,包括未检测警告、过时警告等。
@Override
注解于方法上,表示重写方法。
@SafeVarargs
注释于构造方法或方法上,忽略任何使用参数为泛型变量的方法或构造函数调用产生的警告
@FunctionalInterface
注释于接口上,表示为一个函数式接口。
@Repeatable
注释于注解上,表示该注解可重复声明多次。
使用:
@Target(ElementType.TYPE)
@Retention(RetentionPolicy.RUNTIME)
public   @interface Persons {
   Person[] value();
}
@Repeatable(Persons.class)
public  @interface Person{
    String role() default "";
}
@Person(role = "男的")
@Person(role = "打工族")
public class MeClass {
}
注解的继承
注解的继承是指什么意思?
首先看一个例子:
结论表明如果一个注解被@Inherited 注释的话,那么子类可以继承得到父类的注解
@Target(value = ElementType.TYPE)
@Retention(value = RetentionPolicy.RUNTIME)
@Inherited // 声明注解具有继承性
@interface AnnotationInherited {
    String value() default "";
}
@AnnotationInherited
public class SuperClass {
}
public class SonClass extends SuperClass{
}
public static void main(String[] args) {
    System.out.println(Arrays.asList(SonClass.class.getAnnotations()));
}

简单使用
定义一个注解最重要的就是设置@Target和@Retention。分别表示该注解可以放在哪里和该注解的保留策略。
- RetentionPolicy.RUNTIME 会编译、也会由VM在运行时保留,注解为此保留策略可通过反射获取注解信息
- @Target如果不指定,表示该注解可放于任何地方。如果指定那么就只可以放在指定地方
@Retention(RetentionPolicy.RUNTIME)
@Target(ElementType.TYPE)
public @interface MyDefinitionAnnotation {
}
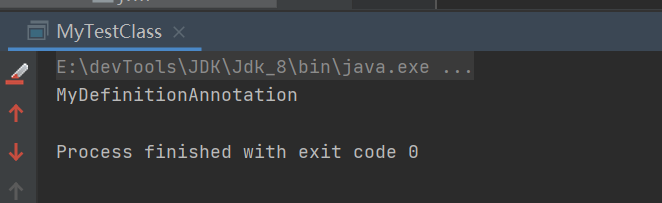
通过反射获取注解信息
如果不设置@Retention(RetentionPolicy.RUNTIME)的话是获取不到注解信息的
@MyDefinitionAnnotation
public class MyTestClass {
}
public static void main(String[] args) {
    final Annotation[] annotations = MyTestClass.class.getAnnotations();
    for (Annotation annotation : annotations) {
        System.out.println(annotation.annotationType().getSimpleName());
    }
}
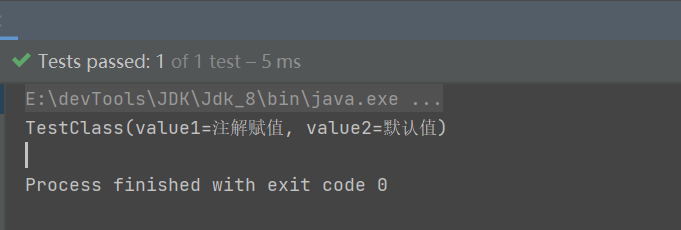
注解可定义属性并赋默认值
注解可定义属性并可以给属性赋予默认值,可以通过属性来控制,类、方法、字段的行为。
以下例子我们通过AnnotationWithValue注解实现了类似于@Value注解的作用
@Retention(RetentionPolicy.RUNTIME)
public @interface AnnotationWithValue {

    String value() default "默认值";

}
@Data
public class TestClass {

    @AnnotationWithValue(value = "注解赋值")
    public String value1;

    @AnnotationWithValue
    public String value2;

    @Test
    public void test() throws NoSuchFieldException, IllegalAccessException {

        final TestClass testClass = new TestClass();
        final Field value1 = TestClass.class.getField("value1");
        final String str1 = value1.getAnnotation(AnnotationWithValue.class).value();
        value1.set(testClass,str1);
        final Field value2 = TestClass.class.getField("value2");
        final String str2 = value2.getAnnotation(AnnotationWithValue.class).value();
        value2.set(testClass,str2);
        System.out.println(testClass);
    }
}
注解+反射实现自动装配
Spring的自动装配原理就是 注解 + 反射,自动装配就是获取字段上的@Value、@AutoWrite注解并进行赋值操作。实现的步骤如下:
- 想使用反射创建对象的化,即必须获取待装配的,类的全限定名。即如何扫描待装配的类
- 自定义一套注解
- 最后就是创建bean并装配属性
如何扫描类
如何扫描待装配的类。这里的思路是,首先有一个启动类,获取启动类所在目录及其子目录下所有类全限定名称,放入一个List中。
方式为文件操作。
下面的方法目的是为了获取启动类所在目录,以便后面扫描此路径。
- 获取路径
- 将 . 替换为 \
public static void run() throws FileNotFoundException {
//获取类路径,到****/classes/
final String classPath = ResourceUtils.getURL("classpath:").getPath();
//获取package名com.xx.xx.xx
final String packageName = ScannerPackage.class.getPackage().getName();
//replace正则匹配进行替换,. --> \. File.separator 在win下为\会被当成转译字符
final String packageNameNew =
packageName.replaceAll("\.", Matcher.quoteReplacement(File.separator));
//当前类所在包路径
String rootPath = String.join("", classPath, packageNameNew);
final File rootFile = new File(rootPath);
dir(Collections.singletonList(rootFile));
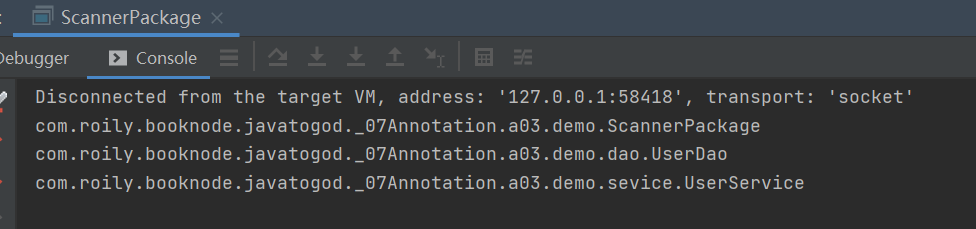
for (String path : classPaths) {
System.out.println(path);
}
}
记录所有类全限定名称:
public static List<String> classPaths = new ArrayList<>();
/**
 * 扫描某路径下的所有文件
 */
public static void dir(List<File> dirList) {
    //遍历当前类,将文件分组,文件夹一组、非文件夹一组。非文件夹记录进集合,文件夹继续操作
    final HashMap<Boolean, List<File>> fileMap =
            dirList.stream().collect(Collectors.groupingBy(File::isDirectory, HashMap::new, Collectors.toList()));
    //文件
    final List<File> fileList = fileMap.get(false);
    final List<File> dir2List = fileMap.get(true);
    files(Optional.ofNullable(fileList).orElse(Collections.emptyList()));
    if (!CollectionUtils.isEmpty(dir2List)) {
        //文件夹
        for (File file : dir2List) {
            dir(Arrays.asList(Optional.ofNullable(file.listFiles()).orElse(new File[0])));
        }
    }
}
public static void files(List<File> fileList) {
    final List<String> fileNameList = fileList.stream().map(file -> {
        //得到 com/xx/xx
        final String str1 = file.getPath().split("classes" + Matcher.quoteReplacement(File.separator))[1];
        final String str2 = str1.replaceAll(Matcher.quoteReplacement(File.separator), ".");
        final String str3 = str2.substring(0, str2.lastIndexOf("."));
        return str3;
    }).collect(Collectors.toList());
    classPaths.addAll(fileNameList);
}
测试一下:
public static void main(String[] args) throws FileNotFoundException {
    run();
}
自定义一套注解
我们已经获取启动类所在目录下的所有类的全限定的名称,那么创建类已经不是问题了。
接下来定义一套自己的注解。
RolyValue
模拟@Value
/**
 * @Date: 2022/08/31/15:55
 * @Description: @Value替代品   可用于方法、字段上
 */
@Target({ElementType.FIELD,ElementType.METHOD})
@Retention(RetentionPolicy.RUNTIME)
public @interface RolyValue {
    String value() default "";
}
测试一下
创建一个Bean对象,存在三个属性
public class RolyValueBean {
    @RolyValue(value = "RolyValue给的值value1")
    String value1;
    @RolyValue(value = "RolyValue给的值value2")
    String value2;

    String value3;
   //toString
}
单元测试,循环给字段赋值:
如果字段不是public的则需要设置AccessAble
@Test
public void testRolyValue() throws IllegalAccessException {
    final RolyValueBean rolyValueBean = new RolyValueBean();
    System.out.println("原对象: ==>" + rolyValueBean);
    final Field[] declaredFields = rolyValueBean.getClass().getDeclaredFields();
    for (Field declaredField : declaredFields) {
        if (!declaredField.isAccessible()) {
            declaredField.setAccessible(true);
        }
        final RolyValue rolyValue = declaredField.getAnnotation(RolyValue.class);
        if (null != rolyValue) {
            declaredField.set(rolyValueBean, rolyValue.value());
        }
    }
    System.out.println("处理后: ==>" + rolyValueBean);
}

RolyComponent
自定义组件注解,模拟@Component。
@Target({ElementType.TYPE})
@Retention(RetentionPolicy.RUNTIME)
public @interface RolyComponent {

}
RolyBean
模拟@Bean
@Target({ElementType.METHOD})
@Retention(RetentionPolicy.RUNTIME)
public @interface RolyBean {
   //bean名称
    String value() default "";
}
RolyValid
模拟@Valid 。此注解作用于方法字段上,判断方法类型。
@Target({ElementType.PARAMETER})
@Retention(RetentionPolicy.RUNTIME)
public @interface RolyValid {
    Class<? extends Object> value() default Object.class;
}
测试:
定义这么一个方法:使用@RolyValid限定此方法参数类型为String。这里故意给一个StringBuilder
public void method(@RolyValid(value = String.class) StringBuilder sb){
}
public void testRolyValid() throws IllegalAccessException {
    final Method[] declaredMethods = RolyValueBean.class.getDeclaredMethods();
    for (Method declaredMethod : declaredMethods) {
        if (declaredMethod.isAccessible()) {
            declaredMethod.setAccessible(true);
        }
        final Parameter[] parameters = declaredMethod.getParameters();
        for (Parameter parameter : parameters) {
            final RolyValid declaredAnnotation = parameter.getDeclaredAnnotation(RolyValid.class);
            if (null != declaredAnnotation) {
                if (!parameter.getType().equals(declaredAnnotation.value())) {
                    throw new RuntimeException(declaredMethod.getName() +
                            "方法参数不合法:" +
                            "require:" + declaredAnnotation.value() +
                            "given:" + parameter.getType());
                }
            }
        }
    }
}

实现
目录结构:

定义两个个待初始化类
@RolyComponent
public class UserDao {
    @RolyValue("@RolyValue给的值")
    String name;
    //没有设置属性
    String other;
}
@RolyService
public class UserService {
    @RolyValue("@RolyValue给的值")
    String name;
    String other;
}
bean工厂或者叫做上下文,负责初始化bean并加入容器。
下面省略的方法即是获取启动类所在目录的class全限定名称,在上文都有提到
public class BeanFactory {
//扫描启动类所在包下所有类,将类的全限定名称保存在此list中
public static List<String> classPaths = new ArrayList<>();
//bean工厂
private static Map<String, Object> beanFactory = new HashMap<>();
static {
try {
init();
initBean();
} catch (FileNotFoundException e) {
e.printStackTrace();
}
}
public static void init() throws FileNotFoundException {
。。。
}
/**
* 扫描某路径下的所有文件
*/
public static void dir(List<File> dirList) {
。。。
}
public static void files(List<File> fileList) {
。。。
}
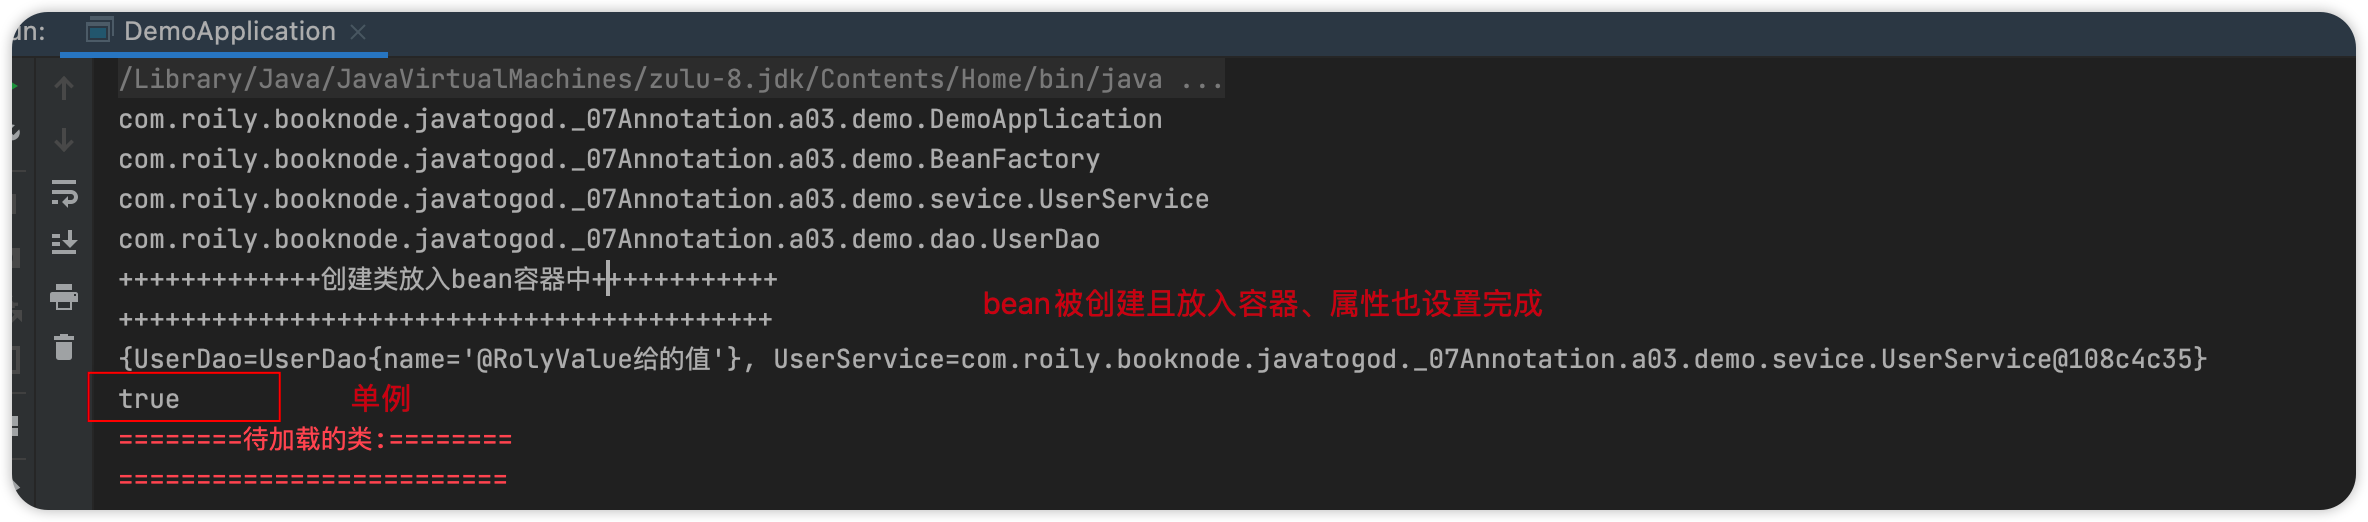
public static void initBean() {
System.out.println("+++++++++++++创建类放入bean容器中++++++++++++");
for (String classPath : classPaths) {
createBeanByName(classPath);
}
System.out.println("++++++++++++++++++++++++++++++++++++++++++");
}
private static void createBeanByName(String classPath) {
Class<?> beanClass;
try {
//默认触发初始化
beanClass = Class.forName(classPath);
//判断是否需要创建
if (!shouldInit(beanClass)) {
return;
}
final Object bean = beanClass.newInstance();
//注入属性
initProperty(bean);
beanFactory.put(beanClass.getSimpleName(), bean);
} catch (Exception e) {
e.printStackTrace();
}
}
private static void initProperty(Object bean) throws IllegalAccessException {
//获取所有的Field
final List<Field> fields = Arrays.asList(bean.getClass().getDeclaredFields());
for (Field field : fields) {
//设置允许访问
if (!field.isAccessible()) {
field.setAccessible(true);
}
//获取RolyValue注解的属性
final RolyValue declaredAnnotation = field.getDeclaredAnnotation(RolyValue.class);
if (null != declaredAnnotation) {
field.set(bean, declaredAnnotation.value());
}
}
}
/**
* 判断beanClass是否需要 自动注入 也就是是否包含@RolyComponent注解
*
* @param beanClass
* @return
*/
public static boolean shouldInit(Class beanClass) {
final List<Annotation> annotations = Arrays.asList(beanClass.getDeclaredAnnotations());
if (annotations.isEmpty()) {
return false;
} else {
final List<? extends Class<? extends Annotation>> annotationTypes = annotations.stream().map(Annotation::annotationType).collect(Collectors.toList());
if (annotationTypes.contains(RolyComponent.class)) {
return true;
}
for (Annotation annotation : annotations) {
if (annotation.annotationType() == RolyComponent.class) {
return true;
}
return shouldInit(annotation.annotationType());
}
}
return false;
}
public static Map<String, Object> objList() {
return beanFactory;
}
public static Object getObjByName(String name) {
return beanFactory.get(name);
}
}
启动类,负责触发类的初始化
这里容器里的bean都是单例的,也可以自定义Scope注解来设置bean声明周期
public class DemoApplication {
    /**
     * 启动类
     */
    public static void main(String[] args) throws FileNotFoundException, ClassNotFoundException {
        Class.forName("com.roily.booknode.javatogod._07Annotation.a03.demo.BeanFactory");
        System.out.println(BeanFactory.objList());
        System.out.println("容器中的bean实例都是单例的:" + BeanFactory.getObjByName("UserDao") == BeanFactory.getObjByName("UserDao"));
    }
}