

👏🏻欢迎来到 CoderStan 的手写 Mini-Vue3 专栏,和我一起✍🏻实现自己的 Mini-Vue3。这是专栏中的第四篇文章,通过这篇文章,你将能够搞清楚 Vue3 中的 Fragment 和 Text 是如何处理的,还包括插槽、Provide / Inject 和自定义渲染器的实现原理。(🙏🏻感谢 阿崔cxr 的 mini-vue)
有不足的地方欢迎大家评论留下意见或建议,如果觉得还不错还请👍🏻支持一下,想看其他部分的文章可以关注我或者关注我的手写 Mini-Vue3专栏,想看逐行注释的源码欢迎访问 GitHub 仓库,也请⭐支持一下。
4. 实现 runtime-core 的初始化
4.9 实现插槽
① happy path
在render函数中可以通过this.$slots访问静态插槽的内容,每个插槽都是一个 VNode 数组。插槽以函数的形式传递,允许子组件控制每个插槽内容的创建。例如,在父组件中将插槽传递给子组件:
render() {
  // 等价于 <div><child v-slot="props"><span>{{ props.text }}</span></child></div>
  return h('div', [
    h(child, {}, {
      default: props => h('span', props.text)
    })
  ])
}
在实现插槽之前,首先在example目录下创建Component-slots文件夹,在其中放置插槽的测试相关文件,同样包括四个文件:index.html、main.js、App.js和Foo.js,其中index.html和main.js文件中的内容与之前的测试相同,App.js和Foo.js文件中的内容如下:
/* App.js */

export const App = {
  name: 'App',
  setup() {
    return {}
  },
  render() {
    // 传入一个 VNode 作为插槽
    return h(Foo, {}, h('p', {}, 'a slot'))
    // 传入一个 VNode 数组,数组中每一项为一个插槽
    // return h(Foo, {}, [h('p', {}, 'a slot'), h('p', {}, 'another slot')])
  }
}
/* Foo.js */

// Foo 组件选项对象
export const Foo = {
  name: 'Foo',
  setup() {
    return {}
  },
  render() {
    // 通过 this.$slots 获取父组件传递的插槽
    return h('div', {}, [h('p', {}, 'Foo component'), this.$slots])
  }
}
其中App.js中包括两种情况,即首先是传入一个 VNode 作为插槽,其次是传入一个数组,数组中的每一项为一个插槽。
② 最基本的实现
插槽就是在render函数中通过 this 的 $slots property 获取父组件传入的 children,并对其进行渲染。
插槽的实现与组件代理对象类似,首先需要完善组件实例对象的 proxy property,在获取 $slots property 时返回组件的 children。而在这之前首先要在setupComponent函数中初始化 slots,也就是完成实现 Component 初始化主流程时留下的调用initSlots函数的 TODO。initSlots函数用于将 children 赋值给组件实例对象的 slots property。
首先,为了通过this.$slots获取父组件传递的插槽,在src/runtime-core目录下的componentPublicInstance.ts文件中增加对应的的 getter:
/* componentPublicInstance.ts */

const publicPropertiesMap = {
  $el: i => i.vnode.el,
  $slots: i => i.slots
}
再完善src/runtime-core目录下的component.ts文件中的createComponentInstance函数,在组件实例对象中增加 slots property:
/* component.ts */

export function createComponentInstance(vnode) {
  const component = {
    vnode,
    type: vnode.type,
    setupState: {},
    props: {},
    slots: {},
    proxy: null,
    emit: () => {}
  }

  /* 其他代码 */
}
然后在src/runtime-core目录下创建componentSlots.ts文件,在其中实现并导出initSlots函数:
/* componentSlots.ts */

// 用于将 children 赋值给组件实例对象的 slots property
export function initSlots(instance, children) {
  instance.slots = children
}
接下来完善src/runtime-core目录下的component.ts文件中的setupComponent函数:
/* component.ts */

export function setupComponent(instance) {
  initProps(instance, instance.vnode.props)

  // 将 children 挂载到组件实例对象的 slots property 上
  initSlots(instance, instance.vnode.children)

  setupStatefulComponent(instance)
}
在项目文件夹下执行yarn build命令进行打包,打包完成后通过 live server 插件打开example/Component-slots目录下的index.html文件,可以看到 Foo 组件选项对象中的内容和插槽都被渲染到了页面上。
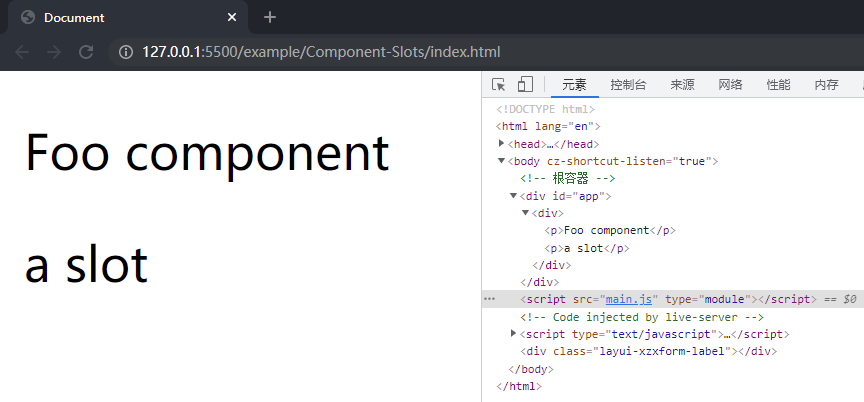
这样就完成了针对第一种情况的实现,即当父组件传入一个 VNode 作为插槽时能够正常渲染,而此时第二种情况还无法正常渲染。针对第二种情况,可以创建一个 VNode,在其中用一个 div 对数组中的多个插槽进行包裹,也就是对example/Component-slots目录下的Foo.js做如下修改:
export const Foo = {
  /* 其他代码 */

  render() {
    return h('div', {}, [h('p', {}, 'Foo component'), h('div', {}, this.$slots)])
  }
}
对以上处理进行封装,在src/runtime-core/helpers目录下创建renderSlots.ts文件,在其中实现并导出renderSlots函数:
/* helpers/renderSlots.ts */

// 用于利用 div 对插槽进行包裹
export function renderSlots(slots) {
  return createVNode('div', {}, slots)
}
并在src/runtime-core目录下的index.ts文件中将renderSlots函数导出:
/* index.ts */

export { renderSlots } from './helpers/renderSlots'
再结合renderSlots函数对example/Component-slots目录下的Foo.js做如下修改:
export const Foo = {
  /* 其他代码 */

  render() {
    return h('div', {}, [h('p', {}, 'Foo component'), renderSlots(this.$slots)])
  }
}
在项目文件夹下执行yarn build命令进行打包,打包完成后通过 live server 插件打开example/Component-slots目录下的index.html文件,可以看到 Foo 组件选项对象中的内容和插槽都被渲染到了页面上。
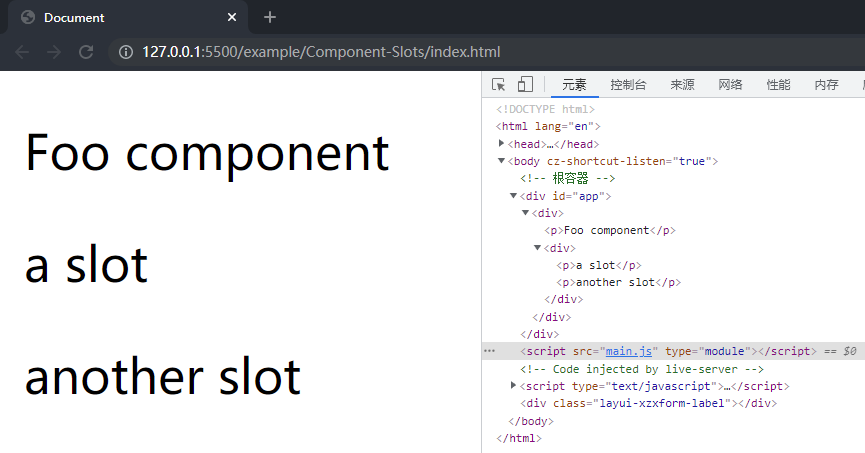
这样就完成了针对第二种情况的实现,但是此时第一种情况就无法正常渲染,为了同时包括两种情况,可以在初始化 slots 时进行处理,若 children 是一个 VNode 则将其转为数组,完善src/runtime-core目录下的componentSlots.ts文件中的initSlots函数:
/* componentSlots.ts */

export function initSlots(instance, children) {
  instance.slots = Array.isArray(children) ? children : [children]
}
在项目文件夹下执行yarn build命令进行打包,打包完成后通过 live server 插件打开example/Component-slots目录下的index.html文件,可以看到两种情况均能正常渲染,这样就完成了插槽最基本的实现。
③ 具名插槽的实现
具名插槽指的是,在由父组件向子组件传入插槽时传入一个对象,其中 key 为插槽的 name,用于指定插槽的位置,value 为插槽,而在子组件中将插槽的 name 作为第二个参数传入renderSlots函数来指定该位置要渲染的插槽。
先来完善具名插槽的测试,在example/Component-slots目录下创建Bar.js文件,其中的内容如下:
/* Bar.js */

// Bar 组件选项对象
export const Bar = {
  /* 其他代码 */

  render() {
    return h('div', {}, [
      // 通过在调用 renderSlots 时传入第二个参数指定在此位置渲染的插槽
      renderSlots(this.$slots, 'header'),
      h('p', {}, 'bar component'),
      renderSlots(this.$slots, 'footer')
    ])
  }
}
对example/Component-slots目录下的App.js文件做相应修改:
/* App.js */

export const App = {
  /* 其他代码 */

  render() {
    // 传入一个对象,对象中每个 property 为一个插槽
    return h(
      Bar,
      {},
      {
        header: h('p', {}, 'header slot'),
        footer: h('p', {}, 'footer slot')
      }
    )
  }
}
要实现具名插槽,首先完善src/runtime-core/helpers目录下的renderSlots.ts文件中的renderSlots函数:
/* helpers/renderSlots.ts */

export function renderSlots(slots, name) {
  // 通过 name 获取相应的插槽
  const slot = slots[name]

  if (slot) {
    return createVNode('div', {}, slot)
  }
}
再来完善src/runtime-core目录下的componentSlots.ts文件中的initSlots函数,在其中对 children 进行遍历,将其 property 对应的 VNode 数组挂载到组件实例对象的 slots property 上:
/* componentSlots.ts */

// 用于将插槽挂载到组件实例对象的 slots property 上
export function initSlots(instance, children) {
  const slots = {}

  // 遍历 children,将其 property 对应的 VNode 数组挂载到 slots 对象上
  for (const key in children) {
    const value = children[key]

    slots[key] = Array.isArray(value) ? value : [value]
  }

  instance.slots = slots
}
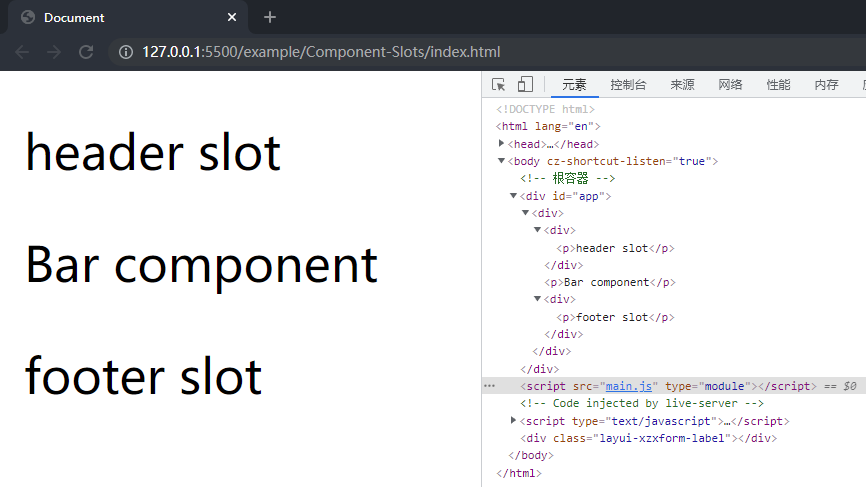
在项目文件夹下执行yarn build命令进行打包,打包完成后通过 live server 插件打开example/Component-slots目录下的index.html文件,可以看到 Bar 组件选项对象中的内容和插槽都被按顺序渲染到了页面上,这样就成功实现了具名插槽。
最后对initSlots函数进行重构,将其中逻辑抽离为normalizeObjectSlots函数和normalizeSlotValue函数:
/* componentSlots.ts */

export function initSlots(instance, children) {
  normalizeObjectSlots(children, instance.slots)
}

// 用于遍历 children,将其 property 对应的 VNode 数组挂载到组件实例对象的 slots property 上
function normalizeObjectSlots(children, slots) {
  for (const key in children) {
    const value = children[key]

    slots[key] = normalizeSlotValue(value)
  }
}

// 用于将一个 VNode 转为数组
function normalizeSlotValue(value) {
  return Array.isArray(value) ? value : [value]
}
④ 作用域插槽的实现
作用域插槽指的是,在由父组件向子组件传入插槽时传入一个对象,其中方法名为插槽的 name,方法用于创建插槽,接受一个对象作为参数,该对象的 property 为要传入插槽的参数,而在子组件中将包含要传入插槽参数的对象作为第三个参数传入renderSlots函数中。
先来完善作用域插槽的测试,在example/Component-slots目录下创建Baz.js文件,其中的内容如下:
/* Baz.js */

// Baz 组件选项对象
export const Baz = {
  name: 'Baz',
  setup() {
    return {}
  },
  render() {
    const msg = 'this is a slot'

    // 通过在调用 renderSlots 函数时传入第三个参数指定传入插槽函数的参数
    return h(
      'div',
      {},
      this.$slots.content({
        msg
      })
    )
  }
}
对example/Component-slots目录下的App.js文件做相应修改:
/* App.js */

export const App = {
  /* 其他代码 */

  render() {
    // 传入一个对象,对象中的每个方法为一个创建插槽的函数
    return h(
      Baz,
      {},
      {
        content: props => h('p', {}, 'content: ' + props.msg)
      }
    )
  }
}
要实现作用域插槽,首先完善src/runtime-core/helpers目录下的renderSlots.ts文件中的renderSlots函数:
/* helpers/renderSlots.ts */

export function renderSlots(slots, name, props) {
  // 通过 name 获取创建相应插槽的方法
  const slot = slots[name]

  if (slot) {
    if (typeof slot === 'function') {
      return createVNode('div', {}, slot(props))
    }
  }
}
再来完善src/runtime-core目录下的componentSlots.ts文件中的normalizeObjectSlots函数,在其中对 children 进行遍历,将创建插槽对应的 VNode 数组的函数挂载到组件实例对象的 slots property 上:
/* componentSlots.ts */

// 用于遍历 children,将创建插槽对应的 VNode 数组的函数挂载到组件实例对象的 slots property 上
function normalizeObjectSlots(children, slots) {
  for (const key in children) {
    const value = children[key]

    slots[key] = props => normalizeSlotValue(value(props))
  }
}
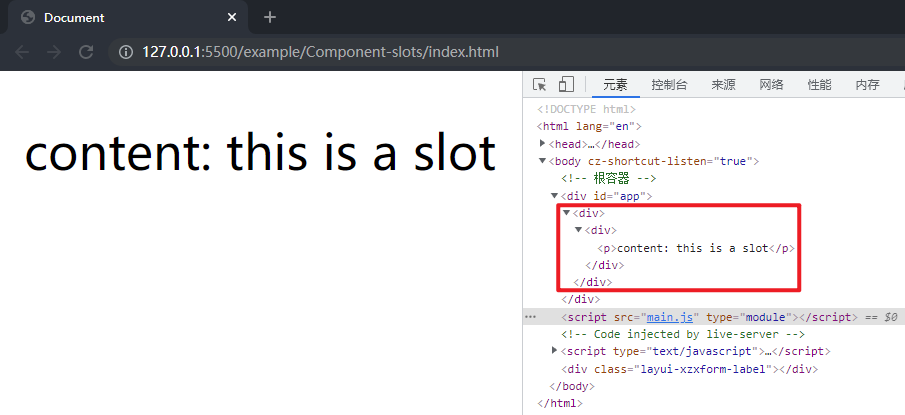
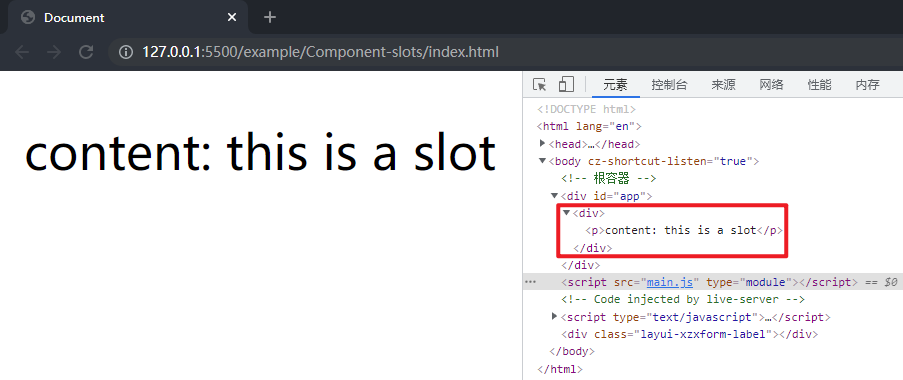
在项目文件夹下执行yarn build命令进行打包,打包完成后通过 live server 插件打开example/Component-slots目录下的index.html文件,可以看到 Baz 组件选项对象中的内容和插槽以及传入的参数都被渲染到了页面上,这样就成功实现了作用域插槽。

最后利用 shapeFlag 完善initSlots函数,增加对 children 的判断,只有在 children 为插槽时才进行处理。首先在src/shared目录下的shapeFlags.ts文件中的枚举变量ShapeFlags中增加一项 SLOTS_CHILDREN,用于判断 children 是否为插槽:
export const enum ShapeFlags {
  /* 其他代码 */

  // 用于判断 children 是否是插槽
  SLOTS_CHILDREN = 1 << 4 // 10000
}
然后完善src/runtime-core目录下的vnode.ts文件中的createVNode函数,若 VNode 类型为 Component 同时 children 类型为对象,则 children 为插槽,设置 shapeFlag 对应的位:
/* render.ts */

export function createVNode(type, props?, children?) {
  /* 其他代码 */

  // 若 VNode 类型为 Component 同时 children 类型为对象,则 children 为插槽,设置 shapeFlag 对应的位
  if (vnode.shapeFlag & ShapeFlags.STATEFUL_COMPONENT) {
    if (typeof children === 'object') {
      vnode.shapeFlag |= ShapeFlags.SLOTS_CHILDREN
    }
  }

  return vnode
}
最后完善src/runtime-core目录下的componentSlots.ts文件中的initSlots函数:
/* componentSlots.ts */

export function initSlots(instance, children) {
  // 通过解构赋值获得组件对应的 VNode
  const { vnode } = instance

  // 若 children 是插槽则进行处理
  if (vnode.shapeFlag & ShapeFlags.SLOTS_CHILDREN) {
    normalizeObjectSlots(children, instance.slots)
  }
}
4.10 处理 Fragment 和 Text
在实现插槽的过程中,为了解决多个插槽同时渲染而 children 中不能包含数组的矛盾,采取了最简单的处理方式,利用一个特殊的 Element 即 div 对插槽进行了包裹,但是这样的处理其实是不合理的。例如在作用域插槽的测试中若采用renderSlots函数则会导致多了一层 div。
return h(
  'div',
  {},
  [
    renderSlots(this.$slots, 'content', {
      msg
    })
  ]
)
更合理的方式利用 Fragment 对插槽进行包裹,而处理 Fragment 时直接调用mountChildren函数对其对应 VNode 的 children 进行处理,在src/runtime-core目录下的renderer.ts文件完善patch方法,并实现processFragment函数:
/* renderer.ts */

function patch(vnode, container) {
  // 根据 VNode 类型的不同调用不同的函数
  const { type, shapeFlag } = vnode

  // 通过 VNode 的 type property 判断 VNode 类型是 Fragment 或其他
  switch (type) {
    case 'Fragment':
      processFragment(vnode, container)
      break
    default:
      // 通过 VNode 的 shapeFlag property 与枚举变量 ShapeFlags 进行与运算来判断 VNode 类型是 Element 或 Component
      if (shapeFlag & ShapeFlags.ELEMENT) {
        processElement(vnode, container)
      } else if (shapeFlag & ShapeFlags.STATEFUL_COMPONENT) {
        processComponent(vnode, container)
      }
      break
  }
}

// 用于处理 Fragment
function processFragment(vnode, container) {
  mountChildren(vnode.children, container)
}
相应地完善src/runtime-core/helpers目录下的renderSlots.ts文件中的renderSlots函数:
/* helpers/renderSlots.ts */

// 用于利用 Fragment 对插槽进行包裹
export function renderSlots(slots, name, props) {
  // 通过 name 获取创建相应插槽的方法
  const slot = slots[name]

  if (slot) {
    if (typeof slot === 'function') {
      // 将创建插槽方法的执行结果作为 children 传入
      return createVNode('Fragment', {}, slot(props))
    }
  }
}
接下来对代码进行优化,在src/runtime-core目录下的vnode.ts文件中创建并导出 Symbol 类型变量Fragment,用于代替字符串"Fragment":
/* vnode.ts */

export const Fragment = Symbol('Fragment')
对src/runtime-core目录下的renderer.ts文件中的patch方法和src/runtime-core/helpers目录下的renderSlots.ts文件中的renderSlots函数做相应修改:
/* renderer.ts */

function patch(vnode, container) {
  const { type, shapeFlag } = vnode

  switch (type) {
    case Fragment:
      processFragment(vnode, container)
      break

    /* 其他代码 */
  }
}
/* helpers/renderSlots.ts */

export function renderSlots(slots, name, props) {
  /* 其他代码 */

  if (slot) {
    if (typeof slot === 'function') {
      return createVNode(Fragment, {}, slot(props))
    }
  }
}
在作用域插槽的测试中采用renderSlots函数就不会有出的一层 div。
借用作用域插槽的测试作为处理 Text 的测试,创建插槽的函数返回一个数组,将其中的第二项字符串作为文本节点渲染,对example/Component-slots目录下的App.js文件做如下修改:
export const App = {
  /* 其他代码 */

  render() {
    return h(
      Baz,
      {},
      {
        content: props => [h('p', {}, 'content: ' + props.msg), 'a text node']
      }
    )
  }
}
在src/runtime-core目录下的vnode.ts文件中创建并导出 Symbol 类型变量Fragment,同时实现并导出createTextVNode函数:
/* vnode.ts */

export const Text = Symbol('Text')

// 用于创建 Text 类型的 VNode
export function createTextVNode(text: string) {
  return createVNode(Text, {}, text)
}
并在src/runtime-core目录下的index.ts文件中将createTextVNode函数导出:
/* index.ts */

export { createTextVNode } from './vnode'
在处理 Text 时,其 children 就是文本节点内容,利用document.createTextNode()创建文本节点,再利用Element.append()将该节点添加到根容器/其父元素中。在src/runtime-core目录下的renderer.ts文件中完善patch方法并实现processText函数:
function patch(vnode, container) {
  const { type, shapeFlag } = vnode

  // 通过 VNode 的 type property 判断 VNode 类型
  switch (type) {
    case Fragment:
      processFragment(vnode, container)
      break
    case Text:
      processText(vnode, container)
      break

    /* 其他代码 */
  }
}

// 用于处理 Text
function processText(vnode, container) {
  // 通过解构赋值获取 Text 对应 VNode 的 children,即文本内容
  const { children } = vnode
  // 利用 document.createTextNode() 创建文本节点
  const textNode = document.createTextNode(children)
  // 利用 Element.append() 将该节点添加到根容器/其父元素中
  container.append(textNode)
}
最后对example/Component-slots目录下的App.js文件做相应修改,利用createTextVNode函数创建文本节点:
export const App = {
  /* 其他代码 */

  render() {
    return h(
      Baz,
      {},
      {
        content: props => [
          h('p', {}, 'content: ' + props.msg),
          createTextVNode('a text node')
        ]
      }
    )
  }
}
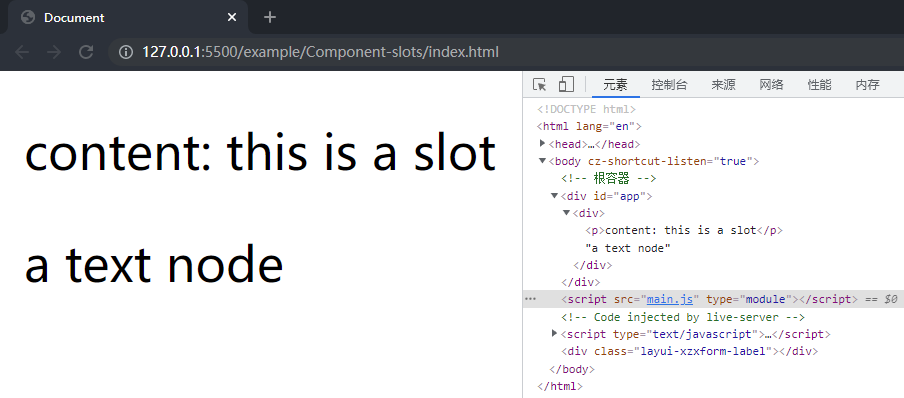
在项目文件夹下执行yarn build命令进行打包,打包完成后通过 live server 插件打开example/Component-slots目录下的index.html文件,可以看到文本节点被渲染到了页面上,这样就完成了 Text 的处理。
4.11 实现getCurrentInstance
查看 Vue3 API 文档中的组合式 API 部分,找到getCurrentInstance的介绍。
getCurrentInstance
getCurrentInstance支持访问内部组件实例。import { getCurrentInstance } from 'vue' const MyComponent = { setup() { const internalInstance = getCurrentInstance() internalInstance.appContext.config.globalProperties // 访问 globalProperties } }
getCurrentInstance只能在setup或生命周期钩子中调用。
① happy path
在实现getCurrentInstance之前,首先在example目录下创建getCurrentInstance文件夹,在其中放置插槽的测试相关文件,同样包括四个文件:index.html、main.js、App.js和Foo.js,其中index.html和main.js文件中的内容与之前的测试相同,App.js和Foo.js文件中的内容如下:
/* App.js */

export const App = {
  name: 'App',
  setup() {
    // 获取当前组件实例对象
    const instance = getCurrentInstance()
    console.log('App:', instance)

    return {}
  },
  render() {
    return h(Foo)
  }
}
/* Foo.js */

// Foo 组件选型对象
export const Foo = {
  name: 'Foo',
  setup() {
    // 获取当前组件实例对象
    const instance = getCurrentInstance()
    console.log('Foo:', instance)

    return {}
  },
  render() {
    return h('p', {}, 'Foo component')
  }
}
② 实现
实现getCurrentInstance就是声明一个全局变量currentInstance用于保存当前组件实例对象,在setupStatefulComponent函数中调用setup前调用setCurrentInstance函数将该全局变量赋值为当前组件实例对象,而在调用后再setCurrentInstance函数将该全局变量赋值为 null。
在src/runtime-core目录下的component.ts文件中声明全局变量currentInstance、实现getCurrentInstance并导出、实现setCurrentInstance函数同时完善setupStatefulComponent函数:
/* component.ts */

// 用于保存当前组件实例对象
let currentInstance = null

// 用于获取当前组件的实例对象
export function getCurrentInstance() {
  return currentInstance
}

// 用于给全局变量 currentInstance 赋值
function setCurrentInstance(instance) {
  currentInstance = instance
}

function setupStatefulComponent(instance) {
  /* 其他代码 */

  if (setup) {
    // 将全局变量 currentInstance 赋值为当前组件实例对象
    setCurrentInstance(instance)

    const setupResult = setup(shallowReadonly(instance.props), {
      emit: instance.emit
    })

    // 将全局变量 currentInstance 赋值为 null
    setCurrentInstance(null)

    handleSetupResult(instance, setupResult)
  }
}
最后在src/runtime-core目录下的index.ts文件中将getCurrentInstance导出:
/* index.ts */

export { getCurrentInstance } from './component'
在项目文件夹下执行yarn build命令进行打包,打包完成后通过 live server 插件打开example/getCurrentInstance目录下的index.html文件,在控制台中输出了对应的内容,这样就成功实现了getCurrentInstance。

4.12 实现 Provide / Inject
查看 Vue3 官方文档中的可复用&组合部分,找到 Provide / Inject 的介绍。
两者都只能在当前活动实例的setup中调用。在setup中使用provide函数和inject函数时首先显示导入,然后调用provide函数注入依赖,provide函数接受两个参数,分别为 name 和 value,再调用inject函数引入依赖。
// MyMap
export default {
  components: {
    MyMarker
  },
  setup() {
    provide('location', 'North Pole')
    provide('geolocation', {
      longitude: 90,
      latitude: 135
    })
  }
}

// MyMarker
export default {
  setup() {
    const userLocation = inject('location', 'The Universe')
    const userGeolocation = inject('geolocation')

    return {
      userLocation,
      userGeolocation
    }
  }
}
① 父子组件间 Provide / Inject
在实现之前,首先在example目录下创建provide-inject文件夹,在其中放置父子组件间 Provide / Inject 的测试相关文件,包括三个文件:index.html、main.js和App.js,其中index.html和main.js文件中的内容与之前的测试相同,App.js文件中的内容如下:
// 父组件选项对象
const Provider = {
  name: 'Provider',
  setup() {
    // 通过 provide 注入 foo
    provide('foo', 'FooFromProvider')
  },
  render() {
    return h('div', {}, [h('p', {}, 'Provider'), h(Consumer)])
  }
}

// 子组件选项对象
const Consumer = {
  name: 'Consumer',
  setup() {
    // 通过 inject 引入 foo
    const foo = inject('foo')

    return {
      foo
    }
  },
  render() {
    return h('div', {}, [h('p', {}, `Consumer: inject ${this.foo}`)])
  }
}

export default {
  name: 'App',
  setup() {},
  render() {
    return h('div', {}, [h('p', {}, 'provide-inject'), h(Provider)])
  }
}
实现父子组件间 Provide / Inject 就是在组件实例对象加入 provides property,用于保存该组件通过provide函数注入的依赖,同时加入 parent property,用于保存其父组件实例对象,而在setup中通过inject函数引入依赖时则获取其父组件实例对象的 provides property 中的相应 property。
首先完善src/runtime-core目录下的component.ts文件中的createComponentInstance函数,在组件实例对象中加入 provides property 和 parent property,同时接受父组件实例对象作为第二个参数:
/* component.ts */

export function createComponentInstance(vnode, parent) {
  const component = {
    vnode,
    type: vnode.type,
    setupState: {},
    props: {},
    slots: {},
    provides: {},
    parent,
    proxy: null,
    emit: () => {}
  }

  /* 其他代码 */
}
然后完善src/runtime-core目录下的renderer.ts文件中所有和组件实例对象相关的函数,解决报错,其中在render函数中调用patch方法对根组件对应 VNode 进行处理时传入的第三个参数为 null,而在setupRenderEffect函数中调用patch方法递归地处理 VNode 树时传入的第三个参数为组件选项对象:
/* renderer.ts */

export function render(vnode, container) {
  patch(vnode, container, null)
}

function setupRenderEffect(instance, vnode, container) {
  /* 其他代码 */

  patch(subTree, container, instance)

  vnode.el = subTree.el
}
接下来在src/runtime-core目录下创建apiInject.ts文件,在其中实现并导出provide函数和inject函数,其中provide函数用于将依赖挂载到当前组件实例对象的 provides property 上,inject函数用于获取父组件实例对象的 provides property 上的相应 property:
/* apiInject.ts */

// 用于注入依赖
export function provide(key, value) {
  // 获取当前组件实例对象
  const currentInstance: any = getCurrentInstance()

  if (currentInstance) {
    // 通过解构赋值获取当前组件实例对象的 provides property
    const { provides } = currentInstance

    // 将依赖挂载到当前组件实例对象的 provides property 上
    provides[key] = value
  }
}

// 用于引入依赖
export function inject(key) {
  // 获取当前组件实例对象
  const currentInstance: any = getCurrentInstance()

  if (currentInstance) {
    // 通过解构赋值获取当前组件实例对象的 parent property,即其父组件实例对象
    const { parent } = currentInstance

    // 返回父组件实例对象的 provides property 上的相应 property
    return parent.provides[key]
  }
}
最后在src/runtime-core目录下的index.ts文件中将provide函数和inject函数导出:
/* index.ts */

export { provide, inject } from './apiInject'
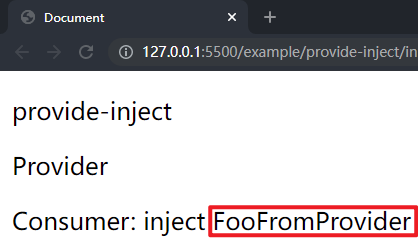
在项目文件夹下执行yarn build命令进行打包,打包完成后通过 live server 插件打开example/provide-inject目录下的index.html文件,可以看到父子组件选项对象中的内容和依赖都被渲染到了页面上,这样就成功实现了父子组件间的 Provide / Inject。
② 跨层次组件间 Provide / Inject
在实现之前先对example/provide-inject目录下的App.js文件做如下修改,增加一个组件,使组件层次变成三层:
// 第一级组件
const Provider_I = {
  name: 'Provider_I',
  setup() {
    // 通过 provide 注入 foo 和 bar
    provide('foo', 'FooFromI')
    provide('bar', 'BarFromI')
  },
  render() {
    return h('div', {}, [h('p', {}, 'Provider_I'), h(Provider_II)])
  }
}

// 第二级组件
const Provider_II = {
  name: 'Provider_II',
  setup() {
    // 通过 provide 注入 foo
    provide('foo', 'FooFromII')
  },
  render() {
    return h('div', {}, [h('p', {}, 'Provider_II'), h(Consumer)])
  }
}

// 第三级组件
const Consumer = {
  name: 'Consumer',
  setup() {
    // 通过 inject 引入 foo 和 bar
    const foo = inject('foo') // => FooFromII
    const bar = inject('bar') // => BarFromI

    // 通过 inject 引入 baz,同时传入默认值或默认值函数
    const baz1 = inject('baz', 'defaultBaz1') // => defaultBaz1
    const baz2 = inject('baz', () => 'defaultBaz2') // => defaultBaz2

    return {
      foo,
      bar,
      baz1,
      baz2
    }
  },
  render() {
    return h('div', {}, [
      h(
        'p',
        {},
        `Consumer: inject ${this.foo}, ${this.bar}, ${this.baz1}, and ${this.baz2}`
      )
    ])
  }
}

export default {
  name: 'App',
  setup() {},
  render() {
    return h('div', {}, [h('p', {}, 'provide-inject'), h(Provider_I)])
  }
}
实现跨层次组件间 Provide / Inject 就是在当前组件存在父组件时,将当前组件实例对象的 provides property 赋值为父组件实例对象的 provides property,而在当前组件的setup中第一次调用provide函数时,将当前组件实例对象的 provides property 赋值为以父组件实例对象的 provides property 为原型的空对象,再将依赖挂载到其上,之后再调用时则直接将依赖挂载到当前组件实例对象的 provides property 上。
首先完善src/runtime-core目录下的component.ts文件中的createComponentInstance函数,根据是否存在父组件为 provides property 赋值:
/* component.ts */

export function createComponentInstance(vnode, parent) {
  const component = {
    vnode,
    type: vnode.type,
    setupState: {},
    props: {},
    slots: {},
    // 若存在父组件则赋值为 父组件实例对象的 provides property,否则为空对象
    provides: parent ? parent.provides : {},
    parent,
    proxy: null,
    emit: () => {}
  }

  /* 其他代码 */
}
接下来完善src/runtime-core目录下的apiInject.ts文件中的provide函数,若当前组件实例对象和父组件实例对象的 provides property 相等,则是在当前组件setup中第一次调用provide函数:
/* apiInject.ts */

export function provide(key, value) {
  /* 其他代码 */

  if (currentInstance) {
    // 通过解构赋值获取当前组件实例对象的 provides property
    let { provides } = currentInstance

    // 获取父组件实例对象的 provides property
    const parentProvides = currentInstance.parent.provides

    // 若判断当前组件实例对象和父组件实例对象的 provides property 相等,则是在当前组件 setup 中第一次调用 provide 函数
    if (provides === parentProvides) {
      // 利用 Object.create() 创建一个以父组件实例对象的 provides property 为原型的空对象,将其赋值给当前组件实例对象的 provides property
      provides = currentInstance.provides = Object.create(parentProvides)
    }

    // 将依赖挂载到当前组件实例对象的 provides property 上
    provides[key] = value
  }
}
最后完善src/runtime-core目录下的apiInject.ts文件中的inject函数,接受一个默认值或默认值函数作为第二个参数:
/* apiInject.ts */

export function inject(key, defaultValue) {
  // 获取当前组件实例对象
  const currentInstance: any = getCurrentInstance()

  if (currentInstance) {
    // 获取父组件实例对象的 parent property
    const parentProvides = currentInstance.parent.provides

    // 若父组件实例对象的 provides property 上有相应的 property 则直接返回
    if (key in parentProvides) {
      return parentProvides[key]
    }
    // 否则,若传入了默认值或默认值函数则返回默认值或默认值函数的返回值
    else if (defaultValue) {
      if (typeof defaultValue === 'function') {
        return defaultValue()
      }

      return defaultValue
    }
  }
}
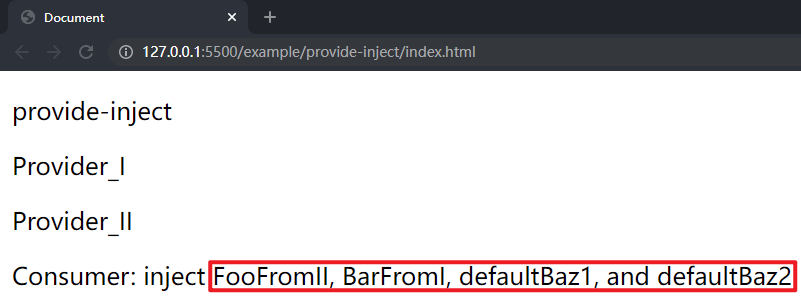
在项目文件夹下执行yarn build命令进行打包,打包完成后通过 live server 插件打开example/provide-inject目录下的index.html文件,可以看到三个层次的组件选项对象中的内容和依赖都被渲染到了页面上,这样就成功实现了跨层次组件间的 Provide / Inject。
4.13 实现自定义渲染器
在之前实现 Element 初始化主流程和注册事件功能以及处理 Text 时,在src/runtime-core目录下的renderer.ts文件中的processText函数和mountElement函数中使用了 DOM 的 API 来创建文本节点、创建元素、将 props 对象中的 property 或方法挂载到元素上以及将元素添加到根容器/父元素中:
/* renderer.ts */

function processText(vnode, container) {
  const { children } = vnode
  // document.createTextNode()
  const textNode = document.createTextNode(children)
  // Element.append()
  container.append(textNode)
}

function mountElement(vnode, container) {
  // document.createElement()
  const el = (vnode.el = document.createElement(vnode.type))

  const { props, shapeFlag, children } = vnode

  for (const key in props) {
    const val = props[key]

    const isOn = (key: string) => /^on[A-Z]/.test(key)

    if (isOn(key)) {
      const event = key.slice(2).toLowerCase()
      // Element.addEventListener()
      el.addEventListener(event, val)
    }  else {
      // Element.setAttribute()
      el.setAttribute(key, val)
    }
  }

  // Element.append()
  container.append(textNode)
}
这样实现的 runtime-core 就是针对浏览器平台的,而 runtime-core 应该是与平台无关的,并且在使用时可以根据需求通过createRenderer函数传入相应的 API。
实现自定义渲染器就是利用createRenderer函数对src/runtime-core目录下的renderer.ts文件中的函数进行封装,createRenderer函数接受一个包含所需 API 的 options 对象作为参数,在其中首先获取相应的 API,再在src/runtime-core目录下的renderer.ts文件中的processText函数和mountElement函数中,利用传入的createText函数、createElement函数、patchProp函数和insert函数完成相应操作。同时createApp是依赖render函数的,因此再利用createAppAPI函数对createApp进行封装,createAppAPI函数接受render函数作为参数并返回createApp,createRenderer函数返回一个包含 createApp 方法的对象,方法具体为调用createAppAPI函数并传入render函数。
首先在src/runtime-core目录下的createApp.ts文件中实现并导出createAppAPI函数,对createApp进行封装:
/* createApp.ts */

// 用于返回 createApp
export function createAppAPI(render) {
  return function createApp(rootComponent) {}
}
接下来在src/runtime-core目录下的renderer.ts文件中实现并导出createRenderer函数,对src/runtime-core目录下的renderer.ts文件中的函数进行封装,并完善processText函数和mountElement函数,利用传入的 API 完成相应操作:
/* renderer.ts */

export function createRenderer(options) {
  // 通过解构赋值获取 createText 函数、createElement 函数、patchProp 函数和 insert 函数
  const {
    createText: hostCreateText,
    createElement: hostCreateElement,
    patchProp: hostPatchProp,
    insert: hostInsert
  } = options

  function render(vnode, container) {}

  /* patch */
  /* processFragment */

  function processText(n1, n2, container) {
    const { children } = n2
    // createText 函数
    const textNode = hostCreateText(children)
    // insert 函数
    hostInsert(textNode, container)
  }

  /* processElement */

  function mountElement(vnode, container, parentComponent) {
    // createElement 函数
    const el = (vnode.el = hostCreateElement(vnode.type))

    const { props, shapeFlag, children } = vnode

    // 遍历 props,将其中的 property 或方法挂载到新元素上
    for (const key in props) {
      const val = props[key]

      // patchProp 函数
      hostPatchProp(el, key, val)
    }

    /* 其他代码 */

    // insert 函数
    hostInsert(el, container)
  }

  /* mountChildren */
  /* processComponent */
  /* mountComponent */
  /* setupRenderEffect */

  // 返回一个包含 createApp 方法的对象,方法具体为调用 createAppAPI 函数并传入 render 函数
  return {
    createApp: createAppAPI(render)
  }
然后对src/runtime-core目录下的index.ts文件做如下修改,导出createRenderer函数而不再导出createApp:
/* index.ts */

export { h } from './h'
export { renderSlots } from './helpers/renderSlots'
export { createTextVNode } from './vnode'
export { getCurrentInstance } from './component'
export { provide, inject } from './apiInject'
export { createRenderer } from './renderer'
再来实现针对浏览器平台的 runtime-dom 的最简单的功能。在src/runtime-dom目录下创建index.ts文件,在其中首先实现createText函数、createElement函数、patchProp函数和insert函数,然后调用createRenderer函数并传入包含以上三个函数的对象,接下来实现并导出createApp函数,主要是调用createRenderer函数返回对象的 createApp 方法,最后导出 runtime-core:
/* src/runtime-dom/index.ts */

// 用于创建元素
function createElement(type) {
  // 利用 document.createElement() 创建 DOM 元素
  return document.createElement(type)
}

// 用于将 props 对象中的 property 或方法挂载到元素上
function patchProp(el, key, val) {
  // 用于通过正则判断该 property 的 key 是否以 on 开头,是则为注册事件,否则为 attribute 或 property
  const isOn = (key: string) => /^on[A-Z]/.test(key)

  // 若为注册事件
  if (isOn(key)) {
    const event = key.slice(2).toLowerCase()
    // 利用 Element.addEventListener() 将方法挂载到元素上
    el.addEventListener(event, val)
  }
  // 否则
  else {
    // 利用 Element.setAttribute() 将 property 挂载到元素上
    el.setAttribute(key, val)
  }
}

// 用于将元素添加到根容器/父元素中
function insert(el, parent) {
  // 利用 Element.append() 将元素添加到根容器/父元素中
  parent.append(el)
}

// 用于创建文本节点
function createText(text) {
  // 利用 document.createTextNode() 创建文本节点
  return document.createTextNode(text)
}

// 调用 createRenderer 函数,并传入包含 createText 函数、createElement 函数、patchProp 函数和 insert 函数的对象
const renderer: any = createRenderer({
  createElement,
  patchProp,
  insert
})

// 用于创建应用实例
export function createApp(...args) {
  // 调用 createRenderer 函数返回对象的 createApp 方法
  return renderer.createApp(...args)
}

export * from '../runtime-core'
最后对src目录下的index.ts文件做如下修改,导出 runtime-dom 而不再导出 runtime-core:
/* src/index.ts */

export * from './runtime-dom'
在项目文件夹下执行yarn build命令进行打包,打包完成后通过 live server 插件打开example目录下的所有文件夹中的index.html,可以看到所有测试均通过,这样就成功实现了自定义渲染器。
总结
至此,就完成了 Mini-Vue3 的 runtime-core 初始化的后半部分,希望这篇文章能够让你有所收获,如果觉得写的不错还请👍🏻支持一下。
