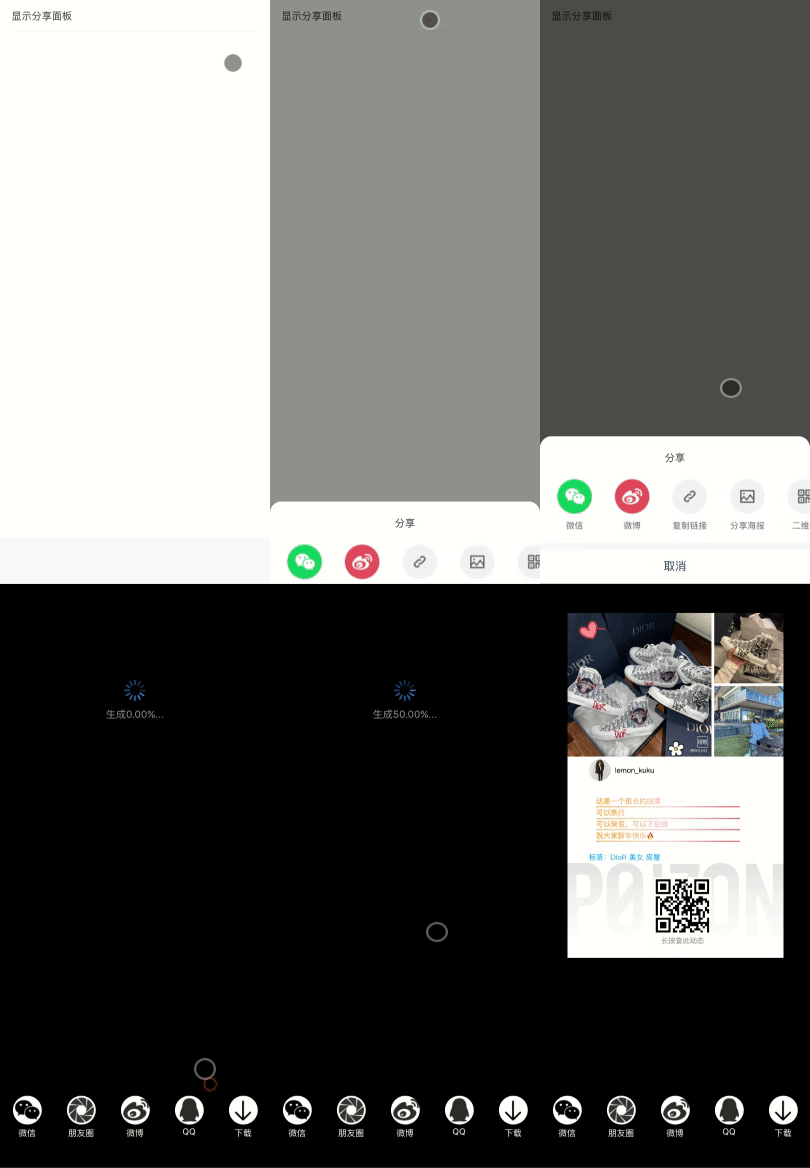
使用json配置生成canvas海报
tip: 参照掘金文章 juejin.cn/post/684490…
使用方法
   /** params: canvas挂载元素 宽 高 json配置 边界是否需要画  */

  const poster = new Poster('demo', 300, 500, this.config, true);
  poster.init();
  poster.listen('progressChange', () => {
    console.log(poster.progress); //海报加载进度
  });
效果图展示

不带边界和带边界
支持文字换行参照coolzjy@v2ex 提供的正则 regexr.com/4f12l ,文字,背景渐变,css布局,进度监听,边界绘制
class Poster {
  constructor(...args) {
     this.parentNode = document.getElementById(args[0]);
     this.width = args[1] || 0;
     this.height = args[2] || 0;
     this.canvas = this.initCanvasContext(this.width, this.height);
     this.defaultConfig = this.setDefault(args[3] || {});
     this.inlineBlockConfig = this.setInlineBlock(this.defaultConfig, 1);
     this.widthConfig = this.setWidth(this.inlineBlockConfig);
     this.heightConfig = this.setHeight(this.widthConfig);
     this.originConfig = this.setOrigin(this.heightConfig);
     this.images = this.getImages(this.originConfig);
     this.progress = 0; //进度
     this.boxShow = args[4] || false; //是否需要画边界
     }
 }
- 1.初始化canvas(initCanvasContext)
当我们初始化canvas的宽高时,可能出现模糊,所以我们需要获取设备像素比,让canvas画布扩大, 保证能够高清显示
initCanvasContext() {
     var ratio = devicePixelRatio / backingStoreRatio;
     canvas.width = width * ratio;
     canvas.height = height * ratio;
}
- 2.设置一些基础默认值(setDefault)
我们需要对json配置对象进行一些填补,比如默认颜色,行高,padding等,这个就看个人意愿了
setDefault(config) {
  //do something...
  return config
}
- 3.改变布局排列(setInlineBlock)
会将连续排列的 inline-block 节点聚合新建一个空白的 div 插入原先的位置然后将这些 inline-block 节点作为 children 插入其中.
setInlineBlock(config) {
  config.children.forEach(item => {
    //do somgthing...
     setInlineBlock(item)
  })
  return config
}
- 4.再次计算盒模型 width(setWidth),会结合 margin,border 等 css 属性再次计算各种盒模型宽。
setWidth(config) {
  //文字可能没有宽 ,图片一定要有宽高, 宽度有最大值和继承父的宽度限定边界
  //div含有字节点继承父节点的宽度
  // do something
  return config
}
- 5.计算盒模型height(setHeight),计算所有节点的高 同宽度 不继承父子节点的高度
setWidth(config) {
  //div含有字节点继承父节点的宽度 行内元素取行内元素里面的最大高度
  // do something
  return config
}
- 6.setOrigin 计算所有节点的绘图位置x,
  setOrigin(config) {
    //需要利用上一个相邻节点的位置计算下一个的
    // do something
    return config
  }
当我们完成上述操作已经拿到了一个计算完成的json配置,接下来我们就开始绘制吧
- 因为加载图片需要时间,所以我们可以等图片加载完再开始绘制,体验更好,而且我们可以监听加载了几张图片,来计算progress进度
  async loadAllImages(images) {
    var that = this;
    let count = 0;
    for (var i = 0; i < images.length; i++) {
      const item = images[i];
      const img = await this.loadImage(item.url);
      count++;
      that.progress = count / images.length;
      item.img = img;
    }
    return images;
  }
  loadImage(url) {
    return new Promise(resolve => {
      const img = new Image();
      img.onload = () => {
        //这里可以使用进度更好体现一点
        setTimeout(() => {
          resolve(img);
        }, 0);
      };
      img.setAttribute('crossOrigin', 'Anonymous');
      img.src = url;
    });
  }
  /** 我们可以在这写一个监听进度的函数 */
  listen(type, callBack) {
    if (type == 'progressChange') {
      Object.defineProperty(this, 'progress', {
        configurable: true, //属性可配置
        set: function(v) {
          this._progress = v;
          console.log('progress发生了改变', v);
          callBack(v);
        },
        get: function() {
          return this._progress;
        },
      });
    }
2.加载图片完成我们可以调用封装的drawCanvas来进行绘制来,进行type区分执行不同的绘制
// 最终绘制方法
  drawCanvas(config) {
    if (config.type == 'text') {
      this.drawParagraph(config);
    }
    if (config.type == 'div') {
      config.custom(this.ctx, config);
    }
    if (config.type == 'image') {
      this.drawImage(config);
    }
    if (config.children) {
      config.children.forEach(item => {
        this.drawCanvas(item);
      });
    }
  }
至于具体这里面绘制的过程,大家可以看我代码,不过大家可以自行先看下canvas的绘制方法,ctx.save();ctx.restore()很关键哦
代码仓库地址放在 github.com/kukudedaxia…