

刚开始使用kotlin-android-extensions插件时, 发现非常舒服。不需要编写繁琐的findViewByid方法, 也不需要引入ButterKnife反射生成View, 直接操作xml布局文件的id资源,大大减少了模板代码, 带来了良好的编码体验。
但是Google最近开始推荐开发者使用ViewBinding, 不在推荐使用kotlin-android-extensions。那么今天就来看看Kotlin-Android-Extensions 的底层是如何实现的。
1、编写XML布局文件
<?xml version="1.0" encoding="utf-8"?>
<RelativeLayout xmlns:android="http://schemas.android.com/apk/res/android"
    xmlns:tools="http://schemas.android.com/tools"
    android:layout_width="match_parent"
    android:layout_height="match_parent">

    <ImageView
        android:id="@+id/imageView"
        android:layout_width="30dp"
        android:layout_height="30dp"
        android:layout_centerInParent="true" />

    <TextView
        android:id="@+id/textView"
        android:layout_width="wrap_content"
        android:layout_height="wrap_content"
        android:layout_below="@+id/imageView"
        android:layout_centerHorizontal="true"
        android:layout_marginTop="20dp"
        android:textSize="18sp"
        tools:text="Hello World" />

    <Button
        android:id="@+id/button"
        android:layout_width="wrap_content"
        android:layout_height="wrap_content"
        android:layout_below="@+id/textView"
        android:layout_centerHorizontal="true"
        android:layout_marginTop="20dp"
        android:text="确认" />

</RelativeLayout>
2、使用Kotlin-Android-Extensions直接操纵xml的View Id进行一些操作
import kotlinx.android.synthetic.main.testactivity.*

/**
 * Create by wsg on 2021/1/27.
 */
class TestActivity : BaseActivity() {

    override fun onCreate(savedInstanceState: Bundle?) {
        super.onCreate(savedInstanceState)
        setContentView(R.layout.testactivity)

        initView()
    }

    private fun initView() {
        imageView.setImageResource(R.drawable.about_pressed)
        textView.text = "Hello World"
        button.setOnClickListener {
            Log.d("TestActivity", "button clicked")
        }
    }
}
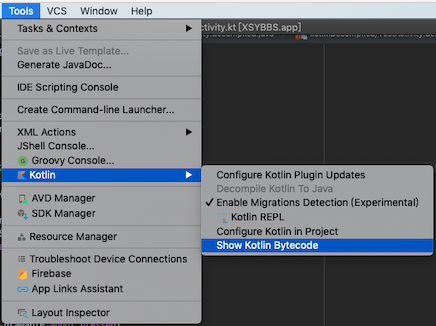
3、使用Android Studio 的 Tools -> Kotlin -> Show Kotlin Bytecode 工具,查看TestActivity的字节码文件
字节码文件如下
public final class TestActivity extends BaseActivity {
   private HashMap _$_findViewCache;

   protected void onCreate(@Nullable Bundle savedInstanceState) {
      super.onCreate(savedInstanceState);
      this.setContentView(1300096);
      this.initView();
   }

   private final void initView() {
      ((ImageView)this._$_findCachedViewById(id.imageView)).setImageResource(700248);
      TextView var10000 = (TextView)this._$_findCachedViewById(id.textView);
      Intrinsics.checkExpressionValueIsNotNull(var10000, "textView");
      var10000.setText((CharSequence)"Hello World");
      ((Button)this._$_findCachedViewById(id.button)).setOnClickListener((OnClickListener)null.INSTANCE);
   }

   public View _$_findCachedViewById(int var1) {
      if (this._$_findViewCache == null) {
         this._$_findViewCache = new HashMap();
      }

      View var2 = (View)this._$_findViewCache.get(var1); //在缓存中进行查找
      if (var2 == null) {
         var2 = this.findViewById(var1);
         this._$_findViewCache.put(var1, var2); // 在缓存中如果找不到该View,则调用findViewById方法查找View, 并存入缓存
      }

      return var2;
   }

   public void _$_clearFindViewByIdCache() {
      if (this._$_findViewCache != null) {
         this._$_findViewCache.clear(); //清除缓存
      }

   }
}
从中可以看出,其实 Kotlin-Android-Extensions插件帮我们在Activity内部缓存了一个Map, 其中Key为View 的id, value为View自身, 内部还是findViewById并把View缓存起来,等到下次使用时可以从Map缓存中读取。等于自动帮我们实现了findViewById操作。
