

作者|Renu Khandelwal 编译|VK 来源|Towards Data Science
在本文中,你将学习如何加载自定义数据和创建图像序列和测试数据集,作为深度学习模型的输入。
- Open CV2
- PIL
这里使用的数据集是来自Kaggle的Intel图像分类。
数据集链接:www.kaggle.com/puneet6060/…
“Intel图像分类”数据集已分为train、test和Val,我们将仅使用训练数据集学习如何使用不同的库加载数据集。
为深度学习模型加载自定义数据集的典型步骤
-
打开图像文件。文件的格式可以是JPEG、PNG、BMP等。
-
调整图像大小以匹配深度学习模型的输入层的输入大小。
-
将图像像素转换为浮点数据类型。
-
将图像标准化,使像素值在0到1之间。
-
深度学习模型的图像数据应该是一个numpy数组或一个张量对象。
自定义图像数据的文件夹结构
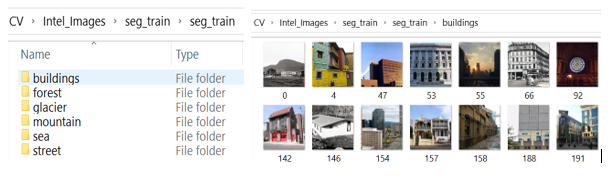
每个类都是一个文件夹,其中包含该特定类的图像。
使用CV2加载图像数据
导入所需的库
import pandas as pd
import numpy as np
import os
import tensorflow as tf
import cv2
from tensorflow import keras
from tensorflow.keras import layers, Dense, Input, InputLayer, Flatten
from tensorflow.keras.models import Sequential, Model
from  matplotlib import pyplot as plt
import matplotlib.image as mpimg
%matplotlib inline
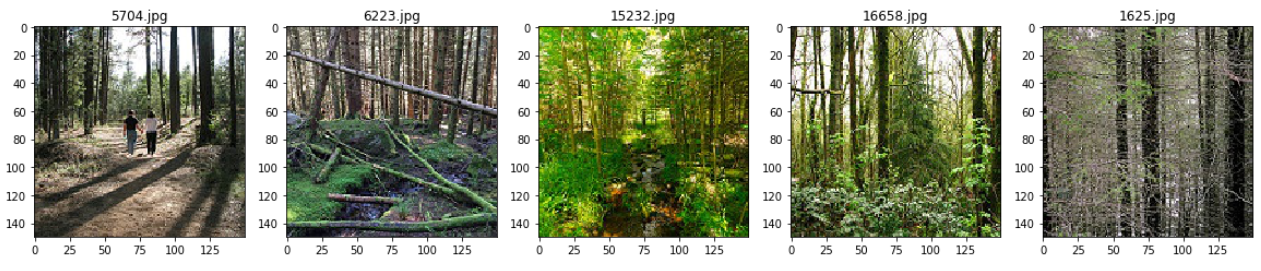
从其中一个文件夹中随机输出五张图像
plt.figure(figsize=(20,20))
test_folder=r'CV\Intel_Images\seg_train\seg_train\forest'
for i in range(5):
    file = random.choice(os.listdir(img_folder))
    image_path= os.path.join(img_folder, file)
    img=mpimg.imread(image_path)
    ax=plt.subplot(1,5,i+1)
    ax.title.set_text(file)
    plt.imshow(img)
设置用于加载数据集的图像维度和源文件夹
IMG_WIDTH=200
IMG_HEIGHT=200
img_folder=r'CV\Intel_Images\seg_train\seg_train\'
从文件夹中的图像创建图像数据和标签
在下面的函数中
-
source文件夹是包含不同类的图像的输入参数。
-
从文件夹中读取图像文件并将其转换为正确的颜色格式。
-
根据模型所需的输入尺寸调整图像大小
-
将图像转换为数据类型为float32的Numpy数组
-
将图像数组标准化,使值在0和1之间,这有助于更快地收敛。
def create_dataset(img_folder):

    img_data_array=[]
    class_name=[]

    for dir1 in os.listdir(img_folder):
        for file in os.listdir(os.path.join(img_folder, dir1)):

            image_path= os.path.join(img_folder, dir1,  file)
            image= cv2.imread( image_path, cv2.COLOR_BGR2RGB)
            image=cv2.resize(image, (IMG_HEIGHT, IMG_WIDTH),interpolation = cv2.INTER_AREA)
            image=np.array(image)
            image = image.astype('float32')
            image /= 255
            img_data_array.append(image)
            class_name.append(dir1)
    return img_data_array, class_name
# extract the image array and class name
img_data, class_name =create_dataset(r'CV\Intel_Images\seg_train\seg_train')
将文本标签转换为数字编码
为类的所有唯一值创建字典
target_dict={k: v for v, k in enumerate(np.unique(class_name))}
target_dict
根据字典将类名称转换为各自的数值
target_val= [target_dict[class_name[i]] for i in range(len(class_name))]
创建一个简单的深度学习模型并编译它
model=tf.keras.Sequential(
        [
            tf.keras.layers.InputLayer(input_shape=(IMG_HEIGHT,IMG_WIDTH, 3)),
            tf.keras.layers.Conv2D(filters=32, kernel_size=3, strides=(2, 2), activation='relu'),
            tf.keras.layers.Conv2D(filters=64, kernel_size=3, strides=(2, 2), activation='relu'),
            tf.keras.layers.Flatten(),
            tf.keras.layers.Dense(6)
        ])

encoder.compile(optimizer='rmsprop', loss='sparse_categorical_crossentropy', metrics=['accuracy'])
我们最终调整数据集来训练模型。我们可以使用Numpy数组作为输入
history = model.fit(x=np.array(img_data, np.float32), y=np.array(list(map(int,target_val)), np.float32), epochs=5)
我们还可以使用tf.cast()将输入数据转换为张量来训练模型。
history = model.fit(x=tf.cast(np.array(img_data), tf.float64), y=tf.cast(list(map(int,target_val)),tf.int32), epochs=5)
我们使用不同的库加载图像数据集但是我们使用相同的模型来进行进一步的训练
用PIL加载图像数据
添加附加库以使用PIL加载图像数据集
from PIL import Image
使用PIL从文件夹中的图像创建图像数据和标签
在下面的函数中
-
source文件夹是包含不同类的图像的输入参数。
-
使用PIL从文件夹中打开图像文件。
-
根据模型所需的输入尺寸调整图像大小
-
将图像转换为数据类型为float32的Numpy数组
-
标准化图像数组以加快收敛。
def create_dataset_PIL(img_folder):

    img_data_array=[]
    class_name=[]
    for dir1 in os.listdir(img_folder):
        for file in os.listdir(os.path.join(img_folder, dir1)):

            image_path= os.path.join(img_folder, dir1,  file)
            image= np.array(Image.open(image_path))
            image= np.resize(image,(IMG_HEIGHT,IMG_WIDTH,3))
            image = image.astype('float32')
            image /= 255
            img_data_array.append(image)
            class_name.append(dir1)
    return img_data_array , class_name
PIL_img_data, class_name=create_dataset_PIL(img_folder)
将文本标签转换为数字编码
下面是我们在CV2中使用的代码
target_dict={k: v for v, k in enumerate(np.unique(class_name))}
target_val=  [target_dict[class_name[i]] for i in range(len(class_name))]
创建和编译一个简单的深度学习模型
model=tf.keras.Sequential(
        [
            tf.keras.layers.InputLayer(input_shape=(IMG_HEIGHT,IMG_WIDTH, 3)),
            tf.keras.layers.Conv2D(filters=32, kernel_size=3, strides=(2, 2), activation='relu'),
            tf.keras.layers.Conv2D(filters=64, kernel_size=3, strides=(2, 2), activation='relu'),
            tf.keras.layers.Flatten(),
            tf.keras.layers.Dense(6)
        ])

encoder.compile(optimizer='rmsprop', loss='sparse_categorical_crossentropy', metrics=['accuracy'])
我们最终调整数据集来训练模型。我们可以使用Numpy数组作为输入
history = model.fit(x=np.array(PIL_img_data, np.float32), y=np.array(list(map(int,target_val)), np.float32), epochs=5)
我们还可以使用tf.cast()将输入数据转换为张量来训练模型。
history = model.fit(x=tf.cast(np.array(PIL_img_data), tf.float64), y=tf.cast(list(map(int,target_val)),tf.int32), epochs=5)
除了几个步骤外,使用CV2和PIL加载数据集的过程是相同的。
现在这将帮助你使用CV2和PIL库加载数据集。
这里提供了使用CV2和PIL加载数据集的代码:github.com/arshren/Loa…
在下一篇文章中,我们将使用以下的库来加载数据集。
- Keras
- tf.data
原文链接:towardsdatascience.com/loading-cus…
欢迎关注磐创AI博客站: panchuang.net/
sklearn机器学习中文官方文档: sklearn123.com/
欢迎关注磐创博客资源汇总站: docs.panchuang.net/
