

Window,表示一个窗口的抽象的概念;同时也是一个抽象类,唯一的实现是PhoneWindow。在PhoneWindow中有一个顶级View—DecorView,继承自FrameLayout,我们可以通过getDecorView()获得它,当我们调用Activity的setContentView时,其实最终会调用Window的setContentView,当我们调用Activity的findViewById时,其实最终调用的是Window的findViewById,这也间接的说明了Window是View的直接管理者。 但是Window并不是真实存在的,它更多的表示一种抽象的功能集合,View才是Android中的视图呈现形式,绘制到屏幕上的是View不是Window,但是View不能单独存在,它必需依附在Window这个抽象的概念上面,Android中需要依赖Window提供视图的有Activity,Dialog,Toast,PopupWindow,StatusBarWindow(系统状态栏),输入法窗口等,因此Activity,Dialog等视图都对应着一个Window。
创建Window,通过WindowManager即可完成。WindowManager是操作Window的入口,Window的具体实现是在WindowManagerService中。WindowManager和WindowManagerService交互是IPC(跨进程通信)过程。
Window是View的管理者,当我们说创建Window时,一方面指实例化这个管理者,一方面指 用WindowManager.addView()添加view,以view的形式来呈现Window这个概念。
一、Window和WindowManager
1.1 window
先看创建window的代码
WindowManager windowManager = getWindowManager();
        Button view = new Button(this);
        view.setText("添加到window中的button");

        WindowManager.LayoutParams layoutParams = new WindowManager.LayoutParams();

        layoutParams.flags = WindowManager.LayoutParams.FLAG_NOT_FOCUSABLE
                | WindowManager.LayoutParams.FLAG_NOT_TOUCH_MODAL
                | WindowManager.LayoutParams.FLAG_SHOW_WHEN_LOCKED;
        layoutParams.type = WindowManager.LayoutParams.TYPE_APPLICATION;

        layoutParams.format = PixelFormat.TRANSPARENT;
        layoutParams.gravity = Gravity.TOP | Gravity.LEFT;
        layoutParams.x = 100;
        layoutParams.y = 100;
        layoutParams.width = ViewGroup.LayoutParams.WRAP_CONTENT;
        layoutParams.height = ViewGroup.LayoutParams.WRAP_CONTENT;

        windowManager.addView(view, layoutParams);
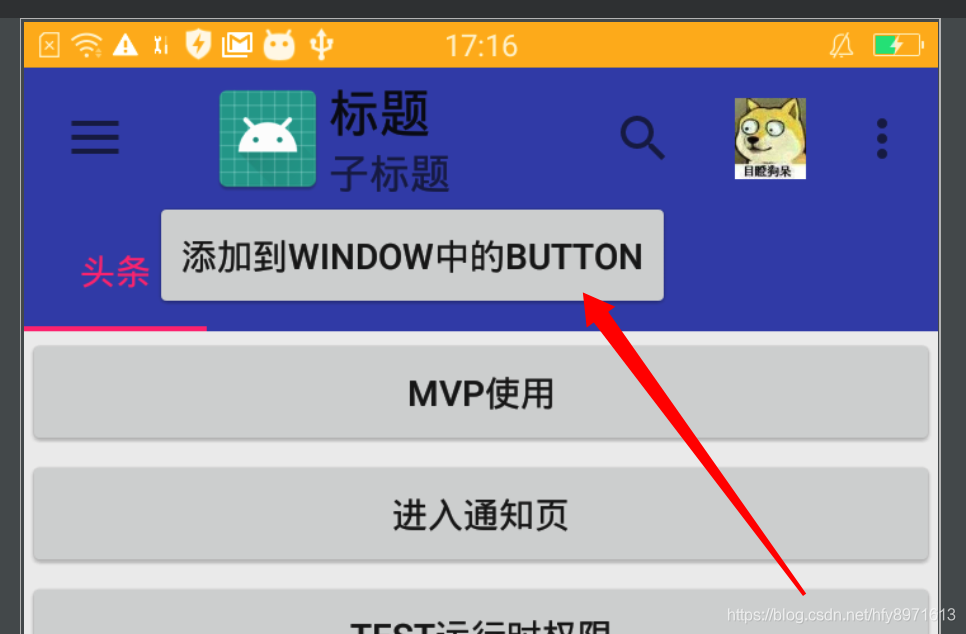 实际就只有一句windowManager.addView(view, layoutParams),这样就添加了一个Window,这个window只有一个button。看下LayoutParams的两个不太认识的属性,flags、type。
flags,决定window的显示特性,有很多值,看下常用的:
实际就只有一句windowManager.addView(view, layoutParams),这样就添加了一个Window,这个window只有一个button。看下LayoutParams的两个不太认识的属性,flags、type。
flags,决定window的显示特性,有很多值,看下常用的:
FLAG_NOT_FOCUSABLE,不需要获取焦点、不需要 输入事件,同时会自定开启FLAG_NOT_TOUCH_MODAL,最终事件会传递给下层具有焦点的window。
FLAG_NOT_TOUCH_MODAL,window区域以外的单击事件会传递给下层window,window范围内的事件自己处理。一般需要开启此标记,否则其他window不能收到事件。
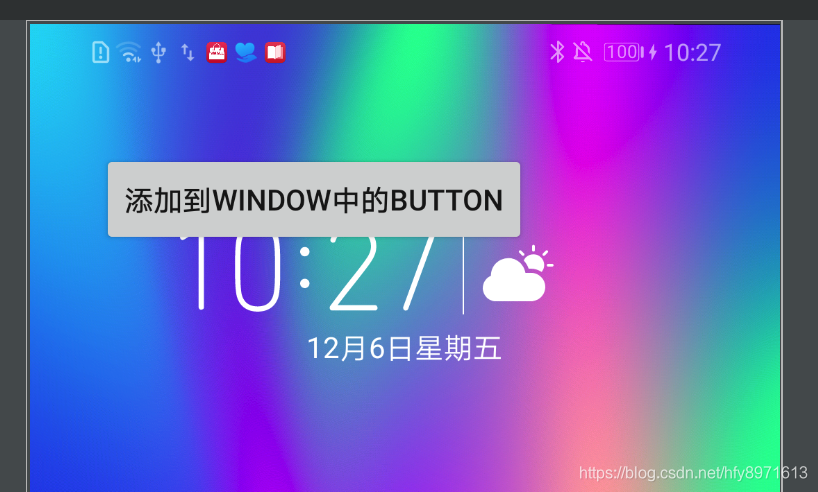
FLAG_SHOW_WHEN_LOCKED,开启后 可以让window显示在锁屏的界面上。
type参数表示window的类型。window有三种类型,应用window、子window、系统window。应用window对应activity;子window要依附在父window上,如dialog;系统window需要申明权限才能创建,比如toast、系统状态栏。 window是分层的,每个window都有对应的z-ordered,层级大的在层级小的上层。应用window的层级范围是1-99,子window是1000-1999,系统window是2000-2999,即type的值。
如果想window位于所有window顶层,那就用系统window。可以设置layoutParams.type = WindowManager.LayoutParams.TYPE_APPLICATION_OVERLAY,并且,要申明使用权限,且6.0以后要让用户手动打开权限。
<uses-permission android:name="android.permission.SYSTEM_ALERT_WINDOW"/>
否则会报错:
Caused by: android.view.WindowManager$BadTokenException: Unable to add window android.view.ViewRootImpl$W@305c3bc -- permission denied for window type 2038
        at android.view.ViewRootImpl.setView(ViewRootImpl.java:958)
        at android.view.WindowManagerGlobal.addView(WindowManagerGlobal.java:398)
        at android.view.WindowManagerImpl.addView(WindowManagerImpl.java:131)
        at com.hfy.demo01.MainActivity.initCustomWindow(MainActivity.java:266)
        at com.hfy.demo01.MainActivity.initView(MainActivity.java:170)
        at com.hfy.demo01.MainActivity.onCreate(MainActivity.java:116)
        at android.app.Activity.performCreate(Activity.java:7458)
        at android.app.Activity.performCreate(Activity.java:7448)
        at android.app.Instrumentation.callActivityOnCreate(Instrumentation.java:1286)
        at android.app.ActivityThread.performLaunchActivity(ActivityThread.java:3409)
        at android.app.ActivityThread.handleLaunchActivity(ActivityThread.java:3614)
        at android.app.servertransaction.LaunchActivityItem.execute(LaunchActivityItem.java:86)
        at android.app.servertransaction.TransactionExecutor.executeCallbacks(TransactionExecutor.java:108)
        at android.app.servertransaction.TransactionExecutor.execute(TransactionExecutor.java:68)
        at android.app.ActivityThread$H.handleMessage(ActivityThread.java:2199)
        at android.os.Handler.dispatchMessage(Handler.java:112)
        at android.os.Looper.loop(Looper.java:216)
        at android.app.ActivityThread.main(ActivityThread.java:7625)
使用系统window的完整代码:
    private void initCustomWindow() {
        //6.0以上需要用户手动打开权限
        // (SYSTEM_ALERT_WINDOW and WRITE_SETTINGS, 这两个权限比较特殊,
        // 不能通过代码申请方式获取,必须得用户打开软件设置页手动打开,才能授权。Manifest申请该权限是无效的。)
        if (Build.VERSION.SDK_INT >= Build.VERSION_CODES.M){
            if (!Settings.canDrawOverlays(this)) {
                //打开设置页,让用户打开设置
                Toast.makeText(this, "can not DrawOverlays", Toast.LENGTH_SHORT).show();
                Intent intent = new Intent(Settings.ACTION_MANAGE_OVERLAY_PERMISSION, Uri.parse("package:" + MainActivity.this.getPackageName()));
                startActivityForResult(intent, OVERLAY_PERMISSION_REQ_CODE);
            }else {
                //已经打开了权限
                handleAddWindow();
            }
        }else {
            //6.0以下直接 Manifest申请该权限 就行。
            handleAddWindow();
        }
    }

    private void handleAddWindow() {
        Button view = new Button(this);
        view.setText("添加到window中的button");

        WindowManager.LayoutParams layoutParams = new WindowManager.LayoutParams(
                WindowManager.LayoutParams.WRAP_CONTENT,
                WindowManager.LayoutParams.WRAP_CONTENT,
                0, 0,
                PixelFormat.TRANSPARENT
        );
        // flag 设置 Window 属性
        layoutParams.flags= WindowManager.LayoutParams.FLAG_NOT_FOCUSABLE | WindowManager.LayoutParams.FLAG_NOT_TOUCH_MODAL;
        // type 设置 Window 类别(层级):系统window
        layoutParams.type = WindowManager.LayoutParams.TYPE_APPLICATION_OVERLAY;

        layoutParams.gravity = Gravity.TOP | Gravity.LEFT;
        layoutParams.x = 100;
        layoutParams.y = 100;

        WindowManager windowManager = getWindowManager();
        windowManager.addView(view, layoutParams);
    }

    @Override
    protected void onActivityResult(int requestCode, int resultCode, @Nullable Intent data) {
        super.onActivityResult(requestCode, resultCode, data);
        switch (requestCode){
            case OVERLAY_PERMISSION_REQ_CODE:
                if (Settings.canDrawOverlays(this)) {
                    //打开了权限
                    handleAddWindow();
                }else {
                    Toast.makeText(this, "can not DrawOverlays", Toast.LENGTH_SHORT).show();
                }
                break;
            default:
                break;
        }
    }
按home键后效果:
1.2 WindowManager
WindowManager是个接口,继承自ViewManager:
public interface ViewManager{
    public void addView(View view, ViewGroup.LayoutParams params);
    public void updateViewLayout(View view, ViewGroup.LayoutParams params);
    public void removeView(View view);
}
所以,windowManager就是 添加、更新、删除 view,实际使用的就是这三个方法,上面创建window的例子用的就是addView方法。所以,操作window就是操作view。
二、window的内部机制
window是抽象的概念,在视图中不是实际存在,它以view的形式呈现。一个window就对应一个view,window操作view实际是通过ViewRootImpl实现。使用中是通过WindowManager对的操作,无法直接访问window。下面就看看WindowManager的三个方法。
2.1 window的添加
WindowManager的实现类是WindowManagerImpl,那么看看操作view的三个方法的实现:
@Override
    public void addView(@NonNull View view, @NonNull ViewGroup.LayoutParams params) {
        applyDefaultToken(params);
        mGlobal.addView(view, params, mContext.getDisplay(), mParentWindow);
    }

    @Override
    public void updateViewLayout(@NonNull View view, @NonNull ViewGroup.LayoutParams params) {
        applyDefaultToken(params);
        mGlobal.updateViewLayout(view, params);
    }

	@Override
    public void removeView(View view) {
        mGlobal.removeView(view, false);
    }
可以看到,全都交给mGlobal处理了,那看下mGlobal,是个单例对象:
private final WindowManagerGlobal mGlobal = WindowManagerGlobal.getInstance();
public static WindowManagerGlobal getInstance() {
        synchronized (WindowManagerGlobal.class) {
            if (sDefaultWindowManager == null) {
                sDefaultWindowManager = new WindowManagerGlobal();
            }
            return sDefaultWindowManager;
        }
    }
那么来看下mGlobal.addView,具体简要概括为3个步骤:
- 数据检查
- 更新各种参数列表
- RootViewImpl添加view(含window的添加)
public void addView(View view, ViewGroup.LayoutParams params,
            Display display, Window parentWindow) {
        //1、数据检查
        if (view == null) {
            throw new IllegalArgumentException("view must not be null");
        }
        if (display == null) {
            throw new IllegalArgumentException("display must not be null");
        }
        if (!(params instanceof WindowManager.LayoutParams)) {
            throw new IllegalArgumentException("Params must be WindowManager.LayoutParams");
        }

        final WindowManager.LayoutParams wparams = (WindowManager.LayoutParams) params;
        if (parentWindow != null) {
            parentWindow.adjustLayoutParamsForSubWindow(wparams);
        } else {
            // If there's no parent, then hardware acceleration for this view is
            // set from the application's hardware acceleration setting.
            final Context context = view.getContext();
            if (context != null
                    && (context.getApplicationInfo().flags
                            & ApplicationInfo.FLAG_HARDWARE_ACCELERATED) != 0) {
                wparams.flags |= WindowManager.LayoutParams.FLAG_HARDWARE_ACCELERATED;
            }
        }

        ViewRootImpl root;
        View panelParentView = null;
        ...
        	//创建viewRoot(一个window对应一个viewRoot)
            root = new ViewRootImpl(view.getContext(), display);
            view.setLayoutParams(wparams);

			//2、更新各种参数列:所有window的--view的列表、rootView的列表、view参数的列表
            mViews.add(view);
            mRoots.add(root);
            mParams.add(wparams);

            // do this last because it fires off messages to start doing things
            try {
           		// 3、RootViewImpl添加view(含window的添加)
                root.setView(view, wparams, panelParentView);
            } catch (RuntimeException e) {
                // BadTokenException or InvalidDisplayException, clean up.
                if (index >= 0) {
                    removeViewLocked(index, true);
                }
                throw e;
            }
        }
    }
接着看ViewRootImpl的setView:
public void setView(View view, WindowManager.LayoutParams attrs, View panelParentView) {
				...
				//1.绘制view
				requestLayout();

                if ((mWindowAttributes.inputFeatures
                        & WindowManager.LayoutParams.INPUT_FEATURE_NO_INPUT_CHANNEL) == 0) {
                    mInputChannel = new InputChannel();
                }
                mForceDecorViewVisibility = (mWindowAttributes.privateFlags
                        & PRIVATE_FLAG_FORCE_DECOR_VIEW_VISIBILITY) != 0;
                try {
                    mOrigWindowType = mWindowAttributes.type;
                    mAttachInfo.mRecomputeGlobalAttributes = true;
                    collectViewAttributes();
                    //2.通过session与WMS建立通信:完成window的添加
                    res = mWindowSession.addToDisplay(mWindow, mSeq, mWindowAttributes,
                            getHostVisibility(), mDisplay.getDisplayId(), mWinFrame,
                            mAttachInfo.mContentInsets, mAttachInfo.mStableInsets,
                            mAttachInfo.mOutsets, mAttachInfo.mDisplayCutout, mInputChannel);
                } catch (RemoteException e) {
                    mAdded = false;
                    mView = null;
                    mAttachInfo.mRootView = null;
                    mInputChannel = null;
                    mFallbackEventHandler.setView(null);
                    unscheduleTraversals();
                    setAccessibilityFocus(null, null);
                    throw new RuntimeException("Adding window failed", e);
                }
				...
}
两个步骤:1、调用requestLayout()异步刷新view,2、mWindowSession.addToDisplay()完成window的添加。
requestLayout()内部最后走到performTraversals(),我们知道这是view绘制流程入口。如下所示:
@Override
    public void requestLayout() {
        if (!mHandlingLayoutInLayoutRequest) {
            checkThread();
            mLayoutRequested = true;
            scheduleTraversals();
        }
    }
void scheduleTraversals() {
        if (!mTraversalScheduled) {
            mTraversalScheduled = true;
            mTraversalBarrier = mHandler.getLooper().getQueue().postSyncBarrier();
            mChoreographer.postCallback(
                    Choreographer.CALLBACK_TRAVERSAL, mTraversalRunnable, null);
            if (!mUnbufferedInputDispatch) {
                scheduleConsumeBatchedInput();
            }
            notifyRendererOfFramePending();
            pokeDrawLockIfNeeded();
        }
    }
final class TraversalRunnable implements Runnable {
        @Override
        public void run() {
            doTraversal();
        }
    }
void doTraversal() {
        if (mTraversalScheduled) {
            mTraversalScheduled = false;
            mHandler.getLooper().getQueue().removeSyncBarrier(mTraversalBarrier);

            if (mProfile) {
                Debug.startMethodTracing("ViewAncestor");
            }
			// 绘制流程
            performTraversals();

            if (mProfile) {
                Debug.stopMethodTracing();
                mProfile = false;
            }
        }
    }
至于mWindowSession.addToDisplay(),先看mWindowSession,类型是IWindowSession,是个Binder对象,具体是com.android.server.wm.Session,所以window的添加是一个IPC过程。 mWindowSessionde 是在ViewRootImpl创建时获取,由WindowManagerGlobal通过获取WindowManagerService来为 每个应用创建一个单独的session。
public ViewRootImpl(Context context, Display display) {
        mContext = context;
        mWindowSession = WindowManagerGlobal.getWindowSession();
	...
}
    public static IWindowSession getWindowSession() {
        synchronized (WindowManagerGlobal.class) {
            if (sWindowSession == null) {
                try {
                    InputMethodManager imm = InputMethodManager.getInstance();
                    IWindowManager windowManager = getWindowManagerService();
                    sWindowSession = windowManager.openSession(
                            new IWindowSessionCallback.Stub() {
                                @Override
                                public void onAnimatorScaleChanged(float scale) {
                                    ValueAnimator.setDurationScale(scale);
                                }
                            },
                            imm.getClient(), imm.getInputContext());
                } catch (RemoteException e) {
                    throw e.rethrowFromSystemServer();
                }
            }
            return sWindowSession;
        }
    }
    public static IWindowManager getWindowManagerService() {
        synchronized (WindowManagerGlobal.class) {
            if (sWindowManagerService == null) {
                sWindowManagerService = IWindowManager.Stub.asInterface(
                        ServiceManager.getService("window"));
                try {
                    if (sWindowManagerService != null) {
                        ValueAnimator.setDurationScale(
                                sWindowManagerService.getCurrentAnimatorScale());
                    }
                } catch (RemoteException e) {
                    throw e.rethrowFromSystemServer();
                }
            }
            return sWindowManagerService;
        }
    }
然后是WindowManagerService的openSession:
    @Override
    public IWindowSession openSession(IWindowSessionCallback callback, IInputMethodClient client,
            IInputContext inputContext) {
        if (client == null) throw new IllegalArgumentException("null client");
        if (inputContext == null) throw new IllegalArgumentException("null inputContext");
        Session session = new Session(this, callback, client, inputContext);
        return session;
    }
接着看Session的addToDisplay:
@Override
    public int addToDisplay(IWindow window, int seq, WindowManager.LayoutParams attrs,
            int viewVisibility, int displayId, Rect outFrame, Rect outContentInsets,
            Rect outStableInsets, Rect outOutsets,
            DisplayCutout.ParcelableWrapper outDisplayCutout, InputChannel outInputChannel) {
        return mService.addWindow(this, window, seq, attrs, viewVisibility, displayId, outFrame,
                outContentInsets, outStableInsets, outOutsets, outDisplayCutout, outInputChannel);
    }
window的添加就交给WindowManagerService了。 WindowManagerService主要作用:
窗口管理: 是先进行窗口的权限检查,因为系统窗口需要声明权限,然后根据相关的Display信息以及窗口信息对窗口进行校对,再然后获取对应的WindowToken,再根据不同的窗口类型检查窗口的有效性,如果上面一系列步骤都通过了,就会为该窗口创建一个WindowState对象,以维护窗口的状态和根据适当的时机调整窗口状态,最后就会通过WindowState的attach方法与SurfaceFlinger通信。因此SurfaceFlinger能使用这些Window信息来合成surfaces,并渲染输出到显示设备。
输入事件的中转站:当我们的触摸屏幕时就会产生输入事件,在Android中负责管理事件的输入是InputManagerService,它里面有一个InputManager,在启动IMS的同时会创建InputManager,在创建InputManager同时创建InputReader和InputDispatcher,InputReader会不断的从设备节点中读取输入事件,InputReader将这些原始输入事件加工后就交给InputDispatcher,而InputDispatcher它会寻找一个最合适的窗口来处理输入事件,WMS是窗口的管理者,WMS会把所有窗口的信息更新到InputDispatcher中,这样InputDispatcher就可以将输入事件派发给合适的Window,Window就会把这个输入事件传给顶级View,然后就会涉及我们熟悉的事件分发机制。
2.2 window的更新
直接看mGlobal.updateViewLayout(view, params):
    public void updateViewLayout(View view, ViewGroup.LayoutParams params) {
    	//1、参数检查
        if (view == null) {
            throw new IllegalArgumentException("view must not be null");
        }
        if (!(params instanceof WindowManager.LayoutParams)) {
            throw new IllegalArgumentException("Params must be WindowManager.LayoutParams");
        }

        final WindowManager.LayoutParams wparams = (WindowManager.LayoutParams)params;
        //2、更新layoutParams及参数列表列表
        view.setLayoutParams(wparams);
        synchronized (mLock) {
            int index = findViewLocked(view, true);
            ViewRootImpl root = mRoots.get(index);
            mParams.remove(index);
            mParams.add(index, wparams);
            //3、RootViewImpl更新布局
            root.setLayoutParams(wparams, false);
        }
    }
再看ViewRootIml.setLayoutParams()中会调用scheduleTraversals() 重新绘制布局,其中也会调用mWindowSession.relayout来更新window ,也是IPC过程。
2.3 window 删除
直接看mGlobal.removeView(view, false):
    public void removeView(View view, boolean immediate) {
        if (view == null) {
            throw new IllegalArgumentException("view must not be null");
        }

        synchronized (mLock) {
        	//找到要移除view在列表中的index
            int index = findViewLocked(view, true);
            View curView = mRoots.get(index).getView();
            //移除
            removeViewLocked(index, immediate);
            if (curView == view) {
                return;
            }

            throw new IllegalStateException("Calling with view " + view
                    + " but the ViewAncestor is attached to " + curView);
        }
    }
再看removeViewLocked(index, immediate):
    private void removeViewLocked(int index, boolean immediate) {
    	//找到对应的ViewRoot
        ViewRootImpl root = mRoots.get(index);
        View view = root.getView();

        if (view != null) {
            InputMethodManager imm = InputMethodManager.getInstance();
            if (imm != null) {
                imm.windowDismissed(mViews.get(index).getWindowToken());
            }
        }
        //ViewRoot用die来删除
        boolean deferred = root.die(immediate);
        if (view != null) {
            view.assignParent(null);
            if (deferred) {
            	//记录要删除的view
                mDyingViews.add(view);
            }
        }
    }
继续看root.die(immediate):
    boolean die(boolean immediate) {
        // 如果是立刻删除,直接调doDie()
        if (immediate && !mIsInTraversal) {
            doDie();
            return false;
        }

        if (!mIsDrawing) {
            destroyHardwareRenderer();
        } else {
            Log.e(mTag, "Attempting to destroy the window while drawing!\n" +
                    "  window=" + this + ", title=" + mWindowAttributes.getTitle());
        }
        //不是立刻删,就放入队列
        mHandler.sendEmptyMessage(MSG_DIE);
        return true;
    }
继续看doeDie():
    void doDie() {
        checkThread();
        if (LOCAL_LOGV) Log.v(mTag, "DIE in " + this + " of " + mSurface);
        synchronized (this) {
            if (mRemoved)
                return;
            }
            mRemoved = true;
            if (mAdded) {
            	//删除操作
                dispatchDetachedFromWindow();
            }

            ...
         //移除对应列表中的root、view、param、dyingView
        WindowManagerGlobal.getInstance().doRemoveView(this);
    }
看下dispatchDetachedFromWindow():
    void dispatchDetachedFromWindow() {
        mFirstInputStage.onDetachedFromWindow();
        if (mView != null && mView.mAttachInfo != null) {
            mAttachInfo.mTreeObserver.dispatchOnWindowAttachedChange(false);
            //回调view的dispatchDetachedFromWindow方法,意思是view要从window中移除了。一般可在其中做一些资源回收工作,如 停止动画等。
            mView.dispatchDetachedFromWindow();
        }
		//移除各种回调
        mAccessibilityInteractionConnectionManager.ensureNoConnection();
        mAccessibilityManager.removeAccessibilityStateChangeListener(
                mAccessibilityInteractionConnectionManager);
        mAccessibilityManager.removeHighTextContrastStateChangeListener(
                mHighContrastTextManager);
        removeSendWindowContentChangedCallback();

        destroyHardwareRenderer();

        setAccessibilityFocus(null, null);

        mView.assignParent(null);
        mView = null;
        mAttachInfo.mRootView = null;

        mSurface.release();

        if (mInputQueueCallback != null && mInputQueue != null) {
            mInputQueueCallback.onInputQueueDestroyed(mInputQueue);
            mInputQueue.dispose();
            mInputQueueCallback = null;
            mInputQueue = null;
        }
        if (mInputEventReceiver != null) {
            mInputEventReceiver.dispose();
            mInputEventReceiver = null;
        }
        try {
        	//删除window
            mWindowSession.remove(mWindow);
        } catch (RemoteException e) {
        }

        // Dispose the input channel after removing the window so the Window Manager
        // doesn't interpret the input channel being closed as an abnormal termination.
        if (mInputChannel != null) {
            mInputChannel.dispose();
            mInputChannel = null;
        }

        mDisplayManager.unregisterDisplayListener(mDisplayListener);

        unscheduleTraversals();
    }
好了,window的三个view操作就这些了。
三、常见Window的创建过程
View依附于Window这个抽象概念,有Activity、Dialog、Toast、PopupWindow等。
3.1 Activity的Window创建
Activity的启动略复杂,这里先看ActivityThread里的performLaunchActivity():
    private Activity performLaunchActivity(ActivityClientRecord r, Intent customIntent) {
    ...
    //创建activity实例:通过类加载器创建
	java.lang.ClassLoader cl = appContext.getClassLoader();
    activity = mInstrumentation.newActivity(cl, component.getClassName(), r.intent);
    ...
    //调用Activity的attach方法--关联上下文环境变量
  	activity.attach(appContext, this, getInstrumentation(), r.token,
                        r.ident, app, r.intent, r.activityInfo, title, r.parent,
                        r.embeddedID, r.lastNonConfigurationInstances, config,
                        r.referrer, r.voiceInteractor, window, r.configCallback);
	...
}
接着看activity.attach方法:
        //实例化window,就是Window的唯一实现PhoneWindow
        mWindow = new PhoneWindow(this, window, activityConfigCallback);
        ...
        //把activity作为回调接口传入window,这样window从外界接受的状态变化都会交给activity
        //例如:dispatchTouchEvent、onAttachedToWindow、onDetachedFromWindow
        mWindow.setCallback(this);
        ...
        //设置windowManager,实际就是WindowManagerImpl的实例,在activity中getWindowManager()获取的就是这个实例
        mWindow.setWindowManager(
                (WindowManager)context.getSystemService(Context.WINDOW_SERVICE),
                mToken, mComponent.flattenToString(),
                (info.flags & ActivityInfo.FLAG_HARDWARE_ACCELERATED) != 0);
        ...
        mWindowManager = mWindow.getWindowManager();
OK,activity视图的管理者window已创建,那么什么时候用windowManager.addView() 来把activity的视图依附在window上呢?
先看Activity的setContentView方法,我们activity的视图由此方法设置:
    public void setContentView(@LayoutRes int layoutResID) {
        getWindow().setContentView(layoutResID);
        initWindowDecorActionBar();
    }
接着看PhonrWindow的setContentView:
    public void setContentView(int layoutResID) {
        // mContentParent为空,就调installDecor(),猜想installDecor()里面创建了mContentParent。且从名字看出mContentParent就是内容视图的容器
        if (mContentParent == null) {
            installDecor();
        } else if (!hasFeature(FEATURE_CONTENT_TRANSITIONS)) {
            mContentParent.removeAllViews();
        }

        if (hasFeature(FEATURE_CONTENT_TRANSITIONS)) {
            final Scene newScene = Scene.getSceneForLayout(mContentParent, layoutResID,
                    getContext());
            transitionTo(newScene);
        } else {
        	//这里看到,确实把我们的视图加载到mContentParent了
            mLayoutInflater.inflate(layoutResID, mContentParent);
        }
        ...
    }
那就看installDecor():
private void installDecor() {
	if (mDecor == null) {
			//创建mDecor
            mDecor = generateDecor(-1);
            mDecor.setDescendantFocusability(ViewGroup.FOCUS_AFTER_DESCENDANTS);
            mDecor.setIsRootNamespace(true);
            if (!mInvalidatePanelMenuPosted && mInvalidatePanelMenuFeatures != 0) {
                mDecor.postOnAnimation(mInvalidatePanelMenuRunnable);
            }
        } else {
            mDecor.setWindow(this);
        }
        if (mContentParent == null) {
        	//创建mContentParent
            mContentParent = generateLayout(mDecor);
   ...
}
看下generateDecor(-1),就是new了个DecorView:
    protected DecorView generateDecor(int featureId) {
        Context context;
        if (mUseDecorContext) {
            Context applicationContext = getContext().getApplicationContext();
            if (applicationContext == null) {
                context = getContext();
            } else {
                context = new DecorContext(applicationContext, getContext());
                if (mTheme != -1) {
                    context.setTheme(mTheme);
                }
            }
        } else {
            context = getContext();
        }
        return new DecorView(context, featureId, this, getAttributes());
    }
继续看generateLayout(mDecor):
		// Apply data from current theme.
        TypedArray a = getWindowStyle();
        ...
        // 这里下面一堆代码是 根据主题,获取DecorView的布局资源
        int layoutResource;
        int features = getLocalFeatures();
        if ((features & (1 << FEATURE_SWIPE_TO_DISMISS)) != 0) {
            layoutResource = R.layout.screen_swipe_dismiss;
            setCloseOnSwipeEnabled(true);
        } else if ((features & ((1 << FEATURE_LEFT_ICON) | (1 << FEATURE_RIGHT_ICON))) != 0)
        ...
        //把布局给到mDecor,这样mDecor就有视图了。
        mDecor.onResourceLoaded(mLayoutInflater, layoutResource)
	//findViewById就是getDecorView().findViewById(id);
	//所以从DecorView中找到id为ID_ANDROID_CONTENT = com.android.internal.R.id.content 的容器,就用用来存放我们activity中设置的视图的。
	ViewGroup contentParent = (ViewGroup)findViewById(ID_ANDROID_CONTENT);
	...
    return contentParent;
}
好了,通过以上流程,就清楚了activity中通过setContentView设置的布局实际是加载到DecorView的id为com.android.internal.R.id.content容器中。我们查看DecorView所有的主题的布局,发现都有这个id的容器,且是FrameLayout。
<LinearLayout xmlns:android="http://schemas.android.com/apk/res/android"
    android:orientation="vertical"
    android:fitsSystemWindows="true">
    <!-- Popout bar for action modes -->
    <ViewStub android:id="@+id/action_mode_bar_stub"
              android:inflatedId="@+id/action_mode_bar"
              android:layout="@layout/action_mode_bar"
              android:layout_width="match_parent"
              android:layout_height="wrap_content"
              android:theme="?attr/actionBarTheme" />

    <FrameLayout android:id="@android:id/title_container"
        android:layout_width="match_parent"
        android:layout_height="?android:attr/windowTitleSize"
        android:transitionName="android:title"
        style="?android:attr/windowTitleBackgroundStyle">
    </FrameLayout>
    //这个容器
    <FrameLayout android:id="@android:id/content"
        android:layout_width="match_parent"
        android:layout_height="0dip"
        android:layout_weight="1"
        android:foregroundGravity="fill_horizontal|top"
        android:foreground="?android:attr/windowContentOverlay" />
</LinearLayout>
最后一步,就是windowManager.addView了,在哪呢? 在ActivityThred的handleResumeActivity()中:
r.activity.makeVisible();
再看activity.makeVisible():
    void makeVisible() {
        if (!mWindowAdded) {
            ViewManager wm = getWindowManager();
            //1、windowManager.addView
            wm.addView(mDecor, getWindow().getAttributes());
            mWindowAdded = true;
        }
        //2、Decor可见
        mDecor.setVisibility(View.VISIBLE);
    }
好了,activity的window加载过程就这样了。
3.2 Dialog的window创建
先看Dialog的构造方法:
    Dialog(@NonNull Context context, @StyleRes int themeResId, boolean createContextThemeWrapper) {
        ...
        //获取windowManager
        mWindowManager = (WindowManager) context.getSystemService(Context.WINDOW_SERVICE);
		//实例化PhoneWindow
        final Window w = new PhoneWindow(mContext);
        mWindow = w;
        //设置回调
        w.setCallback(this);
        w.setOnWindowDismissedCallback(this);
        w.setOnWindowSwipeDismissedCallback(() -> {
            if (mCancelable) {
                cancel();
            }
        });
        w.setWindowManager(mWindowManager, null, null);
        ...
    }
接着看setContentView,和activity类似,把内容视图放入DecorView:
public void setContentView(@LayoutRes int layoutResID) {
        mWindow.setContentView(layoutResID);
    }
再看下show方法:
    public void show() {
        ...
        mDecor = mWindow.getDecorView();
        ...
        WindowManager.LayoutParams l = mWindow.getAttributes();
        boolean restoreSoftInputMode = false;
        if ((l.softInputMode
                & WindowManager.LayoutParams.SOFT_INPUT_IS_FORWARD_NAVIGATION) == 0) {
            l.softInputMode |=
                    WindowManager.LayoutParams.SOFT_INPUT_IS_FORWARD_NAVIGATION;
            restoreSoftInputMode = true;
        }
		//使用WindowManager.addView
        mWindowManager.addView(mDecor, l);
        ...
    }
注意,一般创建dialog时 传入的context必须是Activity。如果要传Application,那么要dialog.getWindow().setType(),设置系统window的type。
3.3 Toast的window创建
使用Toast方式:
Toast.makeText(this, "hehe", Toast.LENGTH_SHORT).show();
看makeText(),就是new一个Toast,设置mNextView为TextView、mDuration:
    public static Toast makeText(Context context, CharSequence text, @Duration int duration) {
        return makeText(context, null, text, duration);
    }
    public static Toast makeText(@NonNull Context context, @Nullable Looper looper,
            @NonNull CharSequence text, @Duration int duration) {
         //实例化
        Toast result = new Toast(context, looper);

        LayoutInflater inflate = (LayoutInflater)
                context.getSystemService(Context.LAYOUT_INFLATER_SERVICE);
        View v = inflate.inflate(com.android.internal.R.layout.transient_notification, null);
        TextView tv = (TextView)v.findViewById(com.android.internal.R.id.message);
        tv.setText(text);
		//设置视图、时间
        result.mNextView = v;
        result.mDuration = duration;

        return result;
    }
Toast构造方法:
    public Toast(@NonNull Context context, @Nullable Looper looper) {
        mContext = context;
        //有个TN,是个Binder对象
        mTN = new TN(context.getPackageName(), looper);
        mTN.mY = context.getResources().getDimensionPixelSize(
                com.android.internal.R.dimen.toast_y_offset);
        mTN.mGravity = context.getResources().getInteger(
                com.android.internal.R.integer.config_toastDefaultGravity);
    }
实际也可以用setView()自定义视图:
    public void setView(View view) {
        mNextView = view;
    }
再看show():
    public void show() {
    	//没有视图不行
        if (mNextView == null) {
            throw new RuntimeException("setView must have been called");
        }

        INotificationManager service = getService();
        String pkg = mContext.getOpPackageName();
        TN tn = mTN;
        tn.mNextView = mNextView;

        try {
        	//IPC过程:NotificationManagerServcice.enqueueToast(),为啥要IPC过程呢?(注意这里的tn就是Toast构造方法里的new的TN)
            service.enqueueToast(pkg, tn, mDuration);
        } catch (RemoteException e) {
            // Empty
        }
    }
看下NotificationManagerServcice.enqueueToast():
//创建ToastRecord,callback就是传进来的TN
record = new ToastRecord(callingPid, pkg, callback, duration, token);
                        mToastQueue.add(record);
...
if (index == 0) {
	//这里看起来是show方法
     showNextToastLocked();
 }
看不showNextToastLocked():
    void showNextToastLocked() {
    	//取出第一个record,这里为啥第0个?
        ToastRecord record = mToastQueue.get(0);
        while (record != null) {
            if (DBG) Slog.d(TAG, "Show pkg=" + record.pkg + " callback=" + record.callback);
            try {
            	//这里跑到TN的show方法了,显然是系统服务NotificationManagerServcice向我们的APP发起IPC过程,完成最终的show。这个保留疑问后面再看~
                record.callback.show(record.token);
                //这个就是 定时 调TN的hide方法,时间就是我们的toast的设置的show时间?为啥这么说,往下看~
                scheduleDurationReachedLocked(record);
                return;
            }
            ...
        }
    }
看下scheduleDurationReachedLocked(record):
    private void scheduleDurationReachedLocked(ToastRecord r)
    {
        mHandler.removeCallbacksAndMessages(r);
        Message m = Message.obtain(mHandler, MESSAGE_DURATION_REACHED, r);
        long delay = r.duration == Toast.LENGTH_LONG ? LONG_DELAY : SHORT_DELAY;
        //handler发送定时任务MESSAGE_DURATION_REACHED,看名字就是隐藏toast,时间就是我们的long或者short
        mHandler.sendMessageDelayed(m, delay);
    }
这个mHandler就是NMS中的handler,找到上面任务的处理方法:
    private void handleDurationReached(ToastRecord record)
    {
        synchronized (mToastQueue) {
            int index = indexOfToastLocked(record.pkg, record.callback);
            if (index >= 0) {
                cancelToastLocked(index);
            }
        }
    }
接着看:
    void cancelToastLocked(int index) {
        ToastRecord record = mToastQueue.get(index);
        try {
        	//果然,是TN的hide方法,哈哈
            record.callback.hide();
        } catch (RemoteException e)
		...
        ToastRecord lastToast = mToastQueue.remove(index);
        if (mToastQueue.size() > 0) {
            // 开始下一个~~~
            showNextToastLocked();
        }
    }
总结下NotificationManagerServcice.enqueueToast()这个IPC的作用:使用NMS中的mHandler 处理队列中的ToastRecord,具体就是通过IPC调用Toast中的TN的show(),然后在定时调用TN的hide()。就是说,系统来保证toast的循序排队,及展示时间。 另外还一点,对非系统应用,队列中最多同时又50个ToastRecord:
                // limit the number of outstanding notificationrecords an app can have
               //MAX_PACKAGE_NOTIFICATIONS = 50
                int count = getNotificationCountLocked(pkg, userId, id, tag);
                if (count >= MAX_PACKAGE_NOTIFICATIONS) {
                    mUsageStats.registerOverCountQuota(pkg);
                    Slog.e(TAG, "Package has already posted or enqueued " + count
                            + " notifications.  Not showing more.  package=" + pkg);
                    return false;
                }
好了,系统进程看完了。接着看实例化Toast时的创建的TN,我们在上面分析,猜测 这里才是我们想要的WIndow的创建过程,那么往下看吧:
    private static class TN extends ITransientNotification.Stub {
        private final WindowManager.LayoutParams mParams = new WindowManager.LayoutParams();

        private static final int SHOW = 0;
        private static final int HIDE = 1;
        private static final int CANCEL = 2;
        final Handler mHandler;
        ...

        static final long SHORT_DURATION_TIMEOUT = 4000;
        static final long LONG_DURATION_TIMEOUT = 7000;

        TN(String packageName, @Nullable Looper looper) {
            final WindowManager.LayoutParams params = mParams;
            ...
            //window的type:TYPE_TOAST = FIRST_SYSTEM_WINDOW+5,是个系统window
            params.type = WindowManager.LayoutParams.TYPE_TOAST;
            params.setTitle("Toast");
            //window的flags
            params.flags = WindowManager.LayoutParams.FLAG_KEEP_SCREEN_ON
                    | WindowManager.LayoutParams.FLAG_NOT_FOCUSABLE
                    | WindowManager.LayoutParams.FLAG_NOT_TOUCHABLE;

            mPackageName = packageName;

			//这里可知,必须在有looper的线程才能new Toast,为啥呢?因为前面分析NMS中调用TN的show、Hide,因为是IPC过程,实际在App这边执行是在Bind线程池中进行的,所以需要切换到当前发Toast的线程
            if (looper == null) {
                // Use Looper.myLooper() if looper is not specified.
                looper = Looper.myLooper();
                if (looper == null) {
                    throw new RuntimeException(
                            "Can't toast on a thread that has not called Looper.prepare()");
                }
            }
            mHandler = new Handler(looper, null) {
                @Override
                public void handleMessage(Message msg) {
                    switch (msg.what) {
                        case SHOW: {
                            IBinder token = (IBinder) msg.obj;
                            handleShow(token);
                            break;
                        }
                        case HIDE: {
                            handleHide();
                            // Don't do this in handleHide() because it is also invoked by
                            // handleShow()
                            mNextView = null;
                            break;
                        }
                        case CANCEL: {
                            handleHide();
                            // Don't do this in handleHide() because it is also invoked by
                            // handleShow()
                            mNextView = null;
                            try {
                                getService().cancelToast(mPackageName, TN.this);
                            } catch (RemoteException e) {
                            }
                            break;
                        }
                    }
                }
            };
        }

        /**
         * schedule handleShow into the right thread
         */
        @Override
        public void show(IBinder windowToken) {
            if (localLOGV) Log.v(TAG, "SHOW: " + this);
            mHandler.obtainMessage(SHOW, windowToken).sendToTarget();
        }

        /**
         * schedule handleHide into the right thread
         */
        @Override
        public void hide() {
            if (localLOGV) Log.v(TAG, "HIDE: " + this);
            mHandler.obtainMessage(HIDE).sendToTarget();
        }

        public void cancel() {
            if (localLOGV) Log.v(TAG, "CANCEL: " + this);
            mHandler.obtainMessage(CANCEL).sendToTarget();
        }

        public void handleShow(IBinder windowToken) {
            ...
            if (mView != mNextView) {
                // remove the old view if necessary
                handleHide();
                //mNextView赋值给mView
                mView = mNextView;
                ...
                //1.获取WindowManager
                mWM = (WindowManager)context.getSystemService(Context.WINDOW_SERVICE);
                // the layout direction
                final Configuration config = mView.getContext().getResources().getConfiguration();
                final int gravity = Gravity.getAbsoluteGravity(mGravity, config.getLayoutDirection());
                ...
                ...
                try {
                	//2.windowManager的addView
                    mWM.addView(mView, mParams);
                    trySendAccessibilityEvent();
                } catch (WindowManager.BadTokenException e) {
                    /* ignore */
                }
            }
        }

        public void handleHide() {
            if (localLOGV) Log.v(TAG, "HANDLE HIDE: " + this + " mView=" + mView);
            if (mView != null) {
                if (mView.getParent() != null) {
                    if (localLOGV) Log.v(TAG, "REMOVE! " + mView + " in " + this);
                    //windowManager的removeView
                    mWM.removeViewImmediate(mView);
                }
			...
                mView = null;
            }
        }
    }
所以,TN才是Toast中真正处理Window创建的地方。
好了,Window讲完啦!
参考: 初步理解 Window 体系 Window, WindowManager和WindowManagerService之间的关系
.
好了,今天就到这里,欢迎留言讨论~
你的 点赞、评论、收藏、转发,是对我的巨大鼓励!
欢迎关注我的 公 众 号:
