

前言
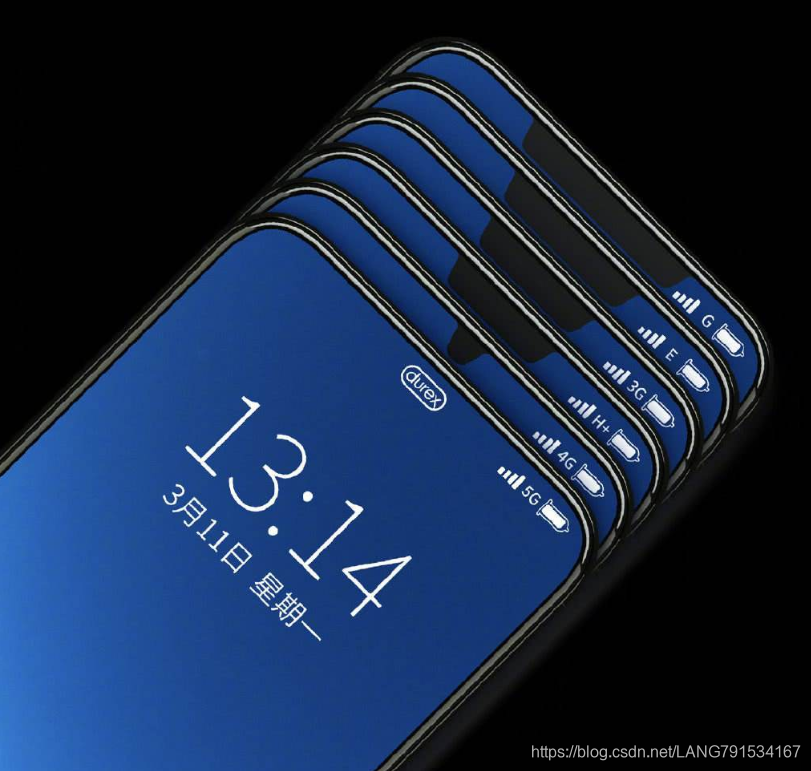
刘海屏是Apple公司在iPhone X率先推出的,后续Android阵营陆续跟进,众所周知Android机型碎片化极其严重,在Google官方正式推出适配方案前,Android开发开发者对各大厂商设备需单独进行刘海屏适配,工作量可想而知。

概要
Google官方在Android 9.0 后对刘海屏进行了支持,本文内容便是基于官方刘海屏解决方案进行介绍:
- 模拟器 开启刘海屏设置
- 官方适配方案 (不适配默认效果) 声明xml 以及代码
- 实现三个刘海屏适配案例
- 应用引导页刘海屏
- 刘海区域和交互控件重合适配
- 沉浸式小说阅读页面刘海屏适配
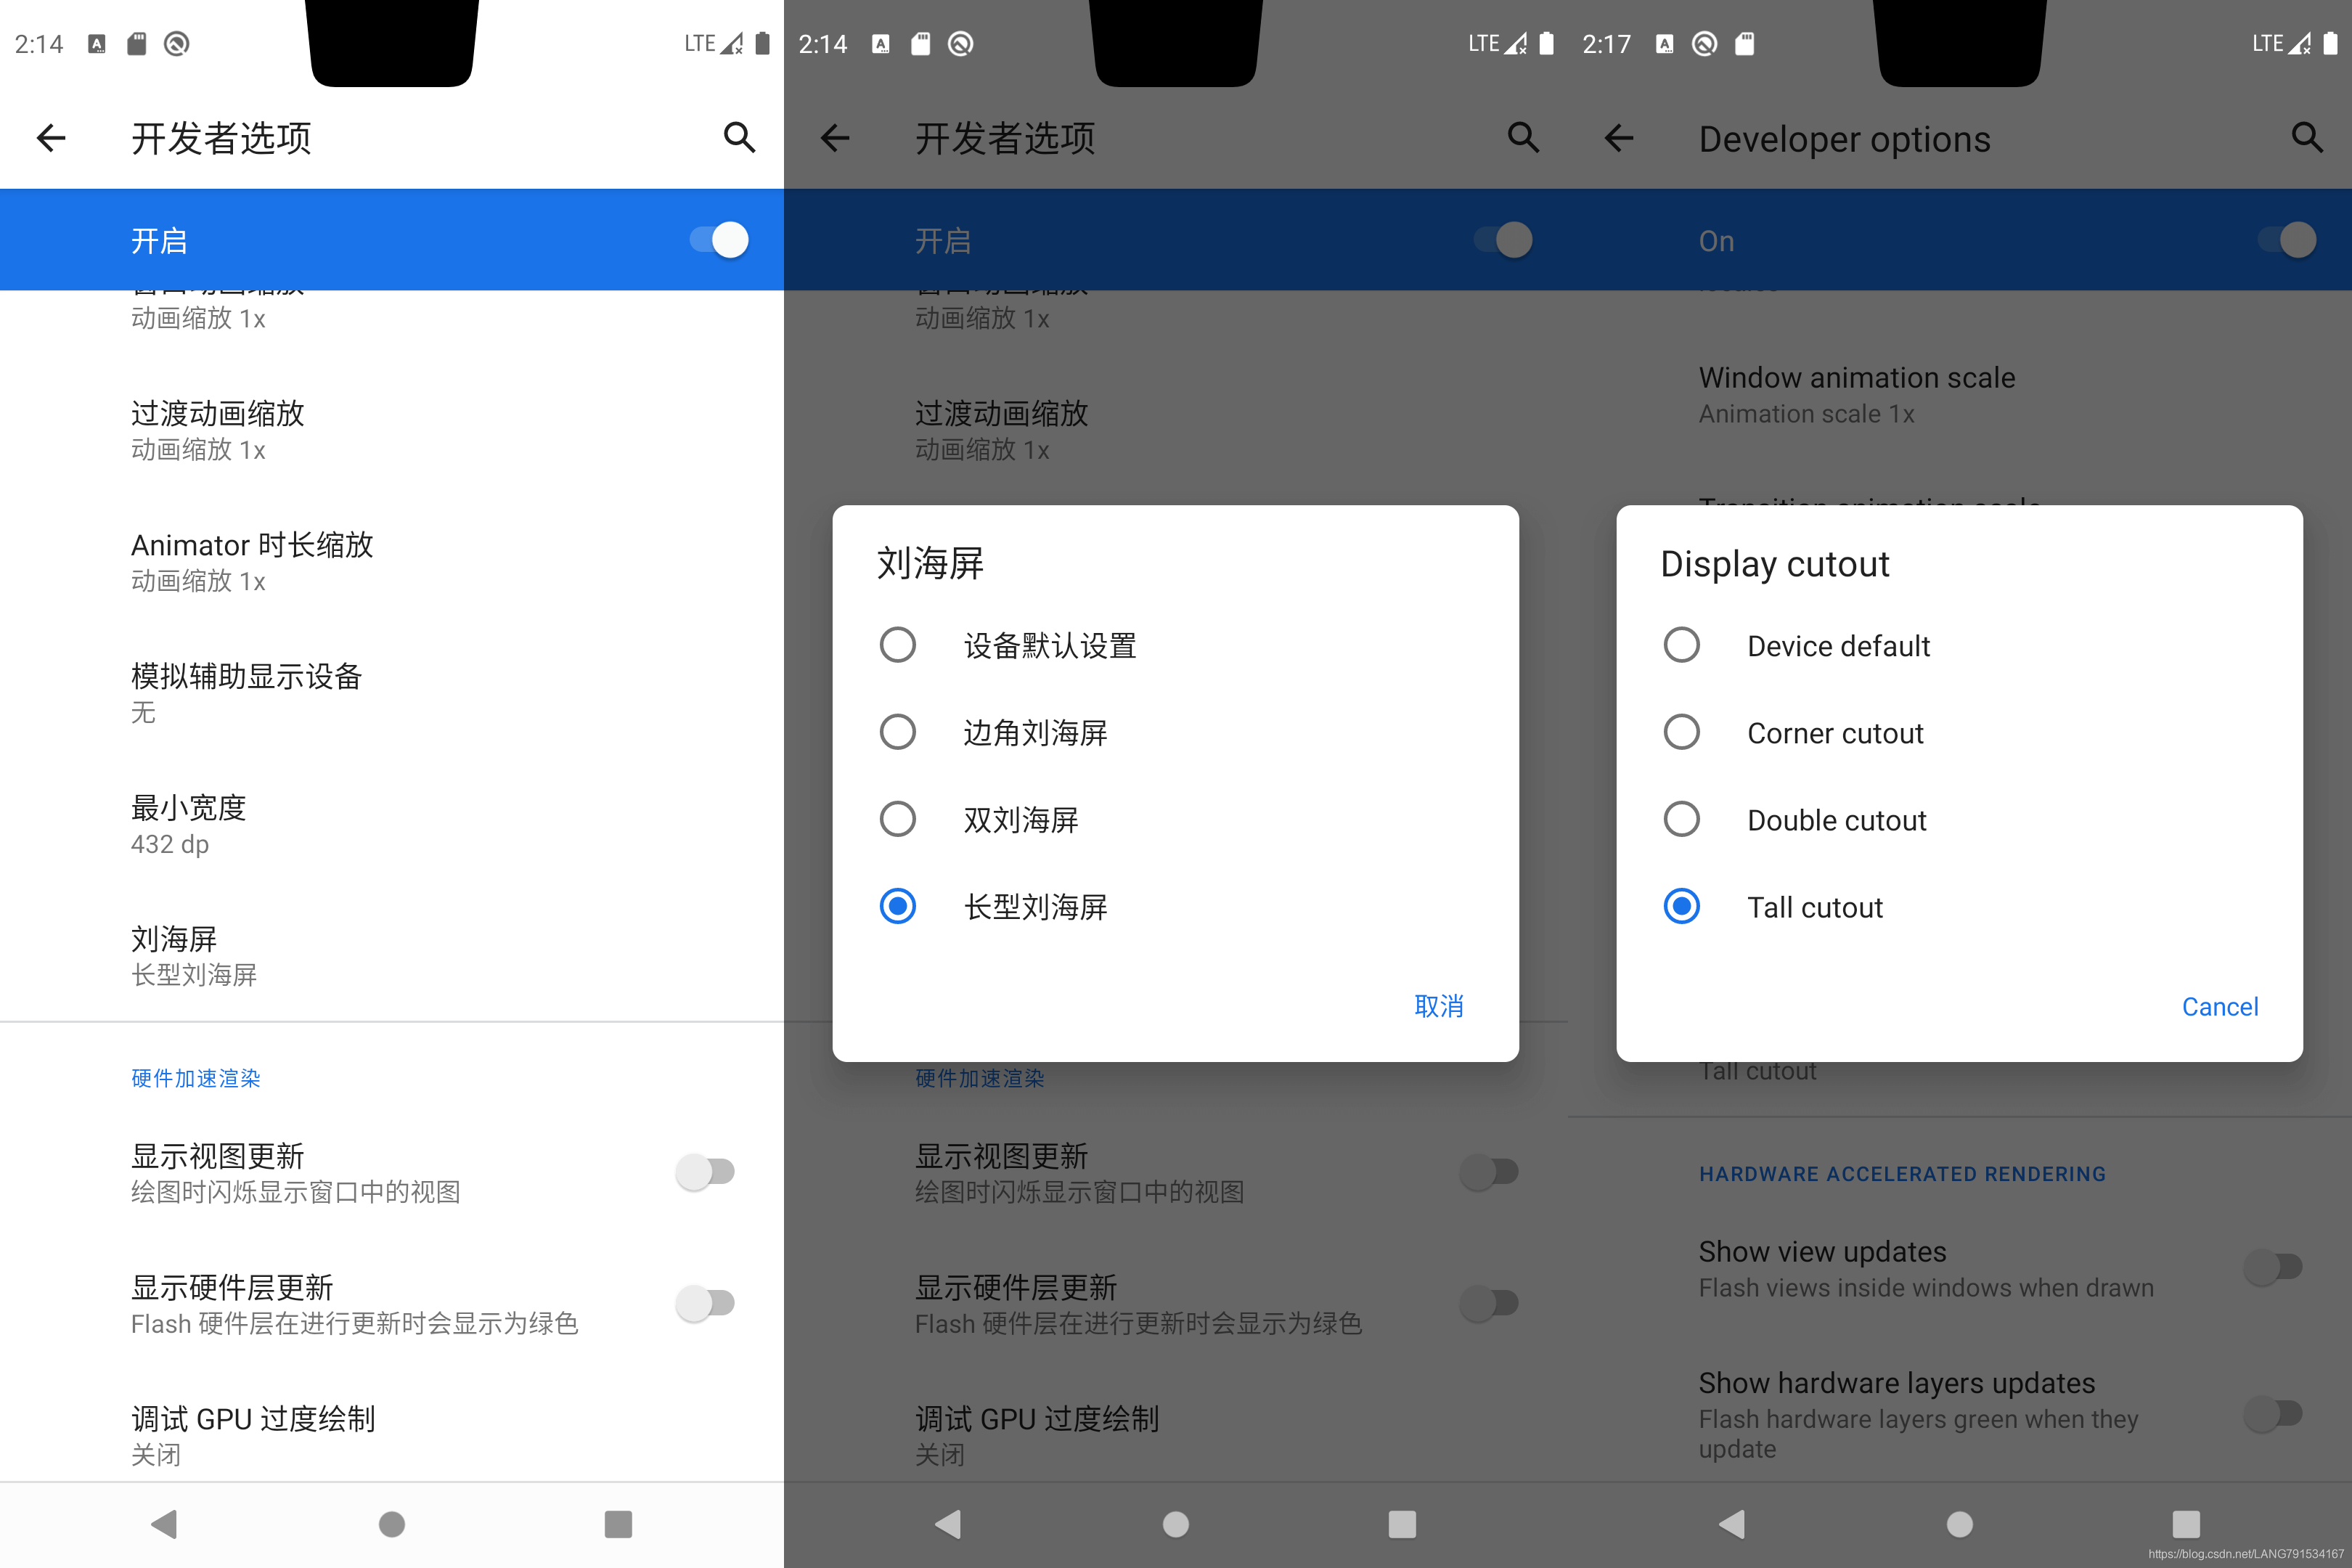
模拟器开启刘海屏设置
工欲善其事必先利其器,如果手上没有一台刘海屏的真机进行开发,我们可通过设置模拟器来展示各类刘海屏;按照以下步骤设置模拟器为指定刘海屏类型
- 中文设置:开发者选项 --> 刘海屏
- English Mode: Developer option --> Display cutout
Google官方适配方案
步入正题开始刘海屏的适配,按照官方文档在Android 9.0后 及API28 支持java代码实现以及xml声明两种方式,两者原理一致,均是通过设置页面DecorView的LayoutParams.layoutInDisplayCutoutMode属性来实现是否支持刘海屏,LayoutParams.layoutInDisplayCutoutMode有以下3种模式:
- WindowManager.LayoutParams.LAYOUT_IN_DISPLAY_CUTOUT_MODE_DEFAULT 默认属性,内容不会显示到刘海区域
- WindowManager.LayoutParams.LAYOUT_IN_DISPLAY_CUTOUT_MODE_SHORT_EDGES 内容会显示到刘海区域
- WindowManager.LayoutParams.LAYOUT_IN_DISPLAY_CUTOUT_MODE_NEVER 内容永远不显示到刘海区域
java代码实现刘海屏
关键代码如下:
WindowManager.LayoutParams layoutParams = getWindow().getAttributes();
layoutParams.layoutInDisplayCutoutMode = WindowManager.LayoutParams.LAYOUT_IN_DISPLAY_CUTOUT_MODE_SHORT_EDGES;
View decorView = getWindow().getDecorView();
decorView.setLayoutParams(layoutParams);
测试发现除了 设置页面DecorView的LayoutParams.layoutInDisplayCutoutMode属性为LayoutParams.LAYOUT_IN_DISPLAY_CUTOUT_MODE_SHORT_EDGES后运行发现页面内容并未显示到刘海区域
这是由于我们还未设置屏幕为全屏显示,接下来我们在onCreate()方法的setContentView()方法设置页面全屏显示
//设置全屏显示
requestWindowFeature(Window.FEATURE_NO_TITLE);
getWindow().setFlags(WindowManager.LayoutParams.FLAG_FULLSCREEN, WindowManager.LayoutParams.FLAG_FULLSCREEN);
此时,已实现了我们将内容区域显示至刘海屏区域,但在部分Android设备上可能出现不允许内容视图与系统栏重叠,因此要替换此行为并强制内容延伸到刘海区域,通过 View.setSystemUiVisibility(int) 方法将页面显示为沉浸式显示
int systemUiVisibility = getWindow().getDecorView().getSystemUiVisibility();
        int flags = View.SYSTEM_UI_FLAG_LAYOUT_STABLE
                | View.SYSTEM_UI_FLAG_LAYOUT_HIDE_NAVIGATION
                | View.SYSTEM_UI_FLAG_LAYOUT_FULLSCREEN;
        systemUiVisibility |= flags;
        getWindow().getDecorView().setSystemUiVisibility(systemUiVisibility);
xml声明页面支持刘海屏
以上便是内容区域显示到刘海区域的全部代码实现,同样的我们也可以通过声明xml布局的形式指定刘海屏 在res/values-28 文件中声明style支持刘海屏样式
<resources>
    <style name="CutoutsActivityTheme" parent="AppTheme">
        <!-- default, shortEdges, never -->
        <item name="android:windowLayoutInDisplayCutoutMode">shortEdges</item>
    </style>
</resources>
声明刘海屏样式后可在AndroidManifest.xml的application和activity节点下指定theme为刘海屏样式,如果application节点下声明表示该应用下所有页面均适配该刘海屏样式,activity节点下指定则只针对指定页面,一般根据具体需求决定;下面以activity节点下指定刘海屏样式为例:
<activity
        android:name=".LeadActivity"
        android:theme="@style/CutoutsActivityTheme">
注意:在activity节点下指定刘海屏样式后,同样需在对应Activity.java代码中设置页面全屏以及设置View.setSystemUiVisibility(int)
了解了刘海屏的具体适配的方法,接下来就结合具体3个常见场景进行应用
场景1:适配刘海屏的引导页
一般应用启动页为一张图片用于展示App名称,在刘海屏设备上如未做刘海屏适配,那么纯背景图上方有条与背景图割裂的状态,用户体验则大打折扣,所以引导页适配刘海屏是及其有必要的;
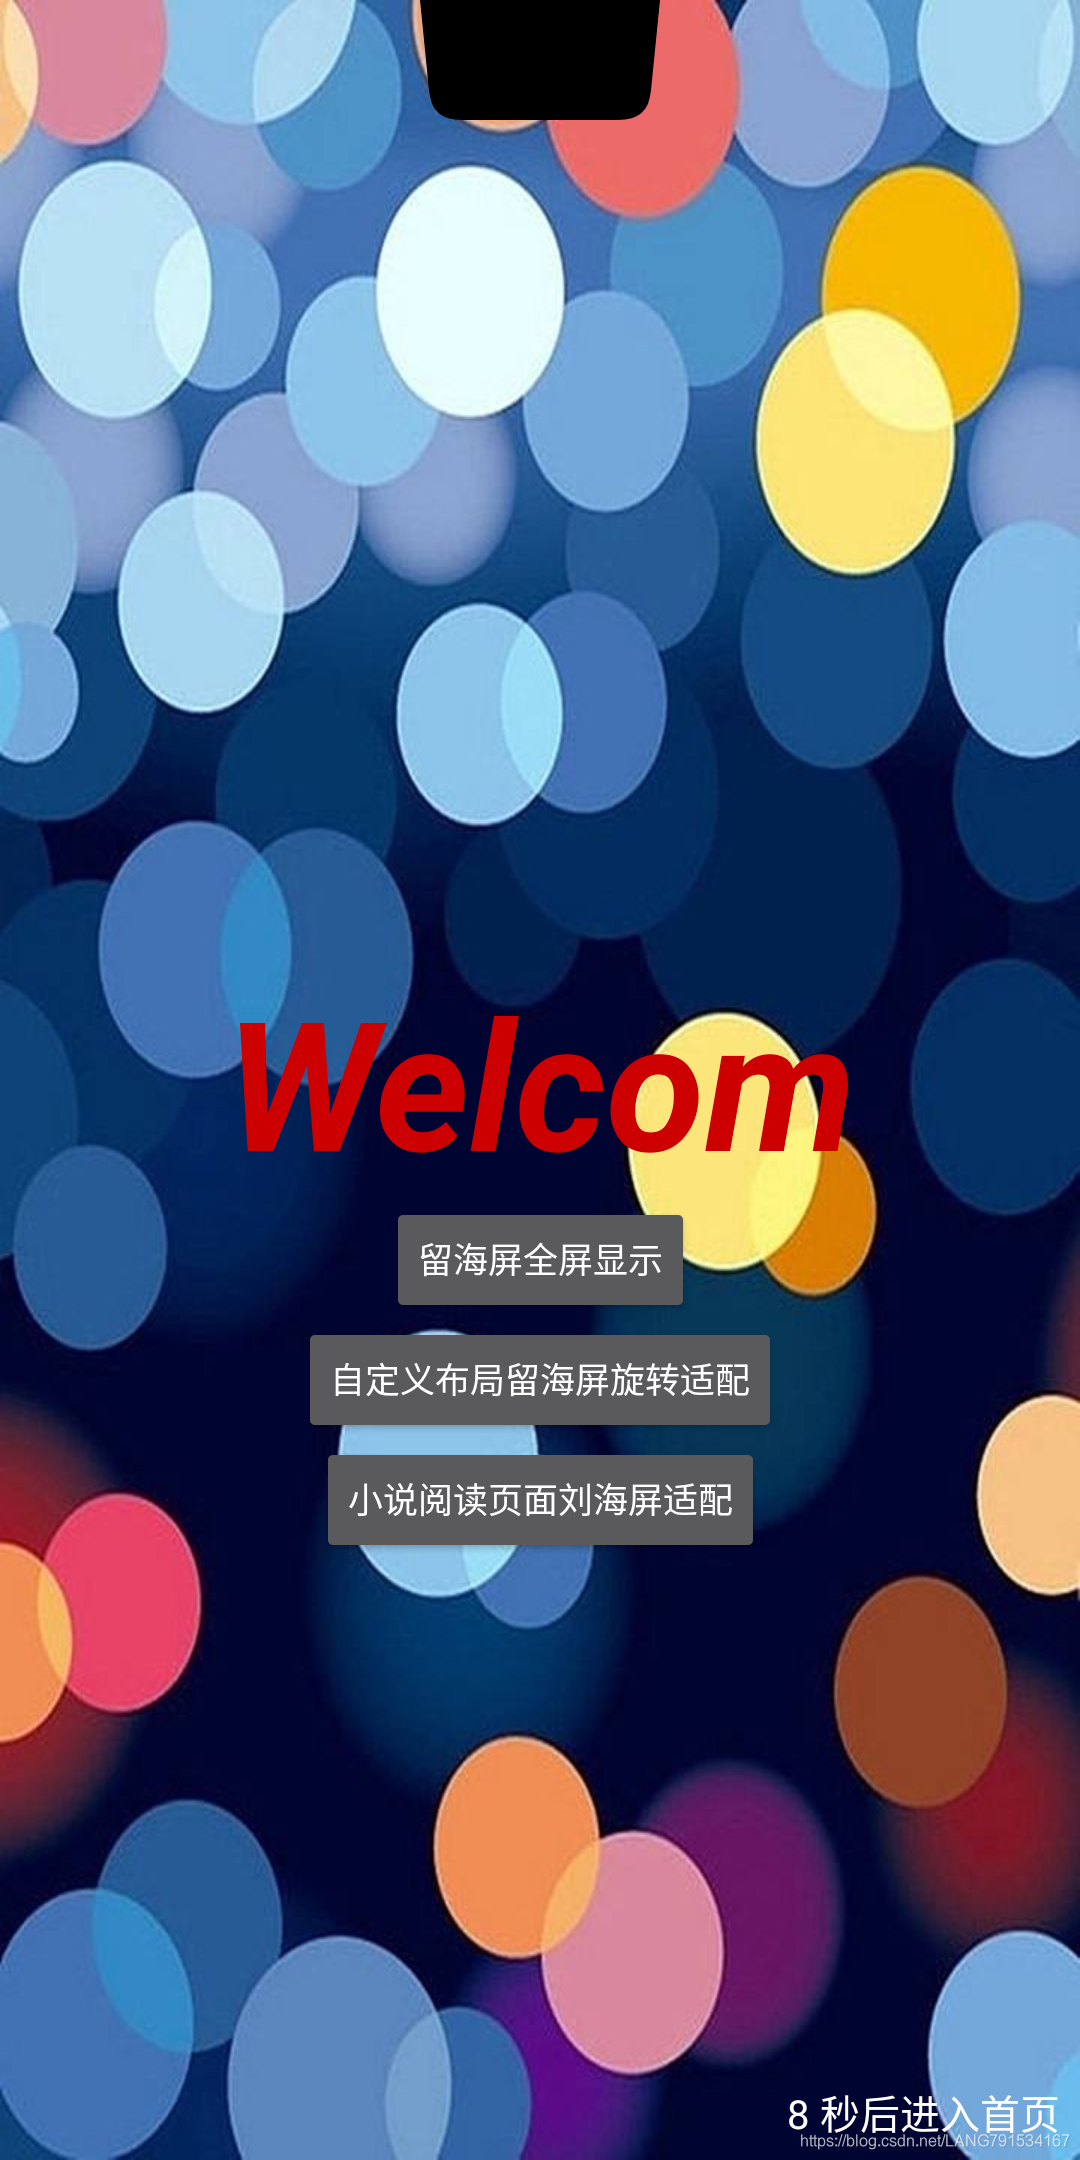
这个案例我们通过声明style.xml 方式声明刘海屏模式,同时通过下面代码可以看到,我们将设置页面全屏的代码也通过style声明
<style name="CutoutsActivityTheme" parent="splashThem">
        <item name="android:windowFullscreen">true</item><!--全屏-->
        <item name="android:windowContentOverlay">@null</item><!--内容区域覆盖-->
        <item name="android:windowTranslucentStatus">true</item><!--沉浸透明状态栏-->
        <item name="android:windowBackground">@drawable/bg</item><!--冷启动背景图片-->
        <!-- default, shortEdges, never -->
        <item name="android:windowLayoutInDisplayCutoutMode">shortEdges</item><!--刘海适配模式-->
</style>
同样的我们在引导页的activity节点下指定刘海屏样式后,开始在引导页代码中再设置为沉浸式显示即可
int systemUiVisibility = getWindow().getDecorView().getSystemUiVisibility();
        int flags = View.SYSTEM_UI_FLAG_LAYOUT_STABLE
                | View.SYSTEM_UI_FLAG_LAYOUT_HIDE_NAVIGATION
                | View.SYSTEM_UI_FLAG_LAYOUT_FULLSCREEN;
        systemUiVisibility |= flags;
        getWindow().getDecorView().setSystemUiVisibility(systemUiVisibility);
场景2:刘海区域和交互控件重合适配
以上案例的适配我们仅仅实现了将页面内容强制显示到刘海区,那么问题来了,如果页面的某一个交互控件如按钮之类的控件恰好被刘海遮挡住了,那么该控件就无法点击,严重影响了用户体验;
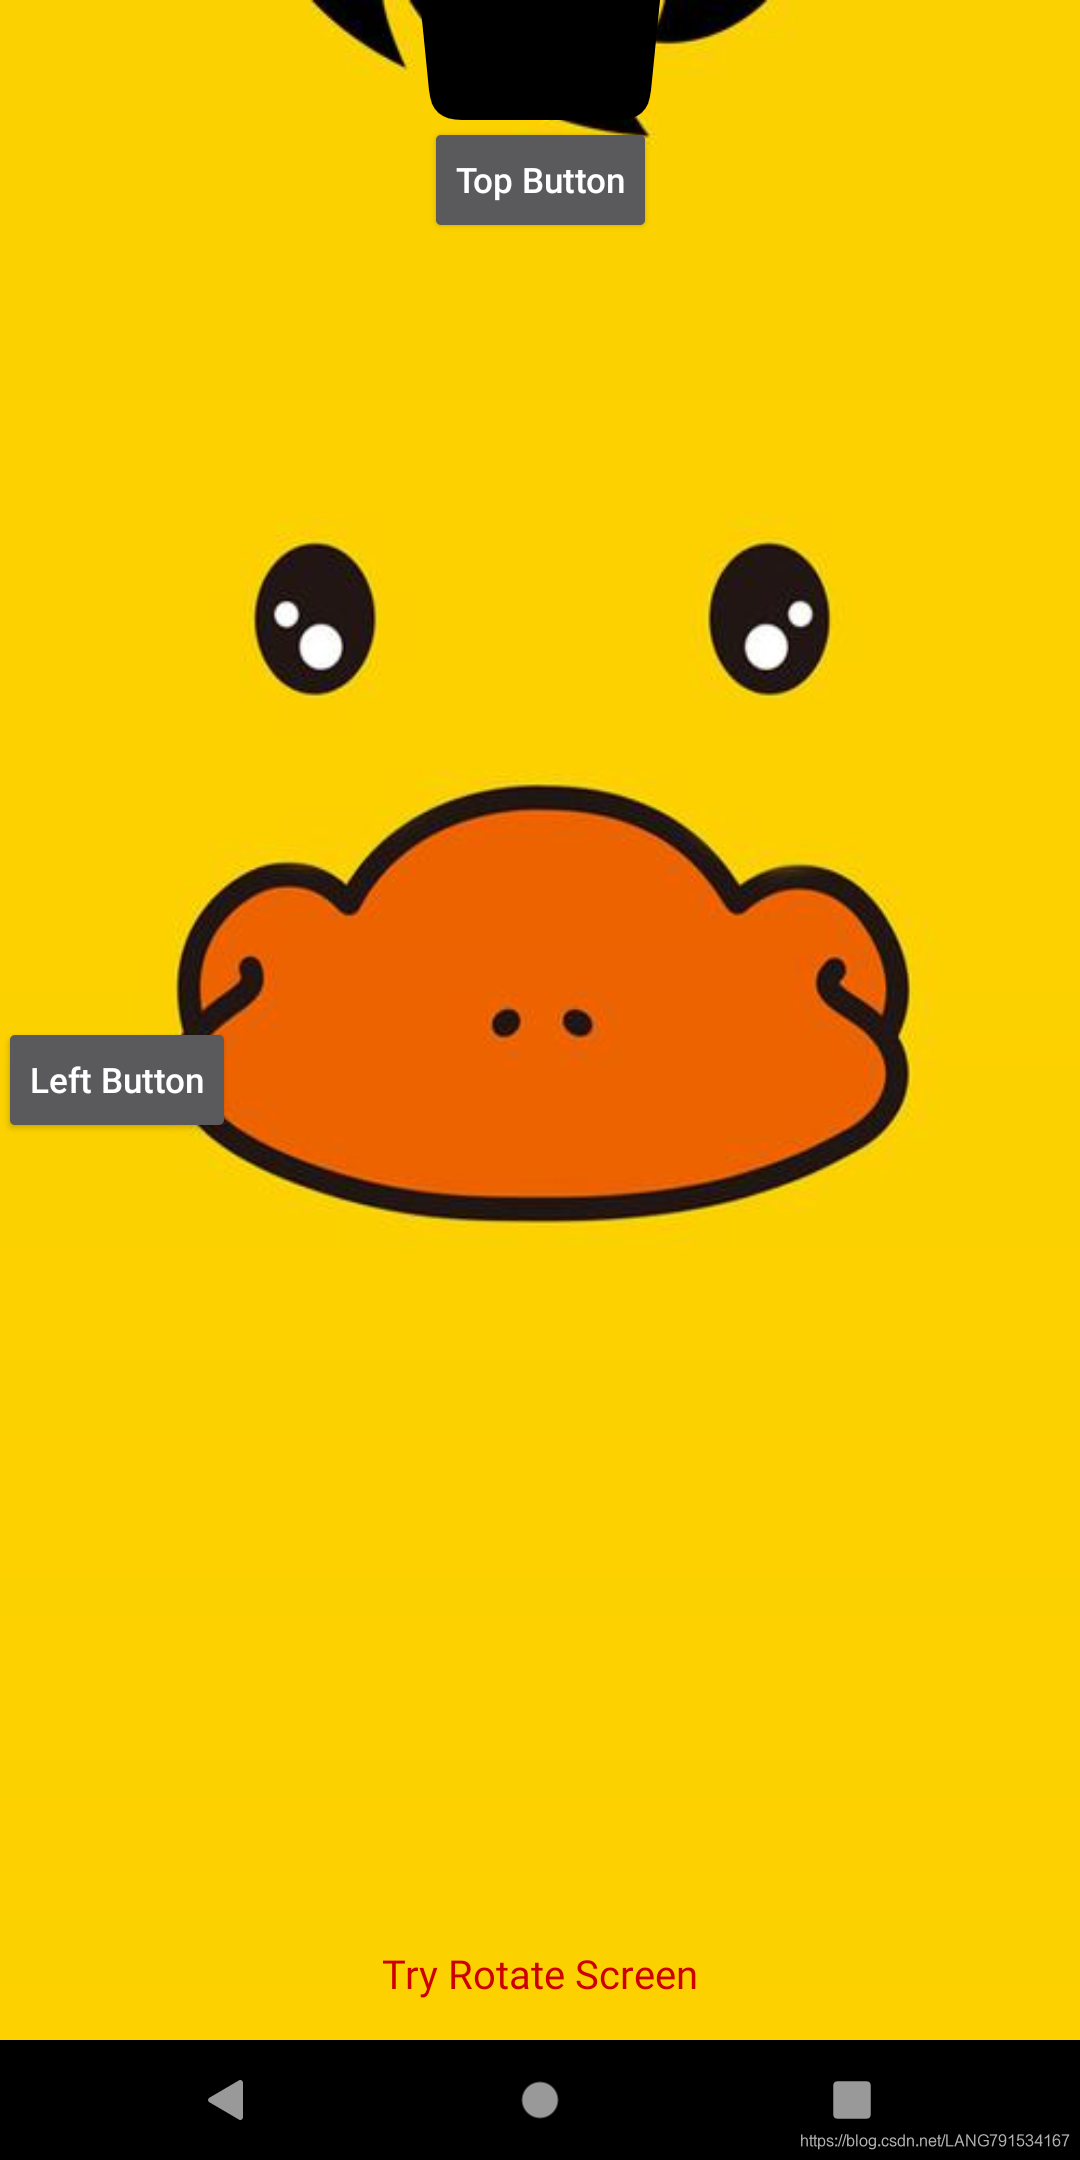
我的解决思路是 通过获取内容区域(即安全区域)距离屏幕边缘距离后,设置内容区域margin值为距离值即可:
此处我们需要用到View.setOnApplyWindowInsetsListener这个api,监听页面变化情况,从而获取页面内容到刘海区域,从而动态修改指定控件的setMargins来实现控件和刘海屏不重叠
rootLayout.setOnApplyWindowInsetsListener(new View.OnApplyWindowInsetsListener() {
            @Override
            public WindowInsets onApplyWindowInsets(View v, WindowInsets insets) {
                //获取刘海区域
                DisplayCutout displayCutout = insets.getDisplayCutout();
                if (displayCutout != null) {
                    int top = displayCutout.getSafeInsetTop();
                    int bottom = displayCutout.getSafeInsetBottom();
                    int left = displayCutout.getSafeInsetLeft();
                    int right = displayCutout.getSafeInsetRight();

                    Log.i("displayCutout", "安全区域距离屏幕左边的距离 SafeInsetLeft:" + left);
                    Log.i("displayCutout", "安全区域距离屏幕右部的距离 SafeInsetRight:" + right);
                    Log.i("displayCutout", "安全区域距离屏幕顶部的距离 SafeInsetTop:" + top);
                    Log.i("displayCutout", "安全区域距离屏幕底部的距离 SafeInsetBottom:" + bottom);
                    ConstraintLayout.LayoutParams topLayoutParams = (ConstraintLayout.LayoutParams) btnTop.getLayoutParams();
                    ConstraintLayout.LayoutParams leftLayoutParams = (ConstraintLayout.LayoutParams) btnLeft.getLayoutParams();
                    topLayoutParams.setMargins(left, top, right, bottom);
                    leftLayoutParams.setMargins(left, top, right, bottom);
                }
                return insets.consumeDisplayCutout();
            }
        });
- 完整案例代码如下
public class CustomLayoutRotateActivity extends AppCompatActivity {

    private Button btnTop;
    private Button btnLeft;
    private ConstraintLayout rootLayout;

    public static void start(Context context) {
        Intent starter = new Intent(context, CustomLayoutRotateActivity.class);
        context.startActivity(starter);
    }

    @Override
    protected void onCreate(Bundle savedInstanceState) {
        super.onCreate(savedInstanceState);
        //设置全屏
        requestWindowFeature(Window.FEATURE_NO_TITLE);
        getWindow().setFlags(WindowManager.LayoutParams.FLAG_FULLSCREEN, WindowManager.LayoutParams.FLAG_FULLSCREEN);

        setContentView(R.layout.activity_custom_layout_rotate);
        initView();

        if (Build.VERSION.SDK_INT >= Build.VERSION_CODES.P) {
            initCutouts();
            setWindowListener();
        }


    }

    private void initView() {
        btnTop = findViewById(R.id.btn_top);
        btnLeft = findViewById(R.id.btn_left);
        rootLayout = findViewById(R.id.root_layout_custom);


    }

    /***
     * 监听根布局,初始化或屏幕旋转时触发, 动态计算刘海区位置,从而设置对应子控件的位置
     */
    @RequiresApi(api = Build.VERSION_CODES.P)
    private void setWindowListener() {
        rootLayout.setOnApplyWindowInsetsListener(new View.OnApplyWindowInsetsListener() {
            @Override
            public WindowInsets onApplyWindowInsets(View v, WindowInsets insets) {
                //获取刘海区域
                DisplayCutout displayCutout = insets.getDisplayCutout();
                if (displayCutout != null) {
                    int top = displayCutout.getSafeInsetTop();
                    int bottom = displayCutout.getSafeInsetBottom();
                    int left = displayCutout.getSafeInsetLeft();
                    int right = displayCutout.getSafeInsetRight();

                    Log.i("displayCutout", "安全区域距离屏幕左边的距离 SafeInsetLeft:" + left);
                    Log.i("displayCutout", "安全区域距离屏幕右部的距离 SafeInsetRight:" + right);
                    Log.i("displayCutout", "安全区域距离屏幕顶部的距离 SafeInsetTop:" + top);
                    Log.i("displayCutout", "安全区域距离屏幕底部的距离 SafeInsetBottom:" + bottom);
                    ConstraintLayout.LayoutParams topLayoutParams = (ConstraintLayout.LayoutParams) btnTop.getLayoutParams();
                    ConstraintLayout.LayoutParams leftLayoutParams = (ConstraintLayout.LayoutParams) btnLeft.getLayoutParams();
                    topLayoutParams.setMargins(left, top, right, bottom);
                    leftLayoutParams.setMargins(left, top, right, bottom);
                }
                return insets.consumeDisplayCutout();
            }
        });
    }

    /***
     * 设置全面屏适配
     */
    @RequiresApi(api = Build.VERSION_CODES.P)
    private void initCutouts() {
        /**
         * 1. WindowManager.LayoutParams.LAYOUT_IN_DISPLAY_CUTOUT_MODE_DEFAULT 默认,内部不显示到刘海区域
         * 2. WindowManager.LayoutParams.LAYOUT_IN_DISPLAY_CUTOUT_MODE_SHORT_EDGES 内部显示到刘海区域
         * 3. WindowManager.LayoutParams.LAYOUT_IN_DISPLAY_CUTOUT_MODE_NEVER 不显示
         */
        WindowManager.LayoutParams layoutParams = getWindow().getAttributes();
        layoutParams.layoutInDisplayCutoutMode = WindowManager.LayoutParams.LAYOUT_IN_DISPLAY_CUTOUT_MODE_SHORT_EDGES;
        View decorView = getWindow().getDecorView();
        decorView.setLayoutParams(layoutParams);

        /*设置状态栏 沉浸式,内容真正融入状态栏内
         * Android 可能不允许内容视图与系统栏重叠。要替换此行为并强制内容延伸到刘海区域,请通过 View.setSystemUiVisibility(int) 方法将以下任一标志应用于视图可见性:
         * View.SYSTEM_UI_FLAG_LAYOUT_STABLE 配合View.SYSTEM_UI_FLAG_LAYOUT_FULLSCREEN
         * 为页面布局设置一个稳定的区域,如果底部存在软键盘,则内容区域显示在软键盘之上
         * */
        int flags = View.SYSTEM_UI_FLAG_LAYOUT_STABLE
                | View.SYSTEM_UI_FLAG_LAYOUT_FULLSCREEN;
        getWindow().getDecorView().setSystemUiVisibility(flags);
    }
}
场景3:沉浸式小说阅读页面刘海屏适配
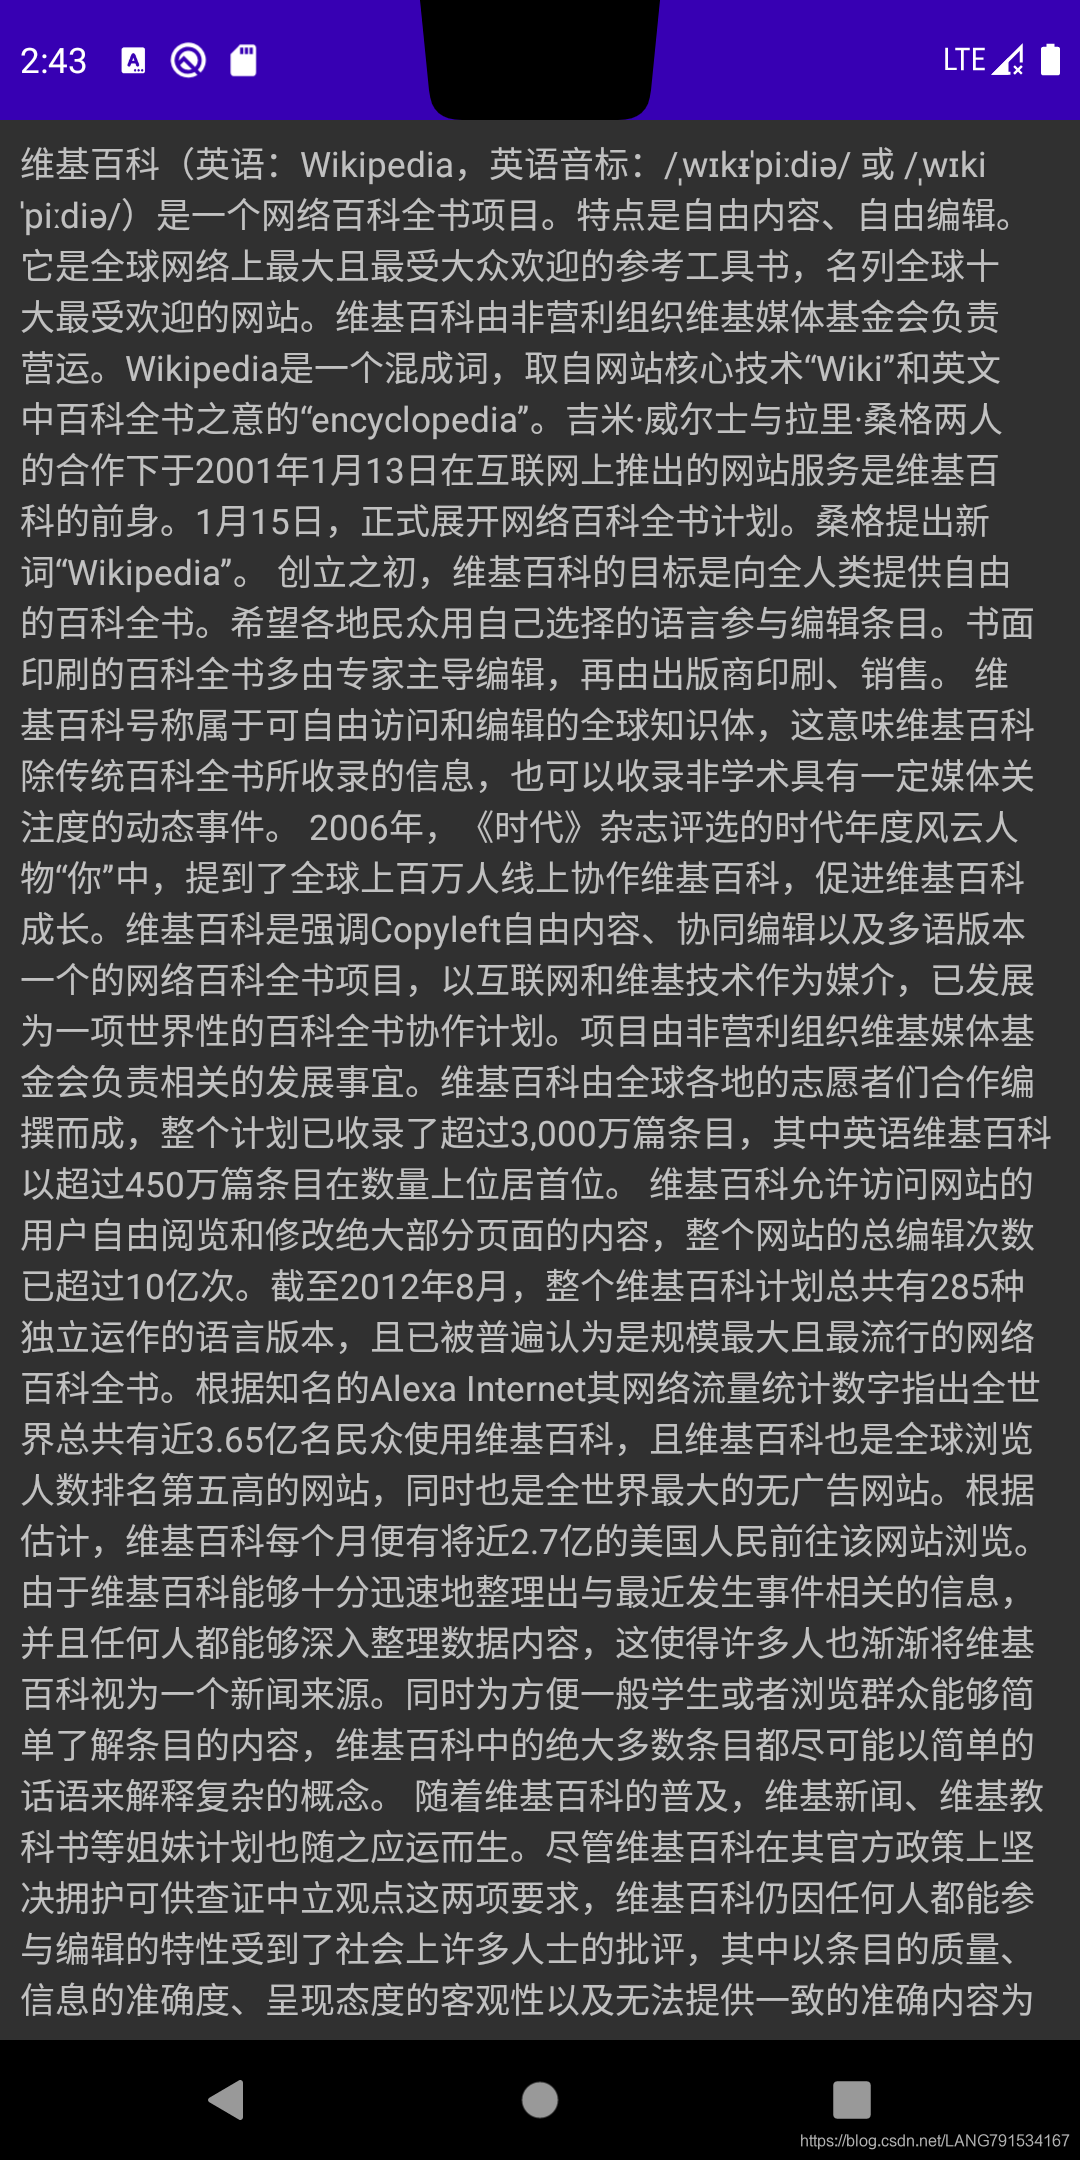
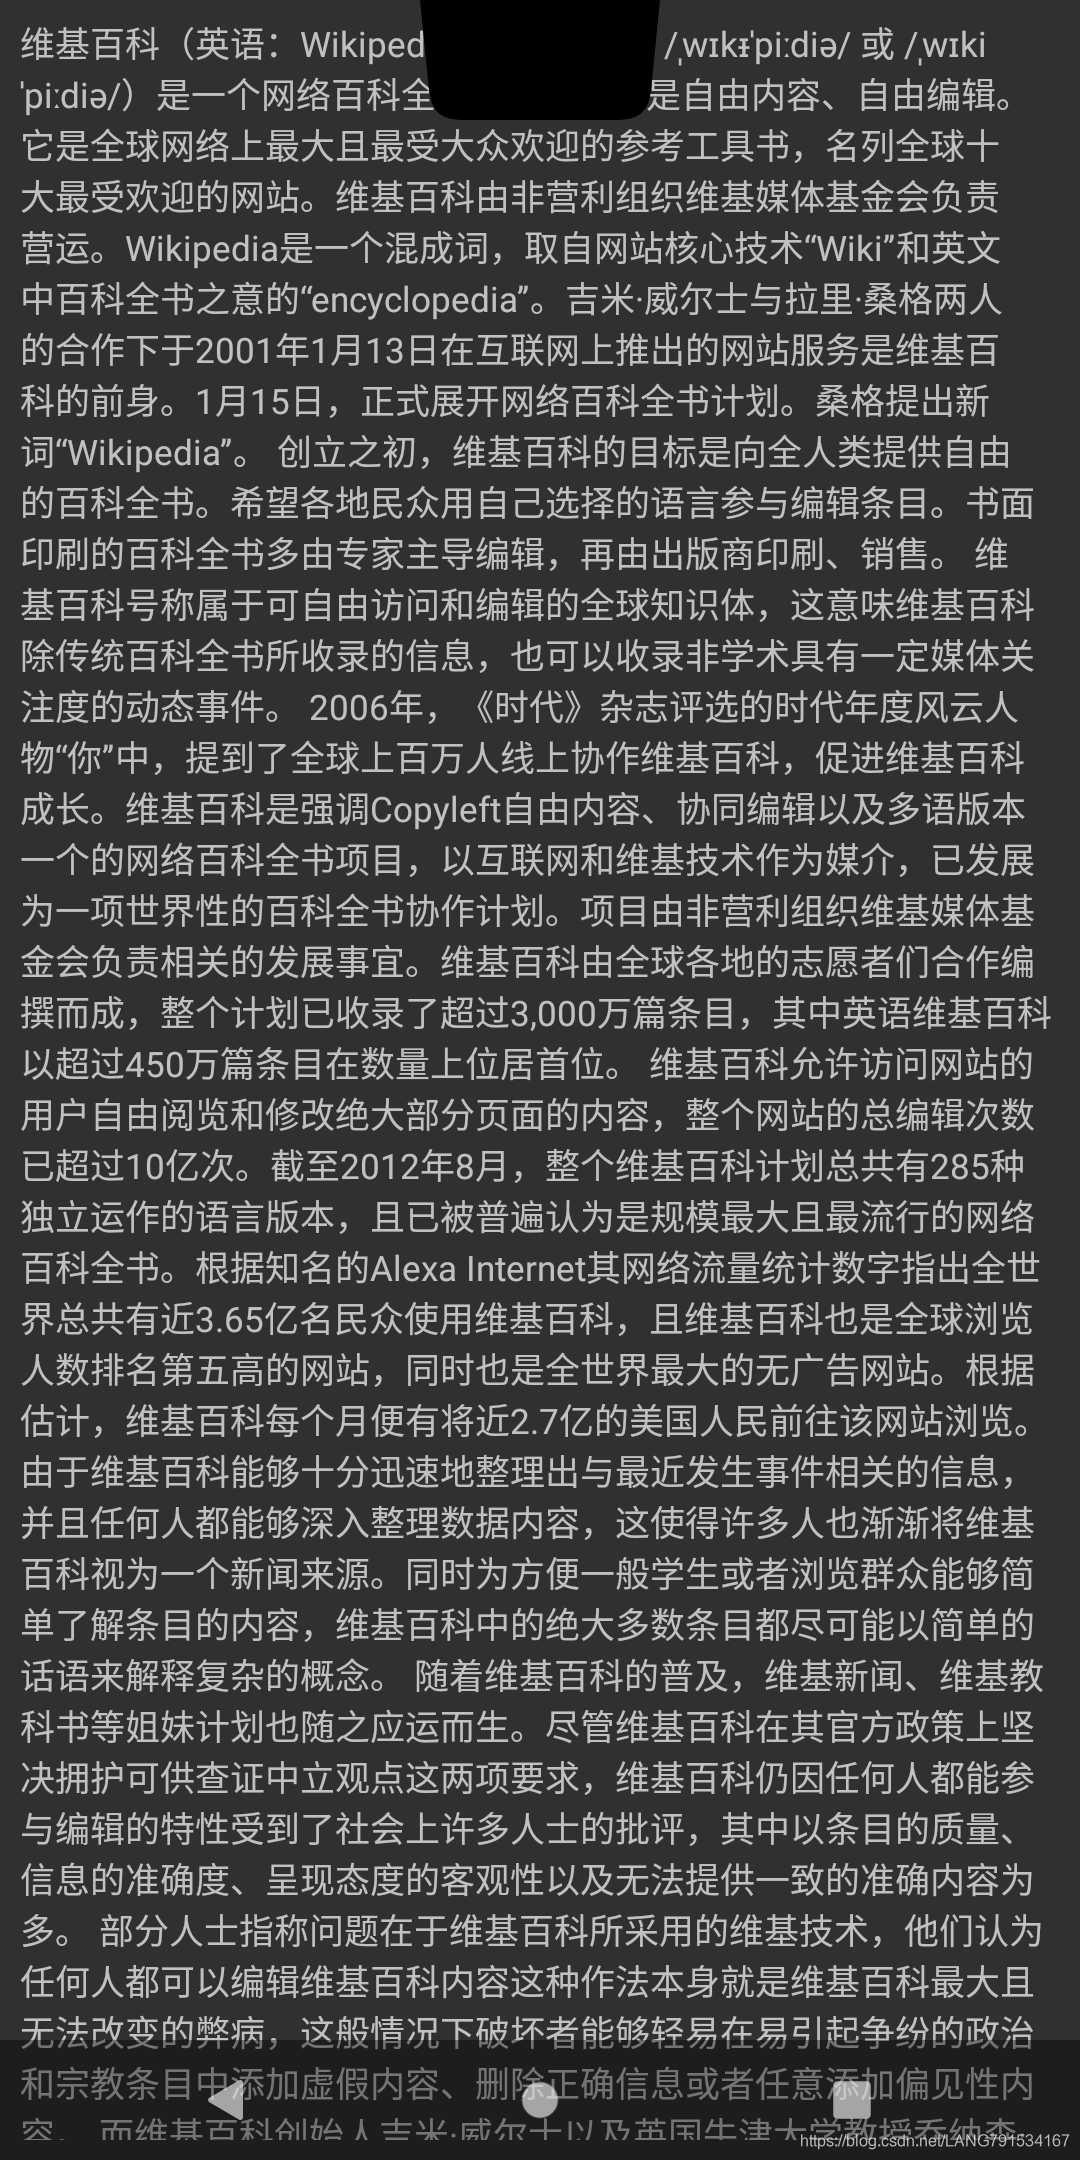
小说类、游戏类App对页面沉浸式要求较高,接下来的案例我们就一起完成一个沉浸式小说阅读页面刘海屏适配,实现小说内容显示在安全区域不与刘海区域重叠,小说标题则显示刘海区域左侧状态栏;
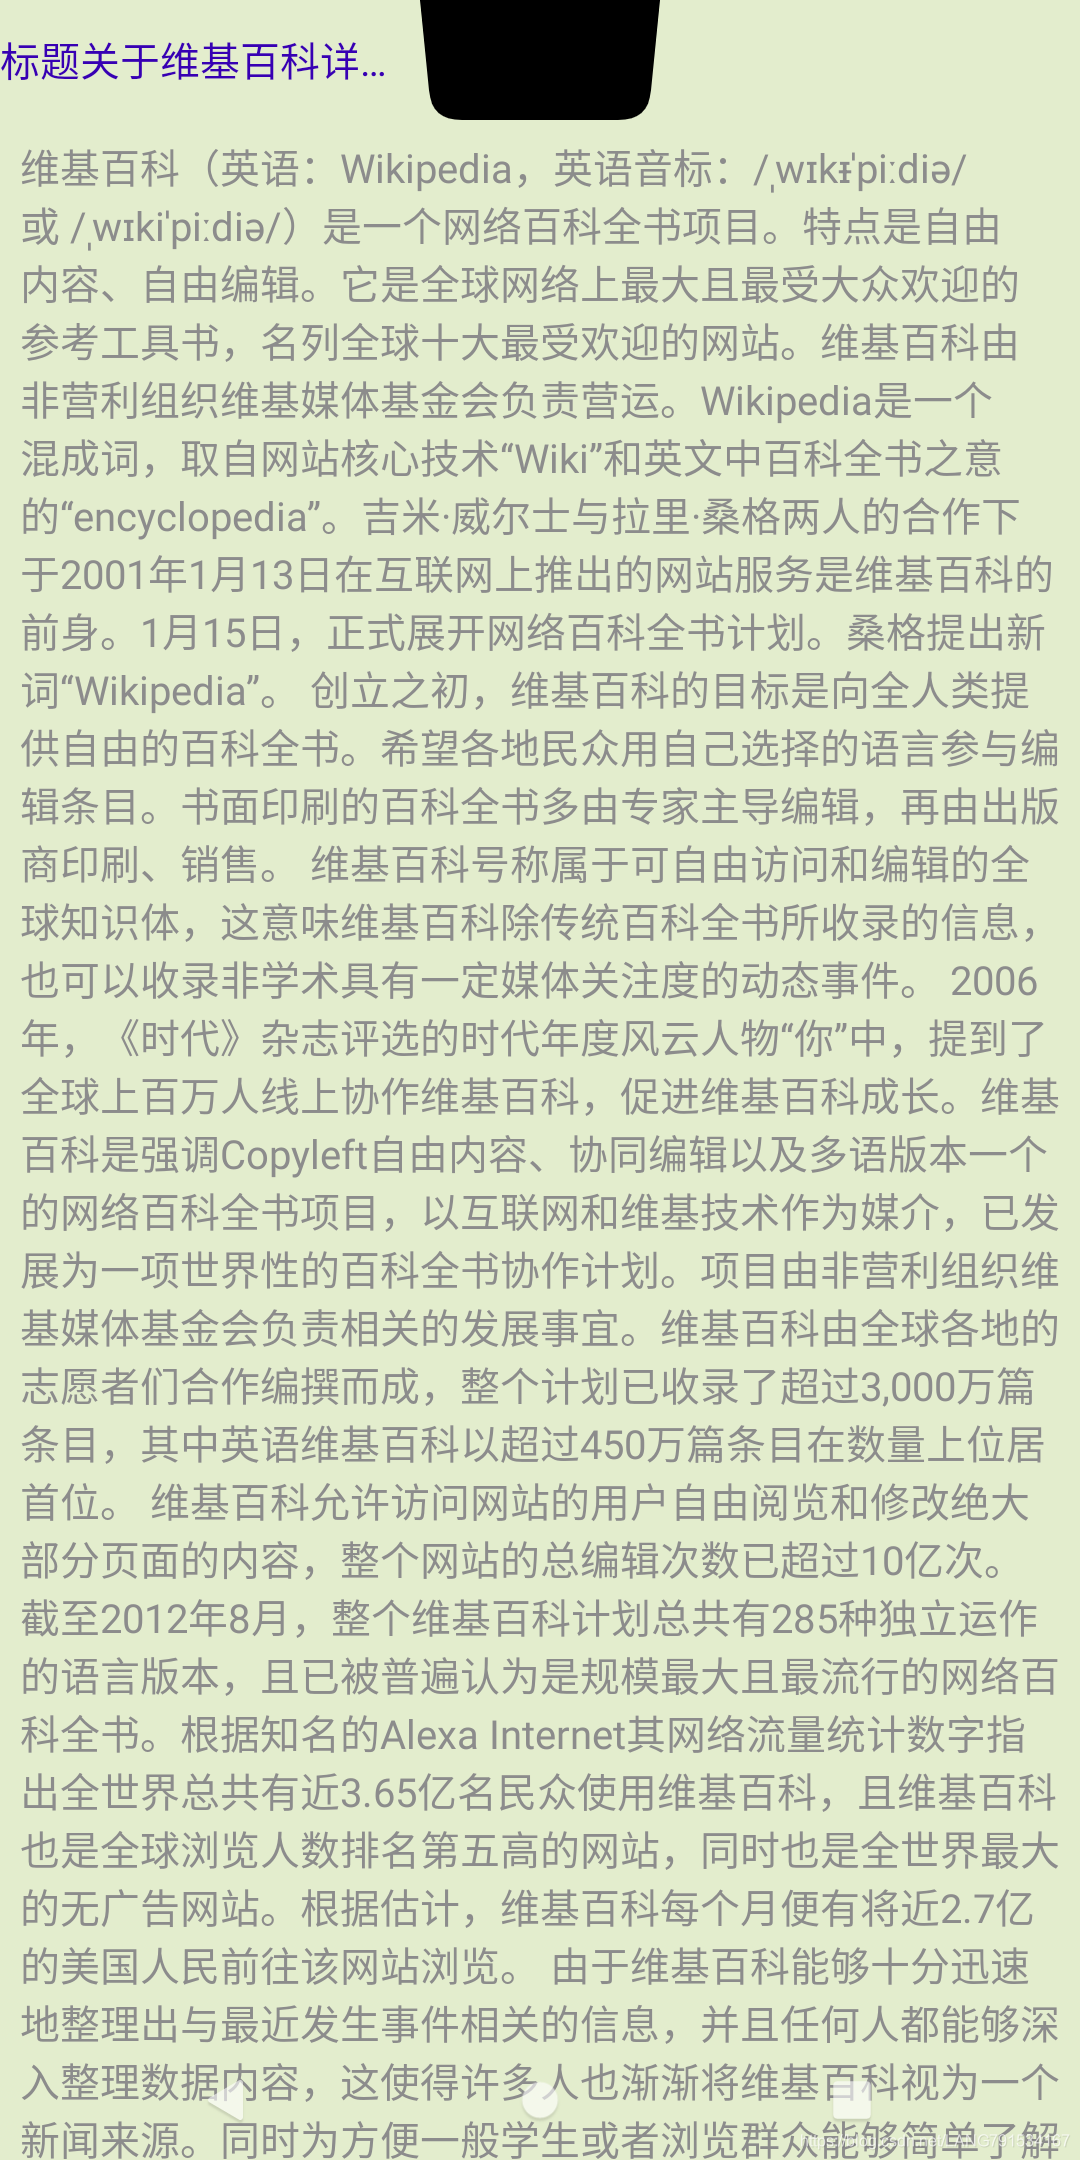
页面布局如下:
<?xml version="1.0" encoding="utf-8"?>
<FrameLayout xmlns:android="http://schemas.android.com/apk/res/android"
    xmlns:app="http://schemas.android.com/apk/res-auto"
    xmlns:tools="http://schemas.android.com/tools"
    android:layout_width="match_parent"
    android:layout_height="match_parent"
    android:background="#E3EDCD">

    <TextView
        android:id="@+id/tv_title_reader"
        android:layout_width="wrap_content"
        android:layout_height="wrap_content"
        android:ellipsize="end"
        android:text="@string/text_title_wiki"
        android:maxLines="1"
        android:padding="4dp"
        android:singleLine="true"
        android:textColor="@color/colorPrimaryDark"
        android:textSize="16sp" />

    <ScrollView
        android:id="@+id/scrollview_reader"
        android:layout_width="match_parent"
        android:layout_height="match_parent"
        tools:context=".CutOutsFullScreenActivity">

        <TextView
            android:id="@+id/tv_content_reader"
            android:layout_width="wrap_content"
            android:layout_height="wrap_content"
            android:padding="8dp"
            android:text="@string/text_about_wiki"
            android:textColor="#8C8C8C"
            android:textSize="16sp" />

    </ScrollView>
</FrameLayout>
在具体Activity页面内指定页面全屏、支持刘海模式、沉浸式状态栏后,我们依然通过上一个案例中View.setOnApplyWindowInsetsListener这个api,回调监听页面变化情况,动态获取刘海位置及大小
//获取刘海信息
DisplayCutout displayCutout = insets.getDisplayCutout();
//获取刘海上下左右位置,从而计算出刘海宽高
displayCutout.getBoundingRects();
思路如下: 通过动态获取刘海位置及大小,动态计算小说内容区域padding从而确保内容不与刘海重合;以竖屏模式为例,根据刘海大小位置在计算出刘海左侧状态栏空白区域宽度,并将其指定为标题宽度即可
getWindow().getDecorView().setOnApplyWindowInsetsListener(new View.OnApplyWindowInsetsListener() {
    @Override
    public WindowInsets onApplyWindowInsets(View v, WindowInsets insets) {
        //获取刘海信息
        DisplayCutout displayCutout = insets.getDisplayCutout();

        int top = displayCutout.getSafeInsetTop();
        int bottom = displayCutout.getSafeInsetBottom();
        int left = displayCutout.getSafeInsetLeft();
        int right = displayCutout.getSafeInsetRight();

        //通过scrollView padding设置内容不显示在安全区域 确保scrollView不与安全区域重合
        scrollView.setPadding(left, top, right, bottom);

        //获取刘海上下左右位置,从而计算出刘海宽高
        List<Rect> boundingList = displayCutout.getBoundingRects();
        if (!boundingList.isEmpty()) {
            FrameLayout.LayoutParams layoutParams = (FrameLayout.LayoutParams) scrollView.getLayoutParams();
            //获取刘海区域
            Rect boundRect = boundingList.get(0);
            //通过设置 scrollView和顶部标题间距
            Log.i("displayRect", "left:" + boundRect.left + " top:" + boundRect.top + " right:" + boundRect.right + " bottom:" + boundRect.bottom);
            if (top > 0) {
                //竖屏在顶部
                //标题强制显示在安全刘海区域,且宽度为顶部刘海区域左侧宽度
                tvTitle.setWidth(boundRect.left);
                tvTitle.setHeight(boundRect.bottom);
                tvTitle.setGravity(Gravity.CENTER_VERTICAL);
                layoutParams.setMargins(0, 0, 0, 0);
            } else if (left > 0 || right > 0) {
                //刘海在左 or 在右
                int height = tvTitle.getMeasuredHeight();
                layoutParams.setMargins(0, height, 0, 0);
            }
        }

        return insets.consumeDisplayCutout();
    }
});
参考1:https://blog.csdn.net/xiangzhihong8/article/details/91352441 参考2:https://blog.csdn.net/guolin_blog/article/details/103112795
