

from IntelliJ IDEA +maven+springboot入门项目helloworld
首先插播一个很简单、但可能大家不知道小技巧:
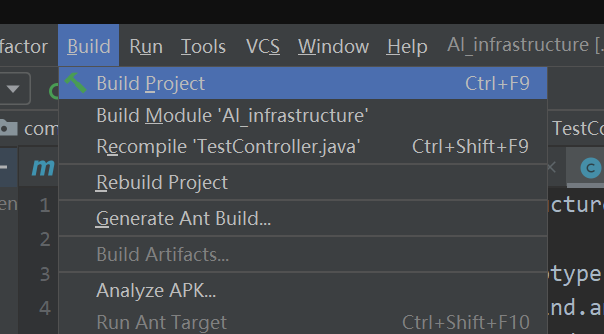
运行SpringBoot项目后,当修改代码后,只需要Build Project,代码就能生效,而不需要整个项目重新运行。
如果连Build都懒得点,可以设置IDEA自动Build,虽然我不是很推荐:IDEA 热启动,每次更改代码后不用重启服务(SpringBoot项目)
接下来进入正题,以下为转载内容:
1、创建maven工程
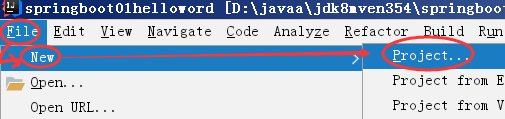
非web工程,不需要web项目。
下图有个错误,需要先勾选Create from archetype,才能选中maven-archetype-quickstart。

后面直接下一步,下一步即可。
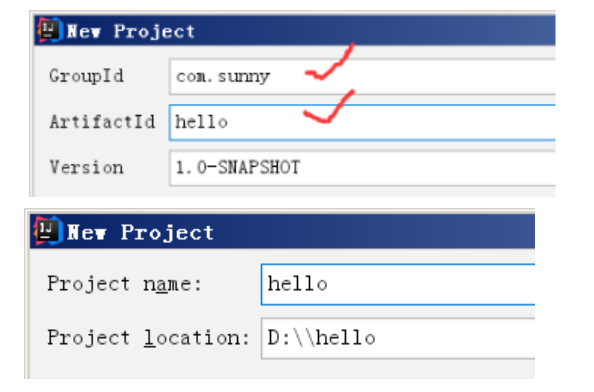
Maven项目创建完成。
2、配置springboot基本类
2.1 配置pom.xml文件
<?xml version="1.0" encoding="UTF-8"?>
<project xmlns="http://maven.apache.org/POM/4.0.0"
         xmlns:xsi="http://www.w3.org/2001/XMLSchema-instance"
         xsi:schemaLocation="http://maven.apache.org/POM/4.0.0 http://maven.apache.org/xsd/maven-4.0.0.xsd">
    <modelVersion>4.0.0</modelVersion>

    <groupId>com.sunny</groupId>
    <artifactId>hello</artifactId>
    <version>1.0-SNAPSHOT</version>

    <parent>
        <groupId>org.springframework.boot</groupId>
        <artifactId>spring-boot-starter-parent</artifactId>
        <version>1.5.2.RELEASE</version>
    </parent>
    <dependencies>
        <dependency>
            <groupId>org.springframework.boot</groupId>
            <artifactId>spring-boot-starter-web</artifactId>
        </dependency>
    </dependencies>

    <build>
        <plugins>
            <plugin>
                <groupId>org.springframework.boot</groupId>
                <artifactId>spring-boot-maven-plugin</artifactId>
            </plugin>
        </plugins>
    </build>
</project>
2.2 创建并配置Controller类
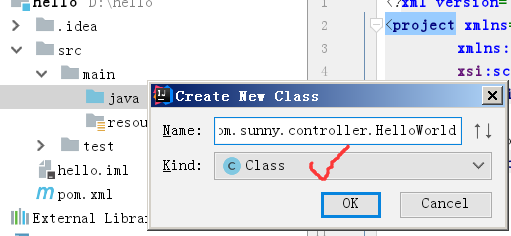
package com.sunny.controller;

import org.springframework.stereotype.Controller;
import org.springframework.web.bind.annotation.RequestMapping;
import org.springframework.web.bind.annotation.ResponseBody;

@Controller
public class HelloWorld {
    @ResponseBody
    @RequestMapping("/hello")
    public  String hello() {
        return  "Hello World...";
    }
}
2.3 配置启动类类
package com.sunny;

import org.springframework.boot.SpringApplication;
import org.springframework.boot.autoconfigure.SpringBootApplication;

@SpringBootApplication
public class HelloWorldMainApplication {
    public static void main(String[] args){
        //Spring应用启动起来
        SpringApplication.run(HelloWorldMainApplication.class,args);
    }
}
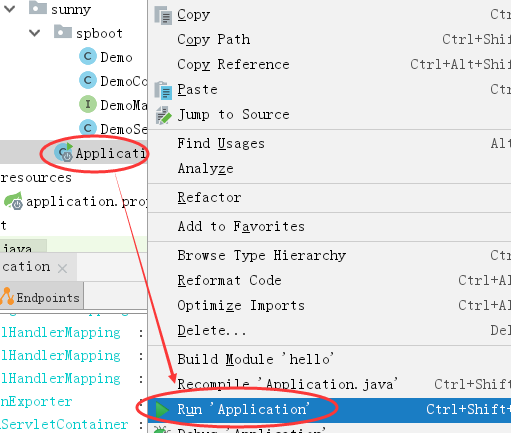
3、启动验证
启动方式,启动入口application服务
访问地址:http://localhost:8080/hello
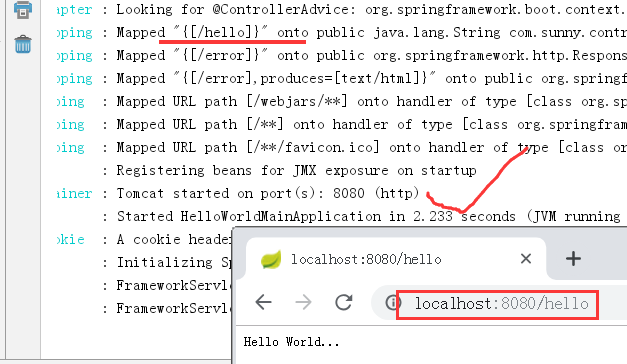
自此,maven+springboot项目demo部署完成。
4、全局配置文件
Spring Boot项目使用一个全局的配置文件application.properties或者是application.yml,在resources目录下或者类路径下的/config下,一般我们放到resources下。
4.1修改端口,匹配规则
原文中这里貌似有点问题,首字母都大写了,导致配置的端口失效。需要写成小写才行。
server.port=8081
server.servlet-path=*.html
5、自动配置静态资源
关于静态资源配置的问题,可以参考这篇博客 Springboot 之 静态资源路径配置
