markdown的语法近几年越来越流行,在前端领域有着一个十分流行的markdown解析的库叫markdown-it。但是其文档对于插件编写这方面显的十分简陋。本文主要详细讲解如何写一个markdown的插件。
原理
要写一个markdown-it的插件首先需要熟悉一下markdown-it的原理。
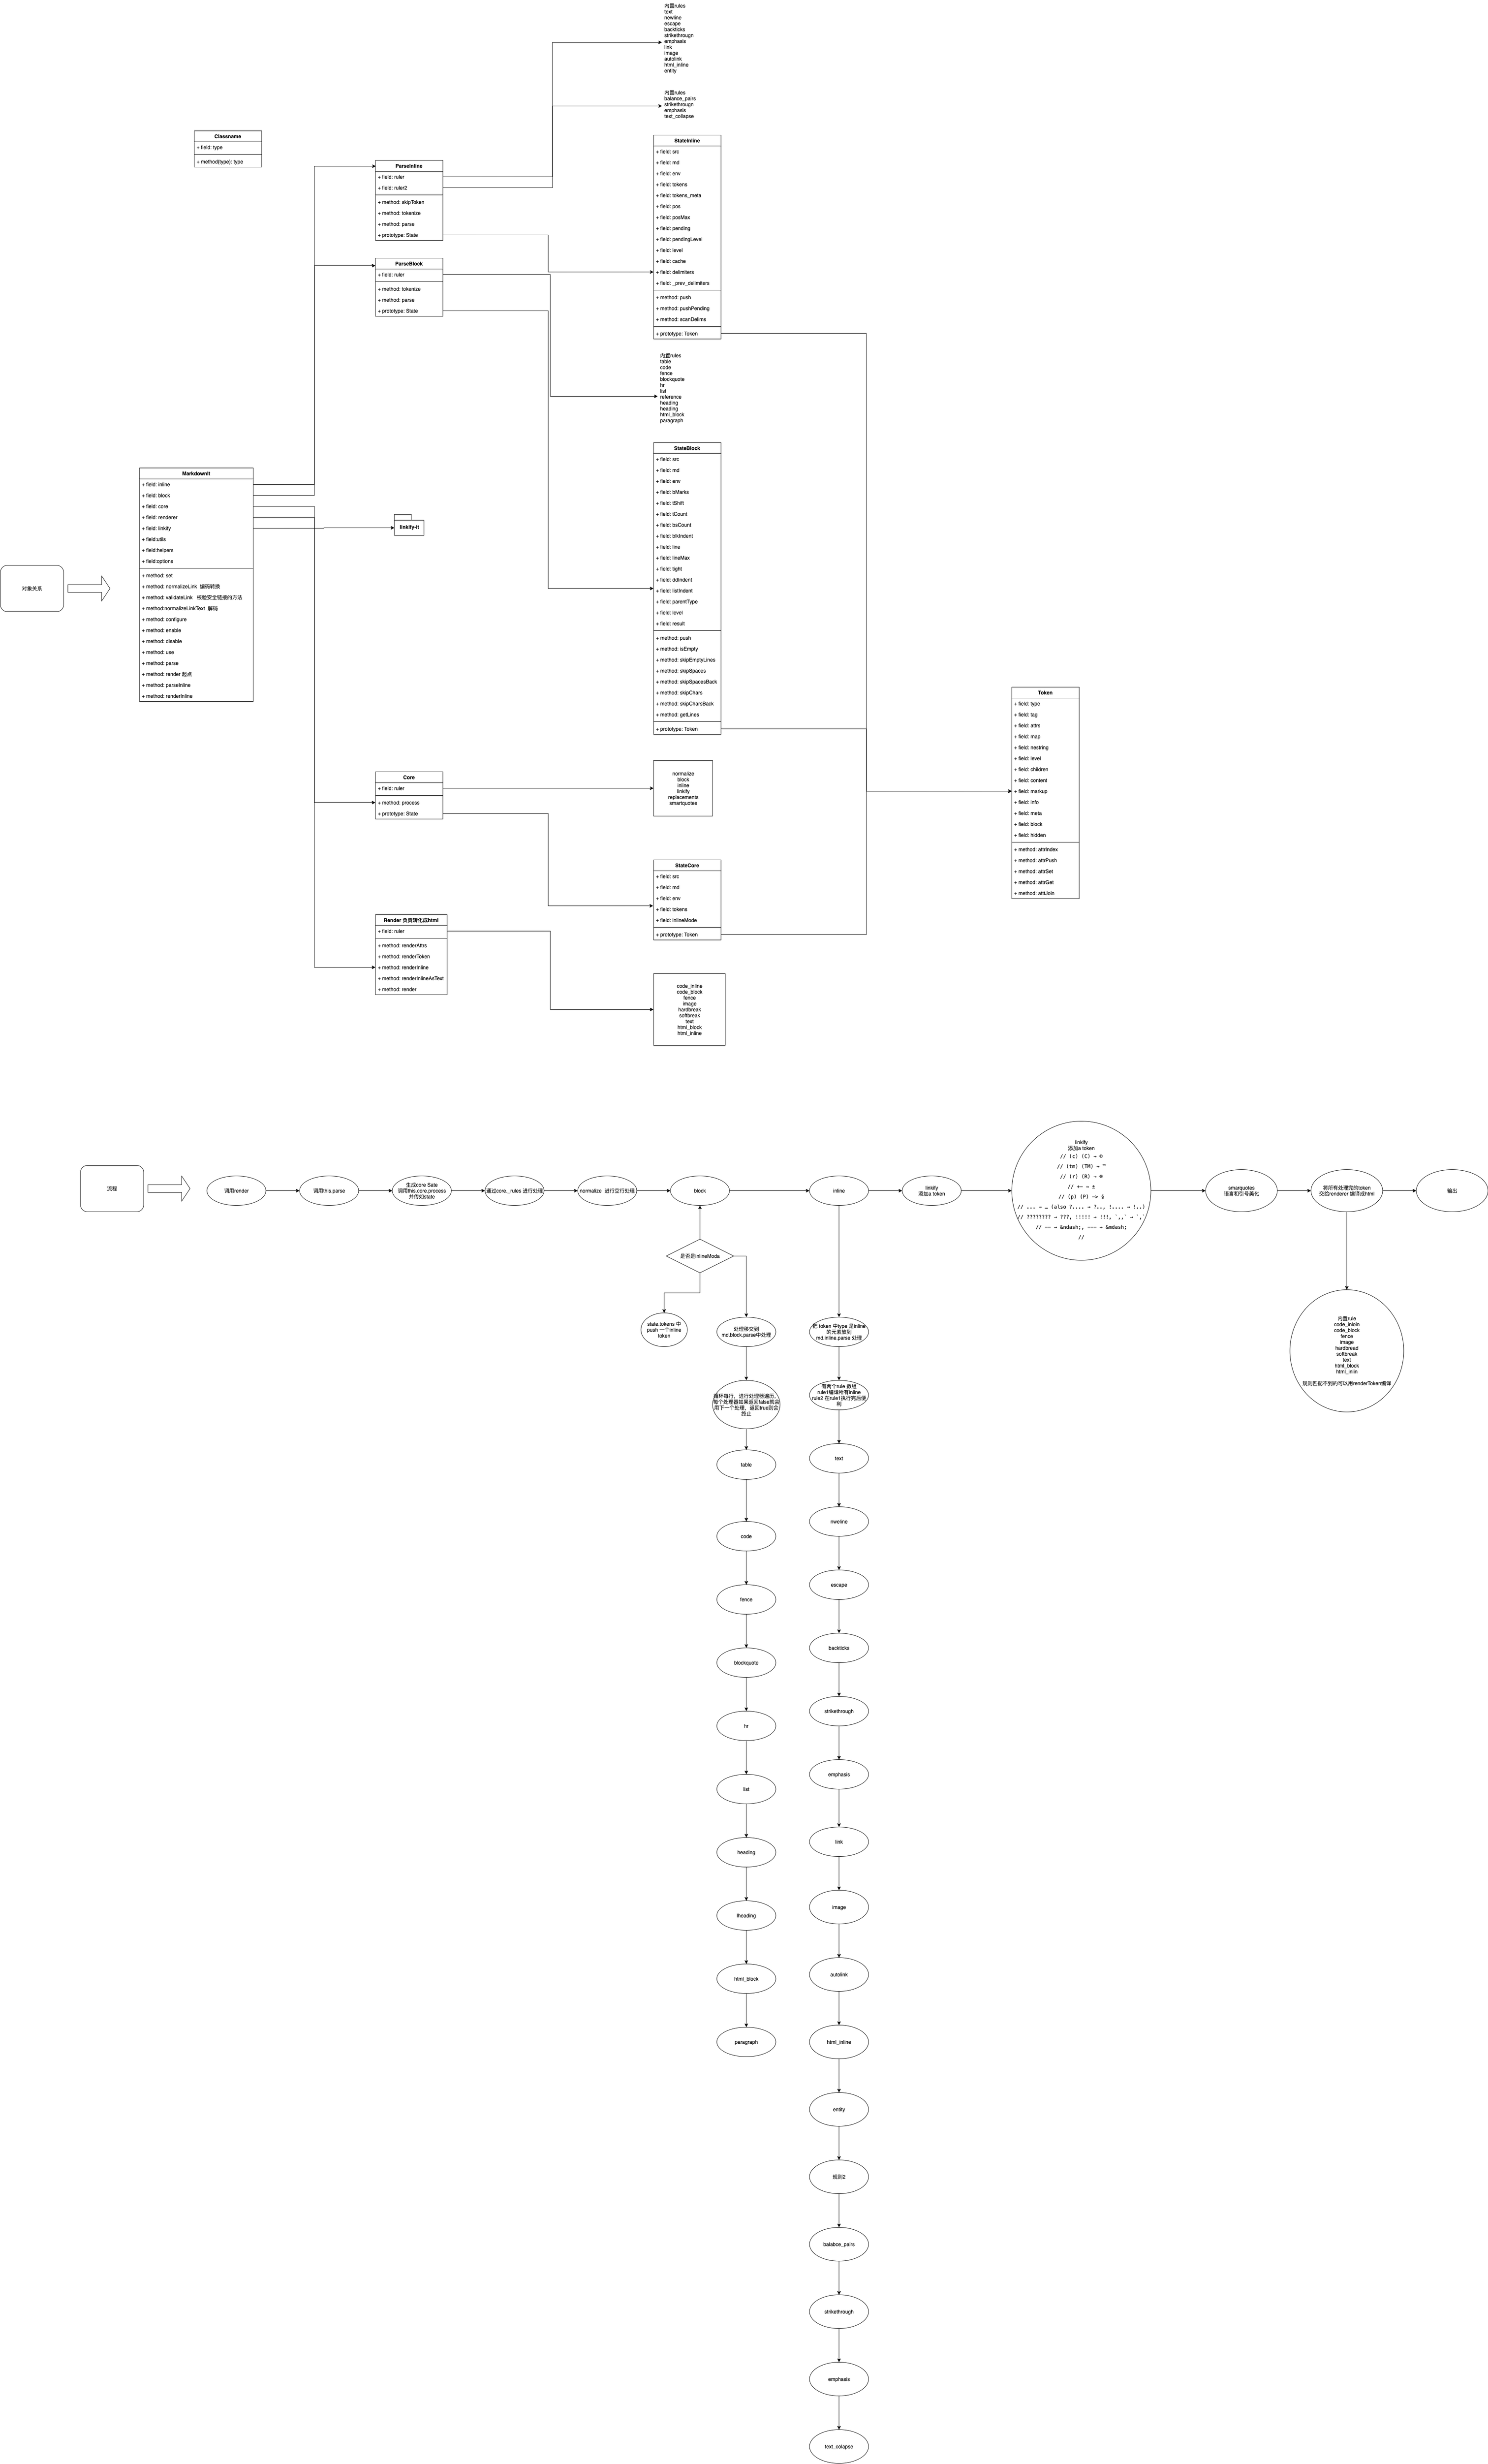
markdown-it的流程为
graph LR
block解析-->inline解析
inline解析-->最后根据token进行render渲染
markdown-it把一个markdown的语法解析为两种大类,一种为block,一种为inline两个部分。
比如像table、code、list、pargraph等为block。
像inline code、image、link等为line。
其调用方式为通过core 调用,然后通过顺序进行规则解析,把其中的state进行传递,生成对应的token对象,最后由render匹配对应的token type进行html标签输出。
同样state也包含两部分,而state是编写规则解析的核心。
当然如果你只想对于渲染部分进行操作,你是不需要触碰规则解析的。比如你想给每个p标签加一个class或者把<h1>标签改为<div style="fontSize:'24px'">,这种你只需要进行对渲染部分进行修改就行了。
但是如果你想进行### 改为@@@就需要对规则解析部分进行修改了。
其详细的uml会在文章末尾给出。
state block
这个state block在初始化的时候会给自动根据\r\n 或者\n,进行行提取。
我们需要注意的几个字段 比如
const text = `~~~test line 1~~~
  test line 2`
这解析这段话的时候。
src对应
`~~~test line 1~~~
  test line 2`
- bMarks 代表行开始的定位的数组
- eMarks 代表行结束的定位的数组
- tShift 代表前一个非空格字符的偏移量
- sCount 代表每行缩进个数
- line 代表当前行
- maxLine 代表最后结束行
在block的规则遍历中,当返回true的时候代表你进行了解析,就会跳过后面的解析规则,这里需要注意一点是一定要对state的line属性进行操作,具体代码如下,如果你不对line进行操作那么就会进入死循环。
// Generate tokens for input range
//
ParserBlock.prototype.tokenize = function (state, startLine, endLine) {
  var ok, i,
      rules = this.ruler.getRules(''),
      len = rules.length,
      line = startLine,
      hasEmptyLines = false,
      maxNesting = state.md.options.maxNesting;

  while (line < endLine) {
    state.line = line = state.skipEmptyLines(line);
    if (line >= endLine) { break; }

    // Termination condition for nested calls.
    // Nested calls currently used for blockquotes & lists
    if (state.sCount[line] < state.blkIndent) { break; }

    // If nesting level exceeded - skip tail to the end. That's not ordinary
    // situation and we should not care about content.
    if (state.level >= maxNesting) {
      state.line = endLine;
      break;
    }

    // Try all possible rules.
    // On success, rule should:
    //
    // - update `state.line`
    // - update `state.tokens`
    // - return true

    for (i = 0; i < len; i++) {
      ok = rules[i](state, line, endLine, false);
      // 当规则返回true的时候,会跳过其他规则
      if (ok) { break; }
    }

    // set state.tight if we had an empty line before current tag
    // i.e. latest empty line should not count
    state.tight = !hasEmptyLines;

    // paragraph might "eat" one newline after it in nested lists
    if (state.isEmpty(state.line - 1)) {
      hasEmptyLines = true;
    }

    // 对line操作不当可能会导致死循环。
    line = state.line;

    if (line < endLine && state.isEmpty(line)) {
      hasEmptyLines = true;
      line++;
      state.line = line;
    }
  }
};
state inline
当block 规则解析完成时候,对于token 的type为 inline 的token会进行inline 规则解析。
和block state 一样其也有对应的state 结构,通常我们需要关注这部分信息。
- pos 当前定位
- posMax 行结束位置
inline 规则解析代码如下
// Generate tokens for input range
//
ParserInline.prototype.tokenize = function (state) {
  var ok, i,
      rules = this.ruler.getRules(''),
      len = rules.length,
      end = state.posMax,
      maxNesting = state.md.options.maxNesting;

  while (state.pos < end) {
    // Try all possible rules.
    // On success, rule should:
    //
    // - update `state.pos`
    // - update `state.tokens`
    // - return true

    if (state.level < maxNesting) {
      for (i = 0; i < len; i++) {
        ok = rules[i](state, false);
        if (ok) { break; }
      }
    }

    if (ok) {
      if (state.pos >= end) { break; }
      continue;
    }

    state.pending += state.src[state.pos++];
  }

  if (state.pending) {
    state.pushPending();
  }
};
元素渲染
对于元素渲染我们需要了解token的常用属性。
token相比于state就比较唯一了,全篇只有一个token类,代表着元素渲染的元数据。
我们可以通过state的push方法新建token并传入state的tokens中。
// push 方法分别传递了类型,标签名,闭合标签,小于0为闭合标签,大于0为开标签,等于0为自闭和标签。
push = function (type, tag, nesting)
- type token 类型
- tag 标签
- content 内容
- attr 标签属性
当渲染时有一下默认的渲染规则
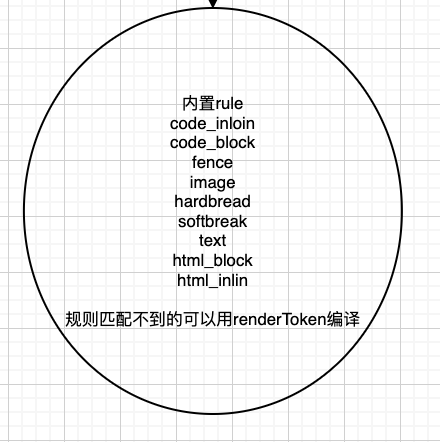
正文
有了上面的知识储备,我们就可以愉快的编写插件了。
案例1
我想自定义匹配规则把 @@@生成h1标签
See the Pen @@@解析成h1 by bxer (@angelname) on CodePen.
const testText = `
@@@ hello world

`

let result = markdownit().use(function(md){
md.block.ruler.before('paragraph','myplugin',function(state,line,maxLine){
  let rg = /^@@@\s(.*)/;
  let start = state.bMarks[line] + state.tShift[line];
  let end = state.eMarks[line];
  let text = state.src.substring(start,end);
  let match = text.match(rg);
  if(match.length){
    let result = match[1];
    console.log(result)
    let token = state.push("heading_open","h1",1);
    token  = state.push('inline', '', 0);
    token.content  = result;
    token.children = [];
    token = state.push('heading_close', "h1",-1);
    state.line++;
    return true;
  }


  })
}).render(testText)

document.write(result)
案例2
我想把每个p标签加上class完成行首缩进,颜色为蓝色。
See the Pen p加class by bxer (@angelname) on CodePen.
const testText = `
我是一个粉刷酱,粉刷本领强。

`

let result = markdownit().use(function(md){
  // 拦截 paragraph 实现逻辑
md.block.ruler.before('paragraph','myplugin',function(state,startLine,maxLine){
  var content, terminate, i, l, token, oldParentType,
      nextLine = startLine + 1,
      terminatorRules = state.md.block.ruler.getRules('paragraph'),
      endLine = state.lineMax;

  oldParentType = state.parentType;
  state.parentType = 'paragraph';

  // jump line-by-line until empty one or EOF
  for (; nextLine < endLine && !state.isEmpty(nextLine); nextLine++) {
    // this would be a code block normally, but after paragraph
    // it's considered a lazy continuation regardless of what's there
    if (state.sCount[nextLine] - state.blkIndent > 3) { continue; }

    // quirk for blockquotes, this line should already be checked by that rule
    if (state.sCount[nextLine] < 0) { continue; }

    // Some tags can terminate paragraph without empty line.
    terminate = false;
    for (i = 0, l = terminatorRules.length; i < l; i++) {
      if (terminatorRules[i](state, nextLine, endLine, true)) {
        terminate = true;
        break;
      }
    }
    if (terminate) { break; }
  }

  content = state.getLines(startLine, nextLine, state.blkIndent, false).trim();

  state.line = nextLine;

  token          = state.push('paragraph_open', 'p', 1);
  token.map      = [ startLine, state.line ];
  token.attrs    = [['class','text-indent-class']]

  token          = state.push('inline', '', 0);
  token.content  = content;
  token.map      = [ startLine, state.line ];
  token.children = [];

  token          = state.push('paragraph_close', 'p', -1);

  state.parentType = oldParentType;

  return true;

  })
}).render(testText)

document.write(result)
案例3
我想在把行内代码作为标签的感觉渲染。
See the Pen 行内标签 by bxer (@angelname) on CodePen.
const testText = `
hello world \`\`\`this is a inline code tag\`\`\`
`
var HTML_ESCAPE_TEST_RE = /[&<>"]/;
var HTML_ESCAPE_REPLACE_RE = /[&<>"]/g;
var HTML_REPLACEMENTS = {
'&': '&',
'<': '<',
'>': '>',
'"': '"'
};
function replaceUnsafeChar(ch) {
return HTML_REPLACEMENTS[ch];
}
function escapeHtml(str) {
if (HTML_ESCAPE_TEST_RE.test(str)) {
return str.replace(HTML_ESCAPE_REPLACE_RE, replaceUnsafeChar);
}
return str;
}
let result = markdownit().use(function(md){
console.log(md)
// 重写code_inline 渲染方法
md.renderer.rules.code_inline = function (tokens, idx, options, env, slf) {
console.log('fff')
var token = tokens[idx];
return '<code class="tag"' + slf.renderAttrs(token) + '>' +
escapeHtml(tokens[idx].content) +
'</code>';
};
}).render(testText)
document.write(result)
总结
最近看了很多源码,发现大部分源码的关键点,其实不在于是如何实现具体功能,更多的在于数据处理流程的设计。
比如markdown it的分为规则机制,插件拓展功能。
token元数据的数据结构,规则匹配渲染等都是可复用于其他部门的,
也许正是这种抽象能力才能真正的体现出程序员其技术水平吧。
最后送上我的源码阅读笔记图