

偶然在 v2ex 看到一个关于 electron-vue boilerplate 的帖子,评论区有人推荐了 quasar 这个框架,去官网看了看,一套代码可以同时搞 SPA,PWA,BEX,SSR,Hybrid Mobile App 和 Multi-platform Desktop App,虽然 write once, deploy everywhere 的想法已经见到很多次了,但是这个 Vue 的重量级框架突然让我有了上手试一试的冲动,不如就果断搞起来吧。
What to do
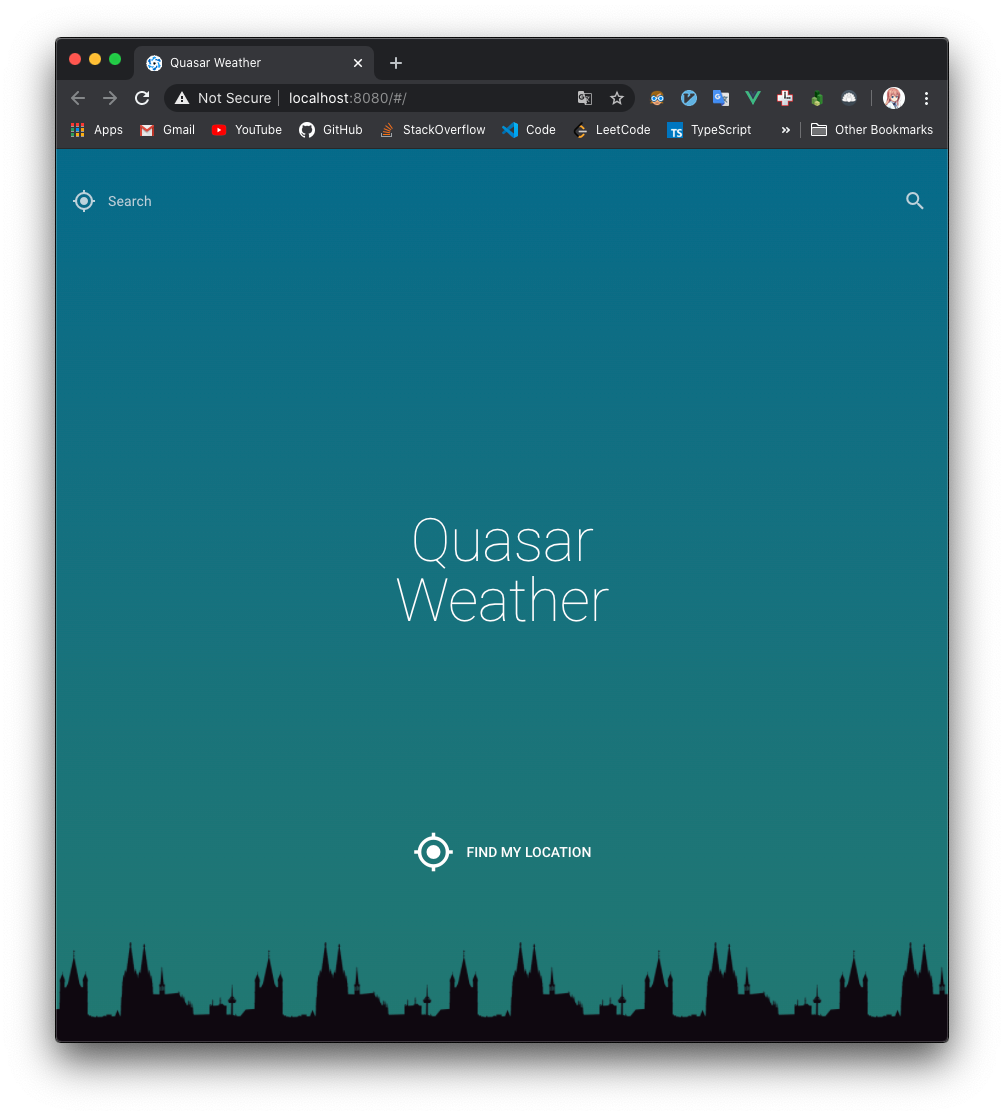
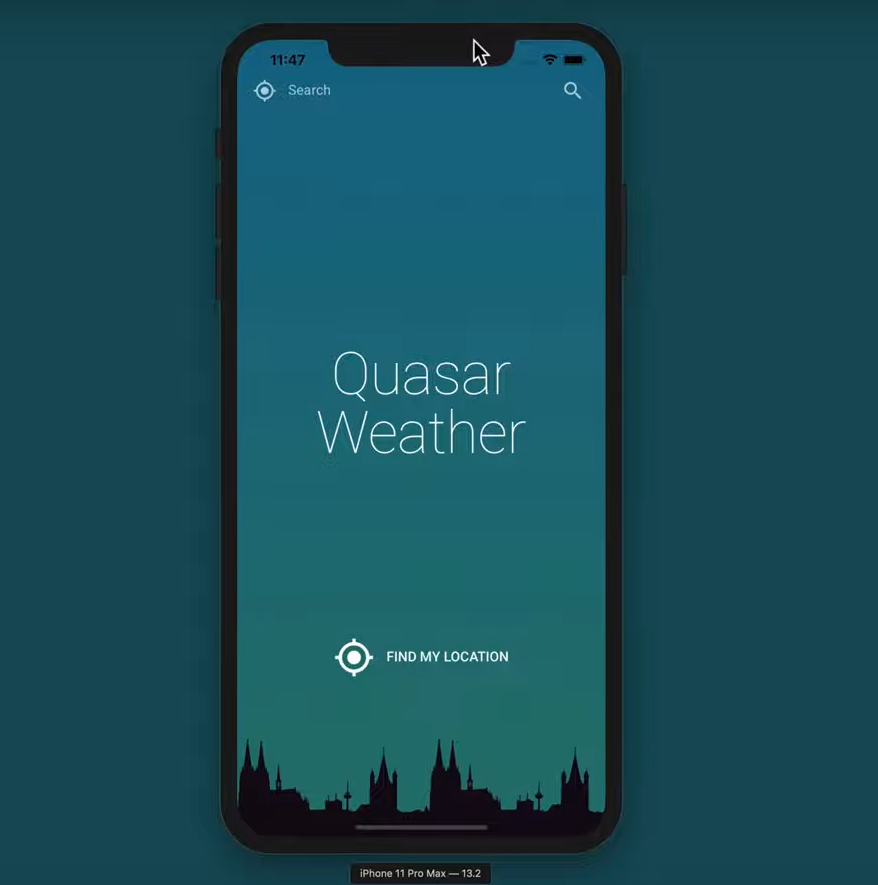
- 既然是写个小 demo,那除了老掉牙的 todo app 就是天气应用了吧,对我来说 todo 已经有 todoist 了,所以就弄 weather app 吧(这明显是个借口嘛 = =),大致效果图就是下面这样的。
- 要完成的主要功能有:定位并显示当前地理位置天气,搜索某一位置天气,背景色及天气图标针对不同情况的适配。
Setup project
- 首先要通过
yarn global add @quasar/cli安装 Quasar CLI。 - 通过
quasar create <folder_name>建立新项目并安装依赖。 - 使用
quasar dev编译运行,此时应该已经编译了单页应用并且在浏览器自动打开了。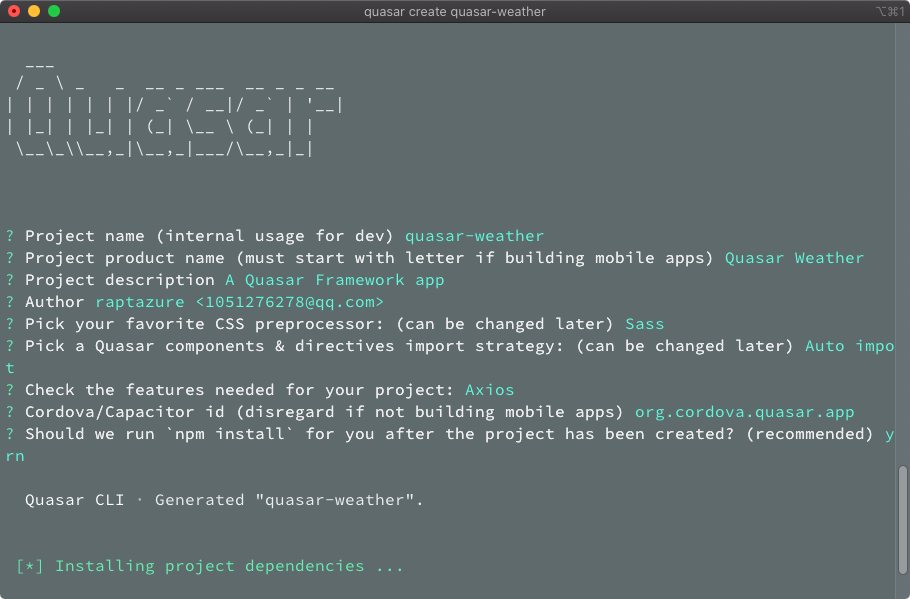
Design & Coding
- 因为功能比较简单,所以即使是 web 端的话,需要显示的内容也并不太多,按照手机的比例设计就好,长长窄窄的感觉,从上到下依次为搜索栏,Logo以及定位并获取当前位置天气按钮 / 天气详细信息。
- 因为生成的 template 里有一些内容我们并不需要,所以先对主战场
src/layouts和src/pages文件夹里的内容进行一下清理,将src/layouts/MainLayout.vue初始化为如下代码:
<template>
  <q-layout view="lHh Lpr lFf">
    <q-page-container>
      <router-view />
    </q-page-container>
  </q-layout>
</template>

<script>
export default {
  name: "MainLayout",
  data() {
    return {};
  }
};
</script>
- 之后,主要任务就是
src/pages/index.vue了,看看官方文档应该能很轻松地看懂如下代码,其中../statics/skyline.png为 pixabay 上的一幅 town sillhouette 的 illustration,而背景的渐进色可以通过 uiGradients 进行选取。
<template>
<q-page class="flex column">
<div class="col q-pt-lg q-px-md">
<q-input
bottom-slots
v-model="search"
placeholder="Search"
dark
borderless
>
<template v-slot:before>
<q-icon name="my_location" />
</template>
<template v-slot:append>
<q-btn round dense flat icon="search" />
</template>
</q-input>
</div>
<template v-if="weatherData">
<div class="col text-white text-center">
<div class="text-h4 text-weight-light">Beijing</div>
<div class="text-h6 text-weitht-light">Clear</div>
<div class="text-h1 text-weight-thin q-my-lg relative-position">
<span>27</span>
<span class="text-h4 relative-position degree">°C</span>
</div>
</div>
<div class="col text-center">
<img src/>
</div>
</template>
<template v-else>
<div class="col column text-center text-white">
<div class="col text-h2 text-weight-thin">
Quasar
<br />Weather
</div>
<q-btn class="col" flat>
<q-icon left size="3em" name="my_location" />
<div>Find my location</div>
</q-btn>
</div>
</template>
<div class="col skyline"></div>
</q-page>
</template>
<script>
export default {
name: "PageIndex",
data() {
return {
search: "",
weatherData: null,
};
}
};
</script>
<style lang="sass">
.q-page
background: linear-gradient(to bottom, #136a8a, #267871)
.degree
top: -44px
.skyline
flex: 0 0 100px
background: url(../statics/skyline.png)
background-size: contain
background-position: center bottom
</style>
-
至此,我们实现了搜索栏(样子货),实现了当有天气数据时显示天气(此时为假数据)和对应的图片(尚未添加),没有天气数据的时候显示应用 logo 并显示定位按钮,最底部还有城市的 illustration 来做装饰。
-
现在,应用的大体样子已经有了,接下来就是要实现各种实际功能,包括获取当前的地理位置(经纬度),查询特定位置的天气(包括按照城市名查询和按照经纬度查询)。为此,需要 OpenWeather API 的帮助,先要去官网注册账号并保存下 api-key,而提到 api-key 啊,就要用
.env来设置环境变量,以免推到 GitHub 上后泄露个人信息,正好官网也是很贴心地提供了 app-extension-dotenv,按照说明安装并使用即可,同时记得重新编译一下以防设置的环境变量没有启用。 -
查询时的加载效果,框架已经集成了,在
quasar.conf.js插件列加上plugins: ["Loading"]后即可通过this.$q.loading进行访问。 -
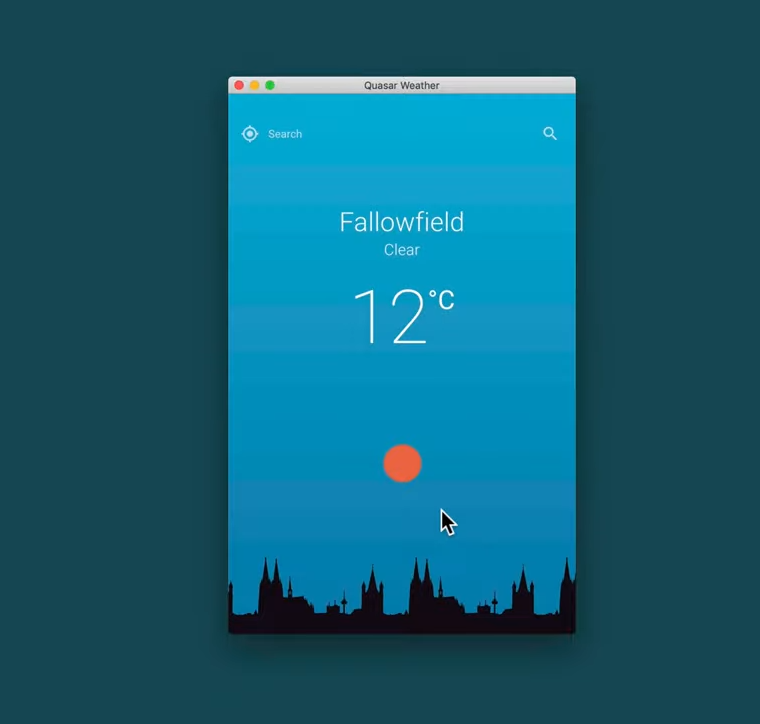
与此同时,我们还通过计算属性
bgClass来实现了根据目标城市的白天和夜间切换不同的渐变背景,至此,SPA 的部分已经基本完成了。
<template>
<q-page class="flex column" :class="bgClass">
<div class="col q-pt-lg q-px-md">
<q-input
bottom-slots
@keyup.enter="getWeatherBySearch"
v-model="search"
placeholder="Search"
dark
borderless
>
<template v-slot:before>
<q-icon @click="getLocation" name="my_location" />
</template>
<template v-slot:append>
<q-btn round dense flat @click="getWeatherBySearch" icon="search" />
</template>
</q-input>
</div>
<template v-if="weatherData">
<div class="col text-white text-center">
<div class="text-h4 text-weight-light">{{ weatherData.name }}</div>
<div class="text-h6 text-weitht-light">{{ weatherData.weather[0].main }}</div>
<div class="text-h1 text-weight-thin q-my-lg relative-position">
<span>{{ Math.round(weatherData.main.temp) }}</span>
<span class="text-h4 relative-position degree">°C</span>
</div>
</div>
<div class="col text-center">
<img
:src="
`https://openweathermap.org/img/wn/${weatherData.weather[0].icon}@2x.png`
"
/>
</div>
</template>
<template v-else>
<div class="col column text-center text-white">
<div class="col text-h2 text-weight-thin">
Quasar
<br />Weather
</div>
<q-btn @click="getLocation" class="col" flat>
<q-icon left size="3em" name="my_location" />
<div>Find my location</div>
</q-btn>
</div>
</template>
<div class="col skyline"></div>
</q-page>
</template>
<script>
export default {
name: "PageIndex",
data() {
return {
search: "",
weatherData: null,
lat: null,
lon: null,
apiUrl: "https://api.openweathermap.org/data/2.5/weather",
apiKey: process.env.API_KEY
};
},
computed: {
bgClass() {
if (this.weatherData) {
if (this.weatherData.weather[0].icon.endsWith("n")) {
return "bg-night";
} else {
return "bg-day";
}
}
}
},
methods: {
getLocation() {
this.$q.loading.show();
navigator.geolocation.getCurrentPosition(position => {
this.lat = position.coords.latitude;
this.lon = position.coords.longitude;
this.getWeatherByCoords();
});
},
getWeatherByCoords() {
this.$q.loading.show();
this.$axios(
`${this.apiUrl}?lat=${this.lat}&lon=${this.lon}&appid=${this.apiKey}&units=metric`
).then(response => {
this.weatherData = response.data;
this.$q.loading.hide();
});
},
getWeatherBySearch() {
this.$q.loading.show();
this.$axios(
`${this.apiUrl}?q=${this.search}&appid=${this.apiKey}&units=metric`
).then(response => {
this.weatherData = response.data;
this.$q.loading.hide();
});
}
}
};
</script>
<style lang="sass">
.q-page
background: linear-gradient(to bottom, #136a8a, #267871)
&.bg-night
background: linear-gradient(to bottom, #232526, #414345)
&.bg-day
background: linear-gradient(to bottom, #00b4db, #0083b0)
.degree
top: -44px
.skyline
flex: 0 0 100px
background: url(../statics/skyline.png)
background-size: contain
background-position: center bottom
</style>
More Platforms
仅仅写完网页版应用肯定是不能满足我们对这个框架的期望啊,接下来就开始适配其他的平台吧。
Electron - macOS
- 因为我目前用的是 macOS,所以运行
quasar dev -m electron即可构建 Weather App for macOS(笑) - 窗口初始大小可以通过
src-electron/main-process/electron-main.js中的 width 与 height 来进行修改,让应用一开始就显得更苗条。 - 但是发现获取地理位置的功能并不起作用,这是因为
geolocation api在 electron 应用中不起作用,所以,我们需要对getLocation()进行一下修改,此时可以通过https://freegeoip.app来获取地理位置,之后就能正常工作:
getLocation() {
    this.$q.loading.show();
    if (this.$q.platform.is.electron) {
      this.$axios.get("https://freegeoip.app/json/").then(response => {
      this.lat = response.data.latitude;
      this.lon = response.data.longitude;
      this.getWeatherByCoords();
    });
  } else {
    navigator.geolocation.getCurrentPosition(position => {
      this.lat = position.coords.latitude;
      this.lon = position.coords.longitude;
      this.getWeatherByCoords();
    });
  }
}
Electron - Windows
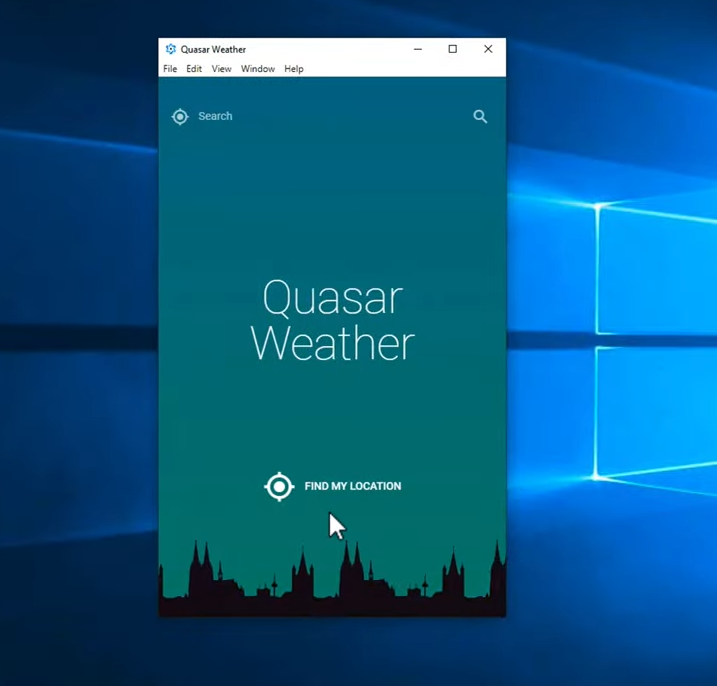
- 在
quasar.conf.js中的electron.package中添加platform: 'win32'。 - 再次运行
quasar build -m electron构建 Windows 版本,然后就可以用虚拟机打开啦!
Cordova - iOS
- 前提是需要已安装
Xcode,运行quasar dev -m ios即可进行调试。 - 但是发现获取地理位置还是不起作用,这是因为我们没有安装
cordova-plugin-geolocation,在src-cordova中运行cordova plugin add cordova-plugin-geolocation,并在src-cordova/config.xml中 ios 的位置添加:
<edit-config target="NSLocationWhenInUseUsageDescription" file="*-Info.plist" mode="merge">
    <string>need location access to find things nearby</string>
</edit-config>
- 重新编译运行应该就能正常工作了。
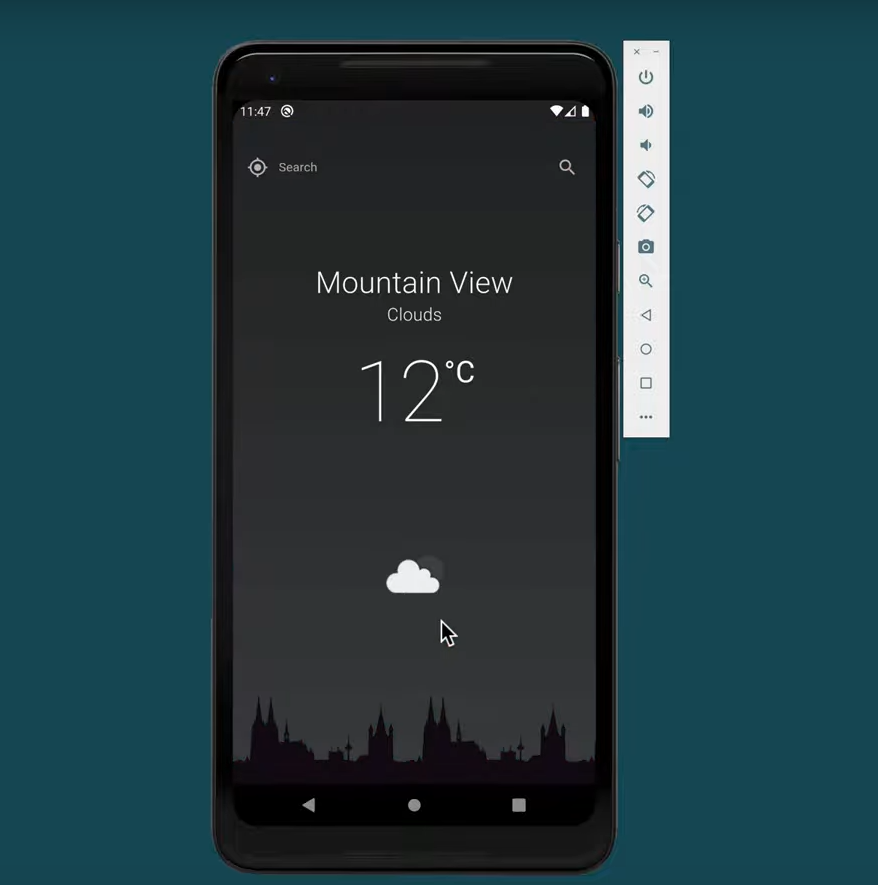
Cordova - Android
- 前提是需要已安装
Android Studio,运行quasar dev -m android即可进行调试。 - 但是获取地理位置还是不起作用,拿 chrome debug 一下,发现是 http 的锅,所以修改
quasar.config.js中的devSever.https为true,同时也要注意模拟器的安卓版本是否支持geolocation。
Conclusion
说实话,一套 codebase 就能搞全平台还是非常具有吸引力的,虽然进行适配的过程也会遇到各种各种的问题,但是相对来说已经节省了大量的人力物力(特别是功能比较简单的应用)。顺便,以上代码可以在这个仓库找到~
