

前言
最近看到公司UED群里有小伙伴聊起了微前端qiankun,我也抱着好奇心入坑了。
什么是微前端?
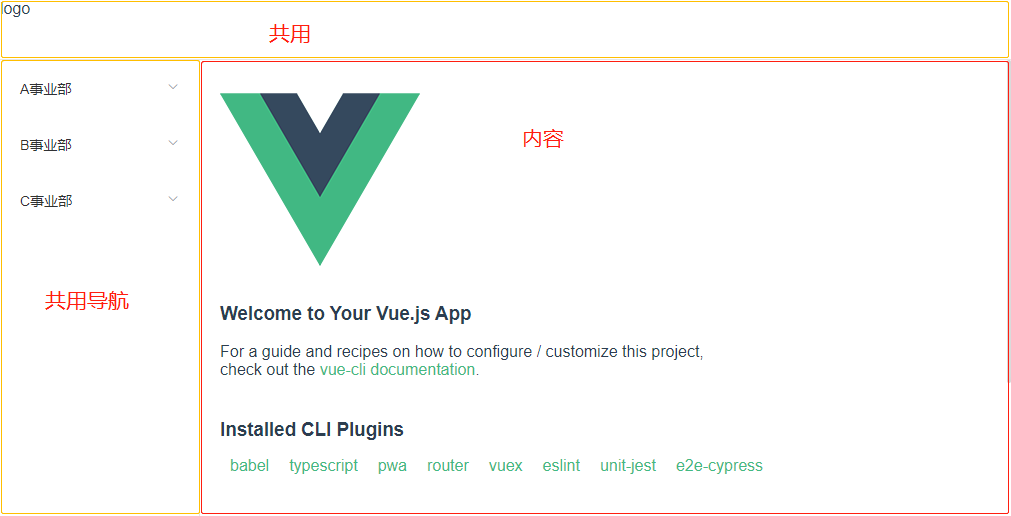
微前端是一种多个团队通过独立发布功能的方式来共同构建现代化 web 应用的技术手段及方法策略,下面这张图来了解下。
qiankun
qiankun 蚂蚁金服基于single-spa 的微前端解决方案,生产可用。
特性
- 基于 single-spa 封装,提供了更加开箱即用的 API。
- 技术栈无关,任意技术栈的应用均可 使用/接入,不论是 React/Vue/Angular/JQuery 还是其他等框架。
- HTML Entry 接入方式,让你接入微应用像使用 iframe 一样简单。
- 样式隔离,确保微应用之间样式互相不干扰。
- JS 沙箱,确保微应用之间 全局变量/事件 不冲突。
- 资源预加载,在浏览器空闲时间预加载未打开的微应用资源,加速微应用打开速度。
主应用搭建
选择用vue-cli初始化了主应用,不了解的可自行阅读官方文档
项目中引入qiankun:
$ yarn add qiankun # 或者 npm i qiankun -S
注册微应用
定义需要加载的微应用
// src/micro/apps.ts
//此时我们还没有微应用,所以暂时为空
const apps: any = [

];

export default apps;
注册微应用并对外暴露方法
// src/micro/index.ts
import {
    registerMicroApps,
    addGlobalUncaughtErrorHandler,
    start,
} from "qiankun";
import NProgress from "nprogress";
import { Message } from 'element-ui';
import 'nprogress/nprogress.css';

NProgress.configure({ parent: '.scrollbar.scroll' });

export default function (apps: []) {
    registerMicroApps(apps, {
        beforeLoad: () => {
            // 加载微应用前,加载进度条
            NProgress.start();
            return Promise.resolve();
        },
        afterMount: () => {
            NProgress.done();
            return Promise.resolve();
        },
    });

    addGlobalUncaughtErrorHandler((event: any) => {
        const { msg } = event as any;
        NProgress.done();
        // 加载失败时提示
        if (msg && msg.includes("died in status LOADING_SOURCE_CODE")) {
            Message.error('微应用加载失败,请检查应用是否可运行');
        }
    });

    start();
}
由于我们的微应用可能是登录后,根据用户左侧菜单权限而生成该用户的微应用。所以,暴露方法以及入参方便登录完成调用注册微应用。
启动微应用
import startQiankun from "@/micro";

startQiankun(...);  //在需要启动的地方调用传入数据就行
这边是我在全局路由守卫处启动,供大家参考。
//router
import Vue from 'vue';
import VueRouter, { RouteConfig } from 'vue-router';
import store from "@/store";
import { getToken } from "@/utils/auth";
import startQiankun from "@/micro";
import apps from "@/micro/apps";

Vue.use(VueRouter);

const routes: Array<RouteConfig> = [
  {
    path: '/login',
    name: 'login',
    component: () => import('@/views/login/index.vue')
  },
  {
    path: '/',
    name: 'main',
    component: () => import('@/views/Layout/index.vue'),
    children: [
      {
        path: '',
        name: 'Home',
        component: () => import('@/views/Home.vue')
      }
    ]
  },
  {
    path: '*',
    name: 'redirect',
    redirect: '/'
  }
];

const createRouter: any = () => new VueRouter({
  mode: "history",
  routes,
});

const router: any = createRouter()

/**
 * 重置路由
 */
export function restRouter() {
  router.matcher = createRouter().matcher;
}

const whiteList = ['login'];
router.beforeEach((to: any, from: any, next: any) => {
  const token = getToken('token');
  if (token) {   //token存在
    if (to.name === 'login') {     //如果login直接跳转首页
      return next({ path: '/' });
    }
    if (!store.state.hasInited) {   //防止反复addRoutes预设的值
      store.dispatch('addRouters').then((res) => {
        router.addRoutes(res);
        startQiankun(apps);
        store.state.hasInited = true;
        next({ ...to, replace: true });
      })
      return;
    }
    next();
  } else if (whiteList.includes(to.name)) {   //白名单直接放行
    next();
  } else {     //token不存在
    next({ path: '/login', query: { redirect: to.path } });
  }
});

export default router;
vue子应用搭建
在主应用中配置需要接入的子应用
// micro/apps.ts
import app from "./shared";  //分享给子应用的数据

/*
 * name: 微应用名称 - 具有唯一性
 * entry: 微应用入口 - 通过该地址加载微应用
 * container: 微应用挂载节点 - 微应用加载完成后将挂载在该节点上
 * activeRule: 微应用触发的路由规则 - 触发路由规则后将加载该微应用
 * props: 共享给微应用的数据
 */
const apps: any = [
    {
        name: "vue-project",
        entry: "//localhost:10300",
        container: "#app-qiankun",
        activeRule: "/vue",
        props: { app }
    }
];

export default apps;
配置子应用
在主应用配置好注册的微应用后,我们需要对子应用进行配置,让子应用能接入到主应用中。
1、vue子应用的入口main.js配置
// public-path.js
if (window.__POWERED_BY_QIANKUN__) {
    // 动态设置 webpack publicPath,防止资源加载出错
    // eslint-disable-next-line no-undef
    __webpack_public_path__ = window.__INJECTED_PUBLIC_PATH_BY_QIANKUN__;
}
// main.js
import Vue from 'vue';
import App from './App.vue';
import VueRouter from "vue-router";
import './registerServiceWorker';
import routes from './router';
import store from './store';
import './public-path'

Vue.use(VueRouter)
Vue.config.productionTip = false;

let instance = null;
let router = null;


function render() {
  router = new VueRouter({
    // 运行在主应用中时,基础路由地址配置为 /vue
    base: window.__POWERED_BY_QIANKUN__ ? "/vue" : "/",
    mode: "history",
    routes,
  });

  instance = new Vue({
    router,
    store,
    render: (h) => h(App),
  }).$mount("#app");
}

/**
 * 不存在主应用时可直接单独运行
 */
if (!window.__POWERED_BY_QIANKUN__) {
  render();
}

export async function bootstrap() {

}

/**
 * 应用每次进入都会调用 mount 方法,通常我们在这里触发应用的渲染方法
 */
export async function mount(props) {
  console.log(props);
  render(props);
}

/**
 * 应用每次 切出/卸载 会调用的方法,通常在这里我们会卸载微应用的应用实例
 */
export async function unmount() {
  instance.$destroy();
  instance = null;
  router = null;
}
2、配置webpack打包策略
// vue.config.js
const path = require("path");

module.exports = {
    //配置静态文件host路径
    publicPath: 'http://localhost:10300',
    devServer: {
        // 监听端口
        port: 10300,
        overlay: {
            warnings: false,
            errors: false
        },
        // 关闭主机检查,使微应用可以被 fetch
        disableHostCheck: true,
        // 配置跨域请求头,解决开发环境的跨域问题
        headers: {
            "Access-Control-Allow-Origin": "*",
        }
    },
    configureWebpack: {
        resolve: {
            alias: {
                "@": path.resolve(__dirname, "src"),
            },
        },
        output: {
            // 微应用的包名,这里与主应用中注册的微应用名称一致
            library: "vue-project",
            // 将你的 library 暴露为所有的模块定义下都可运行的方式
            libraryTarget: "umd",
            // 按需加载相关,设置为 webpackJsonp_vue-projec 即可
            jsonpFunction: `webpackJsonp_vue-project`,
        },
    },
};
此时,已经完整地配置完我们的微前端了,只是当前只接入了一个子应用。根据以上代码可总结出以及几个重点:
1、主应用中注册子应用:registerMicroApps addGlobalUncaughtErrorHandler startqiankun中三个重要的api搭配使用。
2、子应用入口留给主应用调用bootstrap mount unmount的声明。以及window.__POWERED_BY_QIANKUN__的定义。
3、重新配置子应用的打包策略。
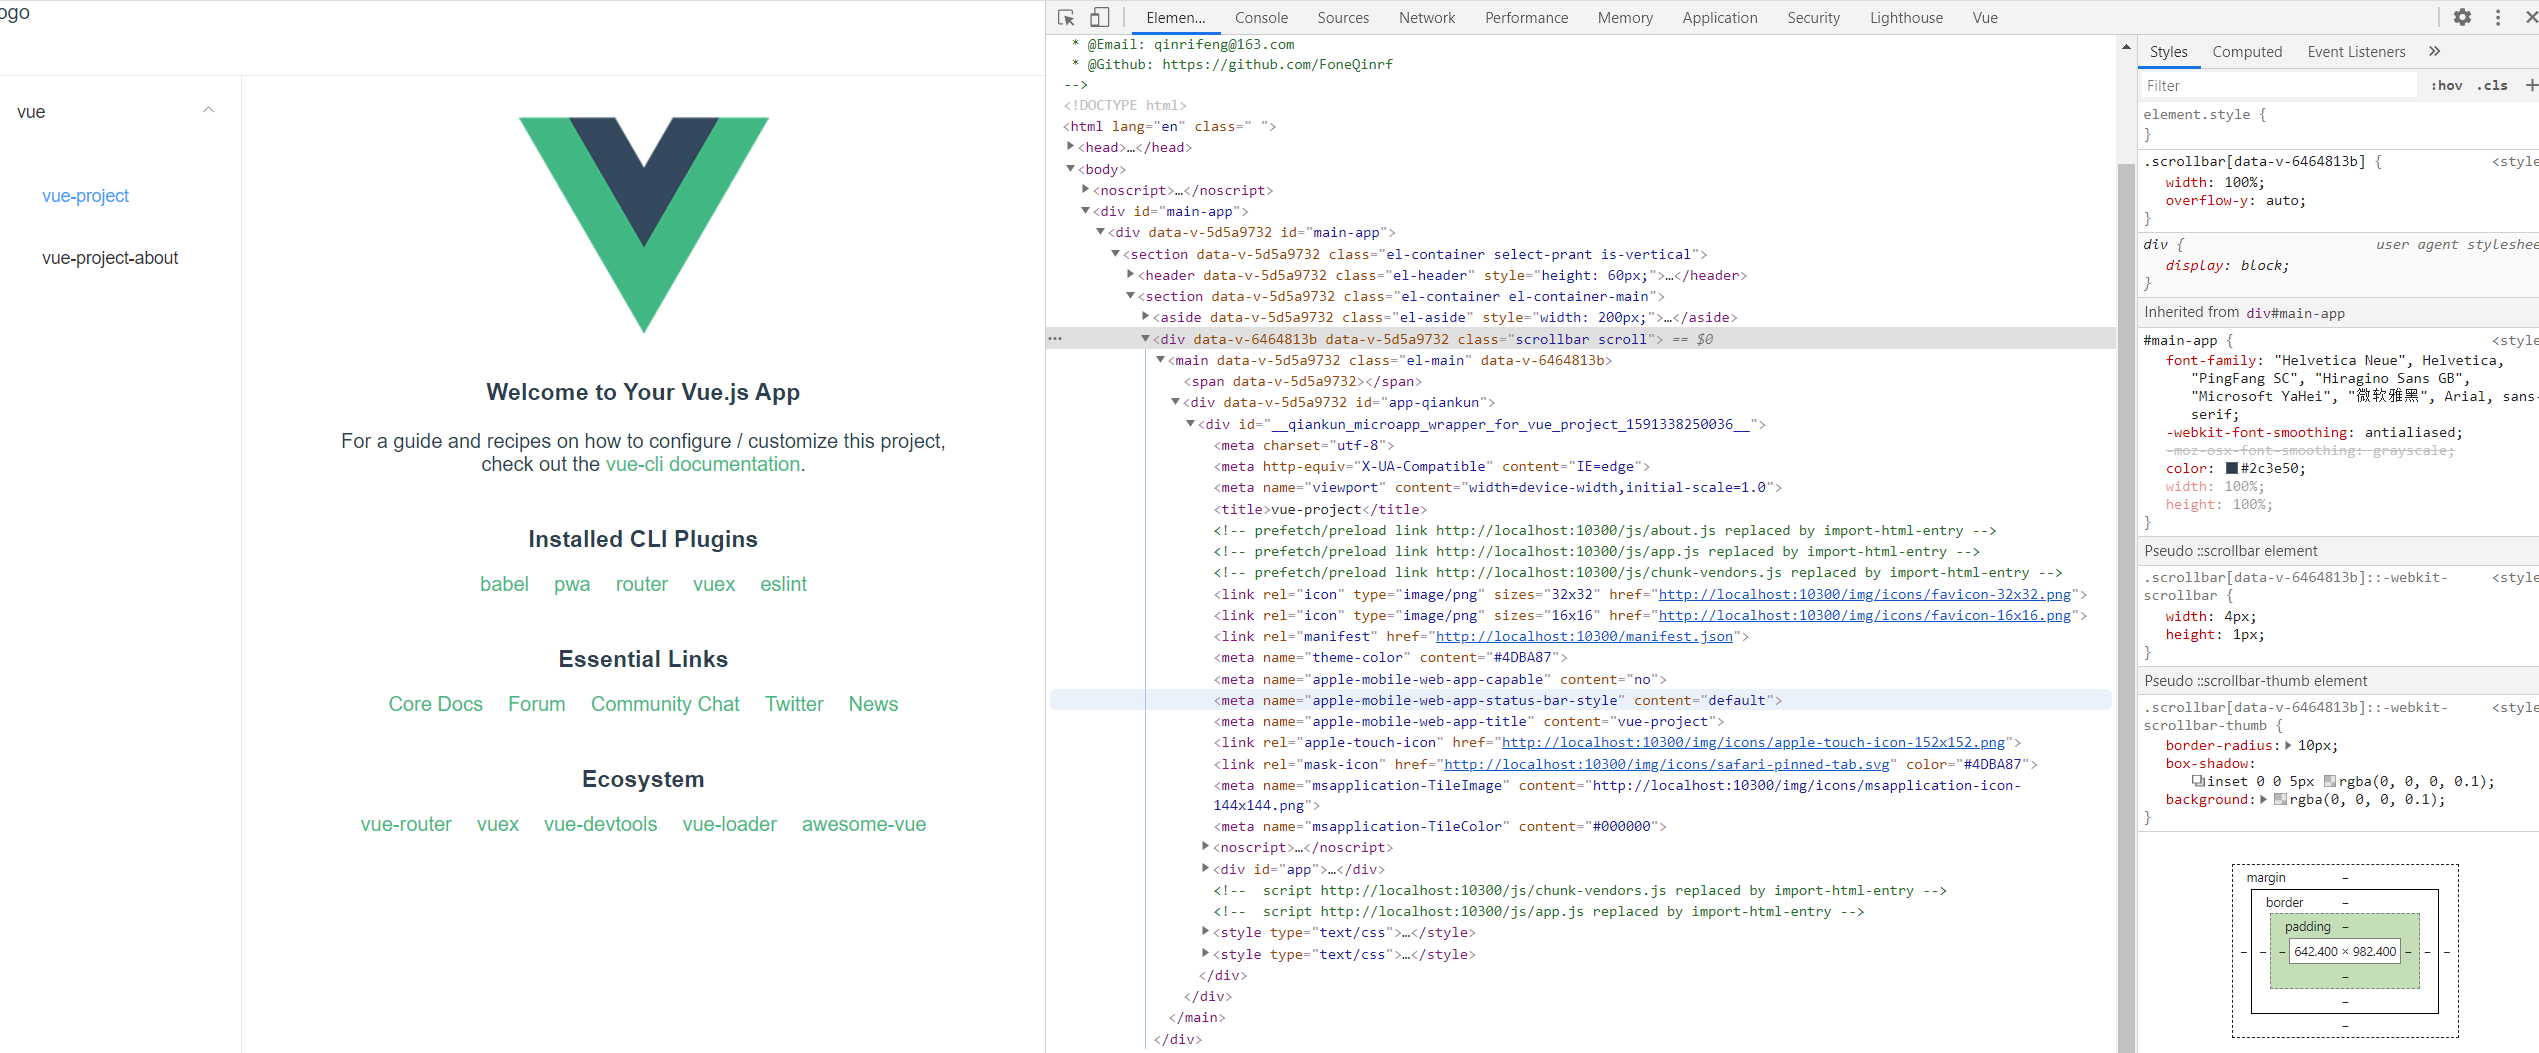
启动主应用和子应用效果:
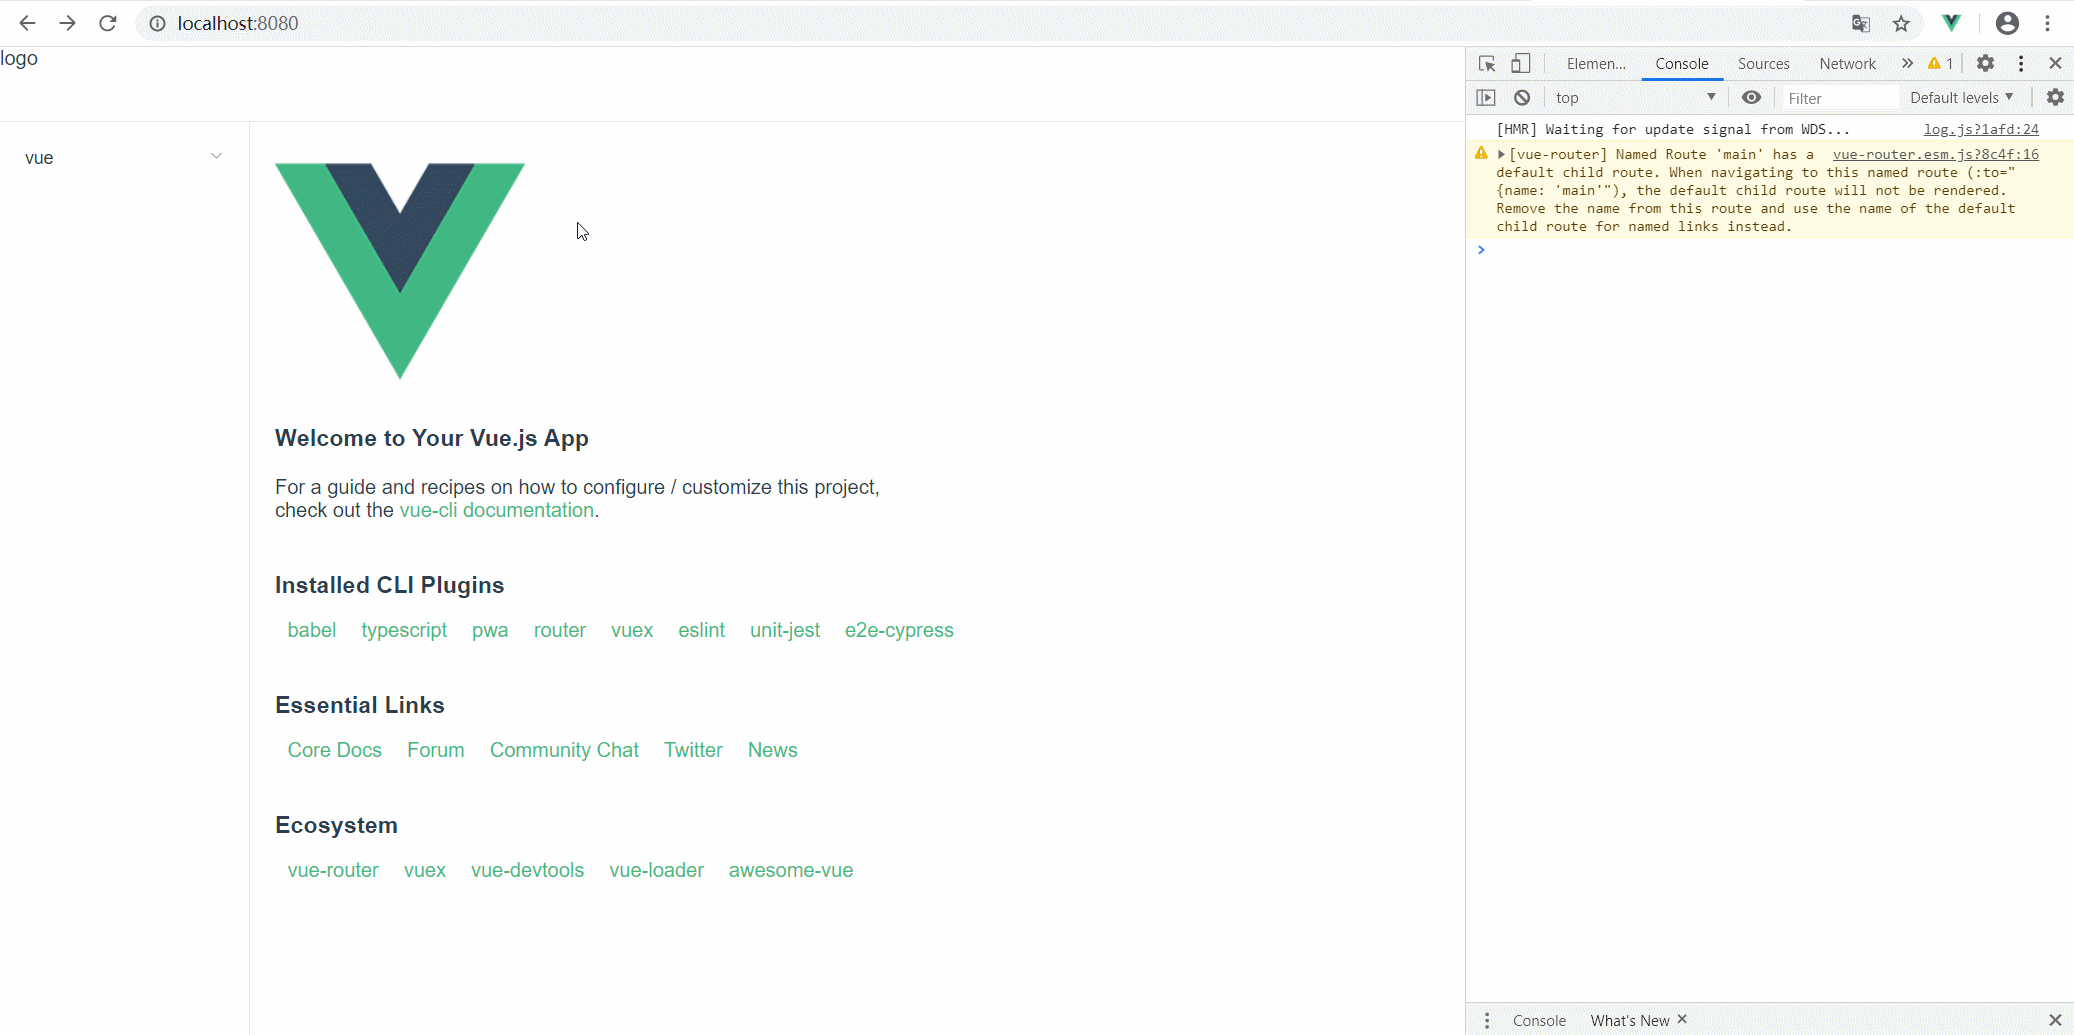
/vue时加载了子应用包括/vue/about也加载了子应用中的/about路由。
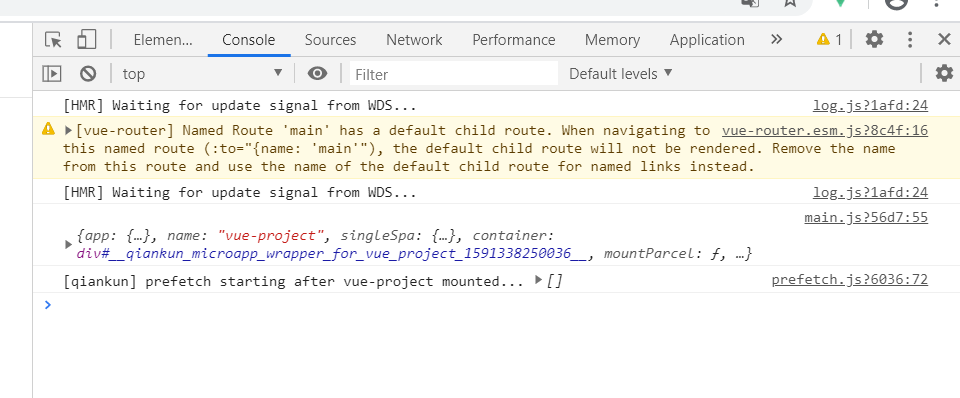
打开控制台,可以看到我们所执行的生命周期钩子函数
react子应用搭建
在主应用中增加需要接入的子应用
// micro/apps.ts
import app from "./shared";  //分享给子应用的数据

/*
 * name: 微应用名称 - 具有唯一性
 * entry: 微应用入口 - 通过该地址加载微应用
 * container: 微应用挂载节点 - 微应用加载完成后将挂载在该节点上
 * activeRule: 微应用触发的路由规则 - 触发路由规则后将加载该微应用
 * props: 共享给微应用的数据
 */
const apps: any = [
    {
        name: "vue-project",
        entry: "//localhost:10300",
        container: "#app-qiankun",
        activeRule: "/vue",
        props: { app }
    },
    {
        name: "react-project",
        entry: "//localhost:10100",
        container: "#app-qiankun",
        activeRule: "/react",
        props: { app }
    }
];

export default apps;
子应用配置
使用create-react-app初始化了react应用
在根目录新增.env文件,增加以下配置
PORT=10100
BROWSER=none
1、react入口配置
// public-path.js
if (window.__POWERED_BY_QIANKUN__) {
    // 动态设置 webpack publicPath,防止资源加载出错
    // eslint-disable-next-line no-undef
    __webpack_public_path__ = window.__INJECTED_PUBLIC_PATH_BY_QIANKUN__;
}
//index.js
import React from 'react';
import ReactDOM from 'react-dom';
import './index.css';
import App from './App';
import * as serviceWorker from './serviceWorker';
import "./public-path";

let root = document.getElementById("root");

function render() {
  ReactDOM.render(
    <React.StrictMode>
      <App />
    </React.StrictMode>,
    root
  );
}

if (!window.__POWERED_BY_QIANKUN__) {
  render();
}

export async function bootstrap() {
  console.log("ReactMicroApp bootstraped");
}

/**
 * 应用每次进入都会调用 mount 方法,通常我们在这里触发应用的渲染方法
 */
export async function mount(props) {
  console.log("ReactMicroApp mount", props);
  root = document.getElementById("root");
  render(props);
}

/**
 * 应用每次 切出/卸载 会调用的方法,通常在这里我们会卸载微应用的应用实例
 */
export async function unmount() {
  console.log("ReactMicroApp unmount");
  //console.log(ReactDOM);
  ReactDOM.unmountComponentAtNode(root);
  root = null;
}

// If you want your app to work offline and load faster, you can change
// unregister() to register() below. Note this comes with some pitfalls.
// Learn more about service workers: https://bit.ly/CRA-PWA
serviceWorker.unregister();
2、配置webpack打包策略
利用react-app-rewired修改打包配置。
//config-overrides.js
const path = require("path");

module.exports = {
  webpack: (config) => {
    // 微应用的包名,这里与主应用中注册的微应用名称一致
    config.output.library = `react-project`;
    // 将你的 library 暴露为所有的模块定义下都可运行的方式
    config.output.libraryTarget = "umd";
    // 按需加载相关,设置为 webpackJsonp_react-project 即可
    config.output.jsonpFunction = `webpackJsonp_react-project`;

    config.resolve.alias = {
      ...config.resolve.alias,
      "@": path.resolve(__dirname, "src"),
    };
    return config;
  },

  devServer: function (configFunction) {
    return function (proxy, allowedHost) {
      const config = configFunction(proxy, allowedHost);
      // 关闭主机检查,使微应用可以被 fetch
      config.disableHostCheck = true;
      // 配置跨域请求头,解决开发环境的跨域问题
      config.headers = {
        "Access-Control-Allow-Origin": "*",
      };
      // 配置 history 模式
      config.historyApiFallback = true;

      return config;
    };
  },
};
到此react的子应用也接入完成了,可以启动看看效果
还有没使用webpack的应用接入、Angular等应用的接入就不多说了,感兴趣的可以自行找资料。
nginx部署打包的文件
nginx的安装和使用就不介绍了,不熟悉的可自行百度。
nginx配置
#user  nobody;
worker_processes  1;

events {
    worker_connections  1024;
}

http {
    include       mime.types;
    default_type  application/octet-stream;

    sendfile        on;
    #tcp_nopush     on;

    #keepalive_timeout  0;
    keepalive_timeout  65;

    #gzip  on;

    server {
        listen       80;
        server_name  localhost;

        #charset koi8-r;

        #access_log  logs/host.access.log  main;

        location / {
            root   html/dist;
            index  index.html index.htm;
            try_files $uri $uri/ /index.html;
            error_page 404 /index.html;
        }

        #error_page  404              /404.html;

        # redirect server error pages to the static page /50x.html
        #
        error_page   500 502 503 504  /50x.html;
        location = /50x.html {
            root   html;
        }
    }

    server {
        listen       10300;
        server_name  localhost;

        location / {
            root   html/vue;
            index  index.html index.htm;
            try_files $uri $uri/ /index.html;
            add_header 'Access-Control-Allow-Origin' '*';
            add_header 'Access-Control-Allow-Credentials' 'true';
            add_header 'Access-Control-Allow-Methods' 'GET, POST, OPTIONS';
            add_header 'Access-Control-Allow-Headers' 'DNT,X-CustomHeader,Keep-Alive,User-Agent,X-Requested-With,If-Modified-Since,Cache-Control,Content-Type';
        }

        #error_page  404              /404.html;

        # redirect server error pages to the static page /50x.html
        #
        error_page   500 502 503 504  /50x.html;
        location = /50x.html {
            root   html;
        }
    }

    server {
        listen       10100;nginx
        server_name  localhost;

        location / {
            root   html/react;
            index  index.html index.htm;
            try_files $uri $uri/ /index.html;
            add_header 'Access-Control-Allow-Origin' '*';
            add_header 'Access-Control-Allow-Credentials' 'true';
            add_header 'Access-Control-Allow-Methods' 'GET, POST, OPTIONS';
            add_header 'Access-Control-Allow-Headers' 'DNT,X-CustomHeader,Keep-Alive,User-Agent,X-Requested-With,If-Modified-Since,Cache-Control,Content-Type';
        }

        #error_page  404              /404.html;

        # redirect server error pages to the static page /50x.html
        #
        error_page   500 502 503 504  /50x.html;
        location = /50x.html {
            root   html;
        }
    }

    server {
        listen       10400;
        server_name  localhost;

        location / {
            root   html/static;
            index  index.html index.htm;
            try_files $uri $uri/ /index.html;
            add_header 'Access-Control-Allow-Origin' '*';
            add_header 'Access-Control-Allow-Credentials' 'true';
            add_header 'Access-Control-Allow-Methods' 'GET, POST, OPTIONS';
            add_header 'Access-Control-Allow-Headers' 'DNT,X-CustomHeader,Keep-Alive,User-Agent,X-Requested-With,If-Modified-Since,Cache-Control,Content-Type';
        }

        #error_page  404              /404.html;

        # redirect server error pages to the static page /50x.html
        #
        error_page   500 502 503 504  /50x.html;
        location = /50x.html {
            root   html;
        }
    }


}
线上为了安全考虑,Access-Control-Allow-Origin不应该配置为*,应配置指定的域名。简单说明上图nginx的配置
html/dist为我们主应用,配置的80端口,html/static简单写下的无webpack打包的项目。- 每个server都配置了不同框架的前端包。
- 注意配置的访问地址得和主应用apps中的一致。
往期回顾
demo地址
总结
以上所有应用的路由模式都是统一使用history模式,有尝试过统一的hash模式没成功,如果两种模式混合呢?有尝试过统一的hash模式或者两种模式混合成功的掘友吗?
本人水平有限,搬砖不易,不足之处请多指教!
