/// 注册 session
$ pod trunk register YOURMAIL 'YOURNAME' --verbose
opening connection to trunk.cocoapods.org:443...
opened
starting SSL for trunk.cocoapods.org:443...
SSL established, protocol: TLSv1.2, cipher: ECDHE-RSA-AES128-GCM-SHA256
<- "POST /api/v1/sessions HTTP/1.1\r\nContent-Type: application/json; charset=utf-8\r\nAccept: application/json; charset=utf-8\r\nUser-Agent: CocoaPods/1.7.2\r\nAccept-Encoding: gzip;q=1.0,deflate;q=0.6,identity;q=0.3\r\nHost: trunk.cocoapods.org\r\nContent-Length: 75\r\n\r\n"
<- "{\"email\":\"YOURMAIL\",\"name\":\"YOURNAME\",\"description\":null}"
-> "HTTP/1.1 201 Created\r\n"
-> "Date: Thu, 20 Jun 2019 14:17:48 GMT\r\n"
-> "Connection: keep-alive\r\n"
-> "Strict-Transport-Security: max-age=31536000\r\n"
-> "Content-Type: application/json\r\n"
-> "Content-Length: 192\r\n"
-> "X-Content-Type-Options: nosniff\r\n"
-> "Server: thin 1.6.2 codename Doc Brown\r\n"
-> "Via: 1.1 vegur\r\n"
-> "\r\n"
reading 192 bytes...
-> "{\"created_at\":\"2019-06-20 14:17:48 UTC\",\"valid_until\":\"2019-10-26 14:17:48 UTC\",\"verified\":false,\"created_from_ip\":\"223.104.3.12\",\"description\":null,\"token\":\"xxxxxxxxxx\"}"read 192 bytes
Conn keep-alive
[!] Please verify the session by clicking the link in the verification email that has been sent to YOURMAIL
去邮箱点击验证链接
验证是否注册成功
$ pod trunk me
  - Name:     YOURNAME
  - Email:    YOURMAIL
  - Since:    June 2nd, 05:34
  - Pods:
    - PodName
  - Sessions:
    - June 2nd, 19:49 - October 8th, 19:51. IP: ****   Description:
    macbook pro
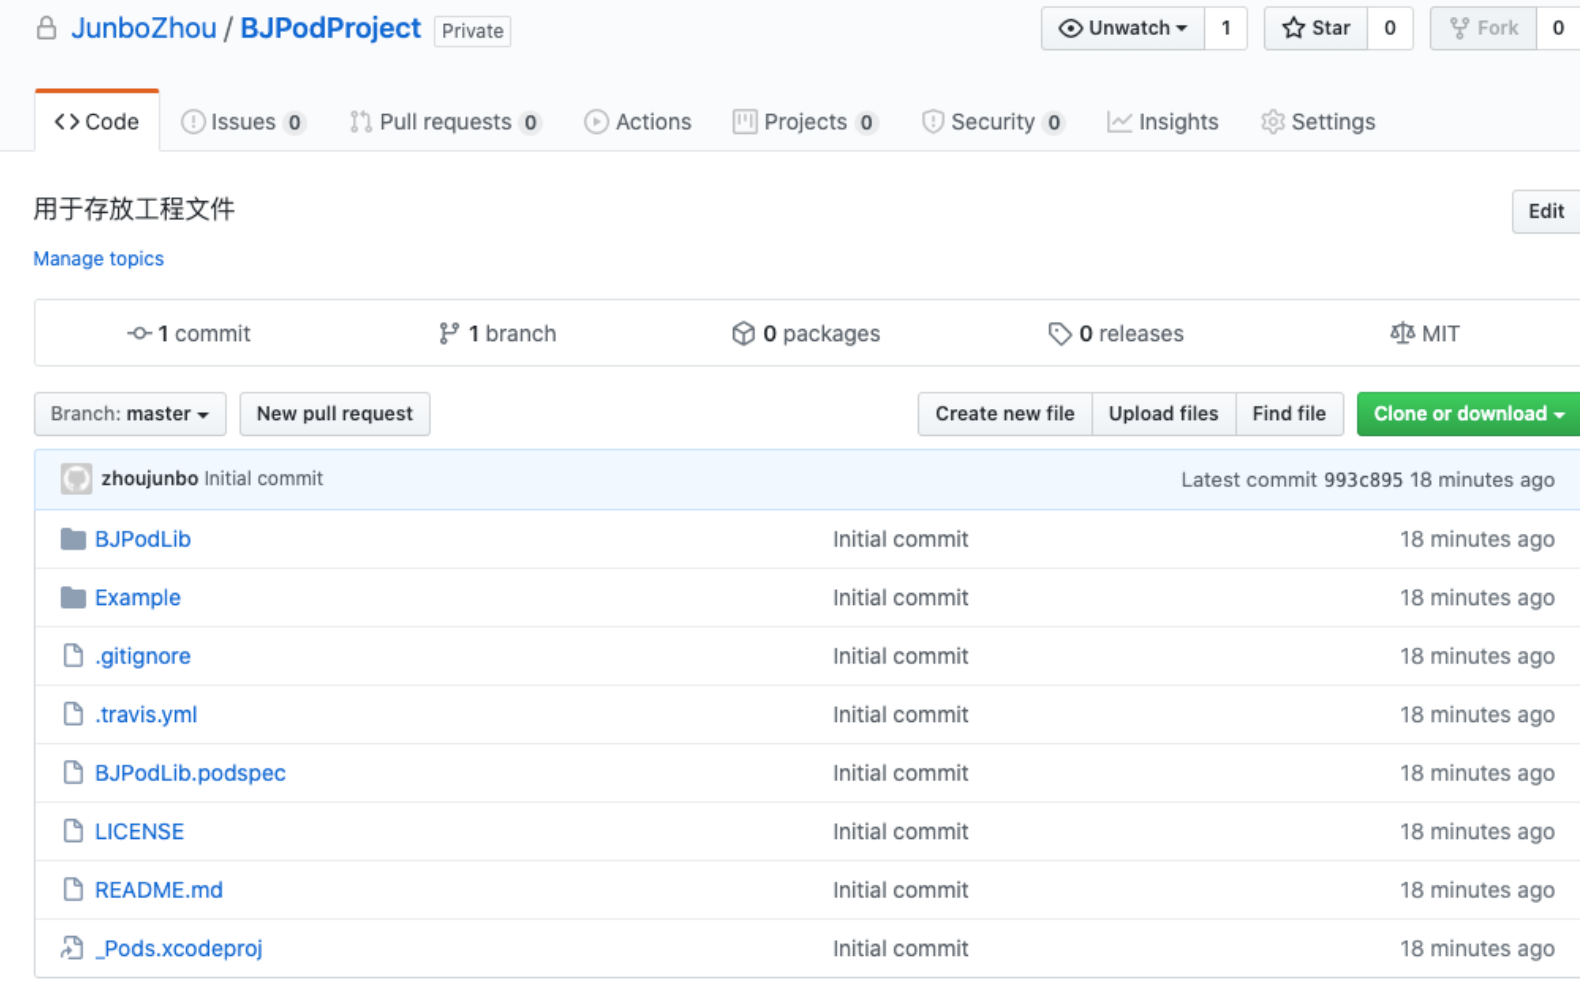
二.创建一个spec Repo的私有远程仓库 和 一个存放pod所需的项目工程文件的远程仓库
可以去github或者码云之类的平台建立两个空项目就ok了
创建spec Repo
前往文件夹 ~/.cocoapods/repos
pod repo Specname spec的git地址
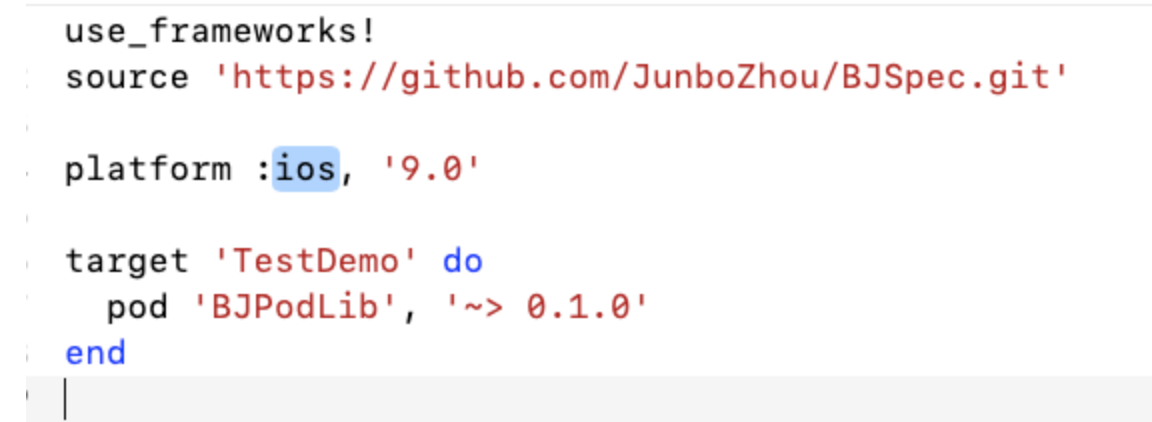
pod repo BJSpec https://github.com/JunboZhou/BJSpec.git
创建pod的所需的项目工程文件,并上传到远程私有仓库
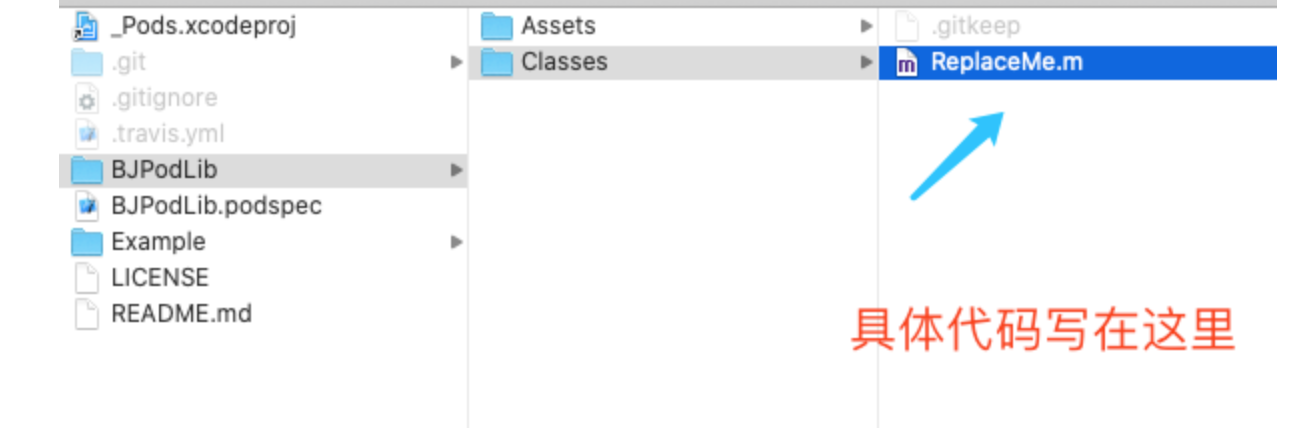
1.创建本地pod所需的项目工程文件
执行: pod lib create YOURPODNAME,接下来按照提示,根据自己的情况进行就可以了。
找一个本地路径用于开发框架,进入路径,执行pod lib create YOURPODNAME
执行 pod lib create BJPodLib 如下
Cloning `https://github.com/CocoaPods/pod-template.git` into `BJPodLib`.
Configuring BJPodLib template.

------------------------------

To get you started we need to ask a few questions, this should only take a minute.

If this is your first time we recommend running through with the guide:
 - https://guides.cocoapods.org/making/using-pod-lib-create.html
 ( hold cmd and click links to open in a browser. )


What platform do you want to use?? [ iOS / macOS ]
 > ios

What language do you want to use?? [ Swift / ObjC ]
 > objc

Would you like to include a demo application with your library? [ Yes / No ]
 > yes

Which testing frameworks will you use? [ Specta / Kiwi / None ]
 > non

Possible answers are [ Specta / Kiwi / None ]
 > none

Would you like to do view based testing? [ Yes / No ]
 > yes

What is your class prefix?
 > BJ

Running pod install on your new library.
Pod::Spec.new do |s|
s.name = 'YOURPODNAME'
s.version = '0.1.0'
s.summary = 'A short description of YOURPODNAME.'# This description is used to generate tags and improve search results.# * Think: What does it do? Why did you write it? What is the focus?# * Try to keep it short, snappy and to the point.# * Write the description between the DESC delimiters below.# * Finally, don't worry about the indent, CocoaPods strips it!
s.description = <<-DESC
TODO: Add long description of the pod here.
DESC
s.homepage = 'https://github.com/YOURGITHUBNAME/YOURPODNAME'# s.screenshots = 'www.example.com/screenshots_1', 'www.example.com/screenshots_2'
s.license = { :type => 'MIT', :file => 'LICENSE' }
s.author = { 'youname' => 'YOURMAIL' }
s.source = { :git => 'https://github.com/YOURGITHUBNAME/YOURPODNAME.git', :tag => s.version.to_s }
# s.social_media_url = 'https://twitter.com/<TWITTER_USERNAME>'
s.ios.deployment_target = '8.0'
s.source_files = 'YOURPODNAME/Classes/**/*'# s.resource_bundles = {# 'YOURPODNAME' => ['YOURPODNAME/Assets/*.png']# }# s.public_header_files = 'Pod/Classes/**/*.h'# s.frameworks = 'UIKit', 'MapKit'# s.dependency 'AFNetworking', '~> 2.3'
end
修改完成后,cd 到BJPodLib目录下,然后验证本地podspec文件有效性,终端命令如下:
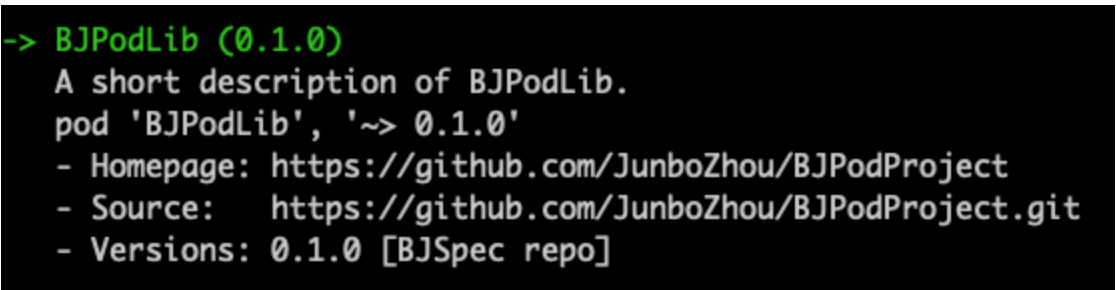
pod lib lint BJPodLib.podspec
如果类似错误可以加上 --allow-warnings 即可
    - WARN  | summary: The summary is not meaningful.
    - WARN  | url: The URL (https://github.com/JunboZhou/BJPodProject) is not reachable.
    - NOTE  | xcodebuild:  note: Using new build system
    - NOTE  | xcodebuild:  note: Building targets in parallel
    - NOTE  | [iOS] xcodebuild:  note: Planning build
    - NOTE  | [iOS] xcodebuild:  note: Constructing build description
    - NOTE  | [iOS] xcodebuild:  warning: Skipping code signing because the target does not have an Info.plist file and one is not being generated automatically. (in target 'App' from project 'App')
    - NOTE  | [iOS] xcodebuild:  note: Execution policy exception registration failed and was skipped: Error Domain=NSPOSIXErrorDomain Code=1 "Operation not permitted" (in target 'BJPodLib' from project 'Pods')
    - NOTE  | [iOS] xcodebuild:  note: Execution policy exception registration failed and was skipped: Error Domain=NSPOSIXErrorDomain Code=1 "Operation not permitted" (in target 'Pods-App' from project 'Pods')
    - NOTE  | [iOS] xcodebuild:  note: Execution policy exception registration failed and was skipped: Error Domain=NSPOSIXErrorDomain Code=1 "Operation not permitted" (in target 'App' from project 'App')

[!] BJPodLib did not pass validation, due to 2 warnings (but you can use `--allow-warnings` to ignore them).