

前言
移动端web项目越来越多,设计师对于UI的要求也越来越高,比如1px 的边框。在高清屏下,移动端的1px 会很粗。现如今已经有许多优秀的1px解决方案
这里总结几种较好用的解决方案
- 伪元素
优点: 因为伪元素::after或::before是独立于当前元素,可以单独对其缩放而不影响元素本身的缩放
伪元素大多数浏览器默认单引号也可以使用,
和伪类一样形式,而且单引号兼容性(ie)更好些
缺点:需要额外编写伪元素样式。对于我这种懒癌往期用户来说,真的头疼;
- less封装
优点:使用 less 对公共代码(方案一)封装,同时增加媒体查询分别对不同 DPR 的设备,进行不同的缩放
缺点:需要调用封装好的less函数。对于不懂less的同学们来说,可能需要额外去学习下less,如果项目没使用预处理(less,sass,stylus),还需要额外引入。
那么,有没有办法我既不额外引入第三方预处理器,也无需额外写一堆伪元素样式? ok,既然你看到这里了,那么就继续加油,马上带你了解一下基于postcss的解决方案。
目录
- 什么是postcss?
- 如何在项目中使用postcss和postcss相关插件?
- postcss插件开发流程和规范
- postcss-border-1px开发、npm包和github
如果你只是想直接使用该插件或者想看代码,你可以直接跳到4。
什么是postcss?
多时候第一次在网上查询 PostCSS 概念的时候,大家都解释成一个后处理器的概念,其实个人觉得这些概念不重要,更为重要的有以下几点:
它本质上是一个什么东西
PostCSS 可以直观的理解为:它就是一个平台、平台、平台,重要的事情来三遍比较爽,哈哈!
什么说它是一个平台呢?因为我们直接用它,感觉不能干什么事情,但是如果让一些插件在它上面跑,那么将会很强大。
PostCSS 提供了一个解析器,它能够将 CSS 解析成抽象语法树(AST)。
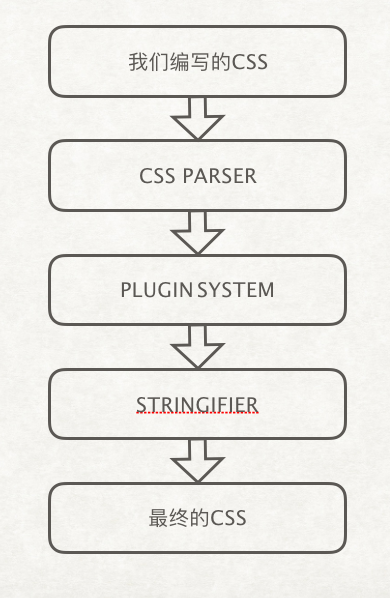
也就是说,postcss只是帮我们把css解析成一个ast,除此之外,它什么都没做。所以说,PostCSS 它需要一个插件系统才能够发挥作用。我们可以通过“插件”来传递AST,然后再把AST转换成一个串,最后再输出到目标文件中去。当然,这里是有API可以用,这里先不讲,免得晕了。
如何在项目中使用postcss?和postcss相关插件
有以下几个步骤
- 在loader中配置postcss
前面说过了,postcss会将css文件转换成AST,所以我们需要为css文件配置postcss-loader,vue-cli3及以上版本都默认配置了postcss,所以你无需再配置。如果你是react版本,请自行google如何配置。
这里有个注意的地方
如果你的项目配置的less sass之类的,需要将less-loader或者sass-loader配置在postcss下面。因为postcss只接受css,无法编译less和sass以及其他语法。 这里以less为例子
{
  test: /\.css$|\.less$/,
  use:
  [
    'style-loader',
    'css-loader',
    'postcss-loader',
    'less-loader'
  ]
}
- 新增postcss.config.js文件
const border1px = require('postcss-botder-1px')
module.exports = {
plugin:[
  border1px({option}) // option是插件的参数
]
}
自此,就完成了插件的使用。在项目中,你可以正常写border
border:1px solid red;
postcss插件开发流程和规范
postcss开发规范
- 用postcss-前缀清除名称。
- 一个插件只做一件事情,也就是单一职责。
- 通过 postcss.plugin 来创建你的插件
 module.exports = postcss.plugin('plugin-name', opts => {
  return (root, result) => {
    // Plugin code
  }
})
- 只使用postcss提供的公共的api来编写 PostCSS插件不得依赖未记录的属性或方法,postcss提供可很多非常好用的api。
postcss开发流程
1. 了解postcss解析的ast。
例子:
要解析的css代码:
.demo{
  border:1px solid red;
}
解析后的ast:
{
  "raws": {
    "semicolon": false,
    "after": ""
  },
  "type": "root",
  "nodes": [
    {
      "raws": {
        "before": "",
        "left": "",
        "right": "\n "
      },
      "type": "comment",
      "source": {
        "start": {
          "line": 1,
          "column": 1
        },
        "input": {
          "css": "/**\n * Paste or drop some CSS here and explore\n * the syntax tree created by chosen parser.\n * Enjoy!\n */\n\n.demo{\n  border:1px solid red;\n}",
          "hasBOM": false,
          "id": "<input css 31>"
        },
        "end": {
          "line": 5,
          "column": 3
        }
      },
      "text": "*\n * Paste or drop some CSS here and explore\n * the syntax tree created by chosen parser.\n * Enjoy!"
    },
    {
      "raws": {
        "before": "\n\n",
        "between": "",
        "semicolon": true,
        "after": "\n"
      },
      "type": "rule",
      "nodes": [
        {
          "raws": {
            "before": "\n  ",
            "between": ":"
          },
          "type": "decl",
          "source": {
            "start": {
              "line": 8,
              "column": 3
            },
            "input": {
              "css": "/**\n * Paste or drop some CSS here and explore\n * the syntax tree created by chosen parser.\n * Enjoy!\n */\n\n.demo{\n  border:1px solid red;\n}",
              "hasBOM": false,
              "id": "<input css 31>"
            },
            "end": {
              "line": 8,
              "column": 23
            }
          },
          "prop": "border",
          "value": "1px solid red"
        }
      ],
      "source": {
        "start": {
          "line": 7,
          "column": 1
        },
        "input": {
          "css": "/**\n * Paste or drop some CSS here and explore\n * the syntax tree created by chosen parser.\n * Enjoy!\n */\n\n.demo{\n  border:1px solid red;\n}",
          "hasBOM": false,
          "id": "<input css 31>"
        },
        "end": {
          "line": 9,
          "column": 1
        }
      },
      "selector": ".demo"
    }
  ],
  "source": {
    "input": {
      "css": "/**\n * Paste or drop some CSS here and explore\n * the syntax tree created by chosen parser.\n * Enjoy!\n */\n\n.demo{\n  border:1px solid red;\n}",
      "hasBOM": false,
      "id": "<input css 31>"
    },
    "start": {
      "line": 1,
      "column": 1
    }
  }
}
是不是感觉看的晕头转向?别怕!通过打印,你将会看到树型结构的Js对象是一个名为Root的构造函数,而起树型结构的nodes节点下还有Commont,AtRule,Rule构造函数。
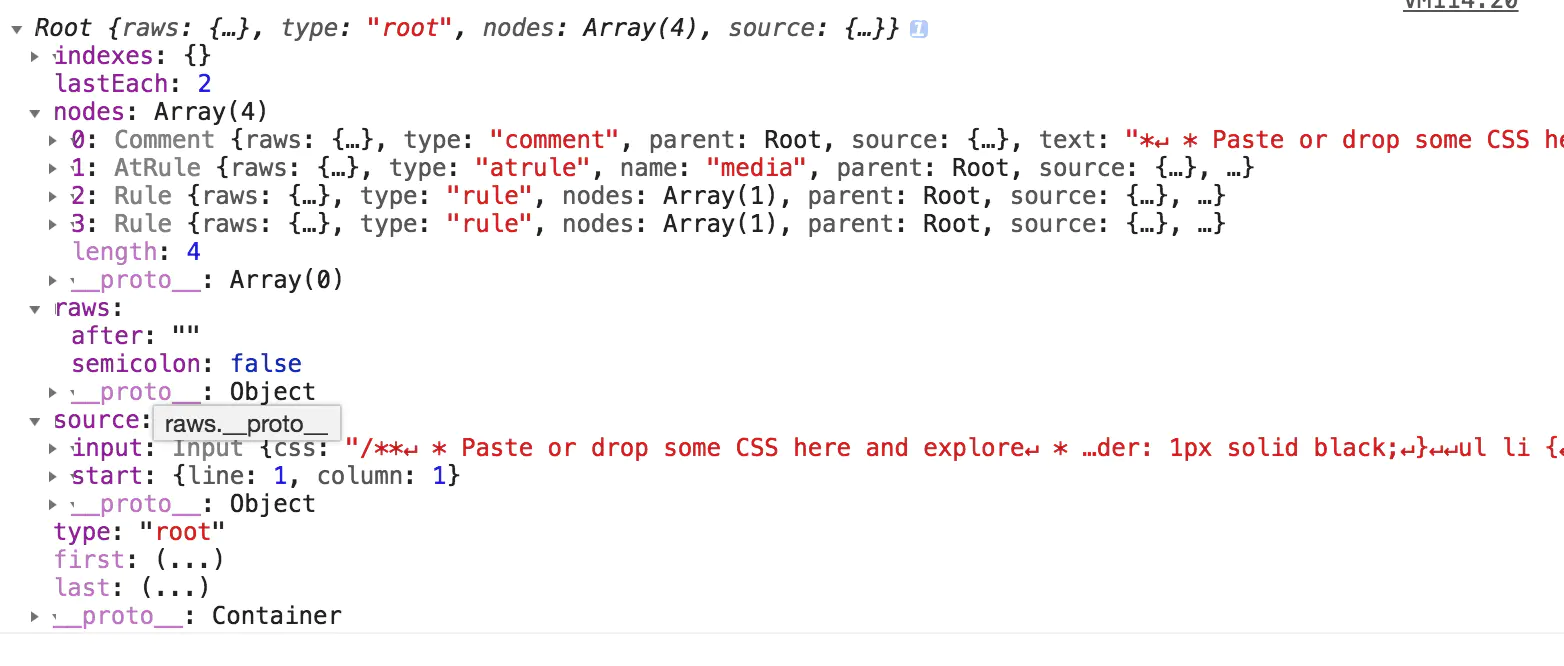
- Root: PostCss处理过的Css,整个处理过程基本上都在围绕着Root,Commont,AtRule,Rule都是它的子节点。
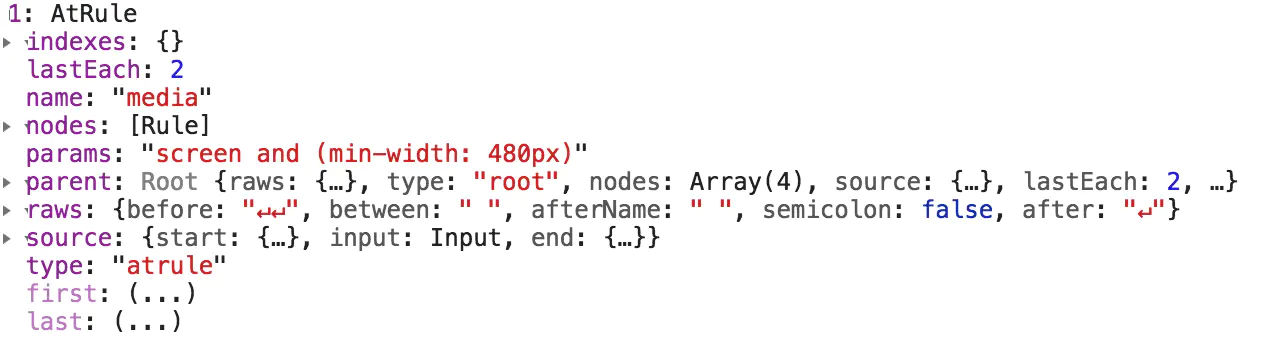
- Commont: Css中的注释信息,注释的内容在Commont.text下。

- AtRule: 为带@标识的部分,name为标识名称,params为标识参数。nodes为内部包含的其他子节点,可以是Commont,AtRule,Rule,这让我们可以自定义更多的规则
- Rule: 选择器样式部分,一个选择器代表一个Rule,选择器对应的样式列表nodes为Declaration构造函数
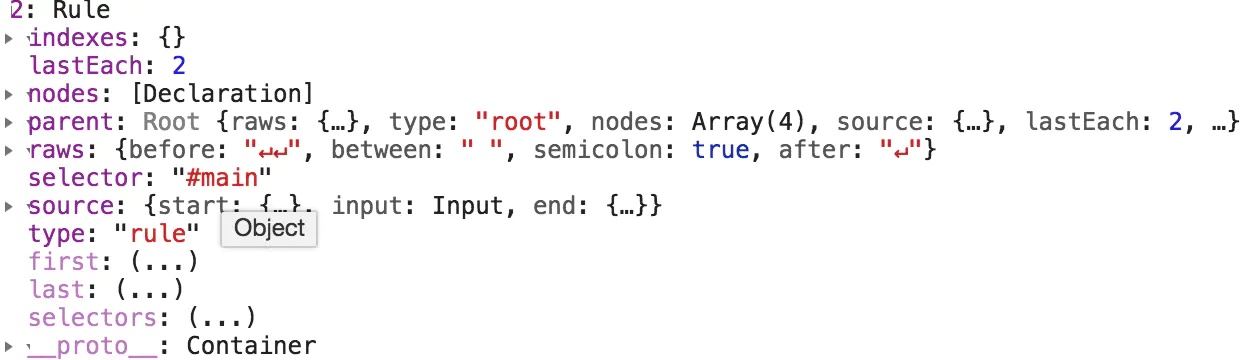
- Declaration: 为Css样式属性,prop为样式属性,value为样式值。可给Rule手动添加样式属性,也可以修改prop,value。

2. 如何调试插件?
postcss插件也可以在node环境中单独运行。
其中,index.js文件就是你编写的插件入口
// 本地测试文件,如果要执行,需要手动创建  /demo/ccs.css
const postcss = require('postcss')
const process = require('process')
const fs = require('fs')
// index.js文件就是你编写的插件入口
const borderFill = require('./index.js')
fs.readFile('./demo/ccs.css', (err, css) => {
  postcss((borderFill)({ ratio: 100, replace: false }))
    .process(css, { from: './demo/css.css', to: './dist/css.css' })
    .then(result => {
      fs.writeFile('./dist/css.css', result.css, () => true)
      if (result.map) {
        fs.writeFile('./dist/css.map', result.map, () => true)
      }
    })
})
这样,你就可以在一个自己搭建的简易的环境中测试你编写的postcss插件了。
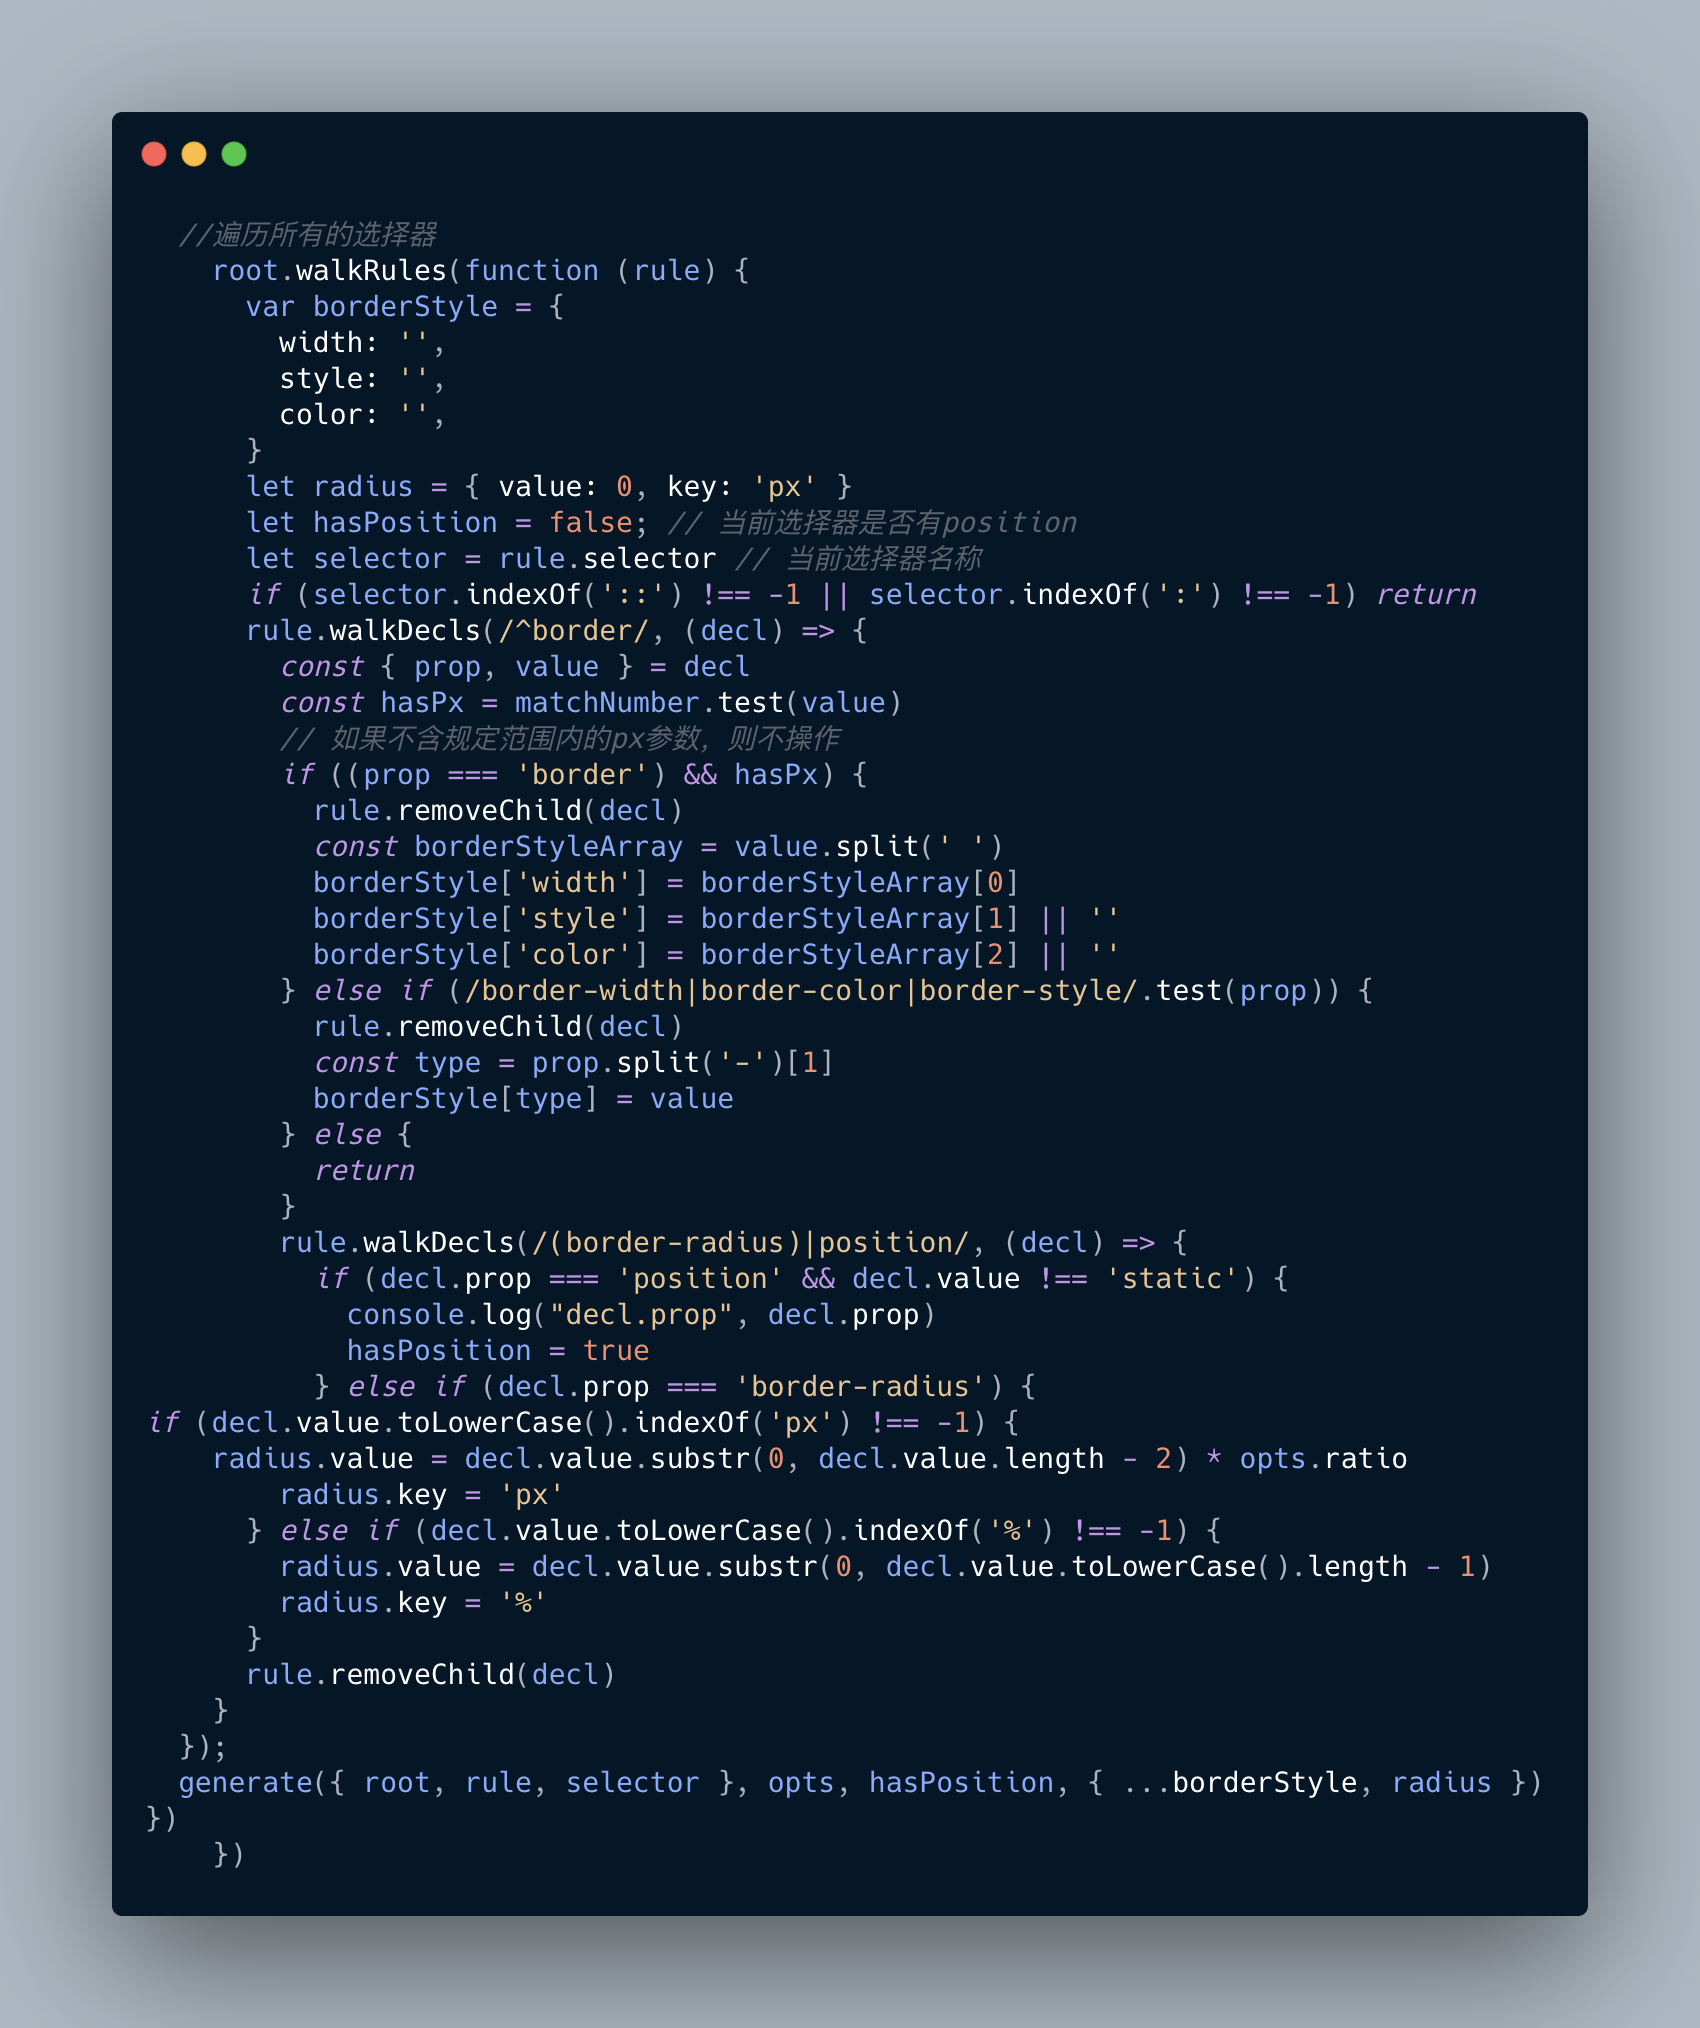
3. 如何编写插件?
上文中,我们对Css处理后生成的Root以及其节点下的Commont,AtRule,Rule, Declaration有了基本的认识,那么我们是如何获得Root,又将拿这些构造函数做些什么呢。
carbon (1).png
总结如下:
我们要重点关注对象
Root,Commont,AtRule,Rule, Declaration,Result;遍历这些对象的方法,在上文提到的api文档中也有详细介绍。
walkCommonts,walkAtRules,walkRules,walkDels;
- 遍历完后,我们匹配到对应的节点后,就需要对节点进行操作,有以下api:
append、clone、remove、after、before、insert
postcss-border-1px开发
npm i postcss-border-1px --s -d
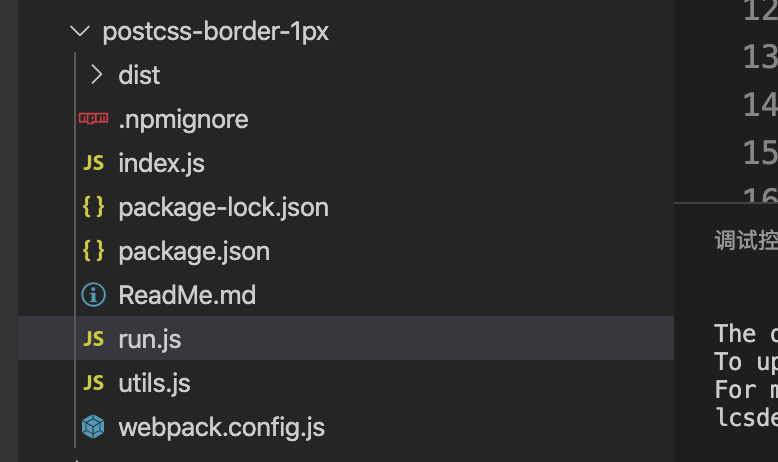
1.目录。
创建postcss-border-1px 项目
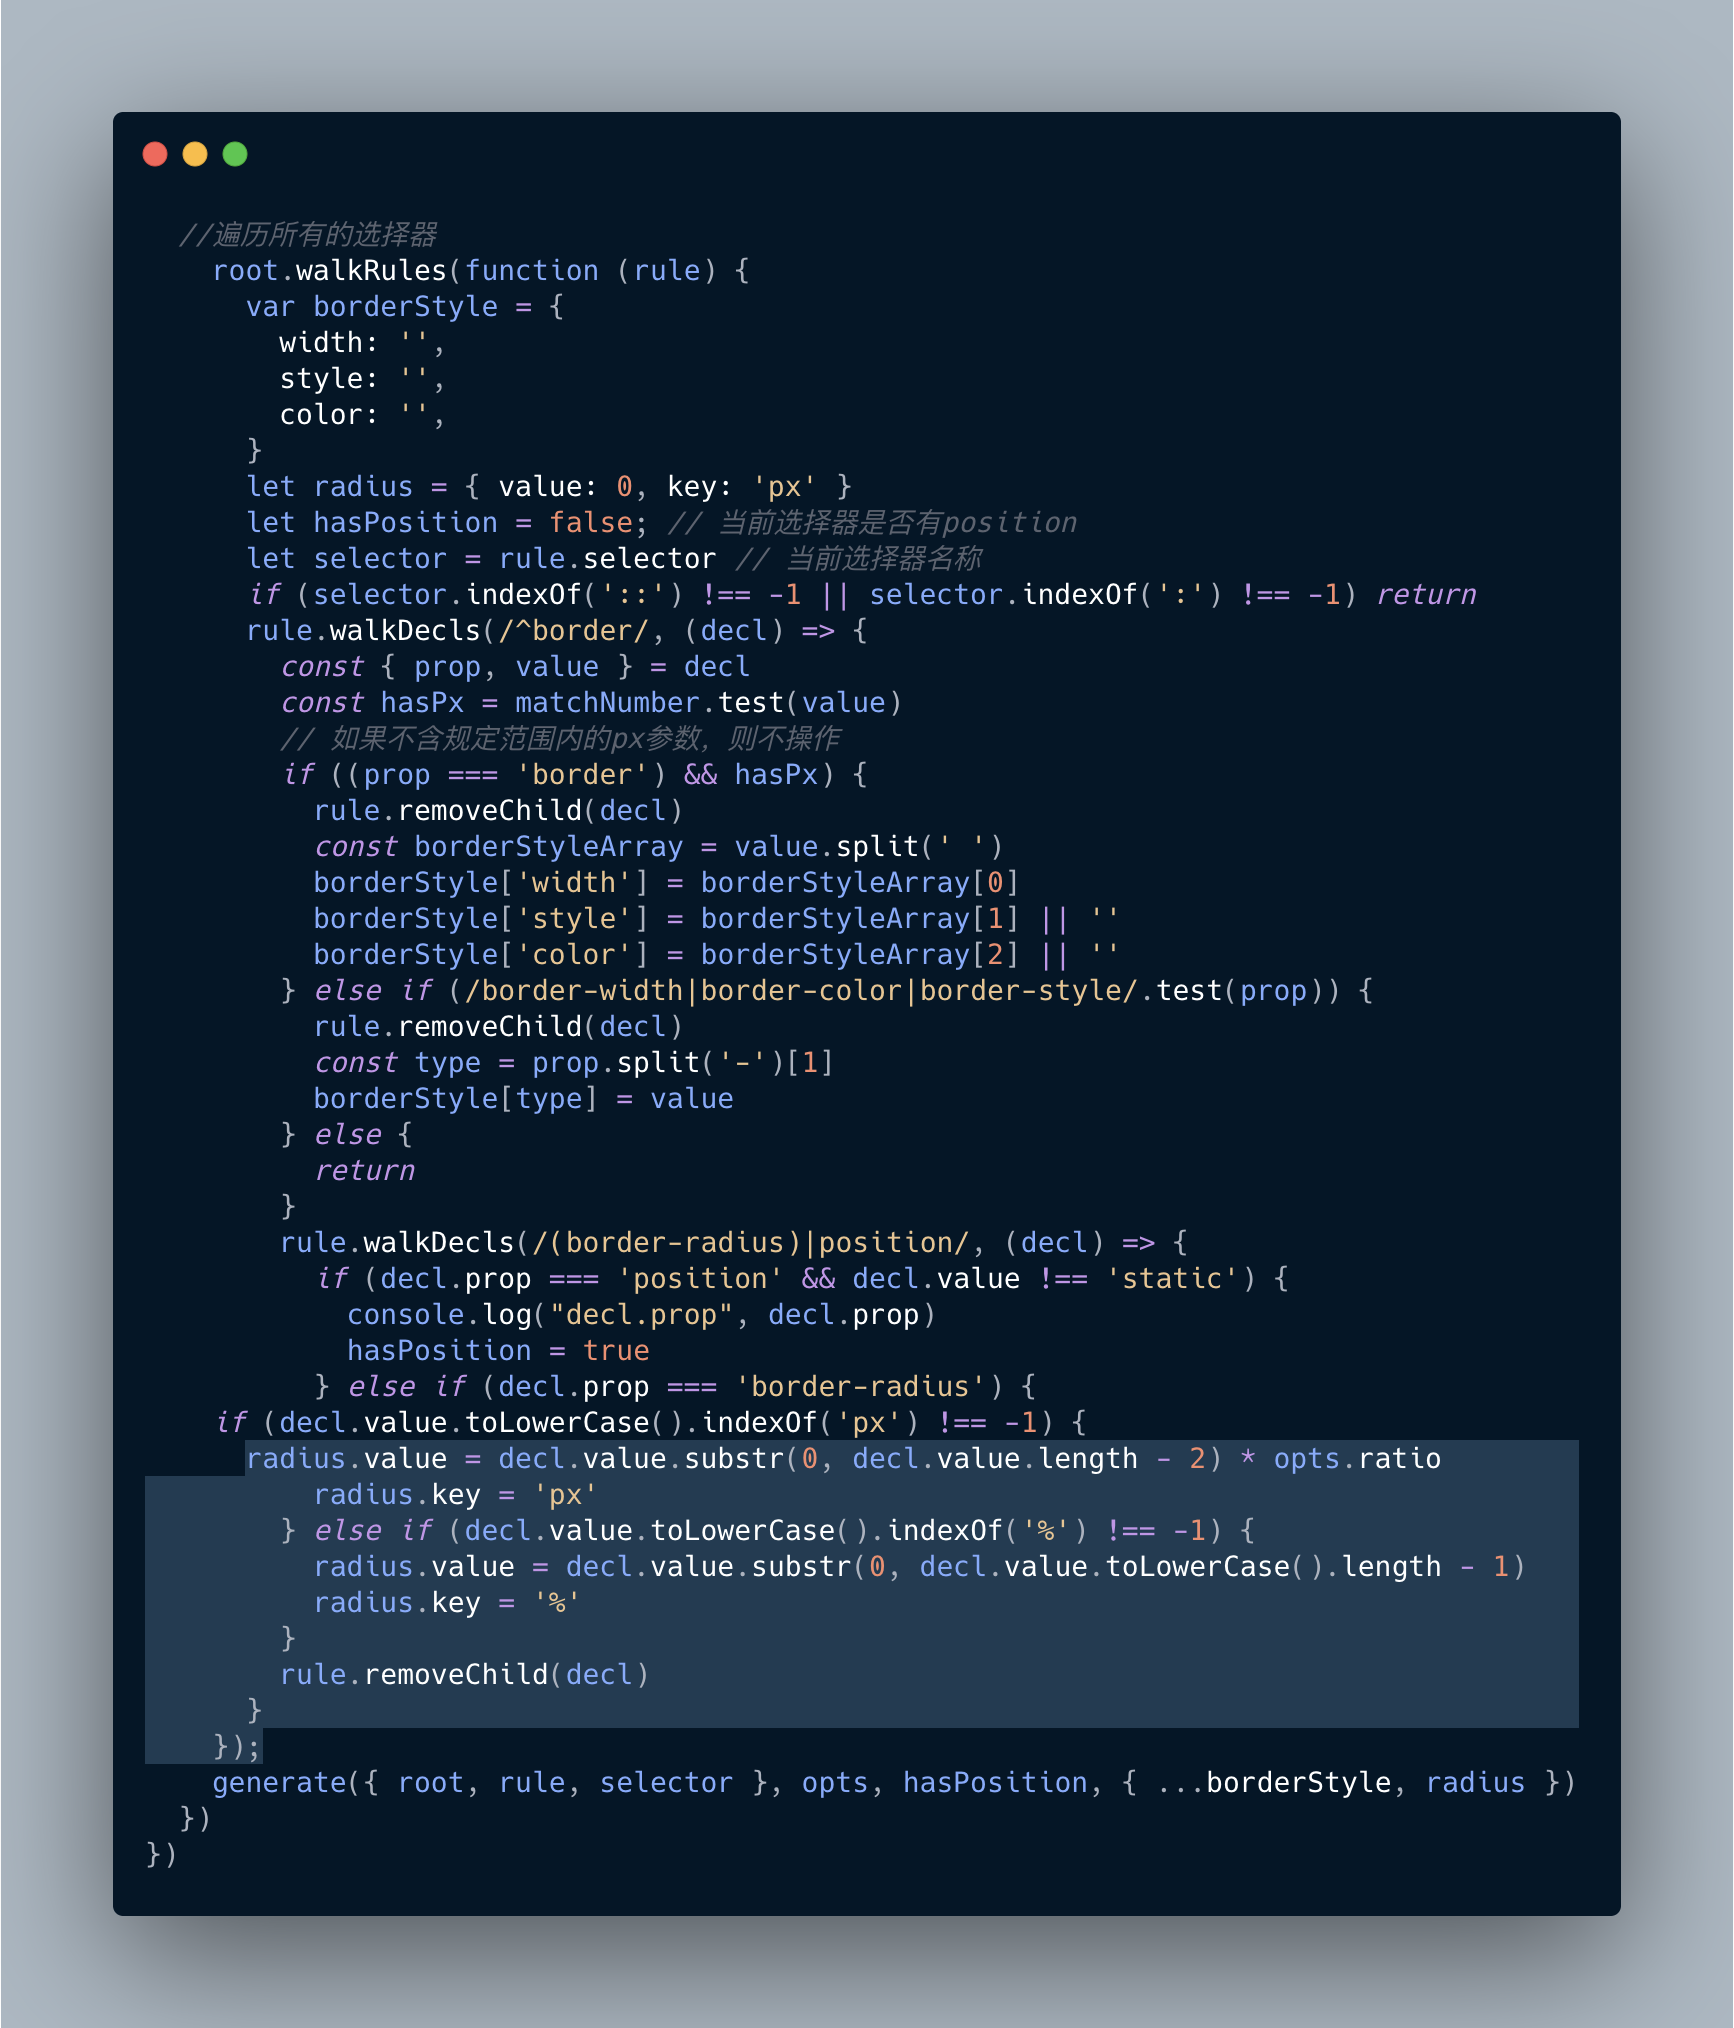
插件思路: 主要是通过遍历css选择器,检测border属性,如果有,就为该选择器新增一个伪元素,并添加伪元素样式。
carbon.png
补充:
- postcss介绍:www.cnblogs.com/wangking/p/…
- postCss 插件体系:github.com/postcss/pos…
- postCss 插件编写标准:github.com/postcss/pos…
- postcss 使用文档:github.com/postcss/pos…
- postcss 插件开发方法 www.jianshu.com/p/f776c2045…
欢迎关注公众号:前端开发指南

本文使用 mdnice 排版
