

关于写此文的目的:
第一次接触富文本编辑器,尤其是react-quill这种,百度不到的各种坑,踩了无数的坑终于搞明白了。
1.安装
npm i react-quill --save
需要用到emjo的话还需要npm i quillEmoji --save
安装完之后页面引进
import ReactQuill, { Quill } from 'react-quill';
import 'react-quill/dist/quill.snow.css';
import quillEmoji from 'quill-emoji';
import "quill-emoji/dist/quill-emoji.css"; //这个不引入的话会出现emoji框一直在输入框下面的情况
import { ImageDrop } from './plugin/quill-image-drop-module'; //讲图片拖进文本框,可以直接安装quill-image-drop-module;但由于我的webpack版本过低,无法兼容es6,所以把插件拿出来了
//注册ToolbarEmoji,将在工具栏出现emoji;注册TextAreaEmoji,将在文本输入框处出现emoji。VideoBlot是我自定义的视频组件,后面会讲,
const { EmojiBlot, ShortNameEmoji, ToolbarEmoji, TextAreaEmoji } = quillEmoji;
Quill.register({
  'formats/emoji': EmojiBlot,
  'formats/video': VideoBlot,
  'modules/emoji-shortname': ShortNameEmoji,
  'modules/emoji-toolbar': ToolbarEmoji,
  'modules/emoji-textarea': TextAreaEmoji,
  // 'modules/ImageExtend': ImageExtend, //拖拽图片扩展组件
  'modules/ImageDrop': ImageDrop, //复制粘贴组件
}, true);
next。
初始化富文本实例,我写在constructor里,module也是写在这里边
constructor(props) { super(props); this.reactQuillRef = null; }
富文本组件react-quill参数
<ReactQuill
      ref={(el) => { this.reactQuillRef = el }}
      defaultValue={postRichText}
       key="1"
       id="textDiv1" theme="snow" modules={this.modules}  />
工具栏modules的定义基本属性如下:
 this.modules = {
      toolbar: {
        container: [
          [{ 'size': ['small', false, 'large', 'huge'] }], //字体设置
          // [{ 'header': [1, 2, 3, 4, 5, 6, false] }], //标题字号,不能设置单个字大小
          ['bold', 'italic', 'underline', 'strike'],
          [{ 'list': 'ordered' }, { 'list': 'bullet' }, { 'indent': '-1' }, { 'indent': '+1' }],
          ['link', 'image'], // a链接和图片的显示
          [{ 'align': [] }],
          [{
            'background': ['rgb(  0,   0,   0)', 'rgb(230,   0,   0)', 'rgb(255, 153,   0)',
              'rgb(255, 255,   0)', 'rgb(  0, 138,   0)', 'rgb(  0, 102, 204)',
              'rgb(153,  51, 255)', 'rgb(255, 255, 255)', 'rgb(250, 204, 204)',
              'rgb(255, 235, 204)', 'rgb(255, 255, 204)', 'rgb(204, 232, 204)',
              'rgb(204, 224, 245)', 'rgb(235, 214, 255)', 'rgb(187, 187, 187)',
              'rgb(240, 102, 102)', 'rgb(255, 194, 102)', 'rgb(255, 255, 102)',
              'rgb(102, 185, 102)', 'rgb(102, 163, 224)', 'rgb(194, 133, 255)',
              'rgb(136, 136, 136)', 'rgb(161,   0,   0)', 'rgb(178, 107,   0)',
              'rgb(178, 178,   0)', 'rgb(  0,  97,   0)', 'rgb(  0,  71, 178)',
              'rgb(107,  36, 178)', 'rgb( 68,  68,  68)', 'rgb( 92,   0,   0)',
              'rgb(102,  61,   0)', 'rgb(102, 102,   0)', 'rgb(  0,  55,   0)',
              'rgb(  0,  41, 102)', 'rgb( 61,  20,  10)']
          }],
          [{
            'color': ['rgb(  0,   0,   0)', 'rgb(230,   0,   0)', 'rgb(255, 153,   0)',
              'rgb(255, 255,   0)', 'rgb(  0, 138,   0)', 'rgb(  0, 102, 204)',
              'rgb(153,  51, 255)', 'rgb(255, 255, 255)', 'rgb(250, 204, 204)',
              'rgb(255, 235, 204)', 'rgb(255, 255, 204)', 'rgb(204, 232, 204)',
              'rgb(204, 224, 245)', 'rgb(235, 214, 255)', 'rgb(187, 187, 187)',
              'rgb(240, 102, 102)', 'rgb(255, 194, 102)', 'rgb(255, 255, 102)',
              'rgb(102, 185, 102)', 'rgb(102, 163, 224)', 'rgb(194, 133, 255)',
              'rgb(136, 136, 136)', 'rgb(161,   0,   0)', 'rgb(178, 107,   0)',
              'rgb(178, 178,   0)', 'rgb(  0,  97,   0)', 'rgb(  0,  71, 178)',
              'rgb(107,  36, 178)', 'rgb( 68,  68,  68)', 'rgb( 92,   0,   0)',
              'rgb(102,  61,   0)', 'rgb(102, 102,   0)', 'rgb(  0,  55,   0)',
              'rgb(  0,  41, 102)', 'rgb( 61,  20,  10)']
          }],
          ['clean'], //清空
          ['emoji'], //emoji表情,设置了才能显示
          ['video2'], //我自定义的视频图标,和插件提供的不一样,所以设置为video2
        ],
        handlers: {
          'image': this.imageHandler.bind(this), //点击图片标志会调用的方法
          'video2': this.showVideoModal.bind(this),
        },
      },
      // ImageExtend: {
      //   loading: true,
      //   name: 'img',
      //   action: RES_URL + "connector?isRelativePath=true",
      //   response: res => FILE_URL + res.info.url
      // },
      ImageDrop: true,
      'emoji-toolbar': true,  //是否展示出来
      "emoji-textarea": false, //我不需要emoji展示在文本框所以设置为false
      "emoji-shortname": true,
    }
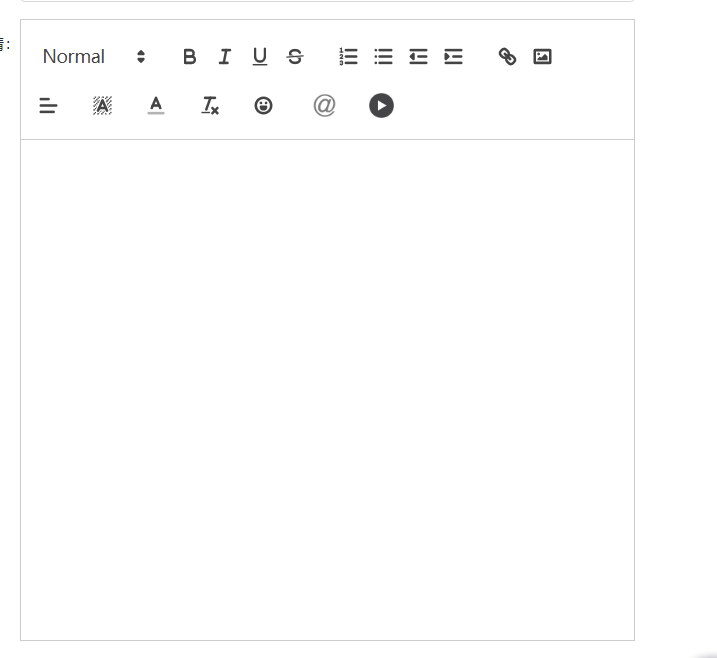
想要的最终效果如下图:
3.功能的开发
1.上传本地图片到服务器,代码如下:
//这是点击图片图标触发的事件
imageHandler() {
    const input = document.createElement('input')
    input.setAttribute('type', 'file')
    input.setAttribute('accept', 'image/*')
    input.setAttribute('multiple', 'multiple')
    input.click()
    const that = this;
    input.onchange = async () => {
      Array.from(input.files).forEach(item => {
      //业务需求安装了压缩图片的插件,可忽略
        new Compressor(item, {
          quality: 0.8,
          convertSize: 1024 * 1024 * 8,
          success(result) {
          //很很很很重要的一步
            const formData = new FormData();
            formData.append('file', result, result.name);
            Axios({
              method: 'post',
              data: formData,
              url: config.RES_URL + 'connector?isRelativePath=true',//图片上传的接口
            }).then(res => {
              if (res.data.success) {
                let quill = that.reactQuillRef.getEditor();//获取到编辑器本身
                const cursorPosition = quill.getSelection().index;//获取当前光标位置
                const link = config.RES_URL + res.data.info.url;
                quill.insertEmbed(cursorPosition, "image", link);//插入图片
                quill.setSelection(cursorPosition + 1);//光标位置加1
              }
            })
          },
        });
      })
    }
  }
到这里已经能实现本地图片上传到服务器的需求了 2.视频自定义
 //上传视频处理
  addVideoItem = (img, url) => {
    let quill = this.reactQuillRef.getEditor();//获取到编辑器本身
    let cursorPosition = quill.selection.savedRange.index
    quill.insertEmbed(cursorPosition, 'Video', {
      url,
      controls: 'controls',
      poster: img,
      width: '100%',
      controlslist: 'nodownload noremoteplayback',
      oncontextmenu: 'return false'
    })
    // 光标不加1的话视频删不掉
    quill.setSelection(cursorPosition + 1);//光标位置加1
    this.setState({
      upVideoShow: false
    })
  }
这段代码功能实现的前提是,我刚开始引入的自定义视频组件,创建视频标签,代码如下:
const Quill = require('quill');

const BlockEmbed = Quill.import('blots/block/embed')
export class VideoBlot extends BlockEmbed {
  static create(value) {
    let node = super.create()
    node.setAttribute('src', value.url)
    node.setAttribute('controls', value.controls)
    node.setAttribute('width', value.width)
    node.setAttribute('poster', value.poster)
    node.setAttribute('controlslist', 'nodownload noremoteplayback')
    node.setAttribute('oncontextmenu', 'return false')
    return node;
  }
  // 富文本初始化取参数,如果有编辑富文本的功能的话,这段代码就需要加上
  static value(node) {
    return {
      url: node.getAttribute('src'),
      controls: node.getAttribute('controls'),
      width: node.getAttribute('width'),
      poster: node.getAttribute('poster'),
      controlslist: node.getAttribute('controlslist'),
      oncontextmenu: node.getAttribute('oncontextmenu')
    };
  }
}
VideoBlot.blotName = 'Video';
VideoBlot.tagName = 'video';
VideoBlot.className = 'ql-video';
完结 踩坑无数搞了两个星期才弄的明明白白,隔了一个月再来写当初怎么艰难开始的也都忘了,写不出来什么了。如有遇到什么问题欢迎留言
