

首先这个项目完成满打满算4天吧
起步
第一步,配置vscode
下载插件
- minapp
- easy-less
- Prettier-Code formatter
- Vetur
- Vue VSCode Snippets 添加以下配置到你的 vscode
创建项目
脚手架搭建项目
1.全局安装
    npm install -g @vue/cli
2.创建项目
    vue create -p dcloudio/uni-preset-vue my-project
3.启动项目(微信小程序)
    npm run dev:mp-weixin
4.微信小程序开发者工具导入项目
注意
1. 以管理员身份运行PowerShell
2. 执行:get-ExecutionPolicy,回复Restricted,表示状态是禁止的
3.执行:set-ExecutionPolicy RemoteSigned
4.选择Y
注意:一定要以管理员的身份运行PowerShell,不是cmd窗口!
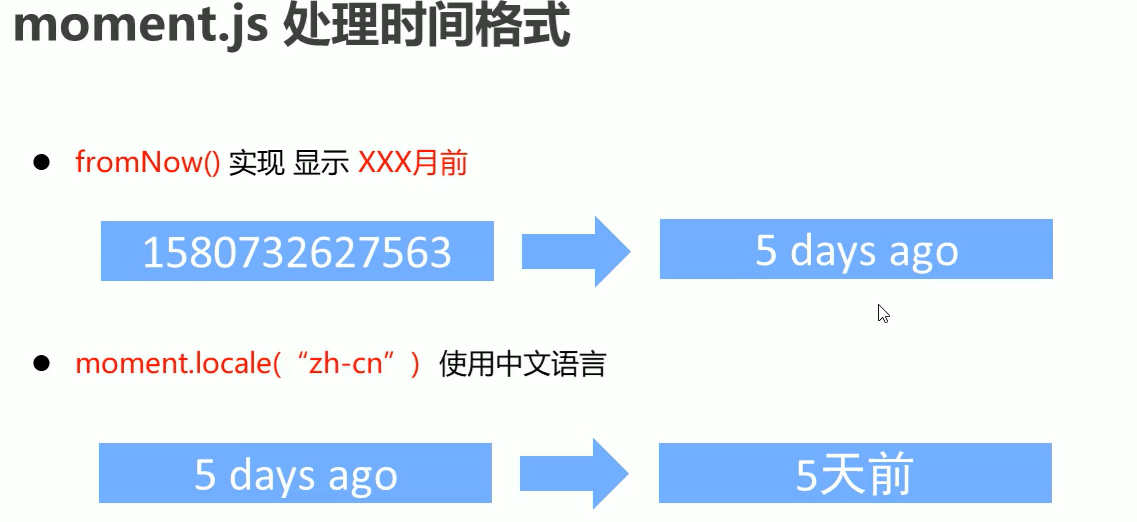
引入的工具
npm install moment --save # npm

//展示
<view class="moneths_info">
    <text>{{monthes.DD}}/</text>
        {{monthes.MM}}月
</view>
//导入
import moment from 'moment';

//方法里引用:
    this.monthes=result.res.homepage[2];
    this.monthes.MM=moment(this.monthes.stime).format('MM');
    this.monthes.DD=moment(this.monthes.stime).format('DD');
注意
-
www.cnblogs.com/damsoft/p/6… 同时选中相同单词 ctrl+shift+L
-
接口会不定时的做一些优化,换成新的接口,所以接口名字也可能变化,要点开APPdate,看看哪里变了,然后去代码里面进行修改
-
太恶心了,node-scss老是自己不见 解决:先uninstall,然后 install
vendor.js超过500k,跳过es6=>es5,只是一个提醒信息,不影响运行效果。

没法真机运行,是因为你的工程整个包体积太大导致的吧,可以在HBuilderX菜单中,运行到小程序模拟器那里,选择运行时压缩代码

尽可能保证自己引用的类库最小化,比如使用echart之类的时候,不要整包引入,而是仅引用自己需要的。
- 有时候这个thumb已经是缩略图, 有时候是大图
轮播图组件和分页组件和改页面标题组件

改页面名字 uni.setNavigationBarTitle
export default {
  mounted () {
    uni.setNavigationBarTitle({ title: '最新' })
  },
}
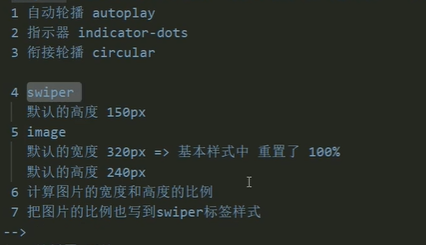
轮播图展示
关键词
autoplay
indicator-dots
circular
  //轮播图
    <view class="album_swiper">
      <swiper autoplay
              indicator-dots
              circular>
        <swiper-item v-for="item in banner"
                     :key="item.id">
          <image :src="item.thumb">
        </swiper-item>
      </swiper>
    </view>
实现单行展示
        关键词
        text-overflow: ellipsis;
        overflow: hidden;
        white-space: nowrap;
加载页面,分页效果
.then(result=>{
          // console.log(result);
          if(this.banner.length === 0){
          this.banner=result.res.banner;
          }
          if(result.res.album.length ===0){
            this.hasMore=false
            return;
          }
          this.album=[...this.album,...result.res.album];
        })
    handleTolower(){
      if(this.hasMore){
        this.params.skip+=this.params.limit;
        this.getList();
      }else{
        uni.showToast({
          title:"到底了",
          icon:"none"
        })
      }
    }
分页滑动
.album_scroll_view {
  height: calc(100vh - 36px);
}
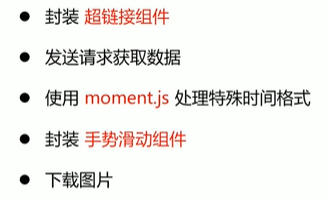
在uni-app里的a标签
<navigator/>   在uni-app里的a标签
<navigator  :url="`/pages/album/index?id=${item.id}`"
//``这个符号是es6里面的语法,这是规定的要加   ?是拼接的意思
</navigator>
链接也可以是动态的
data () {
   return {
    id:-1
   }
 },
onLoad(options){
    this.id=options.id;
 },

 url:'http://157.122.54.189:9088/image/v1/wallpaper/album/${this.id}/wallpaper'

view不能识别特殊符号,比如换行/n,所以要引用下text标签
<view class="album_author_desc"><text>{{album.desc}}</text></view>
拼接规则(修改图片大小)
有时候img本身是大图,但是展示我们需要小图,所以我们可以拼接一个规则(修改图片大小的)比如下面的Height就是规则中的一员,我们可以对它进行修改
 <image mode="aspectFill"
 :src="item.thumb+item.rule.replace('$<Height>',360)"></image>
跳过30条,再加载新的30条
this.params.skip += this.params.limit;
拼接数组
解构新的数组,再解构旧的数组,然后拼接
this.wallpaper = [...this.wallpaper, ...res.wallpaper];
Object.keys(this.album)
如果它括号里面是个对象,且存在属性,则它返回值是数组
 if (Object.keys(this.album).length === 0) {
        this.album = res.album;
  }
点击触发事件
 onLoad(options){
    this.id=options.id;
    getList();
  },
分页触发事件(请求下一页数据)
  onReachBottom () {
    if (this.hasMore) {
      this.params.first = 0;
      this.params.skip += this.params.limit;
      this.getList();
    } else {
      this.showToast()
    }
  },
第一次到底的时候,应该当场跳出提示,而不是等分页事件else跳出提示,注意,一开始是请求了30条数据的,limit:30,???我还是不懂
      if (result.res.wallpaper.length === 0) {
        this.hasMore = false;
        // 第一次不触发 加上触发
        this.showToast()
        return;
      }
长记性了!,含有变量的地址,用`` 不是 '' 母版字符串
url:`http://157.122.54.189:9088/image/v1/wallpaper/album/${this.id}/wallpaper`,
图片详情功能:
如果你不要发送参数,那么不用写data
      const { res } = await this.request({
        url: 'http://157.122.54.189:9088/image/v3/homepage/vertical',
        data: this.params//并不一定要
      })
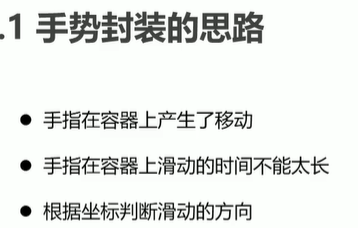
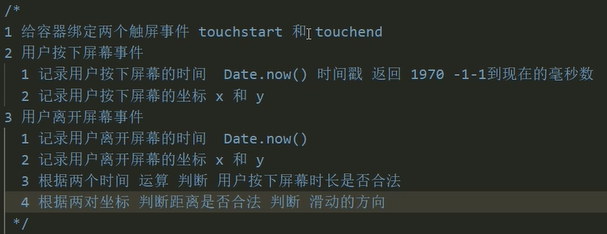
手势封装
swiperAction.vue子组件源码
@touchstart,@touchend,这两个事件uni自带
<template>
<view@touchstart="handleTouchstart"
@touchend="handleTouchend">//声明事件
<slot></slot>
</view>
</template>
<script>
export default {
data () {
return {
startTime: 0,
endTime: 0,
startX: 0,
startY: 0,
endX: 0,
endY: 0,
// 滑动方向
direction: ""
}
},
methods: {
// 用户按下屏幕
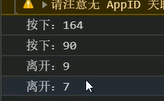
handleTouchstart (event) {
this.startTime = Date.now();
this.startX = event.changedTouches[0].clientX;
this.startY = event.changedTouches[0].clientY;
},
// 用户离开屏幕
handleTouchend (event) {
this.endTime = Date.now();
this.endX = event.changedTouches[0].clientX;
this.endY = event.changedTouches[0].clientY;
if (this.endTime - this.startTime > 2000) {
return;
}
// 判断滑动方向 abs绝对值
if (Math.abs(this.endX - this.startX) > 10 && Math.abs(this.endY - this.startY) < 20) {
this.direction = this.endX - this.startX > 0 ? 'right' : 'left';
} else {
return;
}
this.$emit('swiperAction', { direction: this.direction });//发送参数出去给父组件
}
}
}
</script>
<style scoped>
</style>
父组件中发生了什么?
触发滑动手势,父组件接收子组件发来的信息e(左滑/右滑)
      <swiper-action @swiperAction='handleSwiperAction'>
        <image mode="widthFix"
               :src="imgDetail.thumb"></image>
      </swiper-action>
然后调用函数
    // 滑动事件
    handleSwiperAction (e) {
      // 左滑 imgIndex++
      // 右滑 imgIndex--
      // 判断是否超过数组长度
      const { imgList } = getApp().globalData;
      if (e.direction === 'left' && this.imgIndex < imgList.length - 1) {
        this.imgIndex++;
        this.getDate();
      } else if (e.direction === 'right' && this.imgIndex > 0) {
        this.imgIndex--;
        this.getDate();
      } else {
        uni.showToast({
        title:"到底啦",
        icon:"none"
        })
      }
    },
大概步骤
 <image mode="aspectFill"//改为等比例扩大/缩放
   :src="item.thumb+item.rule.replace('$<Height>',360)">
 </image>

     image {
      height: 180rpx;//把高写死,就不会出现
    }
下载图片
- uni.downloadFile,下载远程文件到小程序的内存中
- uni.saveImageToPhotosAlbum,将图片从内存中下载到本地
    async handleDownload () {
      // 1.下载远程文件到小程序的内存中 tempFilePath
      await uni.showLoading({
        title: '下载中'
      })

      const res1 = await uni.downloadFile({ url: this.imgDetail.img })
      // console.log(res);
      const { tempFilePath } = res1[1]

      // 2.将图片从内存中下载到本地
      const res2 = await uni.saveImageToPhotosAlbum({ filePath: tempFilePath })
      // console.log(res2);

      uni.hideLoading();
      await uni.showToast({
        title: '下载成功'
      })

    }
上下滚动的同时还希望它变成伸缩盒子
首先样式里:
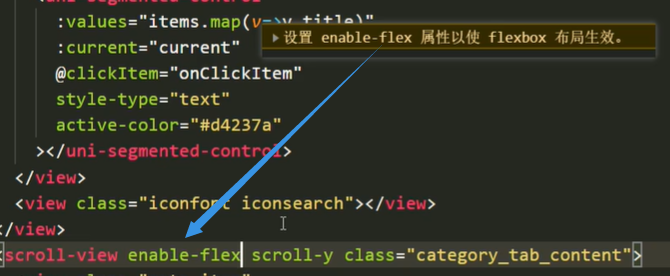
那个pages加了新的页面,记得去加
mounted代表组件挂载完毕,所以如果挂载的同一个组件,点击不一样的按钮,数据缓存不会变化
向子组件传递对象
<video-main :urlobj="{url:items[current].url,params:items[current].params}"></video-main>
视频页面
直接在这里获取url,params,params是发生参数,不一定每个模块都有
  data() {
        return {
      items: [
        { title: "推荐", url: 'http://157.122.54.189:9088/videoimg/v1/videowp/featured', params: { limit: 30, skip: 0, order: 'hot' } },
        { title: "娱乐", url: 'http://157.122.54.189:9088/videoimg/v1/videowp/category/59b25abbe7bce76bc834198a', params: { limit: 30, skip: 0, order: 'new' } },
        { title: "最新", url: 'http://157.122.54.189:9088/videoimg/v1/videowp/videowp', params: { limit: 30, skip: 0, order: 'new' } },
        { title: "热门", url: 'http://157.122.54.189:9088/videoimg/v1/videowp/videowp', params: { limit: 30, skip: 0, order: 'hot' } }
        //{ title: "分类", url: 'http://157.122.54.189:9088/videoimg/v1/videowp/category', params: {} }
      ],
            current: 0
        }
    },
在组件里面,通过watch监听(vue里面的监控属性)
如果没有watch那么切换页面时不会重新渲染,因为这4个页面挂载在同一个组件
  watch: {
    // 监听 urlobj 改变
    urlobj () {
      this.videowp = []//切换页面时,清空上一页的数据
      this.getList()//当切换页面时,重新请求一次新的
    }
  },
    mounted () {
    // console.log(this.urlobj);
    this.getList()//这是第一次挂载的时候,请求一次数据
  },
视频播放
前部分
    <view class="video_item"
          v-for="item in videowp"
          :key="item.id"
          @click="handleGoVideo(item)">
      <image :src="item.img"
             mode="widthFix" />
    </view>
方法部分
    handleGoVideo (item) {
      //将数据存到全局共享中,getApp()是内置函数
      getApp().globalData.video = item;
      //页面跳转
      uni.navigateTo({
        url: '/pages/videoPlay/index'
      })
    }
css3里面的滤镜效果
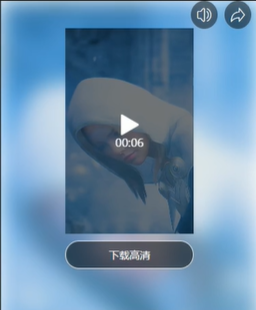
自动拉伸填充视频
    <!-- 视频 -->
    <view class="video_wrap">
      <video :src="videoObj.video"
             objectFit='fill'//就是这个属性
             :muted="muted"></video>
    </view>
开关声音和转发
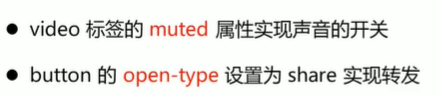
添加muted标签
    <!-- 工具栏 -->
    <view class="video_tool">
      <view @click="handleMuted"
            :class="['iconfont',muted?'iconjingyin':'iconshengyin']"></view>
      <view class="iconfont iconzhuanfa">
        <button open-type="share"></button>
      </view>
    </view>
方法
    // 开关声音
    handleMuted () {
      this.muted = !this.muted;
    },
下载视频,用到es6语法
    // 下载视频
    async handleDownload () {
      await uni.showLoading({ title: "下载中" });
      // 1 将远程文件 下载到小程序内存中
      const { tempFilePath } = (await uni.downloadFile({ url: this.videoObj.video }))[1];
      //之所以拿1是因为返回的第0个元素是状态码,我们要拿第1个
      //这里注意要在整个外面加个括号,因为我们要拿的是这段代码的返回值,不是uni.downloadFile的返回值
      // 2 将内存中的文件 下载到本地上
      await uni.saveVideoToPhotosAlbum({
        filePath: tempFilePath
      });
      uni.hideLoading();
      await uni.showToast({ title: "下载成功" })
    }
样式
jcsp缩写
    justify-content: space-between;
    分布在左右两侧
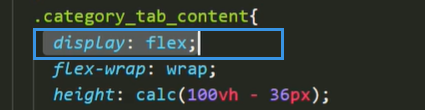
  display: flex;//设置为伸缩盒子
  flex-wrap: wrap;//?
图片的渲染属性
mode='widthFix'//高度自适应
mode='aspectFill'  //既保证原来图片内容的等比例拉伸,又能同时保证该图片拉伸至整张**图片标签**的大小,美观
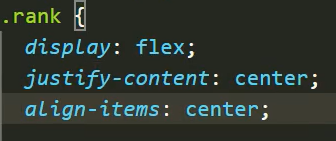
伸缩盒子,水平居中且垂直居中
块元素改为非块元素,这样徽章就不会换行
display: inline-block;
完美运用flex布局
.download {
  height: 120rpx;
  display: flex;
  justify-content: center;
  align-items: center;
  .download-btn {
    width: 90%;
    height: 75%;
    background-color: $color;
    color: #fff;
    font-size: 50rpx;
    font-weight: 600;
    display: flex;
    justify-content: center;
    align-items: center;
  }
}
这是效果图,你细品,两个盒子

  .video_tool {
    height: 80rpx;
    display: flex;
    justify-content: flex-end;//向右对齐
    .iconfont {
      width: 80rpx;
      color: #fff;
      font-size: 50rpx;
      border-radius: 80rpx;
      background-color: rgba(0, 0, 0, 0.2);
      display: flex;
      justify-content: center;//水平居中
      align-items: center;//垂直居中
      margin-right: 20rpx;
    }
    .iconzhuanfa {
      position: relative;
      button {
        position: absolute;
        width: 100%;
        height: 100%;
        opacity: 0;
      }
    }
  }
效果如图自行品味

总结
思路
优化
那个分类页面,切换别的页面无法定位上次的位置,这个要优化。
