

Koa、Egg、Express作为Nodejs三大开发框架,相信对Node有实战经验的朋友都非常熟悉,相对Express,Koa和Egg在企业级开发中应用更为广泛,Egg也是基于Koa的封装,所以我们熟悉Koa之后,对Egg手到擒来,下面我们通过分析中间件koa-bodyparser来深入了解Koa框架中的http请求部分。
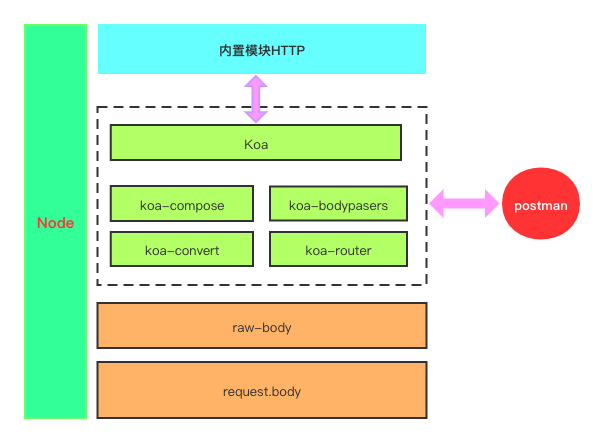
基于Koa服务框架
结合http、koa、koa middleware画的一个简单框架图
Koa搭建简单的Node服务
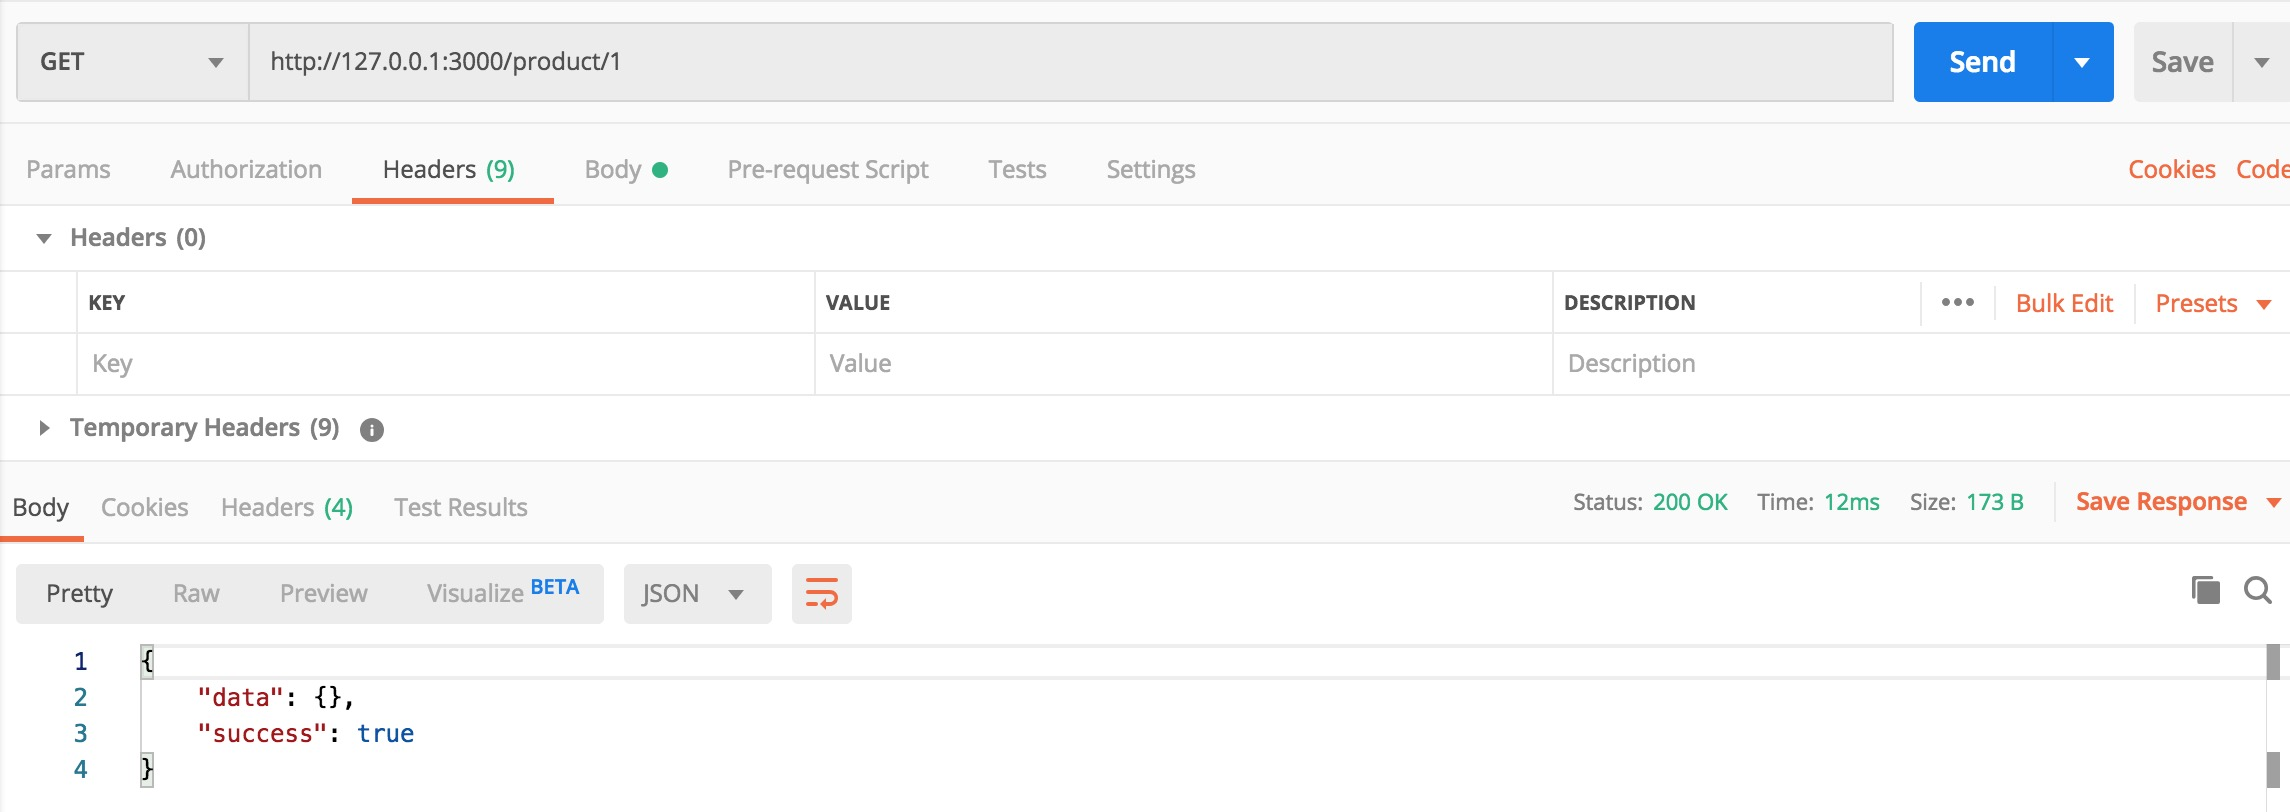
通过koa-router搭建一个简单的node服务,服务提供了一个get接口:/product/1
/* app.js */
const Koa = require('koa');
const Router = require('koa-router')
const app = new Koa()
const router = new Router()

router.get('/product/1', async (ctx, next) => {
  ctx.response.body = {
    data: {},
    success: true
  }
})

app.use(router.routes())
app.listen(3000, () => {
    console.log('app is starting: http://127.0.0.1:3000')
})
启动服务
node app.js
通过postman请求接口/product/1
- GET
- POST
- PUT
- DELETE
- HEAD
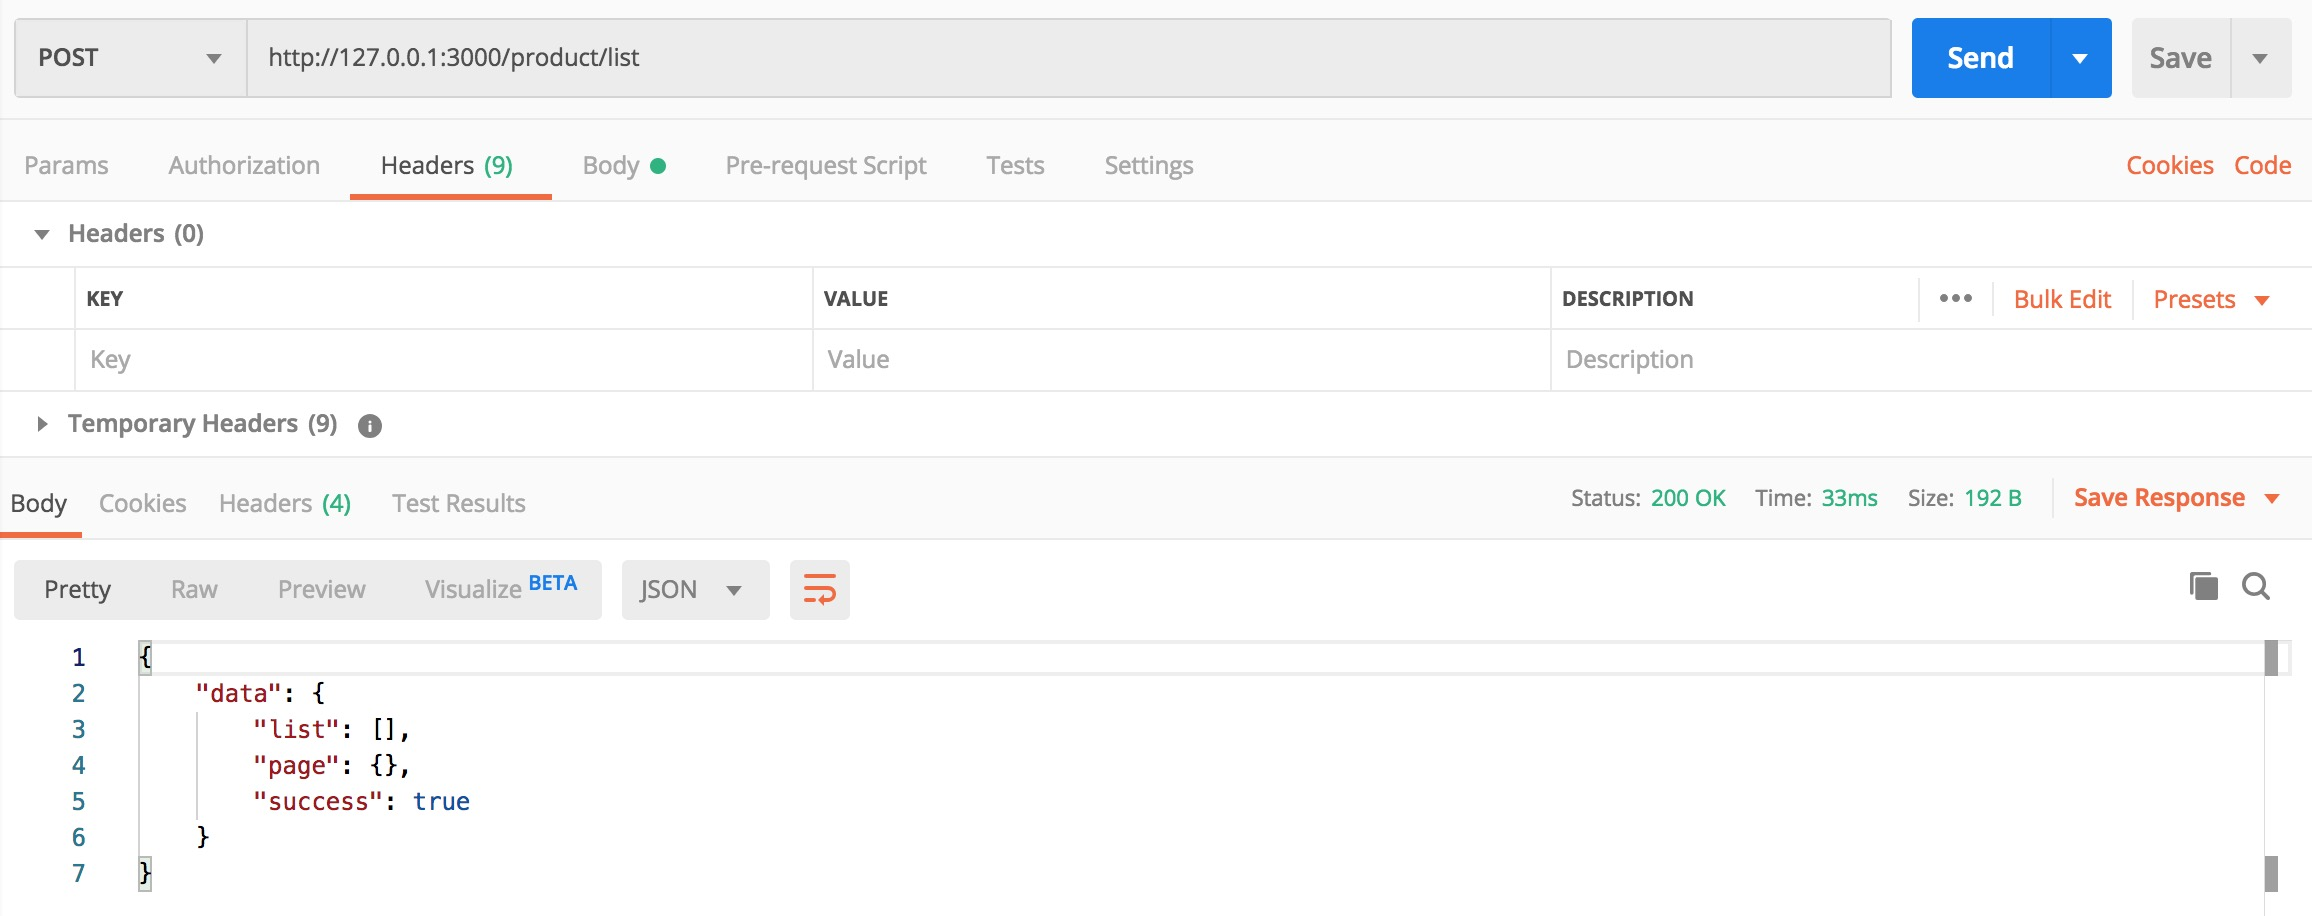
通过修改app.js添加一个method为post的路由
router.post('/product/list', async (ctx, next) => {
  ctx.response.body = {
    data: {
      list: [],
      page: {},
      success: true
    }
  }
})
通过postman请求接口/product/list
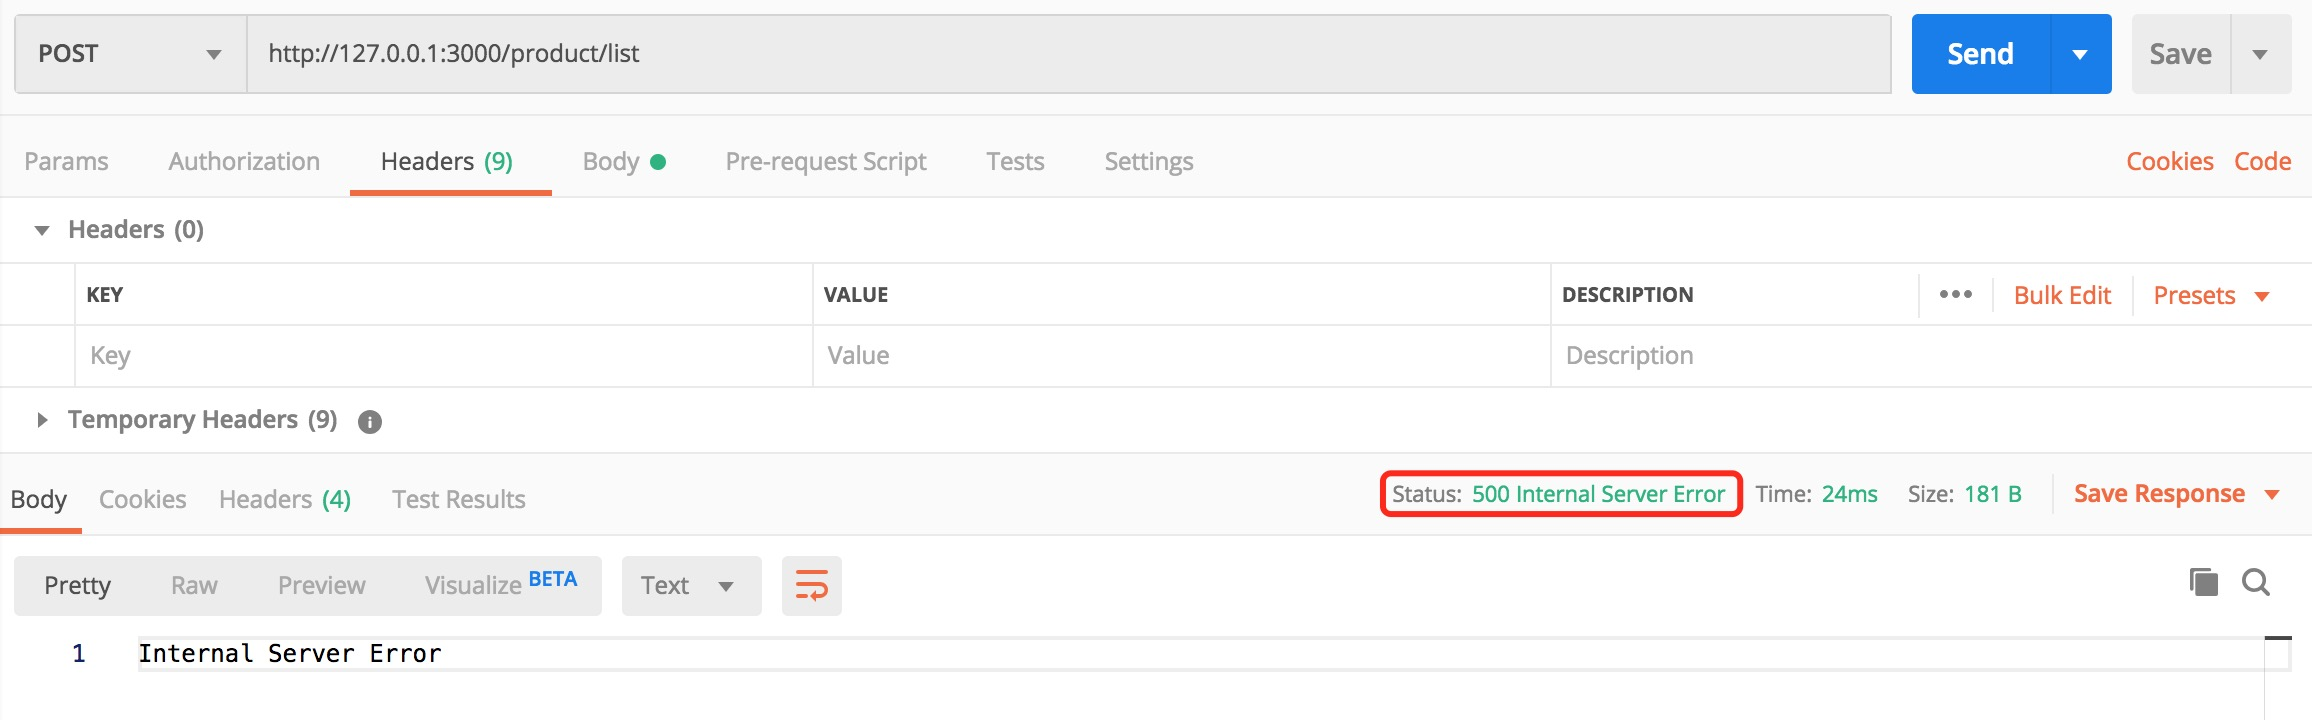
路由改造
router.post('/product/list', async (ctx, next) => {
  const pageNum = ctx.request.body.pageNum
  const pageSize = ctx.request.body.pageSize

  ctx.response.body = {
    data: {
      list: [],
      page: { pageNum, pageSize },
      success: true
    }
  }
})
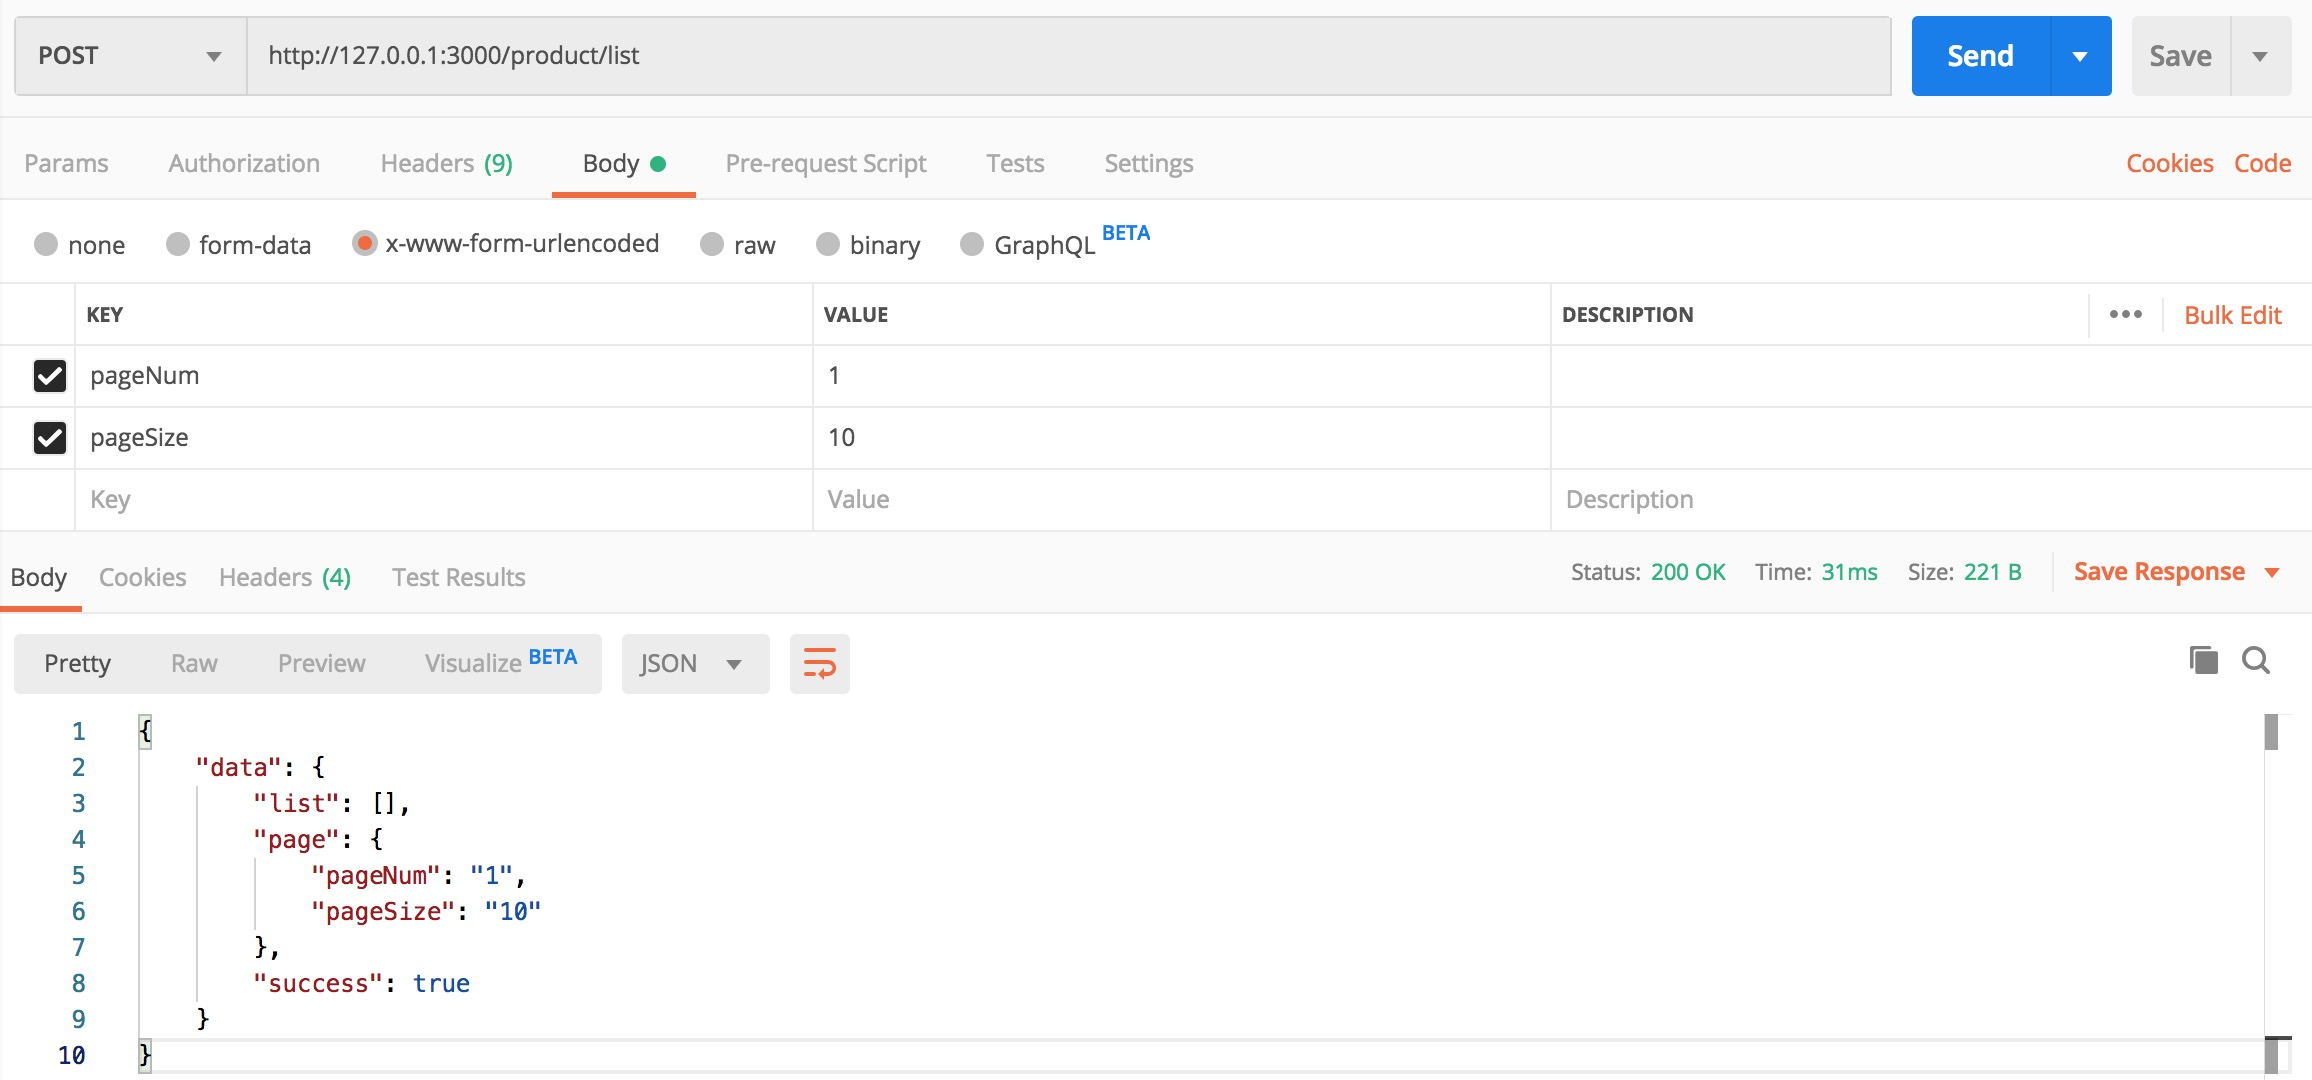
重启服务,通过postman再次请求接口/product/list

Koa-bodyparser的实现原理
上面的例子我们没有引入koa-bodyparser,所以ctx.request上的body属性没有拿到,我们在程序中引入koa-bodyparser看看。
const app = new Koa()
const router = new Router()
const Router = require('koa-router')
const bodyParser = require('koa-bodyparser')

app.use(bodyParser())

router.post('/product/list', async (ctx, next) => {
  const pageNum = ctx.request.body.pageNum
  const pageSize = ctx.request.body.pageSize

  ctx.response.body = {
    data: {
      list: [],
      page: { pageNum, pageSize },
      success: true
    }
  }
})

app.use(router.routes())
app.listen(3000)
通过postman请求接口/product/list
koa-bodyparser内部实现
我们去github上clone一份koa-bodyparser的源代码,我以3.1.0版本为例,代码比较简单,我们找到入口index.js
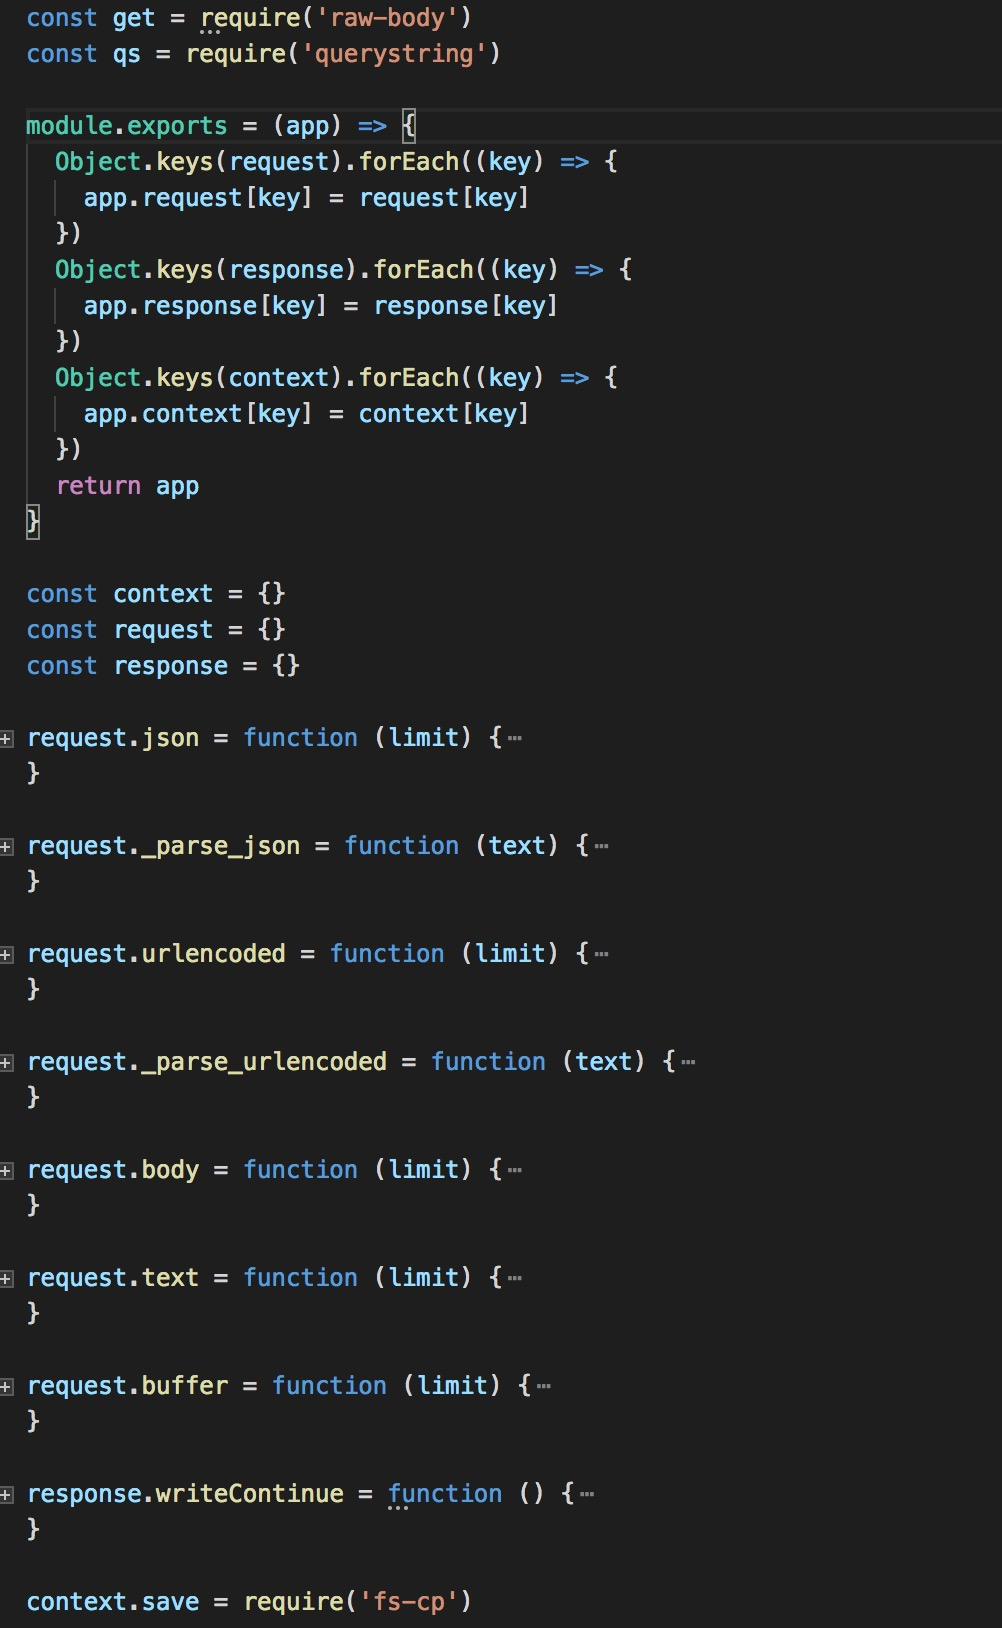
从代码结构可以看出,koa-bodyparser向外暴露一个方法,方法中会在app的request属性和respons,context属性上添加一系列方法:
- json
- urlencoded
- body
- text
- buffer
中间件入参app是什么?其实就是koa的上下文context,我们看看koa源码中对context的定义
/* koa源码 */
createContext(req, res) {
    const context = Object.create(this.context);
    const request = context.request = Object.create(this.request);
    const response = context.response = Object.create(this.response);
    context.app = request.app = response.app = this;
    context.req = request.req = response.req = req;
    context.res = request.res = response.res = res;
    request.ctx = response.ctx = context;
    request.response = response;
    response.request = request;
    context.originalUrl = request.originalUrl = req.url;
    context.state = {};
    return context;
}
koa的上下文是通过createContext方法创建的,创建的目的就是可以在任何地方通过this或者createContext返回的对象中拿到请求(request/req)和响应(response/res)上的各种属性,比如body属性,可以通过ctx.request.body,ctx.req.body,ctx.request.req.body拿到,了解这个之后,我们看看koa-bodyparser中的body方法实现原理。
body方法内部实现
看看koa-bodyparser中body方法源码
request.body = function (limit) {
  switch (this.is('urlencoded', 'json')) {
    case 'json': return this.json(limit)
    case 'urlencoded': return this.urlencoded(limit)
  }
}
代码中有个switch分支判断,判断条件this.is('urlencoded', 'json')的返回值,is方法并没有在当前的中间件中实现,其实这个is方法是在koa中实现的,具体的作用就是判断当前的http请求头content-type值,熟悉http的同学对这个请求头不陌生,在封装http client的时候会经常用到,常用的content-type有:
- text/html
- text/plain
- application/json
- application/x-www-form-urlencoded
- multipart/form-data
其实content-type有十几种,常用的就是上面几种,每种类型的区别,不熟悉的可以自己百度,看下is方法的示例。
/* When Content-Type is application/json */
this.is('json', 'urlencoded'); // => 'json'
因为3.1.0版本的koa-bodyparser,只支持两种类型的content-type,即application/json和application/x-www-form-urlencoded,两者有什么区别?
- json:post的body是json字符串,例如{pageNum: 1, pageSize:10}
- x-www-form-urlencoded:post的body是url encoded,例如pageNum=1&pageSize=10
之后koa-bodyparser的高版本支持了更多类型form、text等。通过body方法源码,我们可看出,如果content-type为application/json,switch就会走json分支,调用this.json并返回,我们看看具体实现:
request.json = function (limit) {
  if (!this.length) return Promise.resolve()
  return this.text(limit).then((text) => this._parse_json(text))
}

request.text = function (limit) {
  this.response.writeContinue()
  return get(this.req, {
    limit: limit || '100kb',
    length: this.length,
    encoding: 'utf8'
  })
}
this.json调用了this.text方法,thi.text又调用了get方法,并传入了this.req和options,get方法是第三方模块提供的:
const get = require('raw-body')
接下来可以看看raw-body模块的实现
raw-body模块实现
raw-body其实就是监听this.req上的data事件,this.req是koa在创建服务时,调用了Node内置模块http的createServer方法传递的
/* koa源码 */
listen(...args) {
    debug('listen');
    const server = http.createServer(this.callback());
    return server.listen(...args);
}

callback() {
    const fn = compose(this.middleware);

    if (!this.listenerCount('error')) this.on('error', this.onerror);

    const handleRequest = (req, res) => {
        const ctx = this.createContext(req, res);
        return this.handleRequest(ctx, fn);
    };

    return handleRequest;
}
http模块的createServer调用方式
http.createServer((req, res) => {
    ...
})
http模块的源码我们在这里不做分析。上面说到raw-body其实就是监听this.req上的data事件,data事件的入参是post请求body的二进制流,我们可以把二进制流转换为options.encoding中的编码格式,比如utf-8,buffer等,默认为buffer
/* raw-body核心源码 */
  var buffer = decoder
    ? ''
    : []

  // attach listeners
  stream.on('aborted', onAborted)
  stream.on('close', cleanup)
  stream.on('data', onData)
  stream.on('end', onEnd)
  stream.on('error', onEnd)
  function onData (chunk) {
    if (complete) return

    received += chunk.length

    if (limit !== null && received > limit) {
      done(createError(413, 'request entity too large', {
        limit: limit,
        received: received,
        type: 'entity.too.large'
      }))
    } else if (decoder) {
      buffer += decoder.write(chunk)
    } else {
      buffer.push(chunk)
    }
  }
  function onEnd (err) {
    if (complete) return
    if (err) return done(err)

    if (length !== null && received !== length) {
      done(createError(400, 'request size did not match content length', {
        expected: length,
        length: length,
        received: received,
        type: 'request.size.invalid'
      }))
    } else {
      var string = decoder
        ? buffer + (decoder.end() || '')
        : Buffer.concat(buffer)
      done(null, string)
    }
  }
总结
通过koa创建node服务,发起一个post请求,内置模块http处理了很多上游的东西,下游的koa中间件把http body的二进制流根据content-type类型,调用对应的适配器转换成json对象,然后放到ctx.request属性上。
