强撸vue-router第一弹
作为公司的前端bug工程师,决心痛定思痛,撸下源码来提升自己的编程能力,与就从vue-router下手了,经过几天的强行调试,感觉自己也算是基本弄懂了vue-router的初始化和渲染流程。在这里把我学习的代码分享出来,供大家学习交流。我把vue-router源码中生产错误警告和生僻配置(暂时没看懂)排除了,后面看懂了在更新(有些菜),仓库里的代码只有vue-router(从源码复制出来的,不过带了写自己的注释)的初始功能,在example文件夹有小demo,大家跑起来项目后,就可以在浏览器手动输入地址测试了。
# 全部安装
npm install -g @vue/cli  @vue/cli-service-global
# 项目依赖
npm install
把代码克隆下来,然后vue serve就可以启动了。

install
vue.use(VueRouter)就调用install方法,并把Vue作为install的参数传入,完成路由插件的初始注册。
export function install(Vue) {
  // 防止重复安装
  if(install.installed  && _Vue == Vue ) return;
  install.installed = true;

  _Vue = Vue;

  const isDef = v => v !== undefined;
  // vue所有的实例 (组件) 都混入一个前置的钩子函数
  Vue.mixin({
    beforeCreate() {
      // 如果实例上有router配置 则是根组件
      if(isDef(this.$options.router)) {
        this._routerRoot = this;
        this._router = this.$options.router;
        // VueRouter 类的初始化方法
        this._router.init(this);
        // 响应式监听 _route 这样视图会重新渲染
        Vue.util.defineReactive(this,'_route',this._router.history.current)
      }else{
        // 其他实例 也记录 根组件 实例对象
        this._routerRoot = (this.$parent && this.$parent._routerRoot) || this;
      }
    }
  })

  // 让每个 vue组件实例都可以通过 $route 获取最新的 匹配好的 路由信息 _route
  Object.defineProperty(Vue.prototype,'$route',{
    get() {
      return this._routerRoot._route
    }
  })

  // 注册router-view 全局组件
  Vue.component('RouterView', View)

}
VueRouter的初始化
VueRouter内部的大致实现:
export default class VueRouter {
  constructor(options = {}) {
    // vue 组件实例 为根组件,
    this.app = null;
    // vue 组件实例 为根组件 的集合 ,我们可能 会多次 new Vue({router})
    this.apps = [];
    this.options = options;

    // 会得到两个方法 match和addRoutes
    // match 可以匹配到当前的路由和要渲染的组件
    // addRoutes 暴露外部使用的api 可以动态地添加路由
    this.matcher = createMatcher(options.routes || [], this);

    let mode = options.mode || 'hash'

    this.mode = mode;

    switch (mode) {
      case 'history':
        this.history = new HTML5History(this, options.base);
        break;
      case 'hash':
        // this.history = new HashHistory(this,options.base)
        break;
      default :
        console.error(`invalid mode: ${mode}`)
    }

  }
    // 得到匹配当前的路由
  match(raw, current, redirectedFrom) {
    return this.matcher.match(raw,current,redirectedFrom);
  }
  // 路由对象初始化
  /**
   *
   * @param {* Vue 的组件实例 (根组件)} app
   */
  init(app) {

  }
}
我们通过new VueRouter({...}),创建了一个VueRouter实例,VueRouter通过参数mode来决定路由模式,这里默认使用了histroy模式,在vue-router内部是对了路由模式做了兼容处理,大致步骤如下:
- 首先根据mode来确定所选的模式,如果当前环境不支持history模式,会强制切换到hash模式;
- 如果当前环境不是浏览器环境,会切换到abstract模式下。然后再根据不同模式来生成不同的history操作对象。
路由对象的init放在,会在install的过程中,调用,我们接下来的任务是看看init 做了什么:
init(app) {
  this.apps.push(app);
  // 防止重复初始化
  if(this.app) {
    return;
  }
  this.app = app;

  const history = this.history;
  if(history instanceof HTML5History) {
    history.transitionTo(history.getCurrentLocation())
  }

  // 订阅路由的切换 并且更新 每一个根实例中的 $route
  history.listen(route=>{
    this.apps.forEach(app=>{
      app._route = route
    })
  })
}
init方法内的 app变量便是存储的当前的vue的根组件。然后将 app 存入数组apps中,这里是为了解决多次new Vue(router)的情况,而收集实例。通过this.app判断是实例否已经被初始化。然后通过history来确定不同路由的切换动作动作 history.transitionTo。最后通过 history.listen来注册路由变化的响应回调。
这就是VueRouter的初始化工作。
接下来我们就要了解一下 history.transitionTo的主要流程以及 history.listen的实现。当然最基础的是先明白history是个什么东西。
HTML5History
当判断当前模式是 HTML5History的时候,会执行 history 对象上的 transitionTo方法。
export class HTML5History extends History {
  constructor(router, base) {
    // 实现 base 基类中的构造函数
    super(router, base);

    // 初始化就监听浏览器路径变化
    // 去除url前面的信息 和用户设定的前缀 只有留下 pathname及其后面的信息 /foo?a=b
    const initLocation = getLocation(this.base)

    window.addEventListener('popstate',e=>{
      const current = this.current;

      const location = getLocation(this.base);

      // 第一次路径没有变化的时候 不重复切换路由
      // 避免在有的浏览器中第一次加载路由就会触发 `popstate` 事件
      if(current == START && location == initLocation) {
        return;
      }
      this.transitionTo(location)
    })
  }
  getCurrentLocation () {
    return getLocation(this.base)
  }
}
在History模式下,只需调用基类构造函数以及初始化监听事件,不需要做额外的工作,路由的跳转的工作是在基类History中实现的。
路由基类History
这里只贴出了基类初始化的代码,
export class History {
  /**
   *
   * @param {*VueRouter 对象} router
   * @param {*路径path 的前缀} base
   */
  constructor(router,base) {
    this.router = router;
    this.base = normalizeBase(base)
    // 默认路径为 / 的 $route 对象
    this.current = START
  }

  // 订阅
  listen(cb){
    this.cb = cb;
  }

  transitionTo(location,onComplete=()=>{},onAbort=()=>{}) {
    const route = this.router.match(location,this.current);
    // 更新当前的$route
    this.current = route
    // 通知根实例路由信息变化
    this.cb && this.cb(route);

  }
}
首先,在构造函数中会记录VueRouter对象,这样就可以使用它的方法来完成路由的匹配工作,current默认是一个路径为'/'的对象,这个对象就是我们平常在项目中使用的$route,listen订阅路由切换的状态,transitionTo完成了路由的匹配的工作,同时也通知了vue的各个实例路由状态的变化,后续的路由钩子函数也是在这里完成。要完成路由的匹配功能,最重要的功臣是VueRouter对象上的match方法。
createMathcer
我们在histoty对象中调用transitionTo匹配路由,实际是调用的createMathcer方法返回的对象里面的match方法,还有一个addRoutes方法,做过路由权限的童鞋应该很熟悉这个方法,它可以帮助我们动态添加路由。
export function createMatcher(routes, router) {
  // 建立了路由表的映射
  const { pathList, pathMap, nameMap } = createRouteMap(routes);
  /**
   *
   * @param {*要新增的路由配置列表} routes
   */
  function addRoutes(routes) {
    // 将新的路由配置追加就好,因为这里的路由映射表,都是引用类型。
    createRouteMap(pathList, pathMap, nameMap, routes)
  }
   /**
   *
   * @param {*路径 /foo 字符类型} raw
   * @param {* 项目中常用的 $route 对象 } currentRoute
   * @param {*location对象 ,解析url得到} redirectedFrom
   * var location = { name: '',path,query:{} ...}
   */
  function match(raw, currentRoute, redirectedFrom) {
     const location = {
      path: raw
    }
    // 配置的路由名称
    const { name } = location;

    if (location.path) {
      for (let i = 0; i < pathList.length; i++) {
        const path = pathList[i];
        const record = pathMap[path];
        if (matchRoute(record.regex, location.path, location.params)) {
          return _createRoute(record, location, redirectedFrom)
        }
      }
    }
    // 没有匹配
    return _createRoute(null, location)
  }
  function _createRoute(record,location,redirectedFrom) {
    return createRoute(record, location, redirectedFrom, router)
  }

  return {
    addRoutes,
    match
  }
}
可以看到要匹配到正确的路由,我们首先要建立好所有路由的映射,vue-router中支持路径path和路由名称name来匹配路由,因此createRouteMap方法就返回了pathList, pathMap, nameMap路由映射;接下来,我们就可以往这三个对象里面增加新的路由映射来是实现动态添加路由Api addRoutes;通过查询路径和名字name在pathMap和nameMap中就可以找到对应的路由记录,生成路由信息$route,然后通过history.listen通知到根实例,更新其_route,在intall方法中,我们给所有vue的实例都代理了根组件的_route。这个属性是响应式的,所以它的变化会通知组件重新渲染,所有我们就可以同来router-view来把匹配的路由组件渲染到页面。
router-view
router-view是一个函数式组件,所以我们只需要把$route的matched属性的组件放在render函数中渲染就可以了,但是在嵌套路由的情况下,macthed数组有多选路由记录(record),我们取出哪一个来渲染呢?
这时候我们就需要有一个变量depth来表示当前需要渲染的组件位置(深度)。比如路径为/parent/child时,matched的取值是这样[{path: '/parent',conponment:{}},{path: '/parent/child'},conponment:{}],那么我们实际需要渲染的是child这个组件,但是我们又不能只渲染child,因为child是parant的子组件,必须也要把parent一起渲染,好在parent也是用vue-view来展示路由匹配的子组件,普通的子组件,还是照常。所以在渲染的时候,会先执行parent组件中router-view的render函数,再执行child中的render。我们在再render 中做的,就是用depth来记录当前组件的深度,同时我们要标识vue-view,避免普通组件嵌套影响层级。
export default {
  name: 'RouterView',
  functional: true,
  props: {
    name: {
      type: String,
      default: 'default'
    }
  },
  render(_,{ parent, data, props,children }) {
    // 标识router-view
    data.routerView = true;
    // 深度
    let depth = 0
    while (parent && parent._routerRoot !== parent) {
      const vnodeData = parent.$vnode ? parent.$vnode.data : {}
      if (vnodeData.routerView) {
        depth++
      }
      parent = parent.$parent
    }
    // 拿到匹配的路由信息
    const route = parent.$route;
    // 默认为 default
    const name = props.name;
    // matched  当前层级要渲染的组件
    const matched = route.matched[depth];
    const component = matched && matched.components[name]

    if (!matched || !component) {
      return h()
    }

    return _(component,data,children)
  }
}
阶段小结
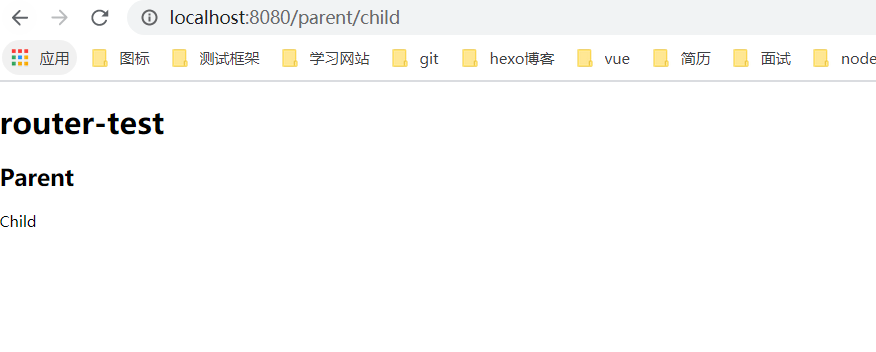
到这里,vue-router从初始化到页面渲染组件的流程已经完成了,我们可以vue-cli的原型开发功能,引入自己搬运的vue-router试试,这里的vue-router已可以实现单个路由和嵌套路由的渲染工作,但是还不能解析参数,也没有提供方法,需要我们手动改浏览器的地址。我也提供了测试的demo,在examples文件夹,完成在github仓库。