

此时webpack版本为v4.42.0.
介绍
学习过程中的demo已上传gitee,点击跳转地址
为什么使用
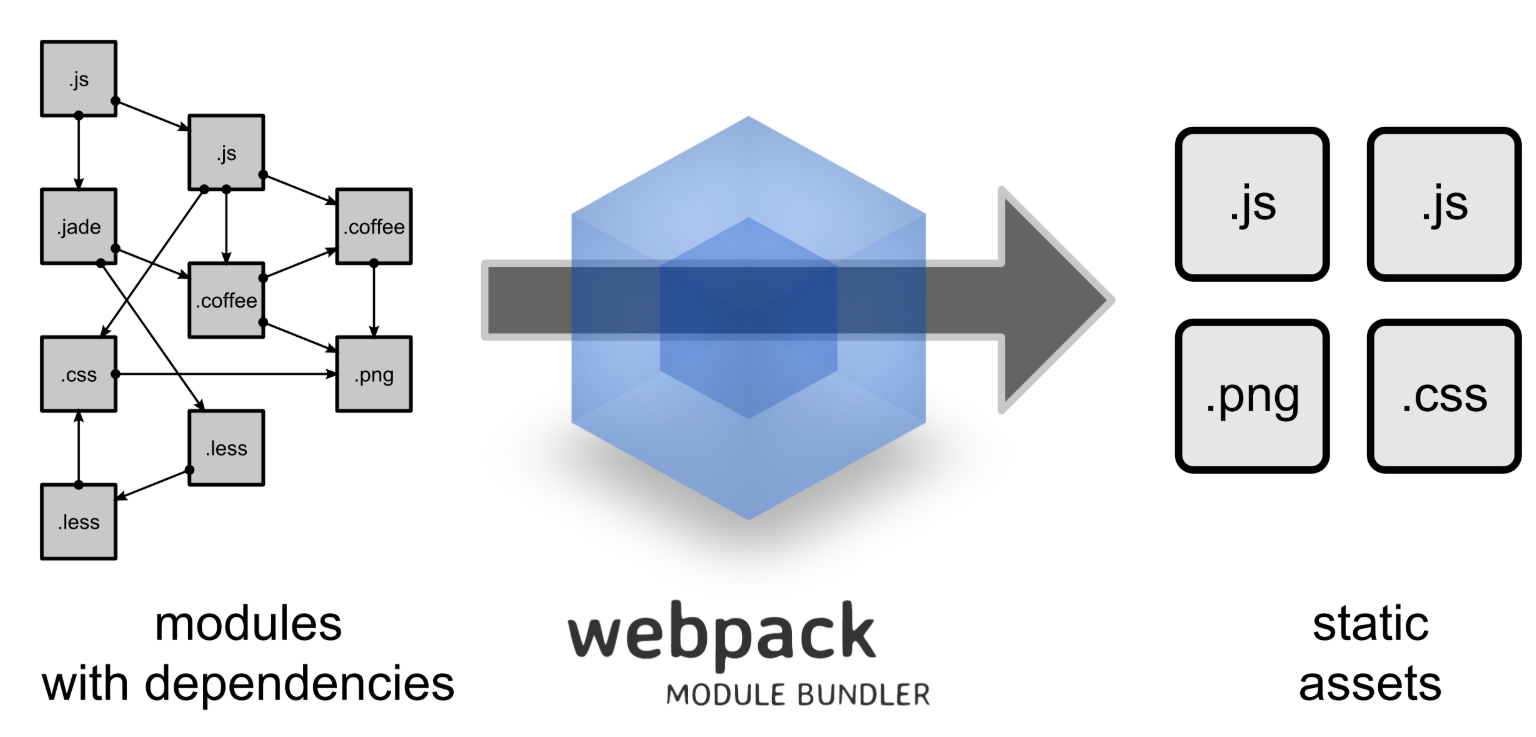
前端网页功能丰富,尤其是spa技术流行后, 打包:JavaScript的复杂度增加和需要一大堆依赖包
转换编译:Sass、less、ES6/ES7等的编译
优化:页面复杂之后,性能也会遇到问题,而webpack也可以做到优化
原理
安装
//全局安装
npm install -g webpack
// 初始化
npm init
// 安装webpack
npm install --save-dev webpack webpack-dev-server webpack-cli
使用
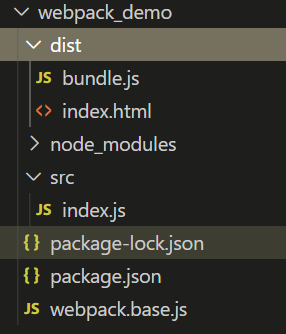
单文件入口
// webpack.base.js 根目录下新建
const path = require('path');

module.exports = {
	entry: './src/index.js',
	output: {
		path: path.resolve(__dirname, 'dist'),
		filename: 'bundle.js',
	},
};
// 打包
npm run build
多文件入口
const path = require('path');

module.exports = {
  entry: {
    entry: './src/index.js',
    second: './src/second.js',
  },
  output: {
    path: path.resolve(__dirname, 'dist'),
    filename: '[name].js',
    publicPath: 'static',
  },
  // chunkFilename: '',
};
// 结果
dist/entry.js   dist/second.js
配置项
mode
告知 webpack使用相应模式的内置优化。
production: 注重模块大小(默认值),进行脚本压缩
development: 调试,热更新
webpack会根据mode生成一个process.env.NODE_ENV变量,是webpack.DefinedPlugin中定义的全局变量,允许根据不同环境执行不同代码,例如:
if (process.env.NODE_ENV==='development') {
// 开发环境执行
} else {
// 生产环境执行
}
生产环境下,uglify打包代码时会自动删除不可达代码,也就是说生产环境压缩后最终的代码为:
// 生产环境执行
热更新HMR
在开发环境中,我们需要快速调试代码,因此需要本地服务器访问webpack打包后的静态文件
优点:
- 保留在完全重新加载页面时丢失的应用程序状态
- 只更新变更内容,以节省时间
- 调整样式更加快速,几乎相当于在浏览器调试器中更改样式
监听之后,热更新并不会生成实际打包文件,只是存在内存中,没有磁盘IO,速度更快
webpack-dev-server是webpack官方提供的工具,当mode为development时可开启热更新,实时预览修改后的代码。
首先我们已经安装了webpack-dev-server,接下来需要在package.json中配置scripts,
scripts: {
	dev: 'webpack-dev-server --mode development --config webpack.base.js',
}
// webpack.base.js
const path = require('path');
const distSrc = path.resolve(__dirname, '../dist');

module.exports = {
  entry: {
    entry: path.resolve(__dirname, '../src/index.js'),
    second: path.resolve(__dirname, '../src/second.js'),
  },
  output: {
    path: distSrc,
    filename: '[name].js',
  },
  devServer: {
    contentBase: distSrc,
    port: '9091', // 本地访问端口号
    compress: true, // 是否开启压缩
    hot: true, // 开启热更新
  },
};
devServer
常用参数:
host - default:'localhost'
hot - 启动热更新
hotOnly- 只有包含HMR的模块会启动热更新
在应用中,
在编辑器中,
在模块中,如果模块内实现了HMR接口,到HMR接收到更新,会使用更新替换旧的。然而并不是所有模块都需要HMR接口,当一个模块没有实现HMR接口时,那么他的更新会冒泡,意味着一个简单的处理函数能对整个模块树进行更新。
在这样的模块中,一个单独的模块更新,整个依赖块会被重新加载。
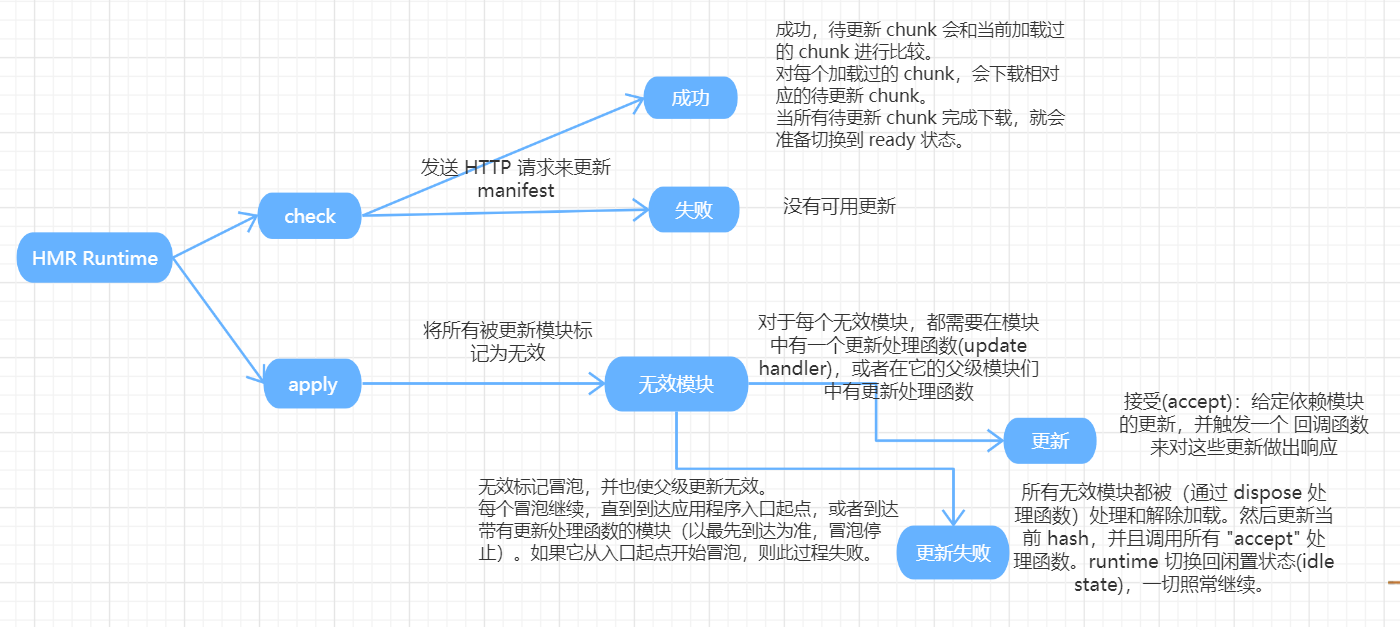
在HMR Runtime中
loader
loader用于对源代码进行转换。可以将不同的语言转换为JavaScript。可以预处理import或加载模块时预处理文件。loader可以将内联图像转化为data URL,甚至允许直接在JavaScript中import css文件、
loader的三个参数:
test:匹配处理文件的扩展名
use:loader名称,要使用的模块的名称
include/exclude:添加必须处理的文件或屏蔽不需要处理的文件
query:为loaders提供额外的设置选项。
css-loader: The css-loader interprets @import and url() like import/require() and will resolve them.
主要是为了处理 CSS 中的依赖,例如 @import 和 url() 等引用外部文件的声明
style-loader: Inject CSS into the DOM.
会将 css-loader 解析的结果转变成 JS 代码,运行时动态插入 style 标签来让 CSS 代码生效。
url-loader/file-loader: 用来处理jpg/png/gif等文件格式
sass-loader node-sass 用来解析scss文件
module: {
  rules: [
    {
      test: /\.(css|less)$/,
      use: [
        {
          loader: 'style-loader'
        },
        {
          loader: 'css-loader',
          options: {
            importLoaders: 1,
          },
        },
        {
          loader: 'postcss-loader',
          options: {
          ident: 'postcss',
            plugins: (loader) => [
              require('postcss-import')({ root: loader.resourcePath }),
              require('postcss-cssnext')(),
              require('autoprefixer')(),
              require('cssnano')(),
            ],
          },
        },
        {
          loader: 'less-loader',
          options: {
            importLoaders: 1,
          },
        },
      ],
    },
    {
      test: /\.(png|jpg|gif)/,
      use: {
        loader: 'url-loader',
        options: {
          limit: 1024,
          fallback: {
            loader: 'file-loader',
            options: {
              name: 'img/[name].[hash:8].[ext]',
            },
          },
        },
      },
    }
  ],
},
或
rules: [
	{ test: '', use: '' }
],
babel
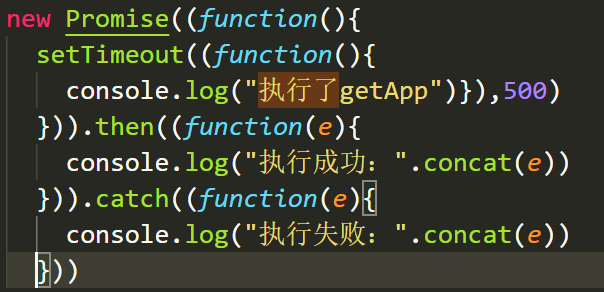
目前低版本浏览器不支持es6/es7语法,需要转成es5语法。
打包之后:

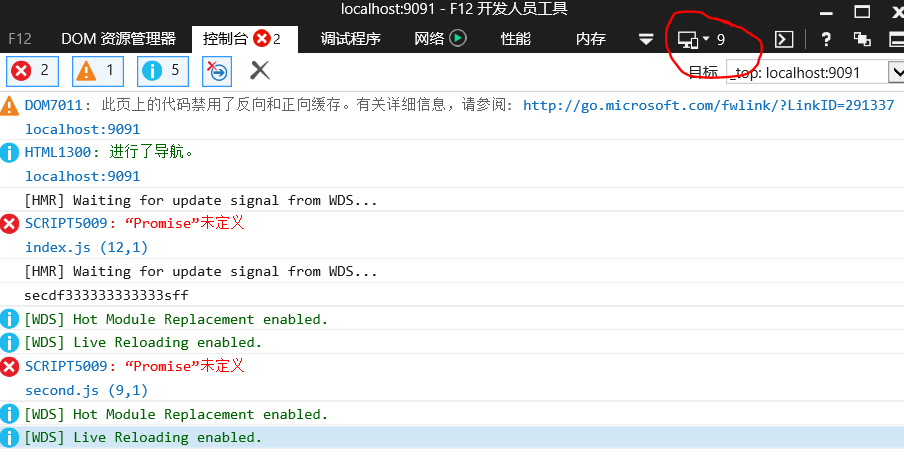
// 可解决箭头函数等,但无法解决promise,symbol等内建对象
npm install -D babel-loader @babel/core @babel/preset-env
引入babel-polyfill,需要在生产环境中使用
npm intall --save babel-polyfill
未引入babel-polyfill

引入之后

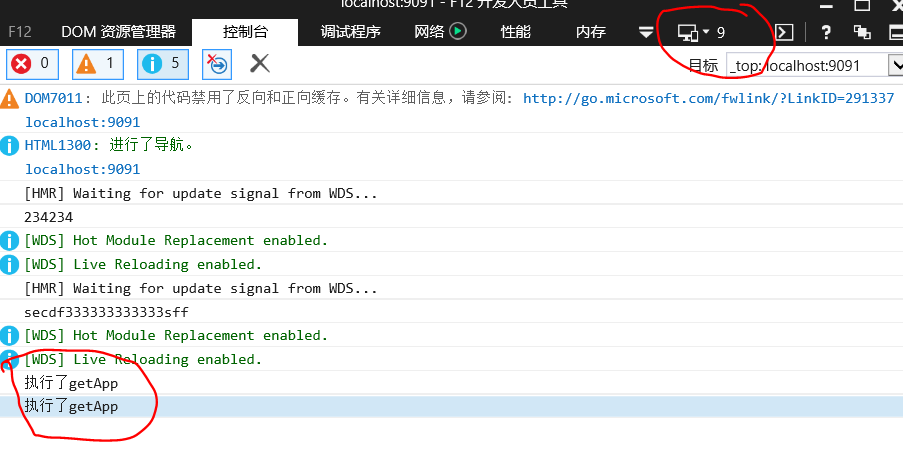
可以很明显发现 entry.js 体积大了很多,因为 babel-polyfill 会污染全局环境,将 promise 添加为全局变量。此时就需要 plugin-transform-runtime
优点:
不会污染全局变量
多次使用只会打包一次
依赖统一按需引入,无重复引入,无多余引入
{
   test: /\.js$/,
   use: {
     loader: 'babel-loader',
     options: {
       presets: ['@babel/preset-env'],
       plugins: ['@babel/plugin-transform-runtime'],
     },
   },
}

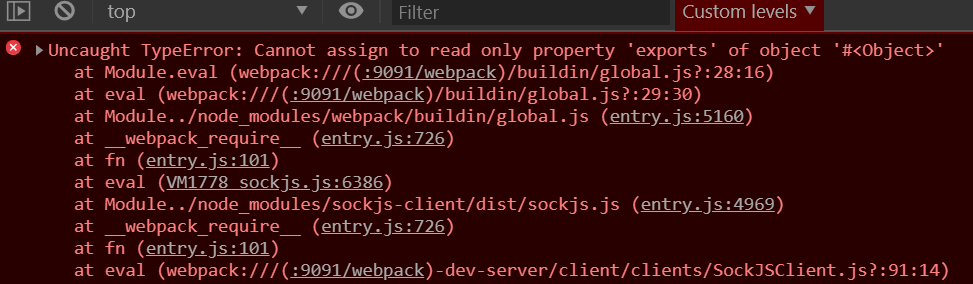
// error
Uncaught TypeError: Cannot assign to read only property 'exports' of object '#<Object>'
使用@babel/plugin-transform-runtime这个插件的时候,同时你又在某个commonJS写的文件里使用这个插件时,babel会默认你这个文件是ES6的文件,然后就使用import导入了这个插件,从而产生了import和module.exports混用的错误。解决方法是在babel.config.js里配置unambiguous设置,让babel和webpack一样严格区分commonJS文件和ES6文件。
{
        test: /\.js$/,
        use: {
          loader: 'babel-loader',
          options: {
            presets: ['@babel/preset-env'],
            plugins: ['@babel/plugin-transform-runtime'],
            sourceType: 'unambiguous',
          },
        },
      },
plugin
在 webpack 构建过程中,plugin 用户处理更多其他构建任务,loader 用来转换语言,更好的兼容。
分块、压缩、优化
自从webpack升级到4以来,号称零配置。代码会自动分割、压缩、优化,同时 webpack也会自动帮你 Scope hoisting 和 Tree-shaking。
当多个 bundle共享一些相同的依赖,需要提取这些依赖到共享的 bundle 中,来避免重复打包。CommonsChunkPlugin在webpack4.0被移除了,取而代之的是optimization.splitChunks and optimization.runtimeChunk
内置代码分隔策略:
新的chunk是否被共享或者来自node_modules的模块
新的chunk体积在压缩前是否大于30kb
按需加载chunk的并发请求数量小于等于5
页面初始加载时的并发请求数量小于等于3
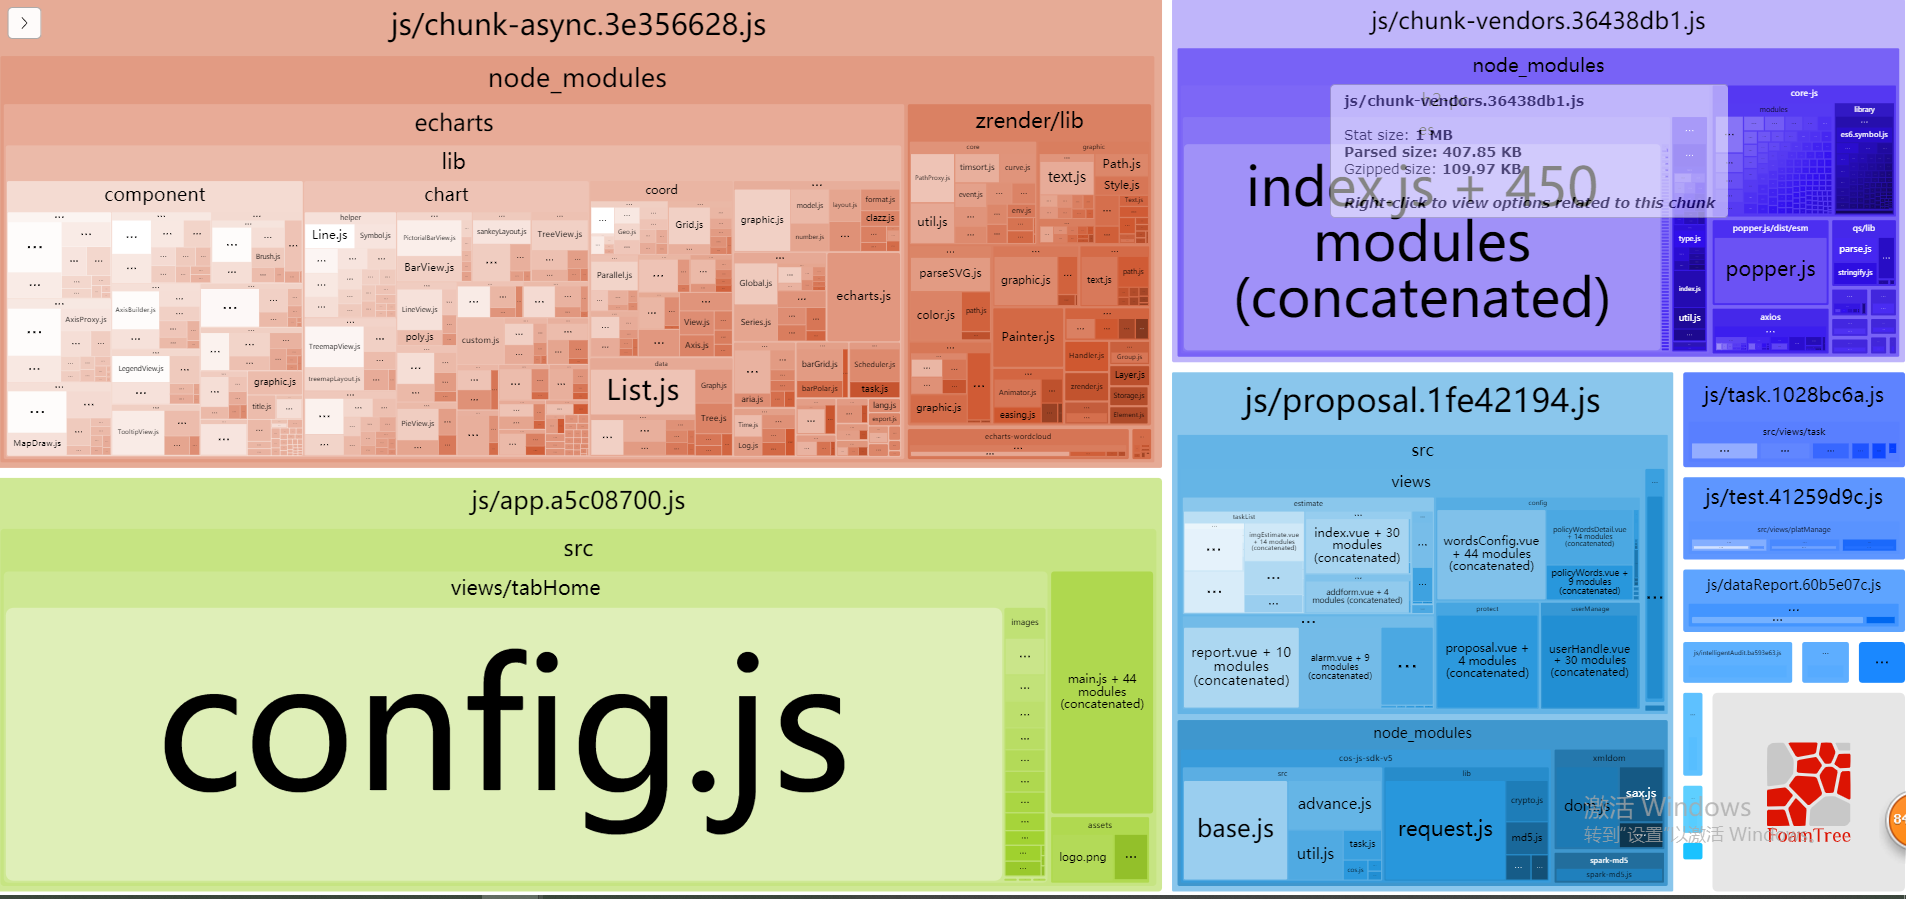
chunk分析插件
npm install --save-dev webpack-bundle-analyzer
// vue.config.js or webpack.base.js
const { BundleAnalyzerPlugin } = require('webpack-bundle-analyzer');

plugins: [
    new BundleAnalyzerPlugin({
        analyzerMode: 'server',
        // analyzerHost: '127.0.0.1',
        analyzerPort: 7777,
        reportFilename: 'index.html',
        defaultSizes: 'parsed',
        openAnalyzer: true,
        generateStatsFile: false,
        statsFilename: 'stats.json',
        statsOptions: null,
        logLevel: 'info',
    }),
],
// package.json
scripts: {
	"analyze": "NODE_ENV=production npm_config_report=true npm run build"
},
DefinePlugin
允许创建一个在编译时可以使用的全局变量。
分离css
mini-css-extract-plugin
npm install --save-dev mini-css-extract-plugin
const MiniCssExtractPlugin = require('mini-css-extract-plugin');
output: {
filename: '[name].js',
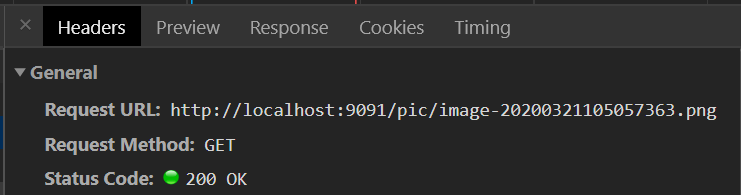
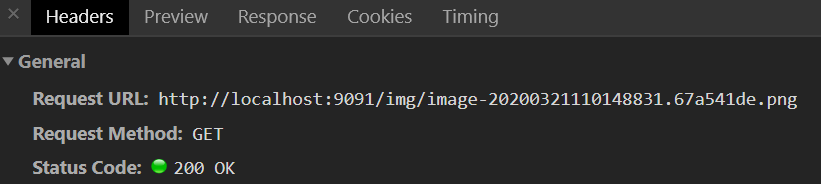
// 解决html里img的路径问题,都改为
publicPath: 'http://localhost:9091',
},
plugins: [
new MiniCssExtractPlugin({
filename: 'css/[name].js',
chunkFilename: '[id].css',
}),
],
module: {
rules: [
{
test: /\.(css|less)$/,
use: [
MiniCssExtractPlugin.loader,
css-loader,
less-loader,
],
}
],
}
html中引入的图片:
css中引入的图片:
自动添加css属性前缀
为css加前缀autoprefixer。前面在写到css-loader时,有为css添加postcss-loader,其中包括autoprefixer插件
rules: [
	{
		test: /\.(css|less)$/,
		use: [
			MiniCssExtractPlugin.loader,
			'css-loader',
			'post-loader',
		],
	}
],
// 在根目录添加文件 postcss.config.js
module.exports = {
	plugins: {
		autoprefixer: {},
	},
};
// 在根目录添加文件 .browserslistrc(推荐)
> 1%
last 2 versions
not ie <= 8

// 或 在package.json中添加(不推荐)
 "browserslist": [
    "last 1 version",
    "> 1%",
    "IE 10"
  ]
忽略模块打包
IgnorePlugin:忽略某些特定模块,让webpack不把这些特定模块打包进去。
module.exports = {
  // ...
  plugins: [
    new webpack.IgnorePlugin(/^\.\/locale$/, /moment$/)
  ]
}
IgnorePlugin配置的参数有两个,第一个是匹配引入模块路径的正则表达式,第二个是匹配模块的对应上下文,即所在目录名。
在vue-cli中忽略打包模块的配置:
module.exports = {
	chainWebpack: (config) => {
		config.externals({
			'element-ui': 'ElEMENT',
			'moment': 'moment',
		}),
	}
};
这些被忽略不打包的文件,可以通过script形式引入。
<script src="<%= BASE_URL %>element-ui@2.13.0.js"></script>
<script src="<%= BASE_URL %>moment.min@2.22.2.js"></script>
分离代码文件
为了实现减小打包后的代码体积,利用缓存来加速静态资源访问,需要将不同且互不影响的代码块分离出来,plugin中说过可以使用mini-css-extract-plugin来对css文件进行分离,除此之外,建议将公共使用的第三方类库显式的配置为公共的部分。因为在第三方库的实际开发中,几乎不会改变,可以避免因公共chunk的频繁变更而导致缓存失效。
hash: 每次构建都会重新全部生成,所有文件hash值相同,无论是否修改都会重新生成,起不到缓存效果
chunkhash:根据不同入口文件进行依赖文件解析,构建对应chunk,生成对应的hash,不改变代码就不需重新构建。
contenthash: 因css和js用的同一个chunkhash,所以只改变js时,css也会重新生成。所以css使用contenthash
module.exports = {
  entry: {
    vendor: ["react", "lodash", "angular", ...], // 指定公共使用的第三方类库
  },
  optimization: {
    splitChunks: {
      cacheGroups: {
        vendor: {
          chunks: "initial",
          test: "vendor",
          name: "vendor", // 使用 vendor 入口作为公共部分
          enforce: true,
        },
      },
    },
  },
  // ... 其他配置
}

// 或者
module.exports = {
  optimization: {
    splitChunks: {
      cacheGroups: {
        vendor: {
          test: /react|angluar|lodash/, // 直接使用 test 来做路径匹配
          chunks: "initial",
          name: "vendor",
          enforce: true,
        },
      },
    },
  },
}

// 或者
module.exports = {
  optimization: {
    splitChunks: {
      cacheGroups: {
        vendor: {
          chunks: "initial",
          test: path.resolve(__dirname, "node_modules") // 路径在 node_modules 目录下的都作为公共部分
          name: "vendor", // 使用 vendor 入口作为公共部分
          enforce: true,
        },
      },
    },
  },
}...
vue-cli中的vue.config.js
module.exports = {
chainWebpack: (config) => {
	config.optimization.splitChunks(Object.assign({}, splitOptions, {
      name: false,
      cacheGroups: {
        default: false,
        vendors: {
          name: 'chunk-vendors',
          test: /[\\/]node_modules|plat-utils[\\/]/,
          minChunks: 2,
          priority: 11,
          chunks: 'all',
          reuseExistingChunk: true,
        },
        betterScroll: {
          test: /[\\/]node_modules[\\/]better-scroll[\\/]/,
          name: 'better-scroll',
          priority: 12,
          chunks: 'all',
          reuseExistingChunk: true,
          enforce: true,
        },
        vueRouter: {
          test: /[\\/]node_modules[\\/]vue-router[\\/]/,
          name: 'vue-router',
          enforce: true,
          priority: 12,
          chunks: 'all',
          reuseExistingChunk: true,
        },
        vueLazyload: {
          test: /[\\/]node_modules[\\/]vue-lazyload[\\/]/,
          name: 'vueLazyload',
          enforce: true,
          priority: 12,
          chunks: 'all',
          reuseExistingChunk: true,
        },
      },
    }));
  }
};
resolve.alias
module.exports = {
	resolve: {
		alias: {
			utils: path.resolve(__dirname, 'src/utils'),
		},
	},
};
引用时:
// 原引用方式
import cookie from './utils/cookie';
// alias之后
import cookit form 'utils/cookie';
vue-cli中的vue.config.js
module.exports = {
  configureWebpack: {
    resolve: {
      alias: {
        'utils': path.resolve('utils'), // 配置别名
      },
    },
  },
  chainWebpack: (config) => {
  	config.resolve.alias.set('utils', path.resolve(__dirname, 'src/components'));
  }
};
引用:
笔记是之前记录的,最近在复习,顺便发下,有理解不对的地方欢迎指正。
优化问题
待更新
