
零、介绍
这篇文章是介绍一个chrome浏览器插件的实现过程,主要包括:
- 浏览器插件是什么
- 插件目录
- 插件通信
- 插件调试
- 项目实现
- 插件发布
- 参考文档
一、浏览器插件是什么
浏览器插件,是基于浏览器的原有功能,另外增加新功能的工具。它不是独立的软件,需要依附于相应的浏览器才能发挥作用。目前主流的浏览器都允许使用插件,以增强浏览器的功能,让你的浏览器的功能更加多样化。 开发浏览器插件,其实就是类似于开发一个web应用,都是由HTML+JS+CSS构成,本文将介绍一个图片采集功能插件的实现。该插件主要用于采集网页图片并存储到服务端。
二、插件目录
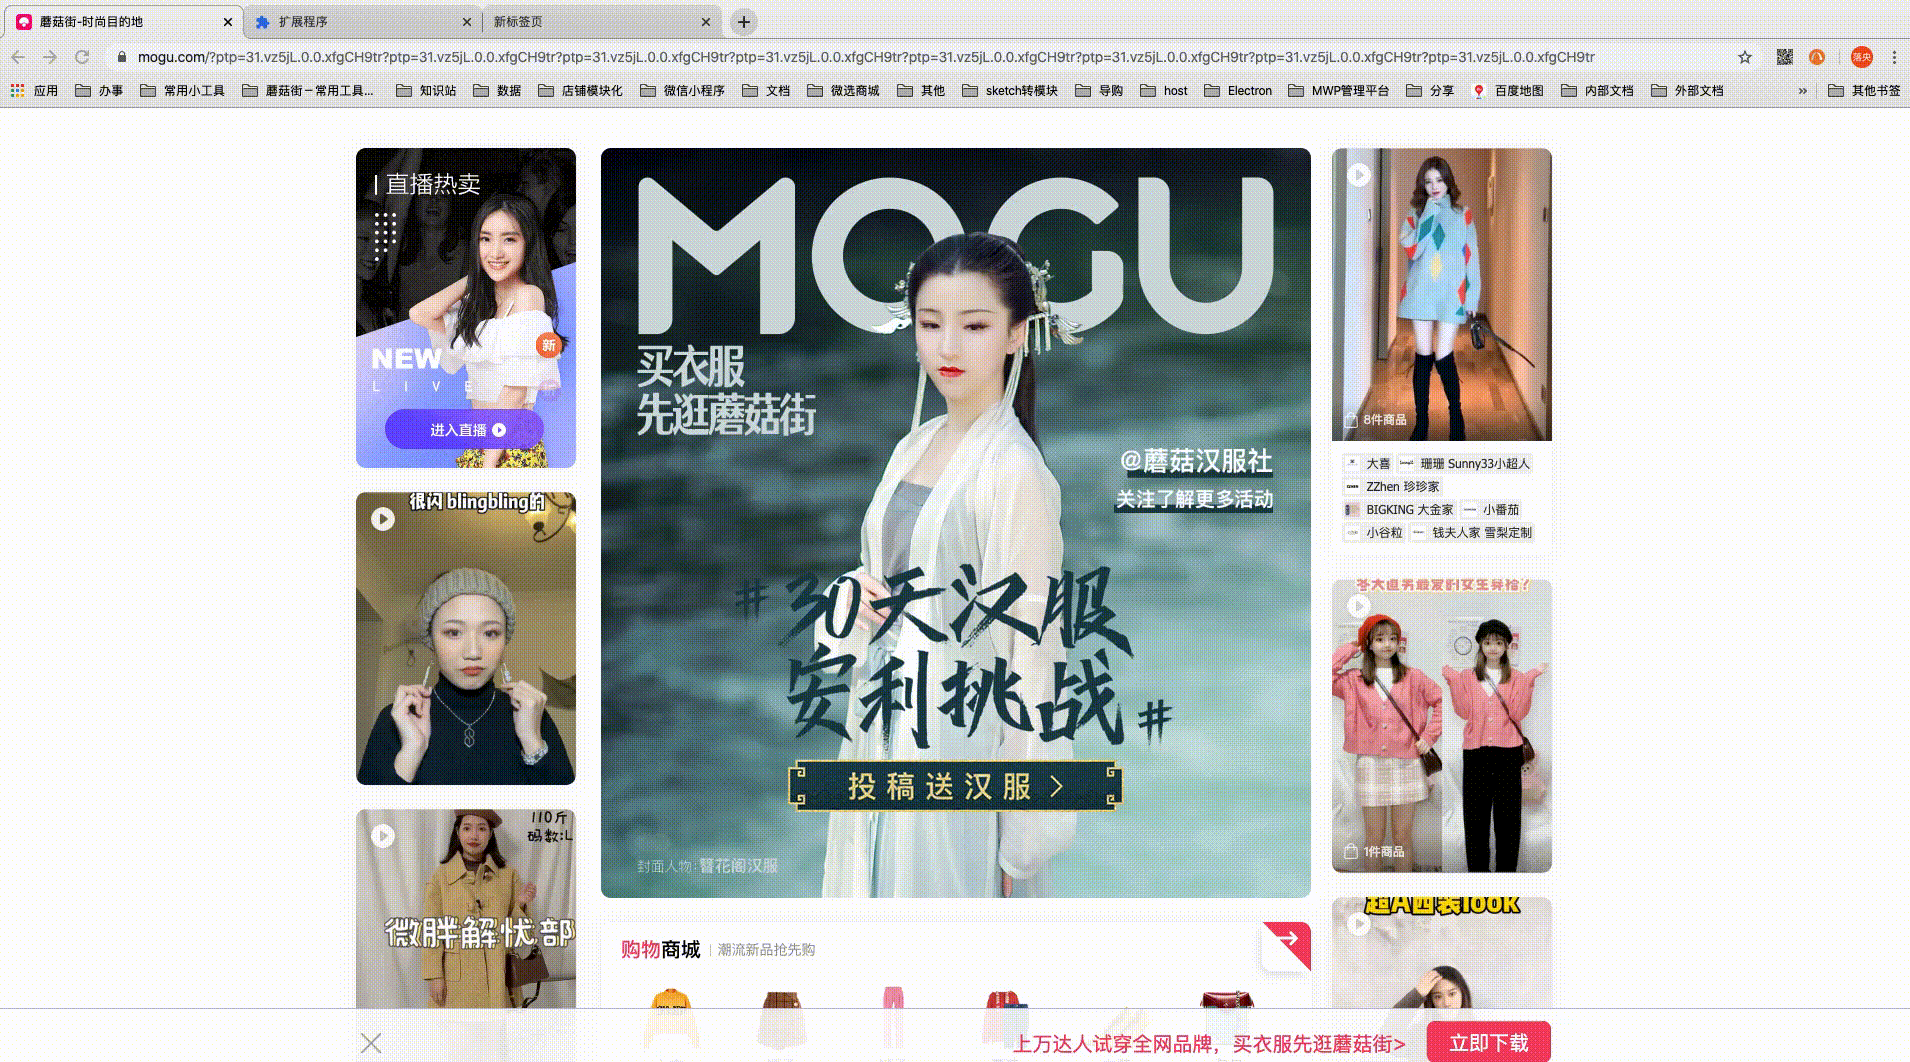
本文实现的chrome浏览器插件的目录如下图所示:

2.1 manifest.json文件
根目录下有一个manifest.json文件,里面提供了整个插件的功能和配置文件清单,非常重要,是插件应用必不可少的文件且必须放置在根目录。其中manifest_version、name、version这3个是必不可少的, description和icons是推荐选项。
{
    "manifest_version": 2, // 清单文件的版本,这个必须写,而且必须是2
    "name": "图片采集", // 插件的名称
    "version": "1.0.0", // 插件的版本
    "description": "这是一个图片采集插件", // 插件描述
    "icons": { // 插件图标
    		"16": "static/img/icon.png"
    		"48": "static/img/icon.png"
        	"128": "static/img/icon.png"
    },
}
2.2 页面模板
template目录则用来放置页面模板,常用的有popup.html和background.html。
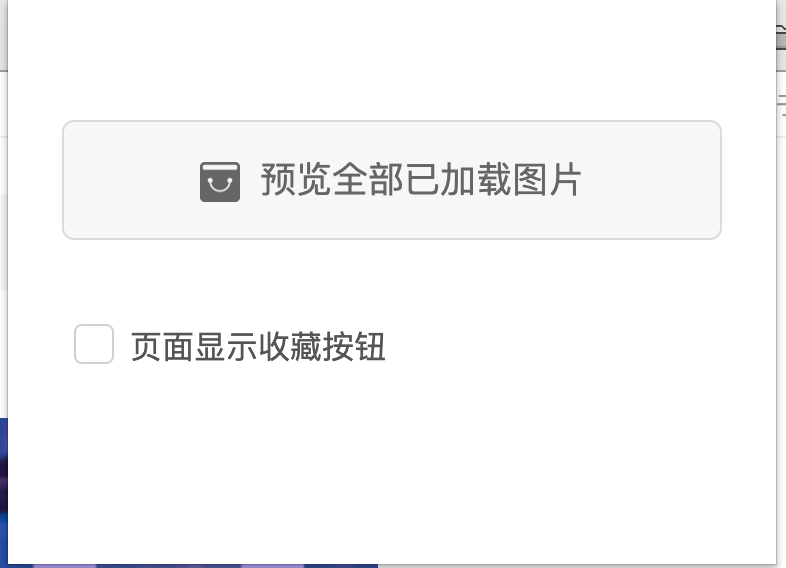
popup.html是窗口网页,点击插件图标时弹出,焦点离开窗口网页就立刻关闭,用于和用户交互。在图片采集插件中提供了”预览全部图片“和”展示采集按钮“两个按钮供用户操作。

{
	 "browser_action": {
        "default_icon": "static/img/icon.png",
        "default_title": "",
        "default_popup": "template/popup.html"
    },
}
background.html是后台页面,是一个常驻页面,它的生命周期是插件中所有类型页面中最长的,随着浏览器的打开而打开,随着浏览器的关闭而关闭,所以通常把需要一直运行的、启动就运行的、全局的代码放置在background.html里面,可以理解为插件运行在浏览器中的一个后台脚本。比如有时候,插件需要和服务端交互进行数据同步等操作,这种操作是用户无感知的,就可以放在后台页面来运行这部分的逻辑。
通过manifest的background字段来指定background页面:
{
	// 2种指定方式,如果指定JS,那么会自动生成一个背景页
	"page": "template/background.html"
	// "scripts": ["static/js/background.js"]
}
2.3 静态文件
static目录放置静态文件包括图片、js脚本、css样式。
icon.png为插件图标。
content-script.js是插件注入到web页面的js脚本,通过使用标准的DOM,它可以读取web页面的细节或者修改页面DOM结构,web页面和插件的通信也可以通过它来实现。在图片采集插件中,主要用来操作网页拿到图片。
popup.js为popup.html的js脚本。在图片采集插件中,主要用户收集用户交互,通知content-script.js去操作网页采集图片。
background.js为background.html的js 脚本。在图片采集插件中,主要用于存储采集到的图片到服务端。
content-script.css为插件注入到web页面的css样式。
conten-script可通过manifest配置的方式注入:
{
	"content_scripts": [{
        "matches": ["<all_urls>"], // <all_urls> 表示匹配所有地址
        "js": ["static/js/jquery-1.8.3.js", "static/js/content-script.js"], // 多个js顺序注入
        "css": ["static/css/content-script.css"], //css注入
        "run_at": "document_end" // 代码注入的时间,可选值: document_start, document_end, or document_idle,最后一个表示页面空闲时,默认document_idle
    }]
}
三、插件通信
3.1 插件上下文通信
popup.js和background.js都运行在插件的上下文中, 因为是运行在同一个线程中,所以它们之间的通信相对比较简单,页面之间可以直接相互调用方法来传递信息。 比如chrome.extension.getViews()方法可以返回属于你的插件的每个活动页面的窗口对象列表,而chrome.extension.getBackgroundPage()方法可以返回background页。
// background.js
var views = chrome.extension.getViews({type:'popup'}); // 返回popup对象
if(views.length > 0) {
    console.log(views[0].location.href);
}
function test(){
	console.log('我是background');
}

// popup.js
var bg = chrome.extension.getBackgroundPage();
bg.test(); // 访问background的函数
console.log(bg.document.body.innerHTML); // 访问background的DOM
3.2 content-script与插件上下文通信
content-script.js是嵌入在web页面的脚本,所以它实际是运行在web页面的上下文中,与插件上下文是完全隔离的,没办法像插件上下文相关页面那样可以相互调用方法来实现通信,它需要借助通信通道来辅助通信。在图片采集插件中content-script.js接收来自popup.js的消息去采集网页图片,并发消息给background.js存储图片。
popup.js或者background.js向content-script.js主动发消息:
function sendMsgToContentScript(message, callback){
	chrome.tabs.query({active: true, currentWindow: true}, function(tabs){
		chrome.tabs.sendMessage(tabs[0].id, message, function(response){
			if(callback) callback(response);
		})
	})
}

sendMsgToContentScript({type: 'popMsg', value: '你好, 我是popup'}, function(response){
	console.log('来自content的回复:' + response);
})
content-script.js接收消息:
chrome.runtime.onMessage.addListener(function(request, sender, sendResponse){
	if(request.type === 'popMsg'){		console.log('收到来自popup的消息:' + request.value);
	}
	sendResponse('我是content-script,已收到你的消息');
})
content-script.js主动发消息给popup.js或者background.js:
chrome.runtime.sendMessage({type: 'contentMsg', value: '你好,我是content-script'},function(response){
	console.log('收到来自后台的回复:'+ response);
})
popup.js和background.js接收消息:
	chrome.runtime.onMessage.addListener(function(request, sender, sendResonse){
		console.log()
		if(request.type === 'contentMsg'){
			console.log('收到来自content-script的消息:' + request.value);
		}
		sendResonse('我是后台,已收到你的消息。');
	})
需要注意的是content-script.js向popup.js主动发消息的前提是popup弹窗页面必须是打开的,否则需要利用background.js作中转。
四、插件调试
4.1 安装插件开发包
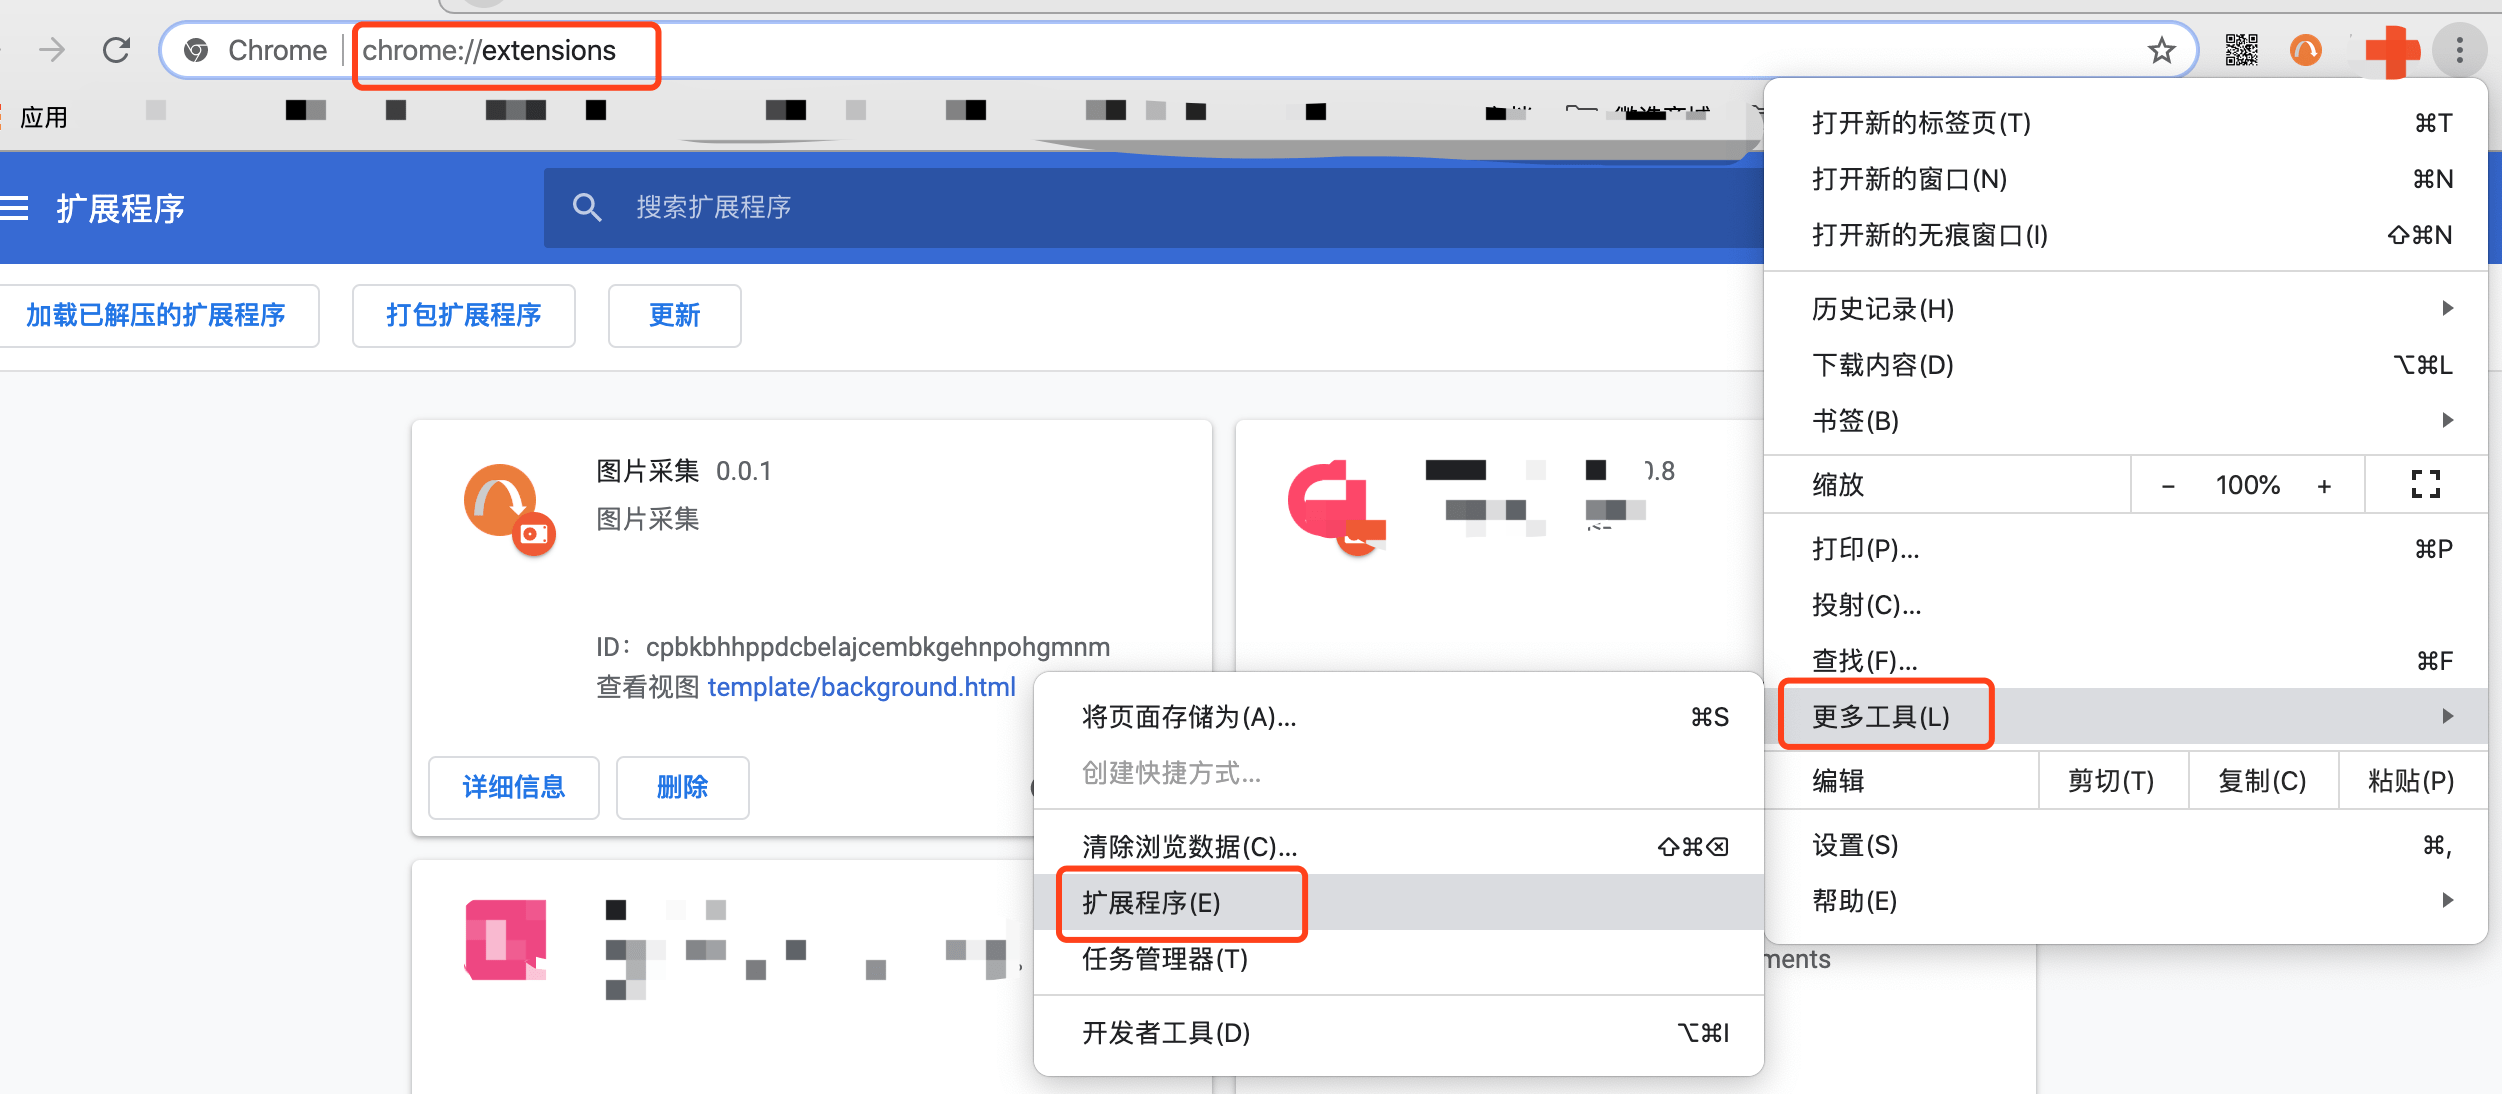
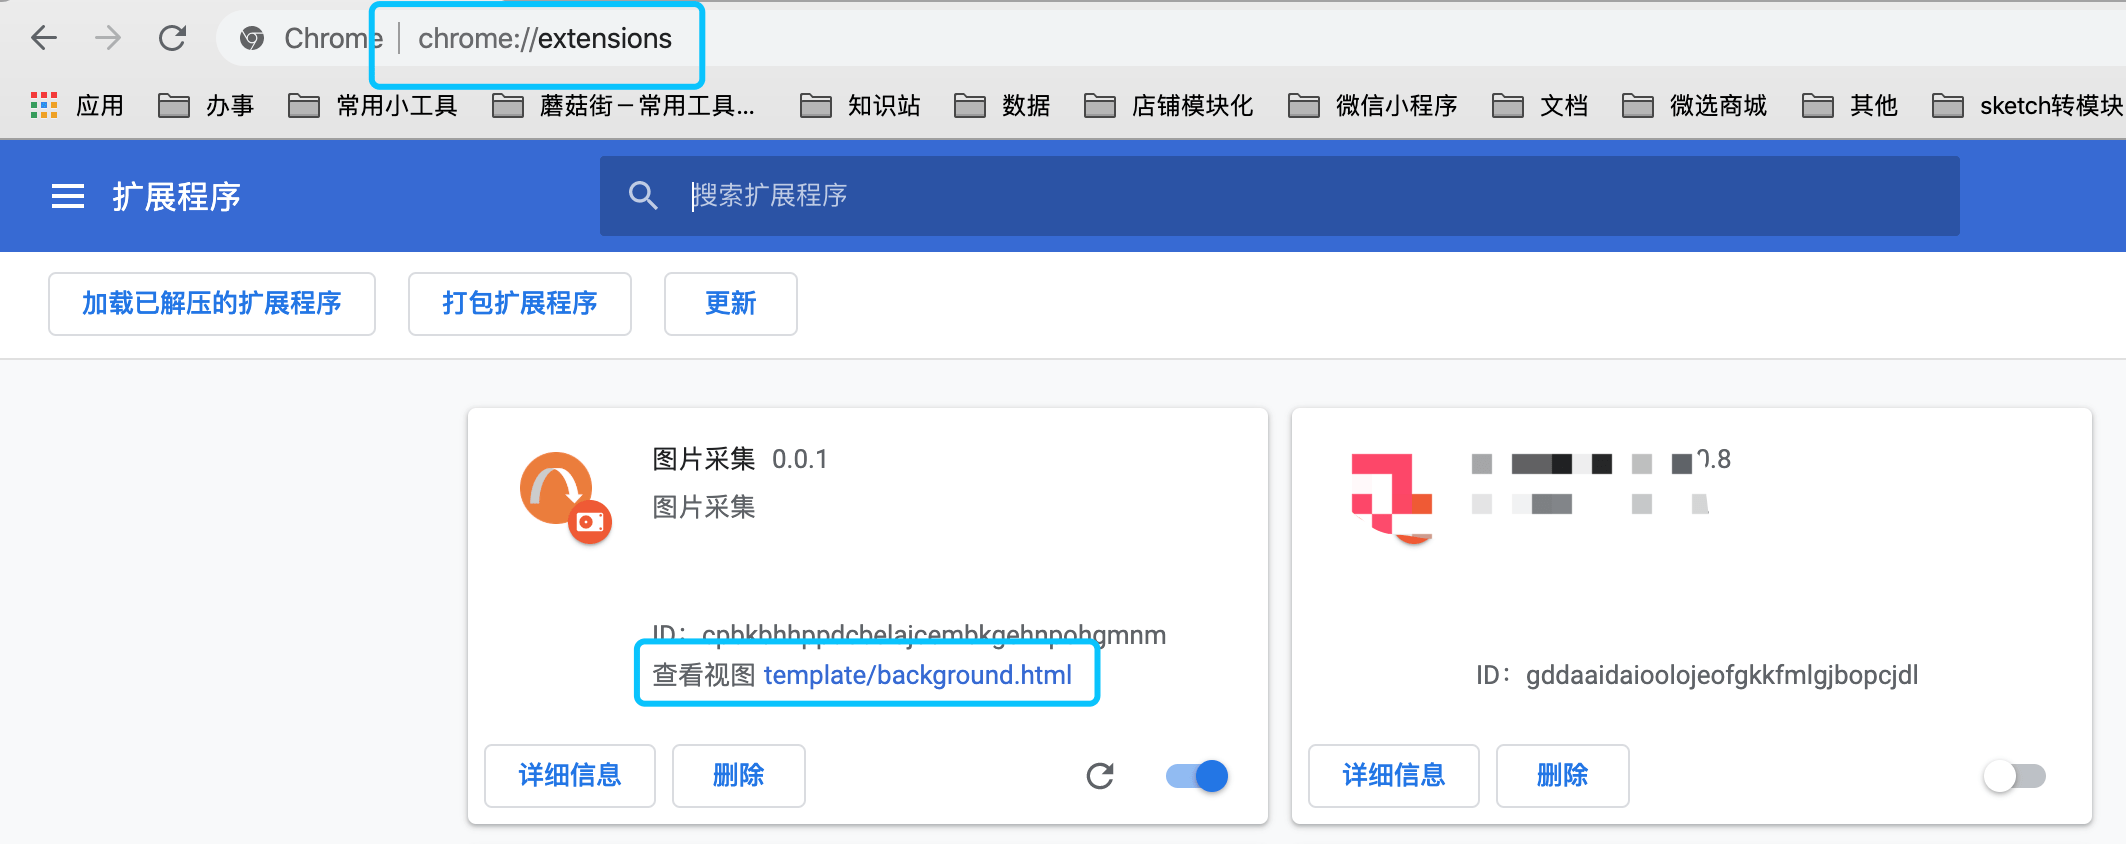
1、打开插件管理页面。通过浏览器菜单进入插件管理页面,也可以直接在地址栏输入chrome://extensions访问。
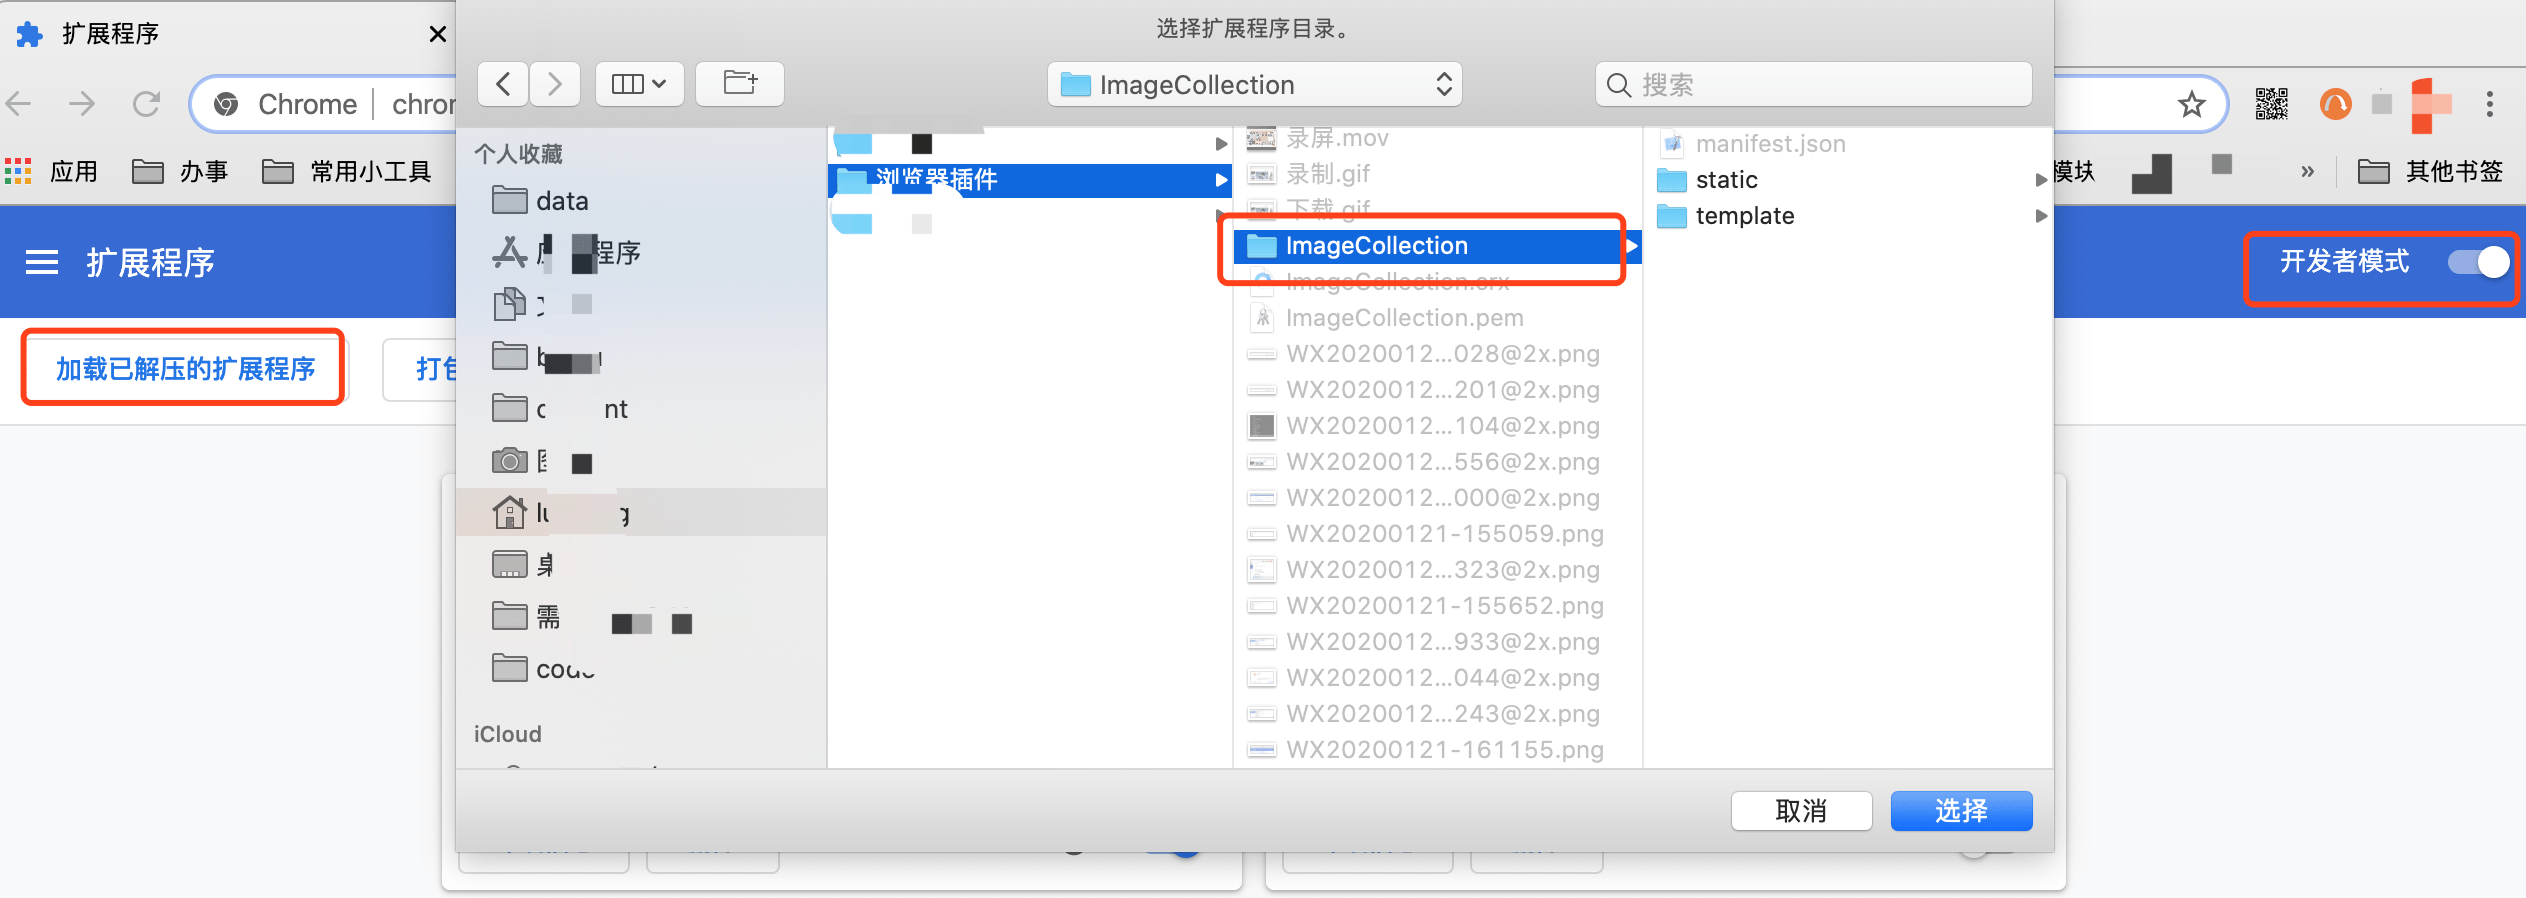
2、勾选开发者模式。勾选后即可以直接加载插件应用文件夹,否则只能安装.crx格式的压缩文件,无法及时同步插件更新。
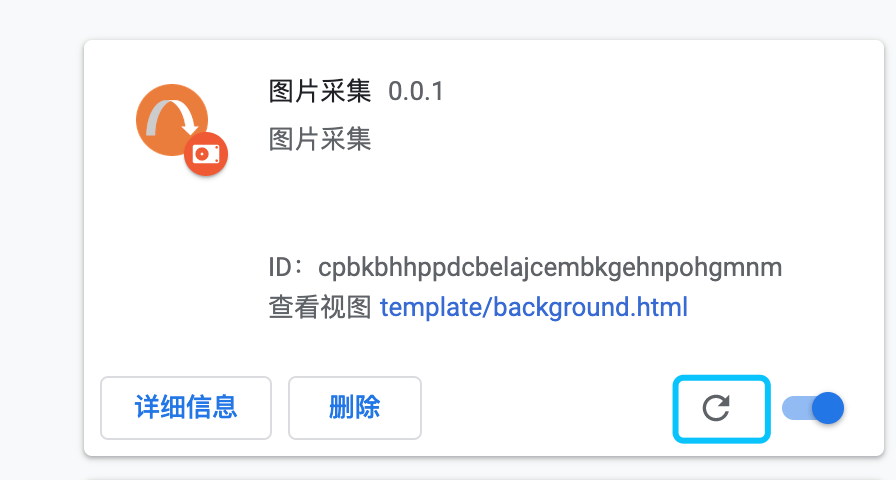
3、插件更新。开发过程中代码有任何改动都需要重新加载插件,点击插件的更新按钮即可,以防万一最好可以把页面也刷新一下。
4.2 调试content-script.js
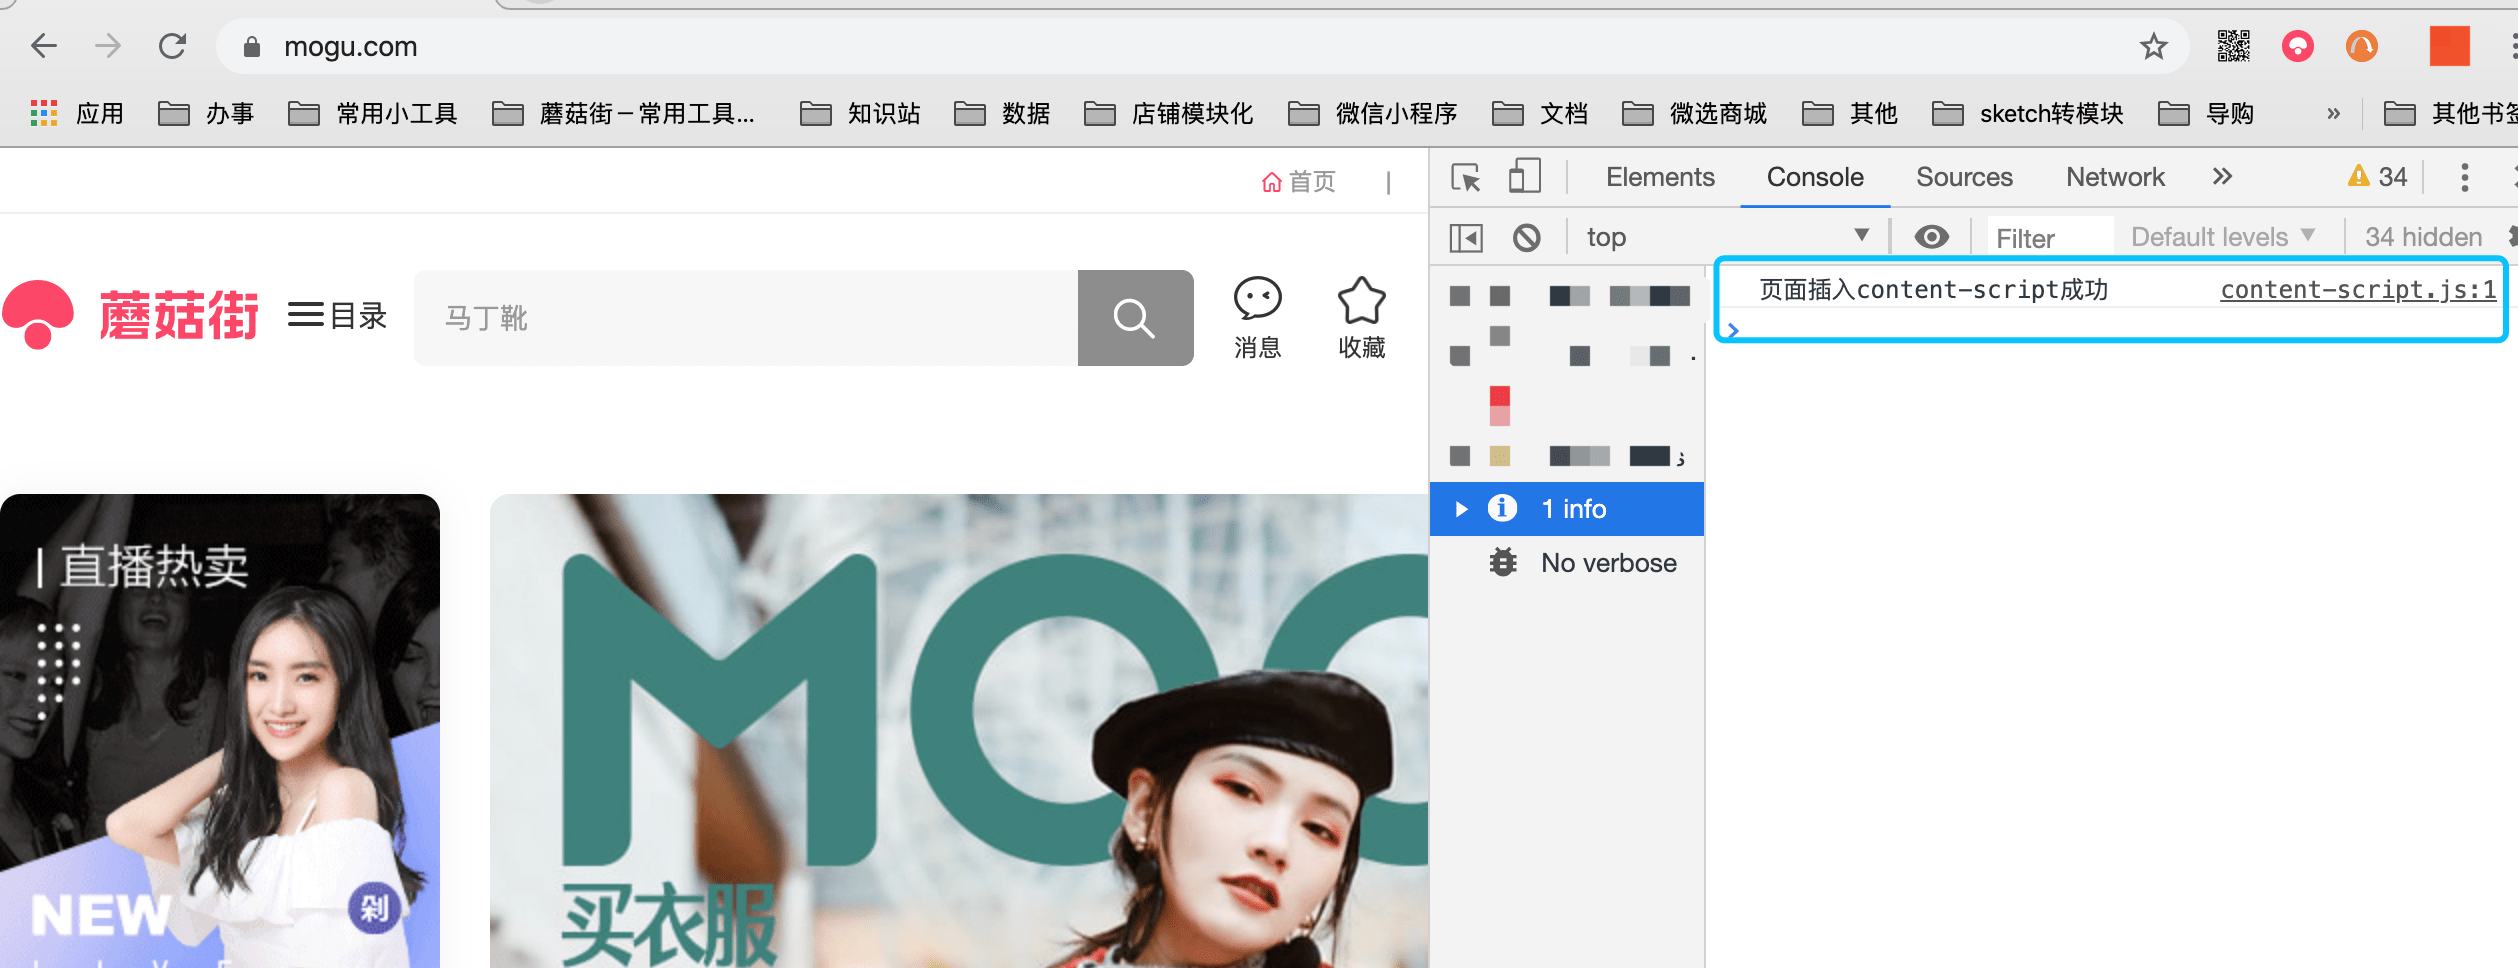
content-script.js是运行在web页面的脚本,打开web页面的开发者工具就可以进行调试了。
4.3 调试background.js
由于background.js和content-script.js不是运行在同一个上下文中,因此web页面的调试窗口是看不到background.js的。调试background.js需要打开插件调试窗口。在插件管理页面点击你的插件的“查看视图template/background.html”,就会出现插件调试窗口了,接下来的操作就和普通web页面调试一样了。

4.4 调试popup.js
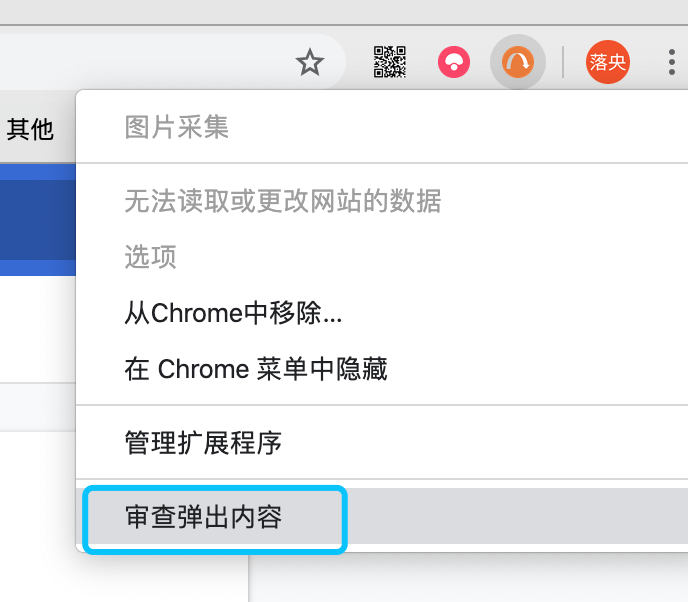
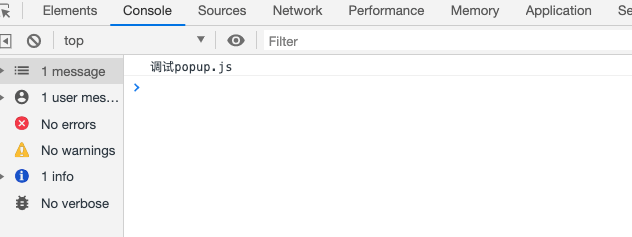
虽然popup.js和background.js是处于同一个上下文中,但是想要看到popup.js,还需要多一步操作“点击审查弹出内容”才可以:
五、项目实现
5.1 popup窗口网页实现
popup窗口网页提供了用户操作界面,主要包含了以下功能:
- 用户点击“预览全部已加载图片”按钮,则popup.js会通知content-script.js去读取web页面的DOM,筛选出图片DOM,并取出图片链接。然后操作DOM在web页面创建一个对话框,将所有图片放到对话框里集中进行预览&采集操作。
- 用户切换“页面是否展示图片采集按钮”选框,选中时popup.js会通知content-script操作web页面的DOM, 给图片加上采集按钮。取消选中时popup.js会通知content-script删除web页面里的采集按钮。
<!-- popup.html -->
<div>
  	<div id="preViewAllImg">
      <img src="https://s10.mogucdn.com/mlcdn/c45406/190219_4949lfk7le758fei1825i6dkd4g9i_40x42.png" />预览全部已加载图片
  	</div>
  	<div class="collect_btn_wrap" id="showCollectBtn">
      	<div class="collect_btn">
          <div class="show_collect_check"><img class="collect_check_img" src="" /></div>页面显示收藏按钮
      	</div>
	 </div>
</div>
<script type="text/javascript" src="../static/js/jquery-1.8.3.js"></script>
<script type="text/javascript" src="../static/js/popup.js"></script>

<!-- popup.js -->
$(function () {

    function sendMsgToContentScript(message, callback){
        chrome.tabs.query({active: true, currentWindow: true}, function(tabs){
            chrome.tabs.sendMessage(tabs[0].id, message, function(response){
                if(callback) callback(response);
            })
        })
    }

    // 一键收集全部图片
    $('#preViewAllImg').click(e => {
        sendMsgToContentScript({type: 'REQUEST_PREVIEW_ALL_IMG', title: '我是popup, 请采集所有已加载图片并进行预览'}, function(response){
            console.log('我是popup, 来自content的回复:' + response);
        });
    });

    // 是否显示采集按钮
    $('#showCollectBtn').click(() => {
        var src = $('.collect_check_img').attr('src');
        var status = src === ''; // status: true 显示
        $('.collect_check_img')[0].src = src === '' ? 'https://s10.mogucdn.com/mlcdn/c45406/190219_0728g95i8bkl3i08jic6lhjhh7gae_24x18.png' : '';

        // 向content-script发送消息显示or隐藏单个商品的收藏按钮
        sendMsgToContentScript({type: 'REQUEST_SWITCH_COLLECT_BTN', title: `我是popup, 请${status?'显示':'隐藏'}采集按钮`, status}, function(response){
                console.log('我是popup, 来自content的回复:' + response);
        });
    });
})
5.2 content-script插入脚本实现
content-script会监听来自popup.js的消息,根据消息通知操作web页面的DOM,执行读取图片链接、添加图片采集按钮、采集图片等操作,并发送消息给background通知其存储采集到的图片链接。
<!-- content-script.js -->
chrome.runtime.onMessage.addListener(function (request, sender, sendResponse) {
    if(request.type === 'REQUEST_PREVIEW_ALL_IMG'){

        console.log('我是content-script,收到来自popup的消息:' + request.title);

        sendResponse('我是content-script, 已收到你的预览全部图片的消息');

        PreviewAllImg();

    }else if(request.type === 'REQUEST_SWITCH_COLLECT_BTN'){

        console.log('我是content-script,收到来自popup的消息:' + request.title);

        sendResponse(`我是content-script, 已收到你${request.status ? '显示':'隐藏'}采集按钮的消息`);

        if(request.status){
            ShowCollectBtn();
        }else{
            ClearCollectBtn();
        }
    }else if(request.type === 'COLLECT_RESULT'){
        console.log('我是content-script,收到来自background的消息:' + request.title);
        sendResponse(`我是content-script, 已收到你的${request.title}的消息`);
    }
});


// 预览所有已加载图片
function PreviewAllImg(){
    GetAllAttrList('img', ['src', 'data-src']).then((res) => {
        ShowImgPanel(res);
    })
}

// 展示采集按钮
function ShowCollectBtn(){
    $('img').each((index, item) => {
        let src = $(item).attr('src') || $(item).attr('data-src');
        $($(item).parent()).css('position', 'relative');
        $($(item).parent()).find('.collect_img_btn').remove();
        $($(item).parent()).append('<div class="collect_img_btn" data-src="'+src+'">采集</div>');

    });
    $('.collect_img_btn').click((e) => {
        e.stopPropagation();
        e.preventDefault();
        let src = $(e.target).data('src');
        chrome.runtime.sendMessage({type: 'SEND_IMG', src: src},function(response){
            console.log('我是content-script, 收到来自后台的回复:' + response);
        })
    });
}

// 清除采集按钮
function ClearCollectBtn(){
    $('.collect_img_btn').remove();
}

// 展示预览图片对话框
function ShowImgPanel(list){
    var panelDOM = $('<div id="collect_img_panel">' +
            '<div class="collect_img_panel_close">x</div>' +
            '<div class="collect_img_panel_content">x</div>' +
            '</div>');
        $('body').append(panelDOM);
        $('body').append('<div id="collect_img_panel_mask"></div>');
        let $item = '';
        $.each(list, function(index, item) {
            $item = $item + '<div class="collect_img_panel_item">' +
                '<div class="collect_img_panel_item_img" style="background-image: url(' + item + ')"></div>' +
                '<div class="collect_img_panel_item_mask"></div>' +
                '<div class="collect_img_panel_item_btn" data-src="'+ item+'">采集图片</div>' +
                '</div>';
        });
        $('.collect_img_panel_content').html($item);
        $('.collect_img_panel_item_btn').click((e)=>{
            let src = $(e.target).data('src');
            chrome.runtime.sendMessage({type: 'SEND_IMG', src: src},function(response){
                console.log('我是content-script, 收到来自后台的回复:' + response);
            })
        });
        $(".collect_img_panel_close").click(function() {
            $('#collect_img_panel').remove();
            $('#collect_img_panel_mask').remove();
        });
}

// 根据标签和属性采集所有符合条件的对象
function GetAllAttrList(obj, attrArr){
    return new Promise((resolve) => {
        let list = [];
        $(obj).each((index, item) => {
            GetAttrContent(item, attrArr).then(res => {
                list.push(res);
                if(index === $(obj).length - 1){
                    resolve(list);
                }
            });
        });
    });
}

// 获取对象的属性内容
function GetAttrContent(obj, attrArr){
    return new Promise((resolve) => {
        $.each(attrArr, (attrIndex, attrItem) => {
            let attrContent = $(obj).attr(attrItem);
            if(attrContent){
                resolve(attrContent);
            }
        })
    });
}
5.3 background后台页面实现
background后台页面监听来自content-script的消息,将采集到的图片存储到服务端。
<!-- background.html -->
<div>
     <script type="text/javascript" src="../static/js/jquery-1.8.3.js"></script>
     <script type="text/javascript" src="../static/js/background.js"></script>
 </div>

<!--background.js-->
chrome.runtime.onMessage.addListener(function (request, sender, sendResponse) {
    if(request.type === 'SEND_IMG'){
        alert('我是background,采集到图片链接:' + request.src);

        sendResponse('正在采集图片');
        requestStoreImg(request.src);
    }
});

// 存储图片
function requestStoreImg(src) {

		$.ajax({
            type: 'get',
            url: 'https:/www.mogu.com/*/store',
            data: {
                url: src
            },
            success: function(res) {
                if (res.status && res.status.code && res.status.code === 1001) {
                		sendMsgToContentScript({type: 'COLLECT_RESULT', title: '图片采集成功'}, function(response){
    				            alert('我是background,来自content的回复:' + response);
    				        });
                } else {
                    sendMsgToContentScript({type: 'COLLECT_RESULT', title: '图片采集失败'}, function(response){
    				            alert('我是background,来自content的回复:' + response);
    				        });
                }
            },
            error: function(res){
            			sendMsgToContentScript({type: 'COLLECT_RESULT', title: '接口异常采集失败'}, function(response){
    				            alert('我是background,来自content的回复:' + response);
    			        });
            }
        })
}

function sendMsgToContentScript(message, callback){
    chrome.tabs.query({active: true, currentWindow: true}, function(tabs){
        chrome.tabs.sendMessage(tabs[0].id, message, function(response){
            if(callback) callback(response);
        })
    })
}
六、插件发布
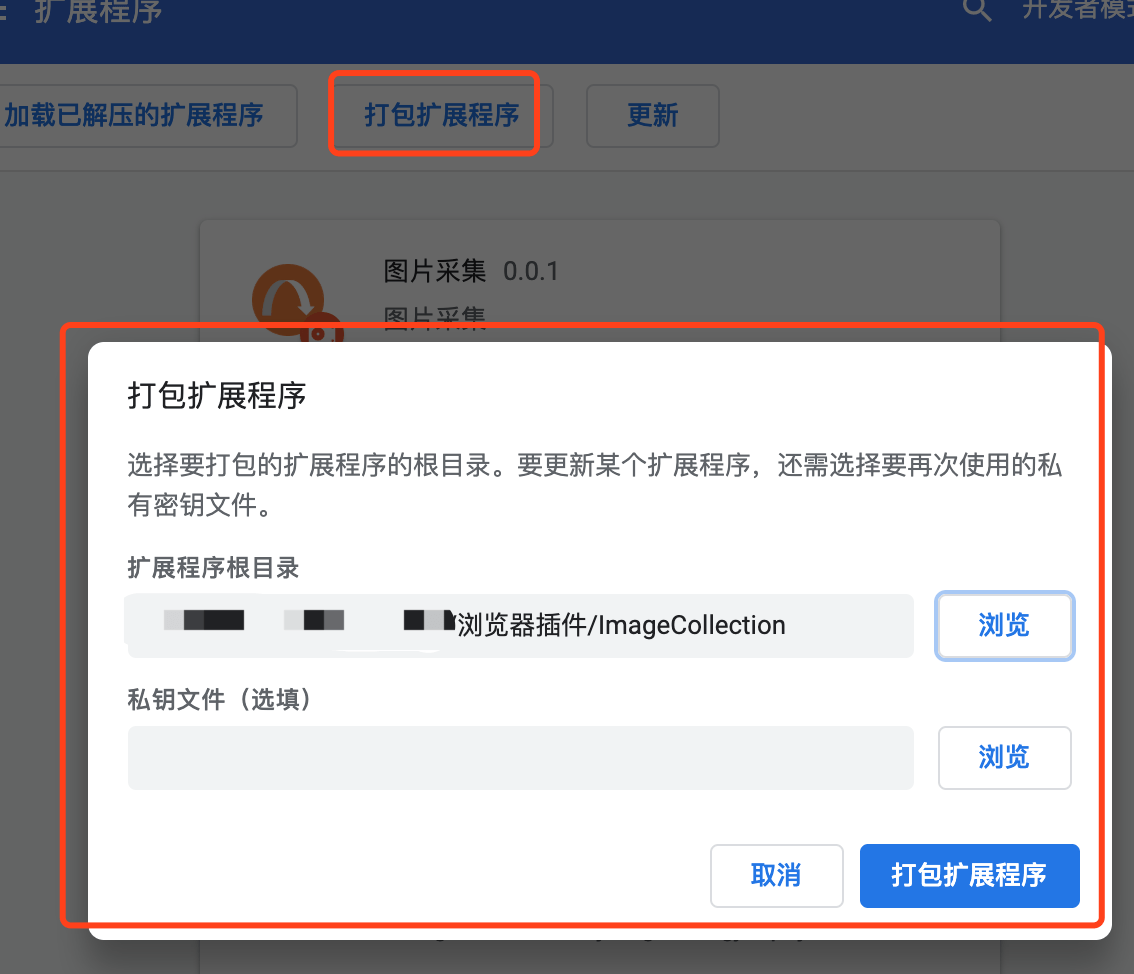
开发完成,通过插件页面的“打包扩展程序”打包生成.crx包。
申请一个Google账号登录开发者信息中心,按照要求填完所有的信息就可以发布了。
七、参考文档
developer.chrome.com/extensions open.chrome.360.cn/extension_d…