

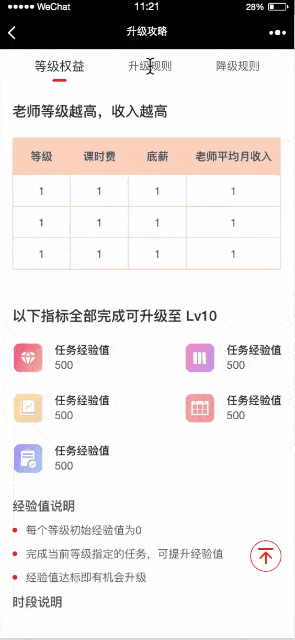
这几天写需求,写了一个tab切换+页面滚动的联动效果,虽然不难,但是觉得还挺有必要记录一下的,因为这种场景也挺常见的,这样下次遇到类似的,就可以直接使用了.
下面是页面效果:
代码:
<template>
  <div class="box">
    <div class="tab" ref="tab">
      <div v-for="(item, index) in tabs" :key="index">
        <div :class="{ active: active === index }" @click="switchTab(index)">
          {{ item }}
        </div>
      </div>
    </div>
    <div class="cont" ref="cont">
      <div class="cont_1" ref="cont_1">内容一</div>
      <div class="cont_2" ref="cont_2">内容二</div>
      <div class="cont_3" ref="cont_3">内容三</div>
    </div>
    <div class="back-top" @click="backTop"></div>
  </div>
</template>
<script>
export default {
  data() {
    return {
      tabs: ["tab1", "tab2", "tab3"],
      active: 0,
      cont1: null,
      cont2: null,
      cont3: null,
      isClickTab: false
    };
  },
  methods: {
    backTop() {
      this.cont1.scrollIntoView({
        block: "start",
        behavior: "smooth"
      });
    },
    switchTab(index) {
      if (index === 0) {
        this.cont1.scrollIntoView({
          block: "start",
          behavior: "smooth"
        });
      } else if (index === 1) {
        this.cont2.scrollIntoView({
          block: "start",
          behavior: "smooth"
        });
      } else {
        this.cont3.scrollIntoView({
          block: "start",
          behavior: "smooth"
        });
      }
    }
  },
  mounted() {
    this.cont1 = this.$refs["cont_1"];
    this.cont2 = this.$refs["cont_2"];
    this.cont3 = this.$refs["cont_3"];
    const tabH = this.$refs["tab"].offsetHeight;
    this.$refs["cont"].addEventListener("scroll", () => {
      if (this.cont3.getBoundingClientRect().top <= tabH) {
        this.active = 2;
        return false;
      }
      if (this.cont2.getBoundingClientRect().top <= tabH) {
        this.active = 1;
        return false;
      }
      if (this.cont1.getBoundingClientRect().top <= tabH) {
        this.active = 0;
      }
    });
  }
};
</script>
<style lang="scss" scoped>
.box {
  font-size: 28px;
  overflow-x: auto;
  height: 100vh;
  display: -webkit-flex;
  display: flex;
  flex-direction: column;
  overflow-y: hidden;
  .tab {
    height: 88px;
    background: #fff;
    line-height: 88px;
    color: #666;
    display: -webkit-flex;
    display: flex;
    justify-content: space-around;
    .active {
      font-size: 32px;
      color: #333;
      &::after {
        display: block;
        content: "";
        width: 36px;
        height: 6px;
        margin: auto;
        margin-top: -10px;
        background: rgba(255, 51, 0, 1);
        border-radius: 3px;
      }
    }
  }
  .cont {
    height: 300px;
    flex-grow: 1;
    overflow: auto;
    .cont_1 {
      height: 400px;
      background: pink;
    }
    .cont_2 {
      height: 800px;
      background: yellow;
    }
    .cont_3 {
      height: 100%;
      background: lightgreen;
    }
  }
  .back-top {
    width: 80px;
    height: 80px;
    background: url(../../assets/back-top.png) center / 100%
      100% no-repeat;
    border-radius: 50%;
    position: fixed;
    bottom: 120px;
    right: 32px;
  }
}
</style>
重点知识点:
- scrollIntoView滚动到指定区域,并且可以设置动画效果,大多数浏览器都支持,在移动端更应该没问题了.
- getBoundingClientRect 这个方法可以获取到当前元素距离窗口的上下左右的距离,console看下:
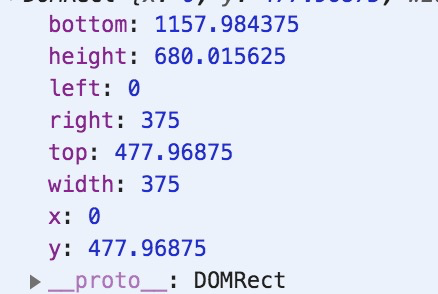
总结:主要是这两个api的配合使用.在tab切换时,用scrollIntoView触发了scroll事件,在scroll事件中监听getBoundingClientRect.top,发现值小于或等于tab的高度了,说明已经进入到此区域了,修改active的值,tab的样式就改变了.反过来,如果手动滚动页面时,会直接触发scroll事件,从而也使改变active的值,控制tab样式的改变.
