前言
flutter_swiper支持卡片轮播无限循环,适用于于Android端、iOS端。
本文介绍插件的具体使用方法及深入分析它的代码是如何运作的。领会一下插件开发者的思想,并从中改进自身代码的不足。好吧,其实在说我自己啦,代码毛病多,思路乱,维护成本高,所以想通过阅读大神的代码提升一下自身水平。我尝试了自己再写一遍插件的代码,感觉确实有所提升。而且,细节确实非常多。
flutter_swiper当前版本:flutter_swiper 1.1.6
pub.dev地址:pub.dev/packages/fl…
github地址:github.com/best-flutte…
使用方法简介
Swiper的属性还是比较多的,在这就不列举了,pub.dev和github上都有展示。
import 'package:flutter_swiper/flutter_swiper.dart';

Swiper(
  itemBuilder: (BuildContext context, int index) {
    return Image.asset(
      images[index],
      fit: BoxFit.fill,
    );
  },
  indicatorLayout: PageIndicatorLayout.COLOR,
  autoplay: true,
  itemCount: images.length,
  pagination: SwiperPagination(),
  control: SwiperControl(),
);
源码目录结构
先简要分析一下每个文件的主要功能,在脑海中能有一个大致的轮廓。
flutter_swiper
- lib/
- src/
- custom_layout.dart
- swiper.dart
- swiper_control.dart
- swiper_controller.dart
- swiper_pagination.dart
- swiper_plugin.dart
- flutter_swiper.dart
- src/
- pubspec.yaml
pubspec.yaml
有两个依赖项,这两个插件和flutter_swiper是同一个开发者。开发者github地址:github.com/best-flutte….
transformer_page_view: ^0.1.6
flutter_page_indicator: ^0.0.3
transformer_page_view:页面切换及切换动画。pub.dev/packages/tr…
flutter_page_indicator:页面指示器,支持NONE、SLIDE、WARM、COLOR、SCALE、DROP. pub.dev/packages/fl…
swiper.dart
插件最主要的类,有三个构造方法,原始构造方法Swiper(), Swiper.children()方法, Swiper.list()方法, 后两个方法通过接收参数转换,调用了Swiper().
支持四种Layout布局,DEFAULT, STACK, TINDER, CUSTOM.
custom_layout.dart
当Layout为CUSTOM时,定义了CustomLayoutOption及多种TransformBuilder, 当页面转换时,增加了addOpacity, addTranslate, addScale, addRotate多种动画效果。
swiper_controller.dart
SwiperController间接方式继承了ChangeNotifier,记录用户执行的动作event,并通知监听者。主要功能是,控制页面的切换,主要方法有:
- startAutoplay():自动播放
- stopAutoplay():停止播放
- move(int index, {bool animation: true}):移动到某页
- next({bool animation: true}):下一页
- previous({bool animation: true}):上一页
继承关系:
SwiperController extends IndexController...
IndexController extends ChangeNotifier...
SwiperController方法示例:
static const int START_AUTO_PLAY = 2;
static const int STOP_AUTO_PLAY = 3;

int index;
bool autoplay;

void startAutoplay() {
  event = SwiperController.START_AUTO_PLAY;
  this.autoplay = true;
  notifyListeners();
}
调用者示例:
controller.addListener(_onController);

void _onController() {
  switch (_controller.event) {
    case SwiperController.START_AUTO_PLAY:
      if (_timer == null) _startAutoplay();
      break;
  }
}
swiper_control.dart
SwiperControl主要是构建向左向右的按钮,点击按钮的时候,通过SwiperController的previous和next方法,通知监听者。
swiper_pagination.dart
SwiperPagination,自定义页码指示器。
持有SwiperPlugin对象,并通过SwiperPlugin的build方法渲染页面指示器。
Widget build(BuildContext context, SwiperPluginConfig config) {
  ...
}
SwiperPluginConfig对象拥有Swiper的很多属性,像itemCount, loop, PageController, SwiperController等。
插件的页码指示器并未实现页码的点击功能,如果读着想实现Dots, Slide等的点击后跳转,可以在Build方法中增加GestureDetector,通过SwiperController对象实现跳转。
swiper_plugin.dart
SwiperPlugin是一个抽象类,主要服务于SwiperPagination,包含一个build方法,注意build方法持有SwiperPluginConfig对象。
它的实现类有SwiperControl, FractionPaginationBuilder, RectSwiperPaginationBuilder, DotSwiperPaginationBuilder, SwiperCustomPagination, SwiperPagination.
abstract class SwiperPlugin {
  const SwiperPlugin();

  Widget build(BuildContext context, SwiperPluginConfig config);
}
flutter_swiper.dart
这个dart文件主要是导入以上各个文件,供调用者插件者使用。
library flutter_swiper;

export 'src/swiper.dart';
export 'src/swiper_pagination.dart';
export 'src/swiper_control.dart';
export 'src/swiper_controller.dart';
export 'src/swiper_plugin.dart';
实现思路
- 最基础还是PageView布局。
- NotificationListener包裹PageView实现滚动监听。
- SwiperController实现控制PageView的操作,上一页、下一页、自动滚动、停止滚动等操作。
- SwiperControl实现前一个、后一个页面的切换,不同于SwiperController的地方是,SwiperControl通过build实现Button的渲染。
- SwiperPagination渲染页码指示器。
- GestureDetector包裹PageView的Item Widget,实现条目点击监听。
- ItemCount是实际Item的个数,PageView的itemCount传递的是实际的ItemCount加上一个中间值1000000000,实现无限循环。
- 监听PageView的onPageChanged实现页面切换监听。
- 定义Timer,实现每autoplayDelay下调用SwiperController的next方法切换下一页。
- 通过AnimatedBuilder, Opacity, Transform.rotate, Transform.translate, Transform.scale等实现Page切换的动画。
功能实现
当你阅读上面的介绍之后,有没有想试一下自己实现一下。接下来我们一起从简单到复杂,一步步实现它的功能(时间有限,并未实现所有功能)。如果你有什么问题可以一起讨论。
实现步骤
- 第一步:初步封装PageView
- 实现条目点击
- 实现切换监听
- 第二步:自定义SwiperController
- 下一页
- 上一页
- 第三步:实现无限循环
- 第四步:实现自动轮播及转换动画
- 第五步:实现页码展示
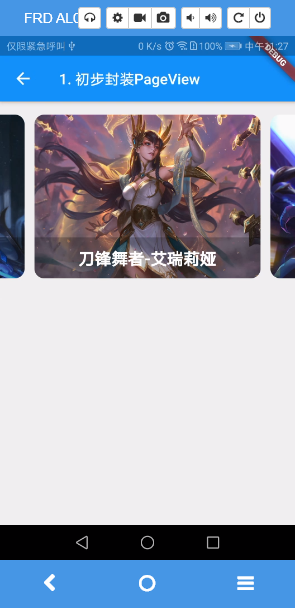
第一步:初步封装PageView
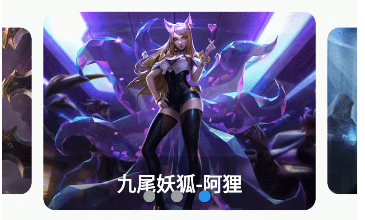
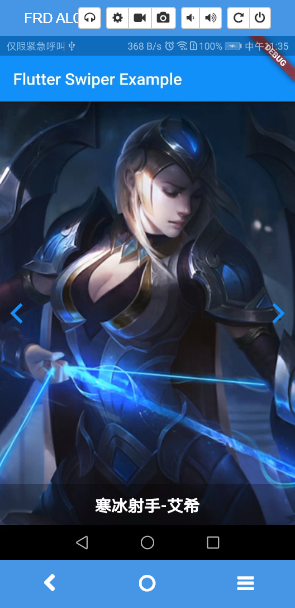
创建程序名为flutter_swiper,并添加assets三张轮播图片,执行Package get。
Widget _buildSwiper() {
  IndexedWidgetBuilder itemBuilder;
  if (widget.onTap != null) {
    itemBuilder = _wrapTap;
  } else {
    itemBuilder = widget.itemBuilder;
  }
  return PageView.builder(
    controller: _pageController,
    itemCount: widget.itemCount,
    itemBuilder: itemBuilder,
    onPageChanged: widget.onIndexChanged,
  );
}
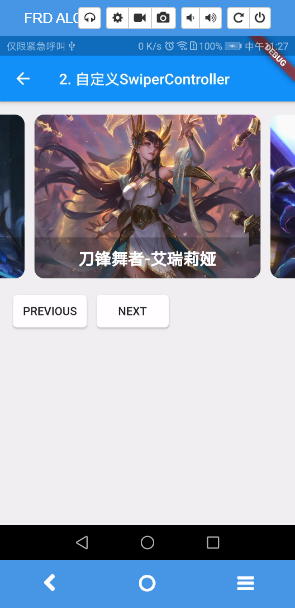
第二步:自定义SwiperController
自定义SwiperController,实现Next,Previous.
import 'dart:async';
import 'package:flutter/foundation.dart';

class SwiperController extends ChangeNotifier {
  /// Next page
  static const int NEXT = 1;

  /// Previous page
  static const int PREVIOUS = -1;

  Completer _completer;

  /// Current index
  int index;

  /// Current event
  int event;

  SwiperController();

  Future next() {
    this.event = NEXT;
    _completer = Completer();
    notifyListeners();
    return _completer.future;
  }

  Future previous() {
    this.event = PREVIOUS;
    _completer = Completer();
    notifyListeners();
    return _completer.future;
  }

  void complete() {
    if (!_completer.isCompleted) {
      _completer.complete();
    }
  }
}

class _SwiperState extends State<Swiper> {
  ...

  @override
  void initState() {
    super.initState();
    ...
    // SwiperController
    _swiperController = widget.swiperController;
    _swiperController.addListener(_onController);
  }

  void _onController() {
    int event = widget.swiperController.event;
    int index = _pageController.page.floor();
    switch (event) {
      case SwiperController.PREVIOUS:
        index--;
        break;
      case SwiperController.NEXT:
        index++;
        break;
    }
    if (index < 0 || index >= widget.itemCount) return;
    _pageController.jumpToPage(index);
    widget.swiperController.complete();
    _activeIndex = index;
  }
}
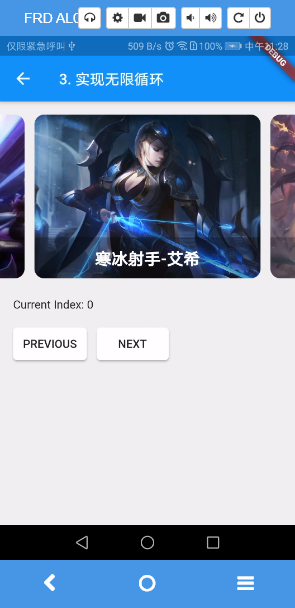
第三步:实现无限循环
循环参数定义:
- bool loop:标记无限循环模式。
如果是无限循环模式,把Swiper.itemCount加上一个常量值(2000000000)传递给PageView.itemCount,Swiper.index加上常量值(1000000000)传递给PageView.PageController.initialPage.
注意点:
- PageView的itemBuilder中,index是Swiper的index,即没有加上常量值的。
- PageView的onPageChanged中,index是Swiper的index,即没有加上常量值的。
- SwiperController的Previous和Next,是加上常量值之后的。
总之,需要注意PageView的实际RealIndex,和Swiper的RenderIndex.
const int kMaxValue = 2000000000;
const int kMiddleValue = 1000000000;

int getRealItemCount() {
  if (widget.itemCount == 0) return 0;
  return widget.loop ? widget.itemCount + kMaxValue : widget.itemCount;
}

int getRealIndexFromRenderIndex({int index, bool loop}) {
  int initPage = index;
  if (loop) {
    initPage += kMiddleValue;
  }
  return initPage;
}

int getRenderIndexFromRealIndex({int index, bool loop, int itemCount}) {
  if (itemCount == 0) return 0;
  int renderIndex;
  if (loop) {
    renderIndex = index - kMiddleValue;
    renderIndex = renderIndex % itemCount;
    if (renderIndex < 0) {
      renderIndex += itemCount;
    }
  } else {
    renderIndex = index;
  }
  return renderIndex;
}
第四步:实现自动轮播及转换动画
轮播参数定义:
- bool autoPlay:标记自动轮播模式。
- int autoPlayDelay:轮播模式下,当前页面停留时间。
- bool autoPlayDisableOnInteraction:轮播模式下,用户主动滑动是否停止轮播。
转换动画参数定义:
- int duration:转换持续时间, 即PageController.animationTo的duration.
- Curve curve:转换曲线
轮播实现思路:
- 监听SwiperController的 START_AUTO_PLAY 和 STOP_AUTO_PLAY.
- 创建定时器 Timer 周期执行 pageController.animateToPage(duration, curve) 方法。
注意点:
- 用户主动滚动PageView的时候,需要停止动画,即通过NotificationListener包裹PageView监听ScrollNotification.
- 停止轮播时,Timer需要及时销毁。
- 两个Duration时间的区别,转换动画参数duration是转换过程的快慢,轮播参数autoPlayDelay是动画结束后,当前页面的停留时间。

/// Controller auto play and stop
abstract class _SwiperTimerMixin extends State<Swiper> {
  Timer _timer;

  SwiperController _controller;

  @override
  void initState() {
    _controller = widget.controller;
    _controller ??= SwiperController();
    _controller.addListener(_onController);
    _handleAutoPlay();
    super.initState();
  }

  void _onController() {
    switch (_controller.event) {
      case SwiperController.START_AUTO_PLAY:
        if (_timer == null) _startAutoPlay();
        break;
      case SwiperController.STOP_AUTO_PLAY:
        if (_timer != null) _stopAutoPlay();
        break;
    }
  }

  @override
  void didUpdateWidget(Swiper oldWidget) {
    if (_controller != oldWidget.controller) {
      if (oldWidget.controller != null) {
        oldWidget.controller.removeListener(_onController);
        _controller = oldWidget.controller;
        _controller.addListener(_onController);
      }
    }
    _handleAutoPlay();
    super.didUpdateWidget(oldWidget);
  }

  @override
  void dispose() {
    _controller?.removeListener(_onController);
    _stopAutoPlay();
    super.dispose();
  }

  bool get autoPlayEnabled => _controller.autoPlay ?? widget.autoPlay;

  void _handleAutoPlay() {
    if (autoPlayEnabled && _timer != null) return;
    _stopAutoPlay();
    if (autoPlayEnabled) _startAutoPlay();
  }

  void _startAutoPlay() {
    assert(_timer == null, "Timer must be stopped before start!");
    _timer = Timer.periodic(
      Duration(milliseconds: widget.autoPlayDelay),
      _onTimer,
    );
  }

  void _onTimer(Timer timer) => _controller.next(animation: true);

  void _stopAutoPlay() {
    if (_timer != null) {
      _timer.cancel();
      _timer = null;
    }
  }
}
-
transformer_page_view
对页面跳转动画及循环的封装
-
transformer_page_controller
对无限循环的封装,主要是RealIndex和RenderIndex的互转
这里面需要注意的是didUpdateWidget(oldWidget)方法,如果在State类,例如_SwiperState,_TransformerPageViewState等,这些类中维护了一些变量,就要注意这些变量在传入新值时候的更新处理。
示例:
class _TransformerPageViewState extends State<TransformerPageView> {
  ...
  @override
  void didUpdateWidget(TransformerPageView oldWidget) {
    int index = widget.index ?? 0;
    bool created = false;
    // PageController changed
    // Here '_pageController' is oldWidget.pageController
    if (_pageController != widget.pageController) {
      if (widget.pageController != null) {
        _pageController = widget.pageController;
      } else {
        created = true;
        _pageController = TransformerPageController(
          initialPage: widget.index,
          itemCount: widget.itemCount,
          loop: widget.loop,
        );
      }
    }
    // Index changed
    if (_pageController.getRenderIndexFromRealIndex(_activeIndex) != index) {
      _activeIndex = _pageController.initialPage;
      if (!created) {
        int initPage = _pageController.getRealIndexFromRenderIndex(index);
        _pageController.animateToPage(
          initPage,
          duration: widget.duration,
          curve: widget.curve,
        );
      }
    }
    // SwiperController changed
    if (_swiperController != widget.controller) {
      if (_swiperController != null) {
        _swiperController.removeListener(onChangeNotifier);
      }
      _swiperController = widget.controller;
      if (_swiperController != null) {
        _swiperController.addListener(onChangeNotifier);
      }
    }
    super.didUpdateWidget(oldWidget);
  }
  ...
}
第五步:实现页码展示
主要是把swiper的widget和pagination的widget用Stack包裹起来。
SwiperPagination需要持有Swiper的参数,如itemCount, loop, swiperController, pageController等参数。
class SwiperPaginationConfig {
  final int activeIndex;
  final int itemCount;
  final bool loop;
  final PageController pageController;
  final SwiperController swiperController;

  const SwiperPaginationConfig({
    this.activeIndex,
    this.itemCount,
    this.swiperController,
    this.pageController,
    this.loop,
  }) : assert(swiperController != null);
}

/// Here only Dots Pagination
class SwiperPagination {
  /// color when current index,if set null, will be Theme.of(context).primaryColor
  final Color activeColor;

  /// if set null, will be Theme.of(context).scaffoldBackgroundColor
  final Color color;

  ///Size of the dot when activate
  final double activeSize;

  ///Size of the dot
  final double size;

  /// Space between dots
  final double space;

  /// Distance between pagination and the container
  final EdgeInsetsGeometry margin;

  final Key key;

  const SwiperPagination({
    this.key,
    this.activeColor,
    this.color,
    this.size: 10.0,
    this.activeSize: 10.0,
    this.space: 3.0,
    this.margin: const EdgeInsets.all(10.0),
  });

  Widget build(BuildContext context, SwiperPaginationConfig config) {
    Color activeColor = this.activeColor;
    Color color = this.color;
    // Default
    activeColor ??= Theme.of(context).primaryColor;
    color ??= Theme.of(context).scaffoldBackgroundColor;

    List<Widget> children = [];
    int itemCount = config.itemCount;
    int activeIndex = config.activeIndex;

    for (int i = 0; i < itemCount; ++i) {
      bool active = i == activeIndex;
      children.add(Container(
        key: Key("Pagination_$i"),
        margin: EdgeInsets.all(space),
        child: ClipOval(
          child: Container(
            color: active ? activeColor : color,
            width: active ? activeSize : size,
            height: active ? activeSize : size,
          ),
        ),
      ));
    }
    return Row(
      key: key,
      mainAxisSize: MainAxisSize.min,
      children: children,
    );
  }
}
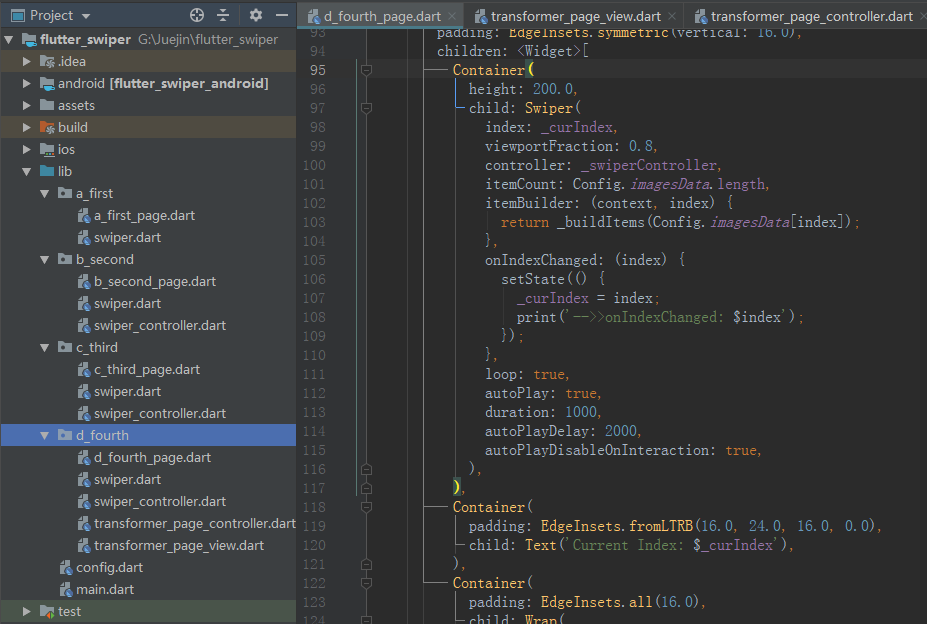
目录结构图