

Flutter动画中用到的基本概念
Flutter动画中有4个比较重要的角色:Animation、Controller、Curve、Tween,先来了解一下这四个角色
1.1 Animation
Animation是Flutter动画库中的核心类,用于插入指导动画的值
Animation对象知道动画当前的状态(比如开始还是停止),可以使用addListener和addStatusListener监听动画状态改变。
   animation.addListener((){
      //调用setState来刷新界面
      setState(() {
      });
    });
    animation.addStatusListener((status){
      debugPrint('status $status');
      switch (status){
        //动画一开始就停止了
        case AnimationStatus.dismissed:
          break;
        //动画从头到尾都在播放
        case AnimationStatus.forward:
          break;
        //动画从结束到开始倒着播放
        case AnimationStatus.reverse:
          break;
        //动画播放完停止
        case AnimationStatus.completed:
          break;
      }
    });
- addListener: 每一帧都会调用,调用之后一般使用setState来刷新界面
- addStatusListener:监听动画当前的状态 如动画开始、结束、正向或反向
在Flutter中,Animation对象本身和UI渲染没有任何关系。Animation是一个抽象类,它拥有其当前值和状态(完成或停止)。其中一个比较常用的Animation类是Animation<double>,还可以生成除double之外的其他类型值,如:Animation<Color> 或Animation<Size> 。
1.2 AnimationController
用来管理Animation,它继承自Animation,是个特殊的Animation,屏幕每刷新一帧,它都会生成一个新值,需要一个vsync参数,vsync的存在可以防止后台动画消耗不必要的资源。
vsync的值怎么获得,可以让stateful对象扩展使用TickerProviderStateMixin比如:
class AnimationDemoHome extends StatefulWidget {
  @override
  _AnimationDemoHomeState createState() => _AnimationDemoHomeState();
}

class _AnimationDemoHomeState extends State<AnimationDemoHome> with TickerProviderStateMixin{...}
AnimationController在默认情况下,在给定的时间段内,AnimationController会生成0.0到1.0的数字。
它可以控制动画,比如使用.forward()方法可以启动一个动画,.stop()可以结束一个动画,.reverse()启动反向动画。
  AnimationController({
    double value,
    this.duration,
    this.reverseDuration,
    this.debugLabel,
    this.lowerBound = 0.0,
    this.upperBound = 1.0,
    this.animationBehavior = AnimationBehavior.normal,
    @required TickerProvider vsync,
  })
看一下AnimationController的构造方法,有一个必须的参数TickerProvider,就是前面给定的TickerProviderStateMixin
在StatefulWidget中创建一个AnimationController对象
  animationController = AnimationController(
//      lowerBound: 32.0,
//      upperBound: 100.0,
      duration: Duration(milliseconds: 2000),
      vsync: this
    );
1.3 CurvedAnimation
定义动画曲线,运动过程,比如匀速,先加速在减速等等
 CurvedAnimation({
    @required this.parent,
    @required this.curve,
    this.reverseCurve,
  })
它有两个必要的参数parent和curve。parent就是前面的AnimationController对象,curve就是动画运行的曲线,相当于Android属性动画中的插值器curve都有哪些取值呢
| curve曲线 | 动画过程 |
|---|---|
| linear | 匀速的 |
| decelerate | 匀减速 |
| ease | 先加速后减速 |
| easeIn | 开始慢后面快 |
| easeOut | 开始快后面慢 |
| easeInOut | 先慢在快在慢 |
上面是常用的一些曲线,还有很多中曲线运动的方式可以去curve.dart源码中去看,源码注释中有mp4的链接,可以清楚的看到动画运动的视频。
abstract class Curve {
  const Curve();

  double transform(double t) {
    assert(t >= 0.0 && t <= 1.0);
    if (t == 0.0 || t == 1.0) {
      return t;
    }
    return transformInternal(t);
  }

  @protected
  double transformInternal(double t) {
    throw UnimplementedError();
  }
  ...
}
如果系统提供的运动曲线仍然无法满足我们的需求,那就可以继承Curve来自己实现一个。上面的代码可以看到Curve是一个抽象类,继承它并重写transform方法即可。比如我们可以自己在里面实现一个sin或者cos函数的曲线。例如
class ShakeCurve extends Curve {
  @override
  double transform(double t) {
    return math.sin(t * math.PI * 2);
  }
}
创建一个CurvedAnimation对象
CurvedAnimation curvedAnimation =
CurvedAnimation(parent: animationController,curve: Curves.bounceOut);
1.4 Tween:
给动画对象插入一个范围值
默认情况下,AnimationController对象的范围从0.0到1.0,如果我们想要更大的范围,就需要使用到Tween了。比如
Tween tween = Tween(begin: 32.0,end: 100.0);
class Tween<T extends dynamic> extends Animatable<T>Tween继承自Animatable,接收一个begin和一个end值,Tween的职责就是定义从输入范围到输出范围的映射。所以这两个值必须能进行加减乘的运算。
要使用Tween对象,调用其animate()方法,传入一个控制器对象,返回一个Animation对象。例如,
Animation   animation = Tween(begin: 32.0,end: 100.0).animate(curvedAnimation);
Animation   animationColor = ColorTween(begin: Colors.red,end: Colors.green).animate(curvedAnimation);
动画的使用
2.1 Animation动画
动画的四个角色都了解了,下面开始使用这些角色来构建一个动画,动画效果如下图
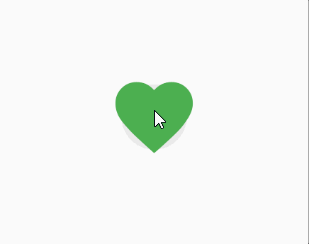
有一个心形的button,点击的时候放大并且颜色渐变,在点击的时候原路返回
class AnimateDemo1 extends StatefulWidget {
  @override
  _AnimateDemo1State createState() => _AnimateDemo1State();
}

class _AnimateDemo1State extends State<AnimateDemo1> with SingleTickerProviderStateMixin{
  AnimationController animationController;
  Animation animationSize;
  Animation animationColor;
  CurvedAnimation curvedAnimation;

  //Tween sizeTween;
  //Tween colorTween;
  @override
  void initState() {
    super.initState();
    animationController = AnimationController(
        duration: Duration(milliseconds: 1000),
        vsync: this
    );
    //设置插值器  这里使用一个默认的插值器bounceInOut
    curvedAnimation = CurvedAnimation(parent: animationController,curve: Curves.bounceOut);
    animationSize = Tween(begin: 32.0,end: 100.0).animate(curvedAnimation);
    animationColor = ColorTween(begin: Colors.red,end: Colors.green).animate(curvedAnimation);
    animationController.addListener((){
      //刷新界面
      setState(() {});
    });
  }

  @override
  void dispose() {
    super.dispose();
    animationController.dispose();
  }

  @override
  Widget build(BuildContext context) {
    return Center(
      child: IconButton(
        icon: Icon(Icons.favorite),
        iconSize: animationSize.value,
        color: animationColor.value,
        //iconSize: sizeTween.evaluate(curvedAnimation),
        //color: colorTween.evaluate(curvedAnimation),
        onPressed: (){
          switch(animationController.status){
            case AnimationStatus.completed:
              animationController.reverse();
              break;
            default:
              animationController.forward();
          }
        },
      ),
    );
  }
}
- 通过animation.value可以拿到动画当前的值,然后赋值给当前需要动画的控件的相关属性即可
- 需要在addListener中调用setState来刷新界面,否则没效果
- 需要注意 animationController需要在dispose()页面销毁的时候释动画资源。
- 如果没有调用Tween的animate方法来构建一个Animation,可以在使用的地方使用如上面代码中
sizeTween.evaluate(curvedAnimation)的方式来获取当前值。
2.2使用AnimatedWidget
2.1中每次写动画都需要在addListener中设置setState来更新UI,有点麻烦,系统给提供了一个AnimatedWidget,它内部封装了addListener和setState的逻辑,我们只需要传给它AnimationController和Animation就行了。
而且我们可以自定义一个Widget继承它,让动画跟原来的视图代码分离
class AnimationDemo2 extends StatefulWidget {
  @override
  _AnimationDemo2State createState() => _AnimationDemo2State();
}

class _AnimationDemo2State extends State<AnimationDemo2> with SingleTickerProviderStateMixin{

  AnimationController animationController;
  Animation animationSize;
  Animation animationColor;
  CurvedAnimation curvedAnimation;
  @override
  void initState() {
    super.initState();
    animationController = AnimationController(
      duration: Duration(milliseconds: 1000),
      vsync: this
    );
    //设置插值器  这里使用一个默认的插值器bounceInOut
    curvedAnimation = CurvedAnimation(parent: animationController,curve: Curves.bounceOut);
    animationSize = Tween(begin: 32.0,end: 100.0).animate(curvedAnimation);
    animationColor = ColorTween(begin: Colors.red,end: Colors.green).animate(curvedAnimation);
  }

  @override
  void dispose() {
    super.dispose();
    animationController.dispose();
  }

  @override
  Widget build(BuildContext context) {
    return Center(
      child: AnimationHeart(
         animations: [
           animationSize,animationColor
         ],
        controller: animationController,
      ),
    );
  }
}
//动画代码抽离
class AnimationHeart extends AnimatedWidget{
  AnimationController controller;
  List animations;
  AnimationHeart({ this.animations,
    this.controller,}):super(listenable:controller);

  @override
  Widget build(BuildContext context) {
    return IconButton(
      icon: Icon(Icons.favorite),
      iconSize: animations[0].value,
      color: animations[1].value,
      onPressed: (){
        switch(controller.status){
          case AnimationStatus.completed:
            controller.reverse();
            break;
          default:
            controller.forward();
        }
      },
    );
  }
}
自定义一个AnimationHeart继承自AnimatedWidget,在构造方法中将AnimationController和Animation传过来。其余的跟2.1中一样,最终效果也一样。
2.3使用AnimatedBuilder
Flutter中还可以使用AnimatedBuilder来构建一个动画
class AnimateDemo3 extends StatefulWidget {
  @override
  _AnimateDemo3State createState() => _AnimateDemo3State();
}

class _AnimateDemo3State extends State<AnimateDemo3> with SingleTickerProviderStateMixin{

  AnimationController animationController;
  Animation animationSize;
  Animation animationColor;
  CurvedAnimation curvedAnimation;
  @override
  void initState() {
    super.initState();
    animationController = AnimationController(
        duration: Duration(milliseconds: 1000),
        vsync: this
    );
    //设置插值器  这里使用一个默认的插值器bounceInOut
    curvedAnimation = CurvedAnimation(parent: animationController,curve: Curves.bounceOut);
    animationSize = Tween(begin: 32.0,end: 100.0).animate(curvedAnimation);
    animationColor = ColorTween(begin: Colors.red,end: Colors.green).animate(curvedAnimation);
  }

  @override
  void dispose() {
    super.dispose();
    animationController.dispose();
  }

  @override
  Widget build(BuildContext context) {
    return AnimatedBuilder(
      animation: animationController,
      builder: (context,child){
        return Center(
          child: IconButton(
            icon: Icon(Icons.favorite),
            iconSize: animationSize.value,
            color: animationColor.value,
            onPressed: (){
              switch(animationController.status){
                case AnimationStatus.completed:
                  animationController.reverse();
                  break;
                default:
                  animationController.forward();
              }
            },
          ),
        );
      },
    );
  }
}
实例化四个动画元素的代码跟前面还是一样,主要是在build代码块中使用AnimatedBuilder构建,传入animation对象。看起来比2.2中的方式也没有简单多少,不过看一下它的构造方法,系统还给提供了一个可选的参数child,让它天然就支持封装。
const AnimatedBuilder({
    Key key,
    @required Listenable animation,
    @required this.builder,
    this.child,
  })
- 必需要一个Listenable,Animation就是Listenable
- 必需要一个builder,前面的代码中知道builder中需要传一个context和一个child
- 可以传一个child。传入的这个child最终会传入到builder中
上面的例子中我们是直接在builder中创建了一个控件,既然child可以传进来,那么我们可以把一个类型的动画封装一下比如缩放动画,渐变动画等,以后只要把需要此动画的小部件传进来,这个小部件就有这个动画了。
比如下面定义一个可以缩放的小部件。
class ScaleAnimate extends StatelessWidget {
  final Animation animation;
  final Widget child;
  ScaleAnimate({@required this.animation,@required this.child});
  @override
  Widget build(BuildContext context) {
    return AnimatedBuilder(
      animation: animation,
      builder: (context,child){
        return SizedBox(
            width: animation.value,
            height: animation.value,
            child: child,
          );
      },
      child: child,
    );
  }
}
Hero动画
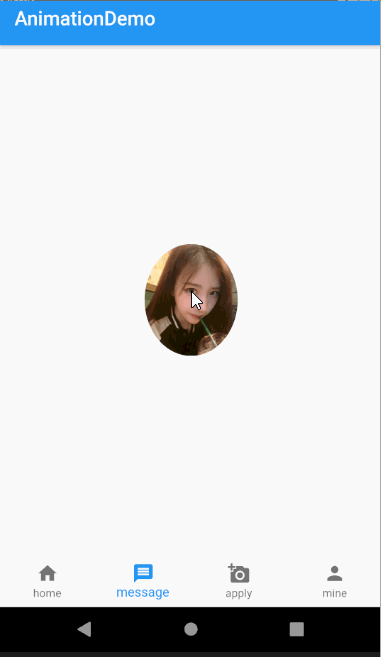
Hero动画很简单不过在平时的项目中也经常用到,主要用在路由页面之间切换。比如一个头像点击看大图,或者新闻列表页面,点击看详情,这种共享式的无缝切换。
动画效果如下图
class AnimateDemo4 extends StatefulWidget {
  @override
  _AnimateDemo4State createState() => _AnimateDemo4State();
}

class _AnimateDemo4State extends State<AnimateDemo4> {
  @override
  Widget build(BuildContext context) {
    return Center(
      child: InkWell(
        child: Hero(
          tag: "avator",
          child: ClipOval(
            child: Image.network('http://ww1.sinaimg.cn/large/0065oQSqly1fsfq1k9cb5j30sg0y7q61.jpg',width: 100,),
          ),
        ),
        onTap: (){
          Navigator.of(context).push(MaterialPageRoute(builder: (context){
            return Scaffold(
              body: Center(
                child: Hero(
                  tag: "avator",
                  child: Image.network('http://ww1.sinaimg.cn/large/0065oQSqly1fsfq1k9cb5j30sg0y7q61.jpg'),
                ),
              ),
            );
          }));
        },
      ),
    );
  }
}
- 当前页面的圆形小图和详情页面的大图都使用Hero包裹。
- 必须使用相同的tag,Flutter Framework通过tag来确定他们之间的关系。
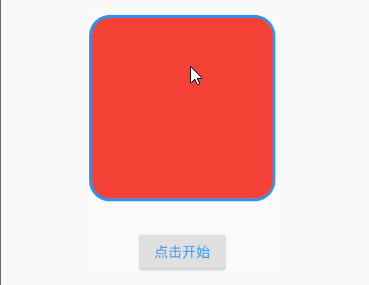
交织动画
有时候我们需要实现一组复杂的动画,比如在0.1-0.2秒缩放,从0.2-0.4秒颜色渐变,从0.4-0.8秒左右移动,这时候使用交织动画可以方便的完成,使用交织动画需要注意下面几点
- 需要使用多个Animation对象
- 一个AnimationController控制所有的动画对象
- 给每一个动画对象指定时间间隔(Interval)
class AnimateDemo5 extends StatefulWidget {
  @override
  _AnimateDemo5State createState() => _AnimateDemo5State();
}

class _AnimateDemo5State extends State<AnimateDemo5> with TickerProviderStateMixin{
  AnimationController _controller;
  @override
  void initState() {
    super.initState();
    _controller = AnimationController(
        duration: const Duration(milliseconds: 2000),
        vsync: this
    );
  }
    @override
  void dispose() {
    super.dispose();
    _controller.dispose();
  }
  @override
  Widget build(BuildContext context) {
    return Center(
      child: Column(
        children: <Widget>[
          SizedBox(height: 30,),
          Center(
            child: StaggerAnimation(controller: _controller,),
          ),
          SizedBox(height: 30,),
          RaisedButton(
            child: Text("点击开始"),
            onPressed: () {
              _play();
            },
            textColor: Theme.of(context).primaryColor,
            splashColor: Colors.grey[400],
          )
        ],
      ),
    );
  }

  void _play() async{
    //先正向执行动画
    await _controller.forward().orCancel;
    //再反向执行动画
    await _controller.reverse().orCancel;
  }
}

class StaggerAnimation extends StatelessWidget {
  final AnimationController controller;
  Animation<double> width,height;
  Animation<EdgeInsets> padding;
  Animation<Color> color;
  Animation<BorderRadius> borderRadius;

  StaggerAnimation({Key key,this.controller}): super(key:key){
    height = Tween<double>(
        begin: 0,
        end: 200)
        .animate(CurvedAnimation(parent: controller, curve: Interval(0.0,0.4,curve: Curves.ease)));
    width = Tween<double>(
        begin: 50,
        end: 200)
        .animate(CurvedAnimation(parent: controller, curve: Interval(0.0,0.4,curve: Curves.ease)));
    padding = Tween<EdgeInsets>(
      begin:EdgeInsets.only(left: .0),
      end:EdgeInsets.only(left: 100.0),
    ).animate(CurvedAnimation(parent: controller, curve: Interval(0.6, 1.0, curve: Curves.ease)),);
    color = ColorTween(
      begin:Colors.green ,
      end:Colors.red,
    ).animate(CurvedAnimation(parent: controller, curve: Interval(0.0, 0.4, curve: Curves.ease,)));
    borderRadius = BorderRadiusTween(
      begin: BorderRadius.circular(3),
      end: BorderRadius.circular(35),
    ).animate(CurvedAnimation(parent: controller, curve: Interval(0.4, 0.6,curve: Curves.ease,),));
  }

  @override
  Widget build(BuildContext context) {
    return AnimatedBuilder(
      animation: controller,
      builder: (context,child){
        return Container(
          alignment: Alignment.bottomCenter,
          padding:padding.value ,
          child: Container(
            width: width.value,
            height: height.value,
            decoration: BoxDecoration(
                color: color.value,
                border: Border.all(color: Colors.blue,width: 3),
                borderRadius:borderRadius.value
            ),
          ),
        );
      },
    );
  }
}
- StaggerAnimation中定义了5个动画,宽,高,颜色,左边距,圆角
- 使用Interval来定义某个动画执行的时机
- 最后异步启动动画。
