

背景介绍
项目使用的是Vue全家桶系列(vue, vuex, vue-router)构建的, 项目代码量和业务复杂度还是有一些. 刚开始人少时, 代码写起来还是没有问题的, 慢慢的, 随着人员的增多, 会发现大家的代码"风格"各异:
- 有jQuery风格的
- 有使用ID选择器更新DOM的
- 有将vue实例挂载到window下方便使用的
- 有函数形参都使用对象/数组传入的
- etc...
凡此种种, 想起之前看过的一段话"欠的债, 迟早要还的". 有没有办法可以约束下这些"风格"各异的代码, 并且对当前工程代码影响不是很大的? => TypeScript, 也许可以试试.
Vue & TypeScript
TypeScript 具有类型系统,且是 JavaScript 的超集,TypeScript 在 2018年 势头迅猛,可谓遍地开花。
Vue3.0 将使用 TS 重写,重写后的 Vue3.0 将更好的支持 TS。 2019 年 TypeScript 将会更加普及,能够熟练掌握 TS,并使用 TS 开发过项目,将更加成为前端开发者的优势。
因此, 这个技能必须要学会, 所以也就边学边实践, 并逐步引用到项目中实战. 预计在12月的版本中, 将其中一个小的vue项目中全部改用TypeScript.
因为公司是内网环境, 不可访问外网. So, 只能回来再将代码复写一回了. 估计更新会比较慢.
练手项目地址: vue-typescript-skills
工程创建
使用@vue/cli 3.0创建typescript工程.
D:\vueProjects>vue create vue-typescript
Vue CLI v3.9.2
┌───────────────────────────┐
│  Update available: 4.0.5  │
└───────────────────────────┘
? Please pick a preset: Manually select features
? Check the features needed for your project: Babel, TS, Router, Vuex, CSS Pre-processors, Linter, Unit, E2E
? Use class-style component syntax? Yes
? Use Babel alongside TypeScript (required for modern mode, auto-detected polyfills, transpiling JSX)? Yes
? Use history mode for router? (Requires proper server setup for index fallback in production) No
? Pick a CSS pre-processor (PostCSS, Autoprefixer and CSS Modules are supported by default): Less
? Pick a linter / formatter config: Standard
? Pick additional lint features: (Press <space> to select, <a> to toggle all, <i> to invert selection)Lint on save
? Pick a unit testing solution: Jest
? Pick a E2E testing solution: Cypress
? Where do you prefer placing config for Babel, PostCSS, ESLint, etc.? In dedicated config files
? Save this as a preset for future projects? Yes
? Save preset as: vue-typescript
安装成功后, 即可运行本地开发环境了.
目录结构
安装成功后, 会生成如下目录 :

这里我们重点关注下4个文件:
- .eslintrc.js
- src/shims-tsx.d.ts
- src/shims-vue.d.ts
- tsconfig.json
.eslintrc.js
eslint示例和解释可参考: .eslintrc 文件示例和解释
在对支持typescript, 可能会新增或修改2个配置,
- extends 添加对vue typescript的支持
 'extends': [
    'plugin:vue/essential',
    '@vue/standard',
    '@vue/typescript'
  ]
- overrides
  overrides: [
    {
      files: [
        '**/__tests__/*.{j,t}s?(x)',
        '**/tests/unit/**/*.spec.{j,t}s?(x)'
      ],
      env: {
        jest: true
      }
    }
  ]
这主要用于复写eslint配置配置, 此处是针对__tests__, 以及tests/units目录下的js/ts/jsx/ts文件, 修改配置规则, 此处是修改env为jest:true
xx.d.ts
ts的语言服务需要.d.ts文件来识别类型,这样才能做到相应的语法检查和智能提示.
我们自己编写的.d.ts文件直接放在项目的目录下,ts自己会去识别,不用我们做什么操作,更加详细的资料可以看一下TypeScript-声明文件
- src/shims-tsx.d.ts, 声明相关的 tsx 模块, 可以vue项目中编写JSX代码
- src/shims-vue.d.ts, 声明相关的 vue 模块, 以使TypeScript识别
.vue文件, 并将所有导入的.vue文件都按VueConstructor<Vue>处理
tsconfig
如果一个目录下存在一个tsconfig.json文件,那么它意味着这个目录是TypeScript项目的根目录。 tsconfig.json文件中指定了用来编译这个项目的根文件和编译选项。 一个项目可以通过以下方式之一来编译:
- 不带任何输入文件的情况下调用tsc,编译器会从当前目录开始去查找tsconfig.json文件,逐级向上搜索父目录。
- 不带任何输入文件的情况下调用tsc,且使用命令行参数--project(或-p)指定一个包含tsconfig.json文件的目录。 当命令行上指定了输入文件时,tsconfig.json文件会被忽略。
tsconfig.json中详细配置项及说明, 请移步至: TypeScript-项目配置-tsconfig.json
package.json
- @vue/eslint-config-typescript - github, vue/cli typescript eslint插件
此规则集是Vue-TypeScript项目的基本配置。除了设置解析器和插件选项外,它还会关闭规则集中的一些冲突规则eslint:recommended。因此,当与其他可共享配置一起使用时,此配置应放在extends数组的末尾。 例如:
// .eslintrc.js:
module.exports = {
  extends: [
    'plugin:vue/essential',
    'eslint:recommended',
    '@vue/typescript'
  ]
}
- @vue/cli-plugin-typescript - github, vue/cli typescript 插件
- vue-class-component - github, 强化 Vue 组件,使用 TypeScript/装饰器 增强 Vue 组件
- vue-property-decorator - github, 在 vue-class-component 上增强更多的结合 Vue 特性的装饰器
Vue组件写法的变化
在此之前, 我们可能需要先了解下ES7装饰器(Decorator)在Javascript中的使用
- vue-class-component , 对 Vue 组件进行了一层封装,让 Vue 组件语法在结合了 TypeScript 语法更加贴近面向对象编程. 并提供一个工具函数一个装饰器:
- @Component
- @mixins
- vue-property-decorator, 在 vue-class-component 上增强更多的结合 Vue 特性的装饰器, 新增了这 7 个装饰器:
- @Watch
- @Model
- @Prop
- @PropSync
- @Emit
- @Provide & @Inject
- @Ref
因此, 会有以下写法上的改变
1. @Component
@Component(options) options 中需要配置 decorator 库不支持的属性, 如: components, filters, directives等
示例:
<template>
 <div>
     <input-demo :demo="demo"></input-demo>
   </div>
 </div>
</template>

<script lang="ts">
import Component from 'vue-class-component'
import { Emit, Inject, Model, Prop, Provide, Ref, Vue, Watch, PropSync } from 'vue-property-decorator'

import InputDemo from './InputDemo.vue'

@Component({
  components: {
    InputDemo
  }
})
export default class Demo extends Vue {
  // data
  count = 0
  demo = '123'

  mounted () {
    window.console.log('bar=> ', this.bar)
    window.console.log('foo=> ', this.foo)
    window.console.log('optional=> ', this.optional)
  }
}
</script>
2. mixins
在使用Vue进行开发时我们可能需要用到混合,在TypeScript中, 我们可以这么写
在以下示例中mixins/index.ts中, 我们在data中添加了一个属性mixinVal, 值为: 'Hello Mixin'
// 定义要混合的类 mixins/index.ts
import Vue from 'vue'
import Component from 'vue-class-component'

@Component
// 一定要用Component修饰
export default class myMixins extends Vue {
  mixinVal: string = 'Hello Mixin'
}
然后, 在其他组件中使用它
<template>
  <div>
    <hello-world msg='hello world'></hello-world>
  </div>
</template>

<script lang="ts">
import Vue from 'vue'
import Component, { mixins } from 'vue-class-component'
import { Emit, Inject, Model, Prop, Provide, Watch, PropSync, Ref } from 'vue-property-decorator'

import HelloWorld from '../components/HelloWorld.vue'
import mixinDemo from './mixin'

@Component({
  components: {
    HelloWorld // 组件注入
  }
})
export default class App extends mixins(mixinDemo) {
  // data
  message = 'hello'
  mounted () {
    // 此时, 就可以使用this.mixinVal
    window.console.log('mixinVal => ', this.mixinVal) // 输出: 'Hello Mixin'
  }
}
</script>
3. data
export default class App extends Vue {
  // data
  message = 'hello'
  name = 'dmax'
  child: number | string = 'james'
}
等价于:
export default {
    name: 'App',
    data () {
        return {
            message: 'hello',
            name: 'dmax',
            child: 'james'
        }
    }
}
4. computed
// 计算属性
  get msg () {
    return 'computed ' + this.message
  }
等价于:
computed: {
    msg(){
        return 'computed ' + this.message
    }
}
5. watch
@Watch(path: string, options: WatchOptions = {})
@Watch 装饰器接收两个参数:
- path: string 被侦听的属性名;
- options?: WatchOptions={} options可以包含两个属性 :
- immediate?:boolean 侦听开始之后是否立即调用该回调函数;
- deep?:boolean 被侦听的对象的属性被改变时,是否调用该回调函数;
@Watch('child')
onChildChanged (val: string, oldVal: string) {
    if (val !== oldVal) {
    window.console.log(val)
    }
}
等价于:
watch: {
    'child': {
        handler: 'onChildChanged',
        immediate: false,
        deep: false
    }
},
method: {
    onChildChanged(val, oldVal) {
        if (val !== oldVal) {
          window.console.log(val)
        }
    }
}
也可以写成: @Watch('child', { immediate: true, deep: true }), 等价于:
watch: {
    'child': {
        handler: 'onChildChanged',
        immediate: true,
        deep: true
    }
},
method: {
    onChildChanged(val, oldVal) {
        if (val !== oldVal) {
          window.console.log(val)
        }
    }
}
6. model
@Model Vue组件提供model: {prop?: string, event?: string} 让我们可以定制prop和event. 默认情况下, 一个组件上的v-model会:
- 将
value用作prop - 将
input用作event,但是一些输入类型比如单选框和复选框按钮可能想使用 value prop来达到不同的目的。使用model选项可以回避这些情况产生的冲突。
下面是Vue官网的例子
Vue.component('my-checkbox', {
  model: {
    prop: 'checked',
    event: 'change'
  },
  props: {
    // this allows using the `value` prop for a different purpose
    value: String,
    // use `checked` as the prop which take the place of `value`
    checked: {
      type: Number,
      default: 0
    }
  },
  // ...
})
<my-checkbox v-model="foo" value="some value"></my-checkbox>
上述代码相当于:
<my-checkbox
  :checked="foo"
  @change="val => { foo = val }"
  value="some value">
</my-checkbox>
即foo双向绑定的是组件的checke, 触发双向绑定数值的事件是change
使用vue-property-decorator提供的@Model改造上面的例子.
Parent.vue
<template>
 <div>
   <child v-model="price"></child>
   <div>
     v-model(price) => {{price}}
   </div>
 </div>
</template>

<script lang="ts">
import { Vue, Component, Prop } from 'vue-property-decorator'

import Child from './Child.vue'

@Component({
  components: {
    Child
  }
})
export default class Parent extends Vue {
  price = 'hello price'
}
</script>
Child.vue
<template>
 <div>
   <input type="text" :value="value" @input="changed"/>
 </div>
</template>

<script lang="ts">
import { Vue, Component, Prop, Model, Emit } from 'vue-property-decorator'

@Component
export default class Child extends Vue {
  @Model('input') value!: boolean

  @Emit('input')
  changed (ev:any) {
    return ev.target.value
  }
}
</script>
最终效果可能为:
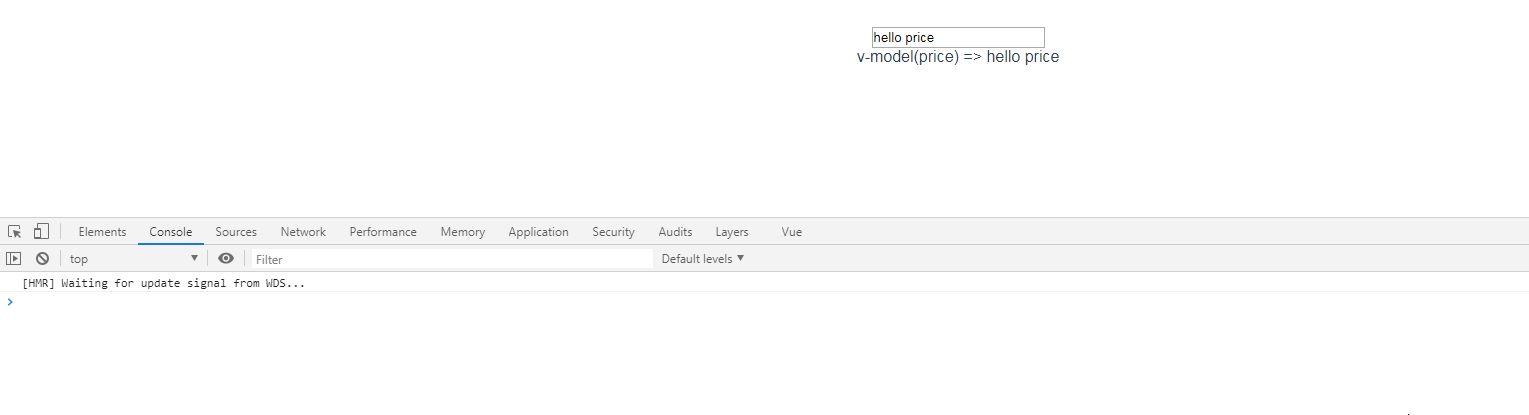
也可以通过clone git库 vue-typescript-skills, 运行本地服务后进入http://localhost:8080/#/model, 看到效果.
7. props
@Prop(options: (PropOptions | Constructor[] | Constructor) = {})
@Prop装饰器接收一个参数,这个参数可以有三种写法:
- Constructor,例如String,Number,Boolean等,指定 prop 的类型;
- Constructor[],指定 prop 的可选类型;
- PropOptions,可以使用以下选项:type,default,required,validator。
示例:
@Component
export default class Hello extends Vue {
  // child, 必传, child! => 表示不需要构建器进行初始化
  @Prop({ type: [String, Number], required: true }) readonly child!: string | number

  // propA, 非必传, 类型可以是number | undefined
  @Prop(Number) readonly propA: number | undefined

  // propB, 非必传, 类型可以是number | undefined, propB! => 表示不需要构建器进行初始化
  @Prop({ default: 'default value' }) readonly propB!: string

  // propC, 非必传, 构建器可以是String|Boolean, 值类型可以为: string | boolean | undefined
  @Prop([String, Boolean]) readonly propC: string | boolean | undefined
}
等价于:
export default {
    name: 'Hello',
    props: {
        child: {
            required: true,
            type: [String, Number]
        },
        propA: {
            type: Number
        },
        propB: {
            required: false,
            type: String,
            default: 'default value'
        },
        propC: {
            type: [String, Boolean]
        }
    }
}
注意
- 属性的ts类型后面需要加上undefined类型;
- 或者在属性名后面加上!,表示非null 和 非undefined的断言,否则编译器会给出错误提示;
8. prop.sync
@PropSync(propName: string, options: (PropOptions | Constructor[] | Constructor) = {})
@PropSync装饰器与@prop用法类似,二者的区别在于: @PropSync 装饰器接收两个参数:
- propName: string 表示父组件传递过来的属性名;
- options: Constructor | Constructor[] | PropOptions 与@Prop的第一个参数一致;
@PropSync 会生成一个新的计算属性。 示例:
import { Vue, Component, PropSync } from 'vue-property-decorator'

@Component
export default class MyComponent extends Vue {
  @PropSync('name', { type: String }) syncedName!: string
}
等价于
props: {
  name: {
    type: String
  }
},
computed: {
  syncedName: {
    get() {
      return this.name
    },
    set(value) {
      this.$emit('update:name', value)
    }
  }
}
注意
@PropSync需要配合父组件的.sync修饰符使用
9. $emit
@Emit(event?: string)
- 接受一个参数 event?: string, 如果没有的话会自动将 camelCase 转为 dash-case 作为事件名.
- 会将函数的返回值作为回调函数的第二个参数, 如果是 Promise 对象,则回调函数会等 Promise resolve 掉之后触发.
- 如果$emit 还有别的参数, 比如点击事件的 event , 会在返回值之后, 也就是第三个参数.
import { Vue, Component, Emit } from 'vue-property-decorator'

@Component
export default class MyComponent extends Vue {
  count = 0
  @Emit('reset')
  public resetCount() {
    this.count = 0
  }
  @Emit()
  public addToCount (n: number) {
    this.count += n
  }
  @Emit()
  public returnValue () {
    return 10
  }
  @Emit()
  public onInputChange (e:any) {
    return e.target.value
  }
  @Emit()
  public promise () {
    return new Promise(resolve => {
      setTimeout(() => {
        resolve(20)
      }, 0)
    })
  }
}
等价于
export default {
  data() {
    return {
      count: 0
    }
  },
  methods: {
    addToCount(n) {
      this.count += n
      this.$emit('add-to-count', n)
    },
    resetCount() {
      this.count = 0
      this.$emit('reset')
    },
    returnValue() {
      this.$emit('return-value', 10)
    },
    onInputChange(e) {
      this.$emit('on-input-change', e.target.value, e)
    },
    promise() {
      const promise = new Promise(resolve => {
        setTimeout(() => {
          resolve(20)
        }, 0)
      })
      promise.then(value => {
        this.$emit('promise', value)
      })
    }
  }
}
10. provide & inject
- @Provide(key?: string | symbol)
@Provide接收一个参数:
- key, 值可以为String 或 symbol类型
如果为了避免命名冲突, 可以使用 ES6 的 Symbol 特性作为 key
- @Inject(options?: { from?: InjectKey, default?: any } | InjectKey) decorator
@Inject 装饰器一个参数, 该参数有两种要能:
- 若为String类型, 即为接收(inject)的key名称
- 若为对象, 则可能需要传入两个值:
- from, 接收(inject)的key名称
- default, 若祖先没有provide此key, 则使用默认值
示例:
import { Component, Inject, Provide, Vue } from 'vue-property-decorator'

const symbol = Symbol('baz')

@Component
export class MyComponent extends Vue {
  @Inject() readonly foo!: string
  @Inject('bar') readonly bar!: string
  @Inject({ from: 'optional', default: 'default' }) readonly optional!: string
  @Inject(symbol) readonly baz!: string

  @Provide() foo = 'foo'
  @Provide('bar') baz = 'bar'
}
等价于:
const symbol = Symbol('baz')

export const MyComponent = Vue.extend({
  inject: {
    foo: 'foo',
    bar: 'bar',
    optional: { from: 'optional', default: 'default' },
    [symbol]: symbol
  },
  data() {
    return {
      foo: 'foo',
      baz: 'bar'
    }
  },
  provide() {
    return {
      foo: this.foo,
      bar: this.baz
    }
  }
})
11. @ProvideReactive/@InjectReactive
顾名思义就是响应式的注入, 会同步更新到子组件中. 比如下例可以实现在 input 中的输入实时注入到子组件中. 示例: Parent.vue
<template>
  <div>
    <input type="text" v-model="bar">
    <Child />
  </div>
</template>
<script lang="ts">
import { Vue, Component, Prop, ProvideReactive } from 'vue-property-decorator'

import Child from './Child.vue'

@Component({
  components: {
    Child
  }
})
export default class Parent extends Vue {
  @ProvideReactive() private bar = 'deeper lorry'
}
</script>
Child.vue
<template>
  <div >
    InjectReactive: {{bar}}
  </div>
</template>
<script lang="ts">
import { Vue, Component, Prop, InjectReactive } from 'vue-property-decorator'

@Component
export default class Child extends Vue {
  @InjectReactive() private bar!: string
}
</script>
最终效果可能如下:
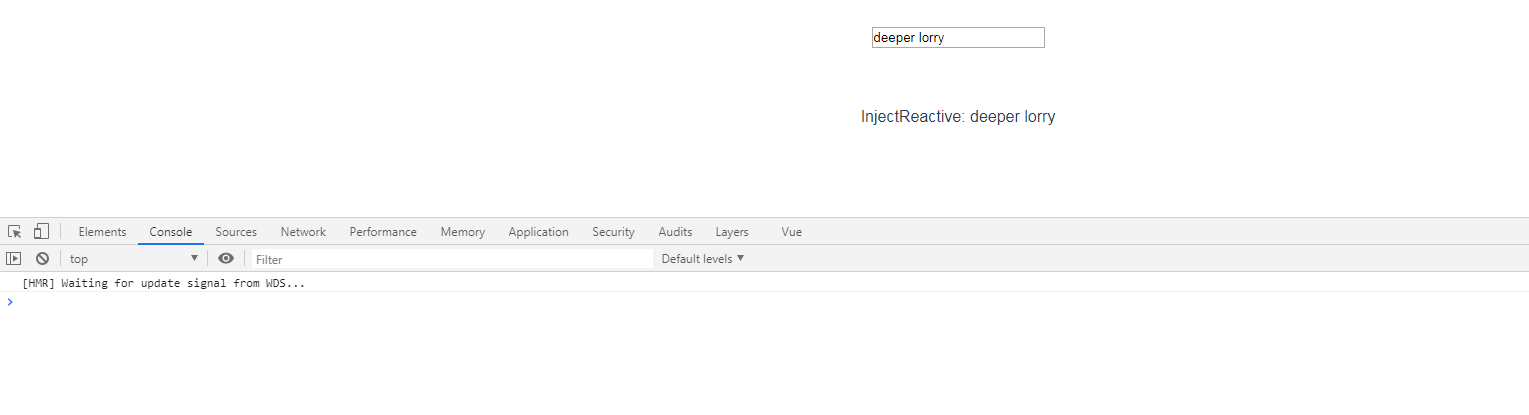
也可以通过clone git库 vue-typescript-skills, 运行本地服务后进入http://localhost:8080/#/provide, 看到效果.
12. ref
@Ref(refKey?: string)
@Ref装饰器接收一个可选参数:
- refKey, 值可以为String, 如果省略传输参数, 那么会自动将属性名作为参数, 注意与@Emit的区别, @Emit在不传参数的情况下会转为 dash-case, 而 @Ref不会转, 为原属性名
<template>
  <div>
    <span>Name:</span>
    <input type="text" v-model="value" ref='name' />
  </div>
</template>

<script lang="ts">
@Component
export default class RefComponent extends Vue {
  @Ref('name') readonly name!: string;
  value = 'lorry'
  mounted() {
    window.console.log(this.inputName); // <input type="text">
  }
}
</script>
等价于:
<template>
  <div>
    <span>Name:</span>
    <input type="text" v-model="value" ref='name' />
  </div>
</template>

<script lang="ts">
@Component
export default {
  data(){
      return {
          value: 'lorry'
      }
  },
  computed: {
    inputName(){
        return this.$refs.name
    }
  },
  mounted() {
    window.console.log(this.inputName); // <input type="text">
  }
}
</script>
13. directives
directives 具体的介绍可以看 Vue 的官方介绍.
示例:
<template>
  <span v-demo:foo.a="1+1">test</span>
</template>

<script lang="ts">
@Component({
  directives: {
    demo: {
      bind(el:any, binding:any, vnode:any) {
        var s = JSON.stringify
        el.innerHTML =
          'name: '       + s(binding.name) + '<br>' +
          'value: '      + s(binding.value) + '<br>' +
          'expression: ' + s(binding.expression) + '<br>' +
          'argument: '   + s(binding.arg) + '<br>' +
          'modifiers: '  + s(binding.modifiers) + '<br>' +
          'vnode keys: ' + Object.keys(vnode).join(', ')
      },
    }
  },
})
export default class App extends Vue {}
</script>
QA
1. 漏写@Component装饰器
在练习时, 发现在定义组件时漏写@Component装饰器时, 会导致运行data/prop/model属性报错:
Property or method "hello" is not defined on the instance but referenced during render
错误源代码:
<template>
  <div>
    {{hello}}
  </div>
</template>

<script lang="ts">
import { createNamespacedHelpers } from 'vuex'
import Component from 'vue-class-component'
import { Emit, Inject, Model, Prop, Provide, Ref, Vue, Watch, PropSync } from 'vue-property-decorator'

const { mapState, mapActions } = createNamespacedHelpers('myMod')

// @Component  ===> 注意此处的@Component装饰器被注释了, 起用此行, 即可解决异常
export default class UseVuex extends Vue {
  hello:string = this.$store.state.myMod.someField
}
</script>

解决办法
- 所有用ts定义的单文件组件, 一定要记得添加
Component装饰器 - 使用代码片段快速生成vue文件模板, 可以参考VS Code自定义代码片段snippets
2. 全局变量/方法声明
如工程当中有使用到window.SystemJS, 如果在ts中不声明直接使用, 会提示错误. 诸如此类, 就需要对全局变量/方法进行合适的类型声明.
在 src 下的 shims-tsx.d.ts 中加入需要声明的代码, 如下所示:
declare global {
  interface Window {
    SystemJS: any; // 如果不确定类型, 可定义为any
  }
}
3. import 的 .vue 文件
import .vue 的文件的时候,要补全 .vue 的后缀,否则会提示语法错误或找不到模块
总结
通过这几天的尝试和试验, 总体来说, 有一点吸引力的, 毕竟vue的写法也很随意, 多加入一些强制性的校验, 项目代码的健壮性应该会增强不少. 后续会慢慢在项目中推行, 也会慢慢进入踩坑中, 后续再持续更新, 敬请关注!
