

socket.io
Socket.IO是一个完全由JavaScript实现、基于Node.js、支持WebSocket的协议用于实时通信、跨平台的开源框架,它包括了客户端的JavaScript和服务器端的Node.js。
服务端
基于koa和socket.io基本使用
const koa = require('koa')
const app = new koa()
const server = require('http').createServer(app.callback())
const io = require('socket.io')(server)

//监听connect事件
io.on('connection', socket => {
  socket.emit('open');//通知客户端已连接
  console.log('connected');

  //监听disconnect事件
  socket.on('disconnect', () => {
    console.log('disconnect')
  }
});
server.listen(3001);
客户端
import io from 'socket.io-client';

//建立websocket连接
const socket = io('http://127.0.0.1:3001');

//收到server的连接确认
socket.on('open', () => {
    showTip('socket io is open !');
    init();
});
实践
测试账号:admin
测试密码:admin
请点击文章“测试socket.io功能”详情评论文章查看效果
服务端
1.编写工具函数startWebSocketApp和webSocketObj实例导出
const roomPrefix = 'user_';

const webSocketObj = {
	noticeRooms: {},
	webSocketIo: null,
	//向指定用户发送消息
	sendNotice(userId, data) {
		const {noticeRooms, webSocketIo} = this;
		const keys = Object.keys(noticeRooms);
		if (!userId || !webSocketIo || !keys.length || !data) {
			return
		}
		const sockets = webSocketIo.sockets.sockets;
		//通过当前用户userId获取当前用户room
		const currentSocket = sockets[noticeRooms[`${roomPrefix}${userId}`]];
		if (currentSocket) {
			//向当前用户room发送通知
			currentSocket.emit('getNotice', data);
		}
	},
	//发送全局系统消息
	sendSystemNotice(data) {
		const {noticeRooms, webSocketIo} = this;
		const keys = Object.keys(noticeRooms);
		if (!data || !webSocketIo || !keys.length) {
			return
		}
		const sockets = this.webSocketIo.sockets.sockets;
		// keys = keys.filter(key => noticeRooms[key] !== socket.id);
		keys.forEach(key => {
			const currentSocket = sockets[noticeRooms[key]];
			if (currentSocket) {
				currentSocket.emit('getNotice', data);
			}
		});
	}
};

const startWebSocketApp = server => {
	const webSocketIo = webSocketObj.webSocketIo = require('socket.io')(server, {path: '/notice'});
	const {noticeRooms} = webSocketObj;
	//webSocket监听方法
	webSocketIo.on('connection', socket => {
		console.log('初始化成功!下面可以用socket绑定事件和触发事件了');
		socket.on(`joinNoticeRoom`, data => {
			console.log('加入房间:', data);
			//根据当前用户id记录当前room id
			noticeRooms[`user_${data}`] = socket.id;
		});
	});
};

module.exports = {startWebSocketApp, webSocketObj};
2.全局应用工具函数startWebSocketApp
const {startWebSocketApp} = require('./server/utils/web-socket');
const app = new Koa();
const server = require('http').Server(app.callback());

//启动webSocket
startWebSocketApp(server);
server.listen(config.port, () => {
	console.log(`starting at port:${config.port}`);
});
3.数据库表设计
- 收发关系表(message)
CREATE TABLE  IF NOT EXISTS `message` (
  `id` int(11) NOT NULL AUTO_INCREMENT,
  `sendId` int(11) DEFAULT NULL COMMENT '发送人id',
  `recId` int(11) DEFAULT NULL COMMENT '接收人id(recId为0时为全部用户)',
  `messageId` int(11) DEFAULT NULL COMMENT 'message内容id',
  `createDate` varchar(50) DEFAULT NULL COMMENT '发送日期',
   PRIMARY KEY (`id`)
)  ENGINE=InnoDB DEFAULT CHARSET=utf8;
- 发送消息表(message_content)
CREATE TABLE  IF NOT EXISTS `message_content` (
   `id` int(11) NOT NULL AUTO_INCREMENT,
  `type` int(11) NULL DEFAULT NULL COMMENT '10: 文章评论 20:文章评论回复(业务可扩展)',
  `title` varchar(255) DEFAULT NULL COMMENT '评论主题',
  `sourceId` int(11) NULL DEFAULT NULL COMMENT '评论源id',
  `content` longtext DEFAULT NULL COMMENT '内容',
  `createDate` varchar(50) DEFAULT NULL COMMENT '发送日期',
  PRIMARY KEY (`id`)
) ENGINE=InnoDB DEFAULT CHARSET=utf8;
- 用户消息关系表(message_user)
CREATE TABLE  IF NOT EXISTS `message_user` (
  `id` int(11) NOT NULL AUTO_INCREMENT,
  `userId` int(11) DEFAULT NULL COMMENT '用户id',
  `messageId` int(11) DEFAULT NULL COMMENT '信息id',
  `status` int(11) NULL DEFAULT 10 COMMENT '(10:已阅读)',
  `createDate` varchar(50) DEFAULT NULL COMMENT '阅读日期',
   PRIMARY KEY (`id`)
)  ENGINE=InnoDB DEFAULT CHARSET=utf8;
4.具体使用
- 每次消息发送,首先在message_content表中插入一条数据,得到message_id。
- message表中记录发送人、接收人、message_id等字段(recId为0是向所有人发送消息通知,避免一次插入n条数据对数据库冲击)。
- 用户在阅读后,会在message_user表中插入一条数据,表明已经阅读了(已阅读得加入message_user表,不用一股脑塞入所有数据)。
5.新建notice sql语句方法
const notice = {
	async createMessageContent(data) {
		const sqlStatement = `insert into ${MESSAGE_CONTENT} (type, title, content, sourceId, createDate) values (?, ?, ?, ?, ?)`;
		const {type, title, content, sourceId} = data;
		const currentDate = formatDate(new Date());
		return query(sqlStatement, [type, title, content, sourceId, currentDate])
	},
	async createMessage(data) {
		const sqlStatement = `insert into ${MESSAGE} (sendId, recId, messageId, createDate) values (?, ?, ?, ?)`;
		const {sendId, recId, messageId} = data;
		const currentDate = formatDate(new Date());
		return query(sqlStatement, [sendId, recId, messageId, currentDate])
	},
	async createMessageUser(data) {
		const sqlStatement = `insert into ${MESSAGE_USER} (userId, messageId, createDate) values (?, ?, ?)`;
		const {userId, messageId} = data;
		const currentDate = formatDate(new Date());
		return query(sqlStatement, [userId, messageId, currentDate])
	},
	async batchCreateMessageUser(values) {
		const sqlStatement = `insert into ${MESSAGE_USER} (userId, messageId, createDate) values ?`;
		return query(sqlStatement, [values])
	},
	async getUnreadMessageList(id) {
		const sqlStatement = `
		SELECT
			NOTICE_CONTENT.*,
			USER.profilePicture,
			USER.username sendName
		FROM
			(
			SELECT
				MESSAGE_CONTENT.*,
				MESSAGE_USER.STATUS
			FROM
				(
				SELECT
					MESSAGE.sendId,
					MESSAGE.recId,
					MESSAGE.messageId,
					CONTENT.*
				FROM
					( SELECT * FROM message WHERE recId = ${id} ) MESSAGE
					LEFT JOIN message_content CONTENT ON MESSAGE.messageId = CONTENT.id
				) MESSAGE_CONTENT
				LEFT JOIN message_user MESSAGE_USER ON MESSAGE_CONTENT.messageId = MESSAGE_USER.messageId
			WHERE
			STATUS IS NULL
	) NOTICE_CONTENT
	LEFT JOIN user_info USER ON NOTICE_CONTENT.sendId = USER.id
	`;
		return query(sqlStatement);
	}
};

module.exports = notice;
6.新建notice controller方法
const notice = {
	async createNotice(data) {
		const {sendId, recId, content, title, type, sourceId} = data;
		const messageContentRes = await noticeSql.createMessageContent({content, title, type, sourceId});
		if (messageContentRes && messageContentRes.insertId) {
			const messageId = messageContentRes.insertId;
			const messageRes = await noticeSql.createMessage({sendId, recId, messageId});
			if (messageRes && messageRes.insertId) {
				const userList = await userSql.getAllUserList();
				if (userList && userList.length) {
					const sendName = userList.find(user => user.id === sendId).username;
					const noticeResult = {sendName, content, title, type};
					if (recId === 0) {
						webSocketObj.sendSystemNotice(noticeResult)
					} else {
						webSocketObj.sendNotice(recId, noticeResult)
					}
				} else {
					console.log(`用户表不存在或用户不存在,无法发送通知`)
				}
			}
		}
	},
	async getUnreadMessageList(ctx) {
		const authorization = ctx.header.authorization;
		const userInfo = await getTokenResult(authorization);
		const {id} = userInfo;
		const response = createResponse();
		const unreadMessageList = await noticeSql.getUnreadMessageList(id);
		if (unreadMessageList && unreadMessageList.length) {
			response.code = 0;
			response.message = '成功';
			response.results = unreadMessageList;
		}else {
			response.code = 404;
			response.message = '信息不存在';
		}
		ctx.body = response;
	},
	async createMessageUser(ctx) {
		const authorization = ctx.header.authorization;
		const userInfo = await getTokenResult(authorization);
		const requestBody = ctx.request.body;
		const {id} = userInfo;
		const {messageId} = requestBody;
		const response = createResponse();
		const res = await noticeSql.createMessageUser({messageId, userId: id});
		if (res && res.insertId !== undefined) {
			response.message = '成功';
		}
		ctx.body = response;
	},
	async batchCreateMessageUser(ctx) {
		const authorization = ctx.header.authorization;
		const userInfo = await getTokenResult(authorization);
		const requestBody = ctx.request.body;
		const {id} = userInfo;
		const {messageIdList} = requestBody;
		const currentDate = formatDate(new Date());
		const sqlValues = messageIdList.map(messageId => [id, messageId, currentDate]);
		const response = createResponse();
		const res = await noticeSql.batchCreateMessageUser(sqlValues);
		if (res &&  res.insertId !== undefined) {
			response.message = '成功';
		}
		ctx.body = response;
	}
};

module.exports = notice;
7.添加notice 服务端路由
const Router = require('koa-router');
const noticeModel = require('../controller/notice');
const notice = new Router();

notice
	.get('/message-un-read', async ctx => noticeModel.getUnreadMessageList(ctx))
	.post('/message-read', async ctx => noticeModel.createMessageUser(ctx))
	.post('/message-read-batch', async ctx => noticeModel.batchCreateMessageUser(ctx))
;
module.exports = notice;
客户端
1.下载socket.io-client
yarn add socket.io-client -S
2.新建web-socket.js工具方法
import io from 'socket.io-client';


export default class WebSocket {
	socket = null;

	connect(url, path = '/socket.io') {
		console.log('Connect socket');
		this.socket = io(url, {path, reconnection: true, reconnectionDelay: 10000});
	}

	disconnect() {
		if(this.socket != null){
			console.log('Disconnect socket');
			this.socket.disconnect();
			this.socket.close();
			this.socket = null;
		}
	}

	register(channel, listener){
		if(this.socket != null){
			this.socket.on(channel, listener);
		}
	}
};
3.博客系统连接服务端socket.io服务
import {noticeTypeList} from "../../../../conf";
import WebSocket from "../../../../lib/plugins/web-socket";
startWebSocketServer(userId) {
const webSocket = new WebSocket();
const {NODE_ENV, SOCKET_URL} = process.env;
webSocket.connect(`${SOCKET_URL}`, `${NODE_ENV === 'production' ? '/prod' : ''}/notice`);
webSocket.register('connect', ()=>{
console.log('Socket connected');
webSocket.socket.emit('joinNoticeRoom', userId);
WebLayout.createWebSocket(userId, webSocket);
});
webSocket.register('disconnect', ()=>{
console.log('Socket disconnected');
});
webSocket.register('error', (msg)=>{
console.log(msg);
});
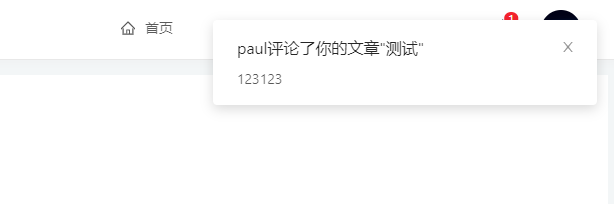
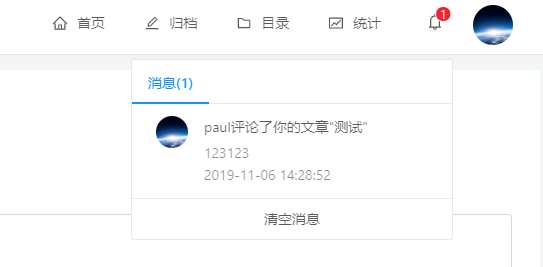
webSocket.register('getNotice', data => {
const {sendName, content, title, type} = data;
this.props.getUnreadMessageList();
notification.open({
message: `${sendName}${noticeTypeList[type]}"${title}"`,
description: content,
});
});
}
componentDidMount() {
const {userInfo: {userId}} = this.props;
const token = localStorage.getItem('authorization');
const isLogin = userId && token;
isLogin && this.startWebSocketServer(userId);
}
componentWillReceiveProps = nextProps => {
const {userInfo: {userId}} = this.props;
const {userId: currentUserId} = nextProps.userInfo;
if (userId !== currentUserId) {
if (currentUserId) {
localStorage.getItem('authorization') && this.startWebSocketServer(currentUserId);
}
}
};
4.前端效果
特别提醒: NGINX通过允许在客户端和后端服务器之间建立隧道来支持WebSocket。为了使NGINX将升级请求从客户端发送到后端服务器,必须明确设置Upgrade和Connection头,如以下示例所示:
location /wsapp/ {
    proxy_pass http://wsbackend;
    proxy_http_version 1.1;
    proxy_set_header Upgrade $http_upgrade;
    proxy_set_header Connection "Upgrade";
}
